Transcription
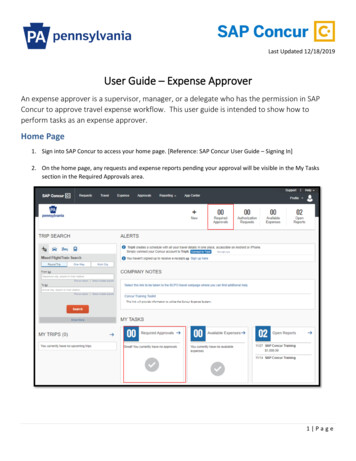
Last Updated 12/18/2019User Guide – Expense ApproverAn expense approver is a supervisor, manager, or a delegate who has the permission in SAPConcur to approve travel expense workflow. This user guide is intended to show how toperform tasks as an expense approver.Home Page1. Sign into SAP Concur to access your home page. [Reference: SAP Concur User Guide – Signing In]2. On the home page, any requests and expense reports pending your approval will be visible in the My Taskssection in the Required Approvals area.1 Page
3. If there are more work items pending than are visible on the home page, you can click on either of the RequiredApprovals links or the Approvals tab on the menu bar.Approvals Page1. On the approvals page, there is a tab for each type of work item and each tab will show a count of items thatneed approval. Work the count to zero to complete your approval tasks.2. Select the Report Name link for the report that you wish to review. The icons to the left of the report name areintended to assist the approver. Hover your mouse over the icons to see what they are for or to view thecomments.2 Page
Expense Report Page1. On the expense report page, the Exceptions area will alert the approver to items that may need attention oraction. Review these carefully and complete any Action items.2. The Expenses area will display detailed information on the expense types claimed. Review all claims thoroughlyto ensure the necessity, propriety, and accuracy of the travel expenses.a. Hover over or click on the icons to display alerts, receipt images, and/or comments for each expense.b. Click the dropdown arrow to the left of the date to display itemizations for an expense (i.e. Hotel roomcharge).c. Click on any expense line to see the details displayed in the right section of the Expense Report page.3 Page
d. In the details area, the Expense tab displays the detailed expense information. The Receipt Image tabwill display the image of an attached receipt.e. In the expense details area, click on the Show reimbursable allowances link to display a comparison ofthe amounts claimed compared to GSA maximum allowances for any Overnight Subsistence and HotelExpenses.4 Page
3. The Report Summary area displays the following information:a. Amount Due Company – this does not apply to the Commonwealth and should always read as 0.00.b. Amount Due Employee – this is the amount that will be reimbursed to the employee.You can always return to the display the Report Summary by clicking on the Summary link under the Report Name.4. The Details dropdown menu provides a list of options under headings for Report, Allocations, and TravelAllowances.5 Page
a. Reporti. Report Header link – general information either entered by the employee or defaulted from theemployee’s profile.ii. Totals link – amounts to be reimbursed to the employee or that were paid directly by COPAbased on what the employee entered on the expense report.iii. Audit Trail link – detailed record of the steps of the report and changes made to it.iv. Approval Flow link – display of the workflow of the expense report. Approvers can add anadditional agency approver in the workflow in this section.v. Comments link – Comments added to the expense report are visible. Approvers can addcomments in this section.b. Allocationsi. Allocations link – this section displays all allocations for the expense report.c. Travel Allowancesi. Itineraries link– this section displays any itineraries that were added to the expense report.ii. Expenses & Adjustments link – this section will display any instances where the travelerreported that a meal was provided.iii. Reimbursable Allowances Summary link – this section will display a comparison of the amountsclaimed compared to GSA maximum allowances for any Overnight Subsistence and HotelExpenses5. The Receipts dropdown menu provides a list of options that include:a. Receipts Required link– opens window with options to view expense report, attach receipt images, orview receipts.b. View Receipts in new window link – opens all receipts associated with the report in a new window.c. View Receipts in current window link – opens all receipts associated with the report in the currentwindow. This gives the approver the ability to view each receipt as each expense type is reviewed.d. Attach Receipt Images link – opens window with option to attach additional receipt images.6 Page
6. The Print/Email dropdown menu provides a list with the only option listed as the report name COPA – DetailedReport with Summary Data link.a. Click on the report name to open it in a new window.b. With the report displayed, click the Show Itemizations checkbox to re-open the report with itemizationsdisplayed. There are also buttons for:i. PDF - save the report as PDFii. Email - email the report to one or more email recipients. Email addresses can be added to theEmail Recipient(s) field. Multiple email addresses should be separated by commas. Enter anyComments to the email in the Comment field.iii. Print – opens a window to preview and print the report.iv. Close – close the report window.7 Page
Report Processing Options1. When the approver is completed with the review, they can click on one of the following buttons:a. Send Back to the Employee – sends the report back to the employee. Enter comments to explain whyyou are returning the report. Click the OK button when finished or click the Cancel button to go back.b. Approve – sends the report to BCPO Travel Audits for processing. Clicking approve opens a window witha Final Confirmation agreement. Click the Accept button to continue or the Decline button to go back.c. Approve & Forward – approves the report and allows the approver to add a User to forward the expensereport to within the agency. Comments may be added to go along with the report. Click the Approve &Forward button to continue or click the Cancel button to go back.8 Page
- sends the report to BCPO Travel Audits for processing. Clicking approve opens a window with a Final Confirmation agreement. Click the . Accept. button to continue or the . Decline . button to go back. c. Approve & Forward - approves the report and allows the approver to add a User to forward the expense report to within the agency.

