Transcription
PeopleSoft Financials User Guide:Expense ReportsEXPENSE REPORTSTABLE OF CONTENTSOverview . 3Responsibilities . 3Delegate Entry Authority to Other Users . 3Create and Manage Expense Reports . 4Create an Expense Report from a Blank Form . 4Create an Expense Report from a Travel Authorization . 15Attach Documents to an Expense Report . 19Withdraw an Expense Report . 21Modify an Expense Report. 23View an Expense Report . 24Delete an Expense Report . 26Advanced Topics . 28Create an Expense Report Template . 28Create an Expense Report from a Template . 30Create an Expense Report from an Existing Expense Report . 31International Travel & Currency Conversion . 35Business Meal Attendees . 35Review Expense Report Payment Information . 36Travel Policy . 39Frequently Asked Questions . 39Travel and Expense Forms . 39How do I get reimbursed for work/travel-related expenses? . 39How do I know which form to use? . 39Updated 11/2020Ctrl Home to Table of ContentsPage 1 of 42
PeopleSoft Financials User Guide:Expense ReportsWhat if I don’t seem to have access to Travel and Expense forms? . 39Expense Reports . 40What do I do when I have expenses related to multiple budgets? . 40Where does my expense form go after I submit it? . 40What should I do with receipts? . 40What if I’m missing a required receipt?. 40What is the difference between Business Meals and Travel Meals? . 40How should Travel Meals be reported?. 41What is a Preferred Merchant? What is a Non-Preferred Merchant? . 41Resources/Help. 41Resources & User Guides . 41Training . 41Related Policies & Procedures . 41Updated 11/2020Ctrl Home to Table of ContentsPage 2 of 42
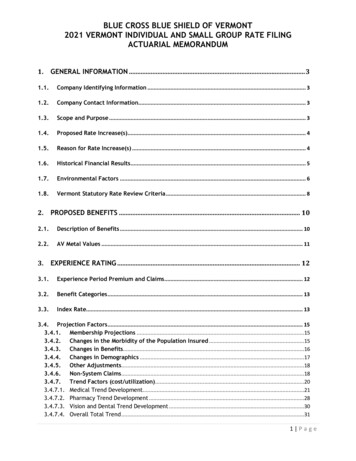
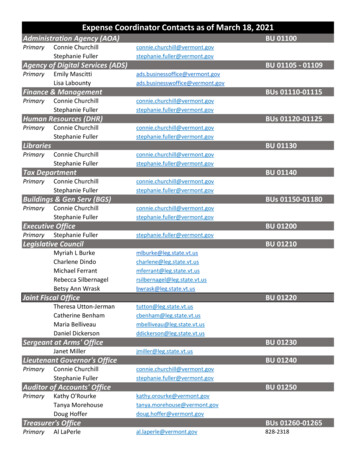
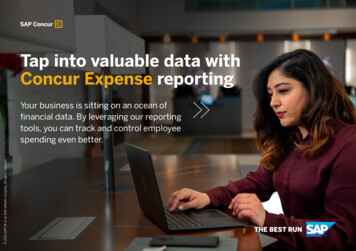
PeopleSoft Financials User Guide:Expense ReportsOverviewThis user guide contains detailed instructions on how to complete and approve Travel and Expenseforms/reports in PeopleSoft Financials. This document applies to UVM employees who handle theirown Travel and Expense forms, as well as their delegates.NOTE: Certain departments rely on the Disbursement Center for travel and expense processing.Please consult the Employee Reimbursement Process/Instructions for each department. Please emailtravel@uvm.edu if you have questions regarding the expense reporting process.Responsibilities Itemized receipts are required. Original, scanned, or digital receipts are acceptable. If a Travel Authorization was created for the trip, create the Expense Report from the TravelAuthorization. See the Travel Authorizations User Guide (PDF). If you obtained a Cash Advance and have excess cash, turn in the cash, and assign the CashAdvance to the Expense Report. Complete Expense Report within 60 days of returning from the trip. Route printed Expense Report and receipts to approver. Follow up to ensure timely approval.Delegate Entry Authority to Other UsersDelegating Entry Authority enables an employee to authorize another employee to take action onPeopleSoft Travel and Expense forms on their behalf.Be aware that colleges or departments within the University may have specific directives on thismatter. Check with your departmental business manager if you have questions on Travel andExpenses for your area.NOTE: Although a traveler may delegate authority to another user to enter Travel and Expenseforms, the traveler is still responsible for understanding the Travel Policy, and for the accuracy,timeliness, and completion of their reports.To set up a delegate for Travel and Expense forms:1. Log in to PeopleSoft through the Financials login.2. Click the Expenses Tile then the Delegate Entry Authority tile.Updated 11/2020Ctrl Home to Table of ContentsPage 3 of 42
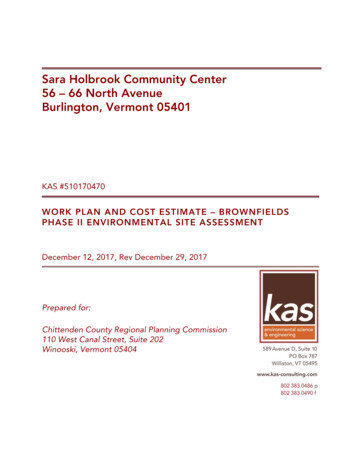
PeopleSoft Financials User Guide:Expense Reportsthen3. The Authorize Users page displays a list of users authorized to take action on your behalf inthe PeopleSoft Travel and Expense module. If you have not authorized any delegates, the onlyUser ID listed will be your own.4. To add a delegate, click the Addicon to add a row.5. Type in the user id of the person whom you are authorizing as a delegate. If you do not knowtheir User ID, click the Look Upicon to search for it.6. The User ID is equivalent to the UVM netID. The netID can be found in the UVM Directory. Itis often, but not always, the first initial of a person’s first name, followed by the first severalletters of their last name.7. If you are unable to find the User ID, click Advanced Lookup. The Description field containsthe employee’s name. Enter the person’s name in this format: first name%last name. Forexample, Rally%Cat. Click Search. If there are multiple people with the same name and youare unsure of the correct User ID to select, check with the employee to confirm theirPeopleSoft User ID.8. Select the Authorization Level from the dropdown list. Assign your delegate Edit, Edit &Submit, or View access.9. Click Save.10. Repeat Steps 4-9 to add more delegates if needed.To delete an authorized user, click the deleteicon at the end of the appropriate line andthe user will be removed from the list upon saving.Create and Manage Expense ReportsCreate an Expense Report from a Blank FormUse these instructions if you are not required to have an associated Travel Authorization.Updated 11/2020Ctrl Home to Table of ContentsPage 4 of 42
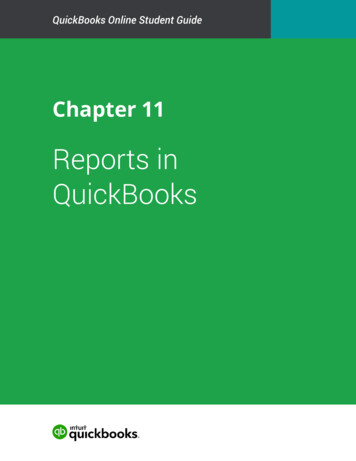
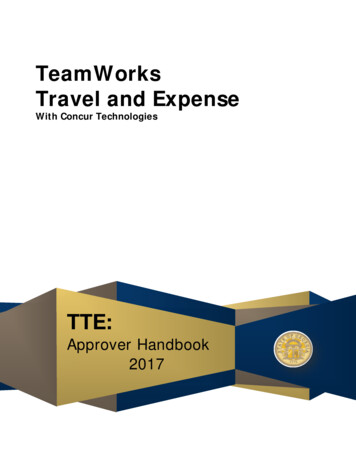
PeopleSoft Financials User Guide:Expense ReportsIf this Expense Report is related to a trip where a Travel Authorization was created, there MUST be alink to the original Travel Authorization. Follow the instructions for Create an Expense Report from aTravel Authorization and Apply a Cash Advance.1. Log in to PeopleSoft through the Financials login.2. On the UVM Employee Homepage click on the Expenses Tile then the Create Expense ReportTile.NOTE: If you are an authorized delegate entering an Expense Report on behalf of anotheremployee, see Creating an Expense Report for Another Employee.3. If you are creating the Expense Report for yourself skip to Step 4. If entering the ExpenseReport as the authorized delegate of another employee click the Actionicon next to yourname and select Change Employee. Click the Empl ID or Name of the person for whom youare entering the Expense Report. If you are a delegate for a large number of people you canalso search by the Employee ID or Employee Name. The Employee Name will be displayed atthe top left of the screen.4. On the Expense Report screen, ensure the correct name is the upper left. Fields marked withan asterisk (*) are required.Updated 11/2020Ctrl Home to Table of ContentsPage 5 of 42
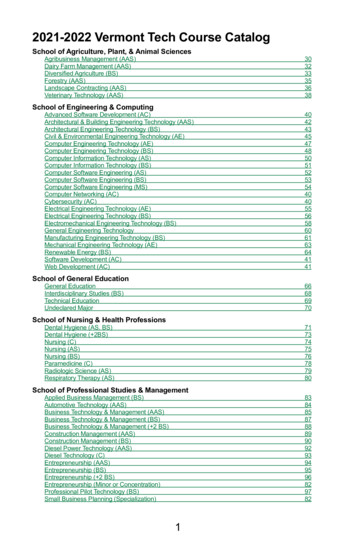
PeopleSoft Financials User Guide:Expense Reports5. Click the Business Purpose dropdown list. Select the entry that most closely identifies thepurpose of the trip.6. In the Description field, type a short, meaningful description of the expense (e.g., 04-2018Recruiting Trip to Boston), this description can be used when searching for previous expensereports.7. Click in the Trip Description/Dates/Comments field and add the details of this expense.NOTE: If this expense report is for a trip, the actual destination(s) MUST be entered here.Enter travel dates, and other important details.8. Click on the Look Upicon for the US State/Country field and select one of the following:a. Country – if for an international locationb. State – if for a state other than Vermontc. County – if for a location in VermontNOTE: If traveling to multiple destinations, select the first destination in the US State /Country field, and enter subsequent destination on the Comments field. If you are seekingreimbursement for expenses incurred locally, the location should be your county in Vermont.9. When using one or more chartstrings for the entire report, the accounting can be adjusted forthe whole report at once, rather than making individual line adjustments.On the right side of the form, click Accounting Defaults. Make any chartstring edits, add aChartfield line to split the expense if needed, then click Done to return to the Expense Report.NOTE: The Accounting Defaults can be changed after data entry is complete. The accountingdetails will be updated with the new chartstring information.Updated 11/2020Ctrl Home to Table of ContentsPage 6 of 42
PeopleSoft Financials User Guide:Expense Reports10. Click the Expense Report Action dropdown list. Select Add Expense Linse.11. On the Expense Entry page, enter the date the expense was incurred, or select the date fromthe Calendaricon.12. Enter an Expense Type or click the Look Upicon to find the appropriate expense type.Click on the All Types tab to view a list of all expense types or use the search box to search forkey words such as “mileage”.Updated 11/2020Ctrl Home to Table of ContentsPage 7 of 42
PeopleSoft Financials User Guide:Expense Reports13. Enter details in the Description field. Expand this field if needed, by clicking and holding thelower right corner, then dragging it downward/to the right.NOTE: The fields displayed and required vary by expense type.14. Fill out any required fields for the expense, denoted by an asterisk (*) next to the field label.For this example using automobile mileage, the number of miles and a description of thetrip(s) must be entered. For other expense types, the number and nature of required fieldswill change.15. Select how the expense was paid for from the Payment dropdown. Options are Cash orPersonal Credit Card.16. Enter the total amount in the Amount field.17. The Currency will populate as USD and this field should remain unchanged. If necessary,convert foreign currencies into dollars, then complete this expense report in US dollars.NOTE: The Disbursement Center uses the OANDA Currency Converter for currency conversion.18. Leave the Billing Type set to the default value of UVM Internal, which is used for reimbursingUVM employees. (The other choice in the list, UVM Billable, is not used.)19. To view or modify the chartstring(s) for this expense line, or to split the expense betweenmultiple chartstrings, click Accounting to open the Accounting Details.20. Enter the correct chartstring or click on the Look Upchartfield(s) value.Updated 11/2020icon to search and select aCtrl Home to Table of ContentsPage 8 of 42
PeopleSoft Financials User Guide:Expense Reports21. To split this expense into two or more chartstrings, click the Addicon to add prepopulated chartfield lines, which may then be adjusted as necessary. When all adjustmentshave been made click Done to return to the expense report.NOTE: If one expense needs to be charged to two or more departments, DO NOT split theexpense in the accounting details. Each expense line can be approved by only onedepartmental approver, not by two or more.If applicable, enter each portion of the expense on a separate expense line. Only in thismanner can the appropriate individuals approve their department’s portion of the expense.22. Click in the appropriate toggleif either of these conditions is true. to the right of Personal Expense or No ReceiptIf No Receipt is marked yes, an explanation is required in the Exception Commentssection, which will display after the toggle is changed to yes. Click on the missingreceipt box to open the comment window. Once you entered your comment clickDone to return to the expense entry page.Note: Although this example is using Domestic Travel Meals as the expense type, No Receiptdoes not need to be checked if a receipt would not be expected as in the case of domestictravel meals per the UVM Travel Policy. Verify all receipt requirements with your departmentadministrator prior to traveling as departments may have stricter requirements than thetravel policy.Updated 11/2020Ctrl Home to Table of ContentsPage 9 of 42
PeopleSoft Financials User Guide:Expense Reports23. When the details are entered for this expense, click Save, in the upper right of the form. Thischecks the report for entry errors, field omissions, and chartstring validity.11.The system will assign a unique Expense Report ID, in the Report field above your name onthe expense report header page. The report will be in Pending status until submission. Toview the expense report number you can return to the header page by clicking on theGeneral Informationicon in the top left next to the report description.NOTE: Checking for Expense Errors does not check whether there are available funds in thatbudget.Updated 11/2020Ctrl Home to Table of ContentsPage 10 of 42
PeopleSoft Financials User Guide:Expense Reports23. Any Expense Lines with errors will have a red flagicon. Select that expense to open thedetails and review the error. The fields with errors or omissions will be highlighted red.Correct or complete the highlighted fields and click Save, until there are no longer anyhighlighted fields.Updated 11/2020Ctrl Home to Table of ContentsPage 11 of 42
PeopleSoft Financials User Guide:Expense Reports24. If the Expense Report Line Errors includes a Combo error for chartfields, the chartstring is notvalid in PeopleSoft.Click on Accounting to correct the issue. For guidance, speak with the appropriate businessmanager for chartstrings related to operational expenses, or with Sponsored ProjectAdministration for grant-related chartstrings.Note: The value in the Account field should never be changed. This automatically populatesbased on the Expense Type chosen.25. Valid chartstrings will, at a minimum, contain entries in the Operating Unit, Department,Fund, Source, and Function fields. If there are no values for the Program, Purpose, andProperty fields, these fields MUST contain the value 0000. (Other fields not mentioned here,if not required by the chartstring, may be left blank.)26. When chartstring issues have been corrected, click Save (see Step 23 for location of the link ifneeded).27. If errors are still present, repeat Steps 23 – 26.28. To add an expense line, click the Addicon on the left side of the screen. Expenses aregrouped by date and each date can be collapsed or expand as needed using the Arrowicon(to the left of the Date). Refer to Step 30 to Copy Expense Lines.29. Click Save frequently, to ensure that the work is saved to the database. To itemize multiple expenses on hotel bills, see the Itemize Hotel Bill section of thisdocument. Combine daily meal totals on one expense line per date. Provide adequate detail in the Merchant (Non-Preferred) and Description fields.30. To duplicate any or all expense lines (e.g., the same expense types were incurred on multipledates), click the MoreCopyUpdated 11/2020icon, select the expenses that you want to copy then click theicon.Ctrl Home to Table of ContentsPage 12 of 42
PeopleSoft Financials User Guide:Expense ReportsTo copy to one day enter the same date in Date From and the Date To fields. To copy to arange of dates enter the desired date range if that option is selected.Click the ToggleUpdated 11/2020switched to include weekends and/or holidays if needed.Ctrl Home to Table of ContentsPage 13 of 42
PeopleSoft Financials User Guide:Expense ReportsWhen finished, click Done.31. To delete a single expense, select the expense then click the Deletethe page. To delete multiple expenses click the Moreto delete, then select the Deleteicon on the right oficon, select the expenses you wishicon.32. When expense entry is complete, click Save to perform one final error check.33. Repeat Steps 23-26 to identify and resolve errors, if present. If no errors are found, proceedwith Step 34.34. If desired, attach supporting documentation such as scanned receipts, a copy of a conferenceagenda, etc. to the Expense Report. See the Attach Documents section for instructions.35. Click Save. Exit the report if you are not ready to submit it for approval. Return to it later tosubmit.36. Upon completion, submit the Expense Report for approval. Click Review and Submit.a. Click the Submit button, review the certification statement, and click the Submitbutton to certify and to route the Expense Report to approver(s).Updated 11/2020Ctrl Home to Table of ContentsPage 14 of 42
PeopleSoft Financials User Guide:Expense Reports37. To print the report return to the UVM Employee homepage, click the Expenses tile then clickthe Print Expense Report tile.a. NOTE: Expense reports cannot be printed until they have been saved or submitted.b. Enter the expense report number then click Search.c. When the expense report opens click the Print hyperlink.Create an Expense Report from a Travel AuthorizationIf a Travel Authorization is created for a trip, the Travel Authorization MUST be associated to theExpense Report.NOTE: These instructions also include how to apply a Cash Advance to the Expense Report that islinked from a Travel Authorization.1. Complete steps 1-35 in Create an Expense Report from a Blank Form.Updated 11/2020Ctrl Home to Table of ContentsPage 15 of 42
PeopleSoft Financials User Guide:Expense Reports2. When you have completed entering all of your expenses and corrected any errors. ClickReview and Submit.3. The next screen will be the Expense Summary screen. In the Additional Infromation sectionthere will be a field for any travel authorizations that are available to be associated to thisexpense report. Click on the travel authorization field.Note: Expense lines created from a travel authorization cannot be modified. If you need tochange the expense line then you will need to create a new line and delete the one createdfrom the travel authorization. If you copy an expense line that was created from the travelauthorization you will not be able to modify that line either.4. Click the Associate button in front of the travel authorization you want to associate to thisexpense report.Note: If the Travel authorization is not displayed you can click the Filter icon to change thedisplay options.5. The travel authorization will now show as associated in the Travel Authorization field ofAdditional Information.Updated 11/2020Ctrl Home to Table of ContentsPage 16 of 42
PeopleSoft Financials User Guide:Expense ReportsAppling a Cash Advance to an Expense Report1. Once you have completed the steps about and applied your travel authorization you can nowapply your cash advance.2. In the Additional Information, section there will be a balance for any outstanding cashadvances. Click on the cash advance field to view all open cash advances.3. Enter the amount to be applied to the expense report in the Total Applied field. When doneapplying all balances from your outstanding cash advances click Apply.NOTE: You can not enter an amount to be applied greater than the total amount of expenses.Do not enter the full amount of the Cash Advance if returning excess funds to the University.UVM policy allows only one Cash Advance per trip. Each Cash Advance MUST be reconciledon its own Expense Report4. Review the updated balances on the expense report for accuracy. The Expense ReportSummary will show and Advance Applied and the amount Due to Employee will be less theadvance amount.The Additional Information will show the Applied Amount and an Outstanding CashAdvance amount for any open balances still open on paid cash advances.Updated 11/2020Ctrl Home to Table of ContentsPage 17 of 42
PeopleSoft Financials User Guide:Expense Reports5. To submit the expense report click the Submit button, review the certification statement, andclick the Submit button to certify and to route the Expense Report to approver(s). If the University owes money to the Employee, The Disbursement Center will process areimbursement once the expense report has been approved by the department andaudited for compliance. If the Employee owes money to the University (as in the case of a Cash Advance whichwas not entirely spent) the employee should take that money to the University Cashier’sOffice along with a copy of the Cash Advance.6. To print the report return to the UVM Employee homepage, click the Expenses tile then clickthe Print Expense Report tile.NOTE: Expense reports cannot be printed until they have been saved or submitted.Updated 11/2020Ctrl Home to Table of ContentsPage 18 of 42
PeopleSoft Financials User Guide:Expense Reports Enter the expense report number then click Search. When the expense report opens click the Print hyperlink.Attach Documents to an Expense ReportThe Attachment functionality is useful for receipts, scanned conference agendas, and additionalsupporting documentation.1. It is best practice to Save the expense report, so that a number is assigned, before adocument is attached. Click the General Information/Attachmentsbutton icon to go to the Expense Report Header. Click AttachReceipts.2. Press the Add Attachment button.3. Click My Device to search for a file.Updated 11/2020Ctrl Home to Table of ContentsPage 19 of 42
PeopleSoft Financials User Guide:Expense Reports4. Navigate to the desired file. Click Open.5. Click Upload.Updated 11/2020Ctrl Home to Table of ContentsPage 20 of 42
PeopleSoft Financials User Guide:Expense Reports6. When the status bar show Upload Complete click the Done button.7. An additional description can be added to the details. Add Attachment if there are moredocuments to attach.Click Done.8. The counter next to Attachments has changed to (1). The document has been successfullyattached to the Expense Report.Withdraw an Expense ReportExpense reports that have been saved and submitted but not yet approved may be “withdrawn” bythe Submitter in order to be modified and resubmitted for approval. (Once an expense report isapproved, only the Prepay Auditor may modify it or send it back to the Submitter.)Updated 11/2020Ctrl Home to Table of ContentsPage 21 of 42
PeopleSoft Financials User Guide:Expense Reports1. Log in to PeopleSoft through the Financials login.2. Click on the Expense Tile on the UVM Employee Homepage. Then click the My ExpenseReports Tile.3. Select Awaiting Approval from the left menu bar to show all the expense reports that havebeen submitted but not approved.4. Click on the expense report that you want to withdraw to open it.5. The Expense Summary page will open. Click the Withdraw button on the top right of thepage.6. You can then click the Refresh Approval Status button to update the expense report status tobe editable. The View Details button will change to Update Details and the Refresh ApprovalStatus button will change to Submit when the expense report is available for edit.Additionally, the Approval Status will show a status of Withdrawn.Updated 11/2020Ctrl Home to Table of ContentsPage 22 of 42
PeopleSoft Financials User Guide:Expense Reports7. To modify the report, see the instructions below to Modify an Expense Report.Modify an Expense ReportIf an Expense Report has been either (1) created and saved, but not submitted, or (2) submittedbut withdrawn before being approved, follow the instructions below to find it for modificationand submission.1. Log in to PeopleSoft through the Financials login.2. Click on the Expense Tile on the UVM Employee Homepage. Then click the My ExpenseReports Tile.Updated 11/2020Ctrl Home to Table of ContentsPage 23 of 42
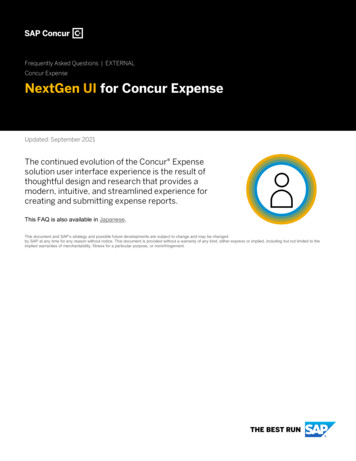
PeopleSoft Financials User Guide:Expense Reports3. Select Not Submitted from the left menu bar to show all the expense reports that are stillpending.4. Click on the expense report that you want to modify to open it.5. Modify the report (add, delete or modify expenses) as appropriate. Reference the Steps 5-36in Create an Expense Report from a Blank Form if needed, making sure to submit the reportwhen complete.View an Expense ReportTo view an Expense Report as a Traveler or Delegate:1. Log in to PeopleSoft through the Financials login.2. Click on the Expense Tile on the UVM Employee Homepage. Then click the Expense HistoryTile.3. Select Expense Report History from the left menu bar to show all your expense reports.Note: The default settings in PeopleSoft is to only view 6 months of expense history. If theexpense report you are looking for is greater than 6 months you can change your preferenceby clicking on the Actionicon in the Status Bar, then selecting My Preferences.a. Select Expenses from the left menu bar then Expense History.b. In the History to Display field enter the number of months you wish to display.c. Click Save.Updated 11/2020Ctrl Home to Table of ContentsPage 24 of 42
PeopleSoft Financials User Guide:Expense Reports4. View the status of the report on the Expense History screen or on the Summary page of theexpense report in the Approval Status section at the top right.The example below has a status of Pending, meaning that the report is awaitingcompletion/submission by the traveler or delegate.5. If a submitted report has not been approved and requires edits, it can be modified in one ofthree ways:a. If the Expense Report has not yet been approved, the Submitter can Withdraw it fromApprovalb. The Approver can modify the Expense Reportc. The Approver can send it back to the Submitter for modification/resubmission6. Expense Report status definitions:PendingSubmitted for ApprovalApprovedIn ProcessDeniedStagedPaidReconciledUpdated 11/2020Not yet submittedAwaiting approvalOK'd by Departmental ApproverApproval by Multiple Departments in processNot approved - no longer usableThe payment is being generated.Money disbursed, or ready for disbursementCash Advance is reconciled with Expense ReportCtrl Home to Table of ContentsPage 25 of 42
PeopleSoft Financials User Guide:Expense ReportsA report which has been Denied cannot be resubmitted; a new report will have to be created.7. The Approval Status section report displays icons that represent where the Expense Report isin the approval process. The CheckThe HourglassEnvelope/Cautionthe process.icon indicates that this stage of the process complete.icon indicates that the expense is at this stage in the process. Theicon indicates that the expense report has not reached that stage IDelete an Expense ReportThe traveler or the traveler’s delegate can delete an Expense Report. NOTE: Once the ExpenseReport is deleted, it cannot be reversed.1. Log in to PeopleSoft through the Financials login.2. Click on the Expense Tile on the UVM Employee Homepage. Then click the Expense HistotyTile.3. Select Expense Report History from the left menu bar to show all your expense reports.Note: The default settings in PeopleSoft is to only view 6 months of expense history. If theexpense report you are looking for is greater than 6 months you can change your preferenceby clicking on the ActionUpdated 11/2020icon in the Status Bar, then selecting My Preferences.Ctrl Home to Table of ContentsPage 26 of 42
PeopleSoft Financials User Guide:Expense Reportsd. Select Expenses from the left menu bar t
Advance to the Expense Report. Complete Expense Report within 60 days of returning from the trip. Route printed Expense Report and receipts to approver. Follow up to ensure timely approval. Delegate Entry Authority to Other Users Delegating Entry Authority enables an employee to authorize another employee to take action on