Transcription
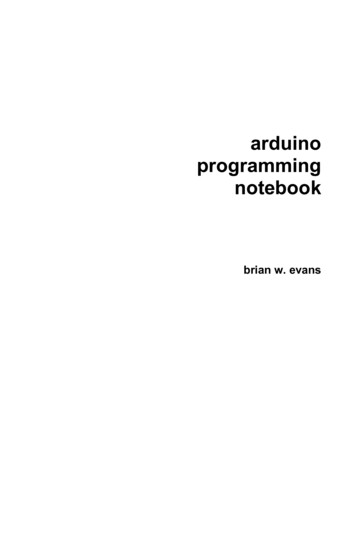
Lily Pad (Arduino) ProgrammingAndrew BullenGetting Started 1. Attach your LilyPad Arduino to your computer and start the Arduino software2. Select the correct serial portNow you need to select the right serial port so that the Arduino software can talk to your LilyPad.Under the “Tools– Serial Port” menu, choose the highest numbered COM port.Note: for either Mac or PC computers, you can also find the correct port by unplugging your board, looking at the menu, and thenplugging your board in and looking at the menu again. The item that has appeared is the correct port.
3. Select the appropriate boardNow you need to select the right board, so that the software knows you’re using a LilyPad and not some other Arduino board. Underthe “Tools– Boards” menu, select the entry appropriate for the board you’re using. If you’re using a LilyPad Arduino SimpleSnap,LilyPad Aruduino Simple Board, LilyPad Arduino Main Board, or one of the LilyPad ProtoSnap Development boards, choose“LilyPad Arduino w/ ATmega328″. If you’re using a LilyPad Arduino USB Board, choose “LilyPad Arduino USB”.Basic Programming StepsProgramming the LilyPad and executing your program takes place in four stages:1. Write a programFirst, you write your program. The Arduino environment lets you program in the programming language called C, which is what we’llbe using. You must obey the C language format for writing programs.2. Compile the programSecond, you compile your program, translating the code that you wrote to code that the computer chip on the LilyPad can understand.If you’ve made any mistakes in your code, they will be detected during this phase and you will have to correct them and recompileyour code before you move on to the next step.3. Load the program onto the LilyPad
Third, you load your compiled code onto your LilyPad, moving the code from your computer to the LilyPad.4. The program executes on the LilyPadOnce it has been loaded, your program executes on your LilyPad. The LilyPad does what you told it to do.Basic Code ElementsSo, that’s the process you go through in writing and executing a program, but how do programs work? Well, all programs execute in anorderly fashion, obeying your written commands (the lines in your program) line by line as they are written. There are a few differenttypes of commands or code elements in most programming languages. To start with, we will use comments, simple statements andconditional statements.Since we will be using the C programming language, this section will describe what these elements look like in the C language, and wewill be using the Arduino Language Reference to get more detailed information on how each code element works.1. CommentsComments are pieces of code that are ignored by computers. You can use them to make notes in your code, but they’re only forreference. They don’t affect the behavior of your program. Anything written on a line after two slash characters // is a comment.Comments show up a greyish brown in the Arduino window. Here’s are a couple example comments:// This is a comment. It doesn’t do anything.// Comments just make code easier for youunderstandandotherpeopletoAnything written between “/*” and “*/” characters is also a comment. Comments that start with “//” can only be on one line, butcomments between the “/*” and “*/” characters can take up several lines. These types of comments will show up in that same greyishbrown in the Arduino window so that you can always spot them easily. Here’s how we’d rewrite the comments above in this style:/* This is a comment. It doesn’t do anything.Comments just make code easier for you and other people to understand*/Throughout the rest of this page, we will use comments as you would normally use them in a program, to explain what pieces of codeare doing. Check out the Comment Page of the Arduino Language Reference for more information.2. Simple statementsA simple statement is a single instruction. It takes up a single line and is always followed by a semi-colon. Here are some examplestatements:int ledPin 13;// This statement declares a variable called “ledPin” and sets its initial value to 13.// We’ll use “ledPin” later to control the LED that is on the LilyPadint switchPin 2;// This creates a variable called “switchPin” and sets its initial value to 2
// We’ll use “switchPin” later to read data from a switch attached to petal 2.int // This creates a variable called “switchValue”, but does not initialize it// This tells the LilyPad to do nothing for 1000 milliseconds (1 second).// This sets ledPin (pin 13 on the LilyPad as defined above) to 5 volts// Setting pin 13 to 5 volts/HIGH will turn the LED on the LilyPad on.digitalWrite(ledPin,LOW);// This sets ledPin to 0 volts// Setting pin 13 to 0 volts/LOW will turn the LED on the LilyPad off.Notice how each statement is followed by a comment that describes what the statement is doing.To get a more thorough explanation of what each statement is doing, we would turn again to the Arduino Language Reference. Thereference contains an entry for every simple statement form in the Arduino language. To understand the “int ledPin 13;” statementbetter, see the variable declaration section of the Arduino reference. To understand the “delay(1000);” statement better, see thedelay page of the Arduino reference. To understand the “digitalWrite(ledPin, HIGH);” statement better, see the digitalWrite pageof the Arduino reference.3. Conditional statementsConditional statements are statements that consist of a condition and then a series of statements in brackets like this { } that executewhen the condition is met. See the Control Structures section of the Arduino Language Reference for more information. Here aresome example conditional statements:if (switchValue LOW) {digitalWrite(ledPin,HIGH);}// This is the condition followed by the first bracket// This tells the LED on the LilyPad to turn on// Finally, you have the closing bracketNotice how the condition above consists of the word “if” and then a condition in brackets like this ( ). This is the basic form that aconditional statement always takes. To make sense of conditional statements, read through them as though they were regular english. Inthe case above, you would read it “if the variable switchValue is equal to LOW then turn the LilyPad’s LED on.” Here’s anotherexample:while (switchValue rite(ledPin,LOW);delay(100);switchValue // This line is the condition followed by the first bracket// This tells the LED on the LilyPad to turn on// This tells the LilyPad to wait for 100 milliseconds.// This tells the LED on the LilyPad to turn off// This stores a new value into the variable switchValue
digitalRead(switchPin);}So, this statement would be read like this “as long as the variable switchValue is equal to LOW, do the following: turn the LilyPad’sLED on, then do nothing for 100 milliseconds (1/10th of a second), then turn the LilyPad’s LED off, then do nothing for 100milliseconds, then store a new value into the variable switchValue”.Arduino Program StructureThe previous section looked at the different code elements of the Arduino language. Now let’s see how to put these elements togetherinto a complete program.Each Arduino program has three main parts: a section where you declare variables, a “setup” section and a “loop” section. When yourprogram executes, it will first define your variables, will then execute the setup section once and will then execute the loop section overand over. Here is a full example program in the Arduino window:First Program1. Open the Blink sketch
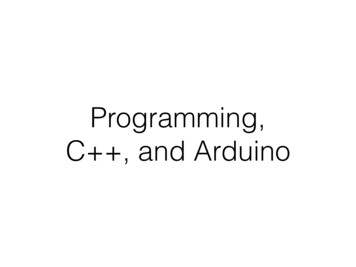
Click on the Open icon (the upward pointing arrow in the Arduino software) and then browse to “01.Basics– Blink”. You can alsoaccess this same example through the “File” menu. Go to “File– Examples– Basics– Blink”. This will open the Blink “sketch”A little note about “sketches”: programs in Arduino are called sketches. All of your programs will be saved in your Arduino“sketchbook”.Your window should now look like the one below, with the Blink sketch loaded into the top half of the screen under a tab labled“Blink”.
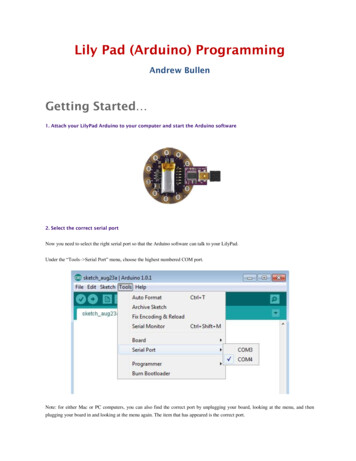
2. Compile the Blink sketch.Click on the Verify/Compile icon (the check button in upper left corner of the Arduino window). When you hover your mouse over theicon, text saying “Verify” will appear at the top of the Arduino window.The compiling process will take a few seconds. Once it’s done the Arduino window will tell you it’s “Done compiling” and will tellyou the size of your sketch (the amount of memory it takes up). Your window should look something like this:
3. Load the sketch onto your LilyPadClick on the Upload button in the software (the right pointing arrow in the Arduino window). When you move your mouse over thisicon, text saying “Upload” (or “Upload Using Programmer”) will appear at the top of the Arduino window.If all goes well, your window should look something like the one below when you’re done uploading. It will tell you that the upload isfinished and give you the size of your sketch again.
Here are a few errors that you might encounter. These will appear in the bottom half of your screen.
You didn’t select the correct serial port. Or, maybe your LilyPad isn’t actually attached to your computer. Double check yourconnections and see the setup page for instructions on selecting the serial port.Other errors? Check out ladyada’s fabulous help page and the Arduino Troubleshooting guide.4. Hey, it blinks!
5. Play with modifying the code to get different behavior Can you get the LED to blink faster or slower?Can you get the it to blink in a heartbeat pattern?How about getting it to flicker like a candle?Next Program: Sensing (Switches)1. Copy this sample code into an Arduino window(Switch Code)int ledPin 13;int switchPin 2;int switchValue;void NPUT);digitalWrite(switchPin,HIGH);}void loop(){switchValue digitalRead(switchPin);if (switchValue LOW) {// LED is connected to digital pin 13// switch connected to digital pin 2// a variable to keep track of when switchis pressed// sets the ledPin to be an output// sets the switchPin to be an input// sets the default (unpressed) state ofswitchPin to HIGH// run over and over again// check to see if the switch is pressed// if the switch is pressed then,// turn the LED ondigitalWrite(ledPin, HIGH);}else {// otherwise,digitalWrite(ledPin, LOW);}}2. Format the Code// turn the LED off
Under the Tools menu, select Auto Format. After you do this, align all of your comments (the statements in grey-brown following “//”on each line) so that they are in readable columns on the right hand side of the screen. This will help you read through the code. Here’swhat my Arduino window looked like after I formatted everything:Read through the code to get a sense of what it is doing. The comments at the end of each line should help you understand what’shappening. Note that in the code we are listening for a LOW signal on the switchPin. We turn on the LED when the switchPin isattached to ground. As was mentioned earlier, when we put the two alligator clips together this is exactly what is happening: theswitchPin is attached to ground via the clips. So, let’s test it out in the real world 3. Load the code onto the LilyPadCompile the code and load it onto the LilyPad. Do this by hitting the upload button in the Arduino window (that’s the right pointingarrow at the top of the Arduino window).4. See what happens when you close the switch!If you’re using the LilyPad Proto Snap Development Board, turn on the pre-wired switch. The green light (next to pin 11) should turnon. Trying changing the code so you can use the button on pin A5 to turn on the green light.
5. Play with modifying the code to get different behavior Can you get the LED to turn on when the switch is open and off when the switch is closed? (Basically swappingthe behavior of the sample code.) Can you get the LED to blink quickly while the switch is closed and turn off when the switch is open?Something a little more challenging can you get the LED to toggle on and off with each press of the switch? Thatis, the first time you press the switch, the LED turns on, the second time you press the switch it turns off, and soon?Color (LEDs)
1. Attach the LilyPad to your computer and start the Arduino software2. Copy this sample code into an Arduino window(RGB LED example code)/**LilyPad tutorial: color (RGB LEDs)**Uses a LilyPad RGB LED module to play with*dynamic colored light. See this web colorchart*for the (Red, Green, Blue) values ofdifferent colors:*http://www.visibone.com/colorlab/*/int ledPin 13;int redPin 11;int greenPin 9;int bluePin 10;void setup()// LED is connected to digital pin 13// R petal on RGB LED module connected todigital pin 11// G petal on RGB LED module connected todigital pin 9// B petal on RGB LED module connected todigital pin 10
d loop(){//Basic elay(1000);color(0,0,255);delay(1000);// sets the ledPin to be an output// sets the redPin to be an output// sets the greenPin to be an output// sets the bluePin to be an input// run over and over again//turn the RGB LED red//delay for 1 second//turn the RGB LED green//delay for 1 second//turn the RGB LED blue//delay for 1 second//Example 0);color(0,0,0);delay(1000);//turn the RGB LED yellow//delay for 1 second//turn the RGB LED white//delay for 1 second//turn the RGB LED purple//delay for 1 second//turn the RGB LED off//delay for 1 second}void color (unsigned char red, unsigned char green,unsigned char Pin,255-b
will be using the Arduino Language Reference to get more detailed information on how each code element works. 1. Comments Comments are pieces of code that are ignored by computers. You can use them to make notes in your code, but they’re only for reference. They don’t affect the behavior of your program. Anything written on a line after two slash characters // is a comment. Comments show .