Transcription
Intralinks Connectorfor SharePoint Version 4.4.2Installation and Configuration GuideIntralinks 24x7x365 support US: (1) 212 543 7800 UK: 44 (0)20 7623 8500.See Intralinks login page for other national numbersCopyright 2018 Intralinks, Inc. Version 4.4.2 September 2019
Table of ContentsChapter 1: Introduction.4Overview.4Chapter 2: Prerequisites .5Microsoft SharePoint . 5Hardware requirements .5Active Directory .6Domain accounts .6Active Directory group. 7Log network path and access.7Proxy requirements . 7WCF service requirement .7IIS server level requirement . 9Certificate requirements . 9Digital certificate for high trust app.9SharePoint Provider hosted app requirements.9SharePoint services requirement .9SharePoint service application requirements. 10User profile requirements. 10Registering the App in the SharePoint Farm . 10Setting permissions for executing installation scripts . 11Setting the time zone of the SharePoint servers, Intralinks Connector servers and theSharePoint site(s). 11Upgrading the Intralinks Connector for SharePoint . 13Prerequisites . 13Uninstallation. 13Upgrading the Intralinks Connector from 4.4.0 to higher versions . 13Preparing for installation . 14Installation . 14Post installation . 14Installing the Intralinks Connector for multiple web applications . 14Chapter 3: Preparing for installation .15Before executing the installation scripts . 15Chapter 4: Installing the Intralinks Connector for SharePoint .16Executing the installation scripts . 16Chapter 5: Post-installation configuration of the Intralinks Connector .18Updating the certificate store. 18Updating the server ID. 18Updating the Intralinks Connector web service configuration. 18SMTP settings . 18Updating the Farm Identifier . 19Restarting syncing . 19Proxy server settings . 19Chapter 6: Verifying the Connector Installation .21Chapter 7: Migrating the Intralinks Connector from SharePoint 2013Intralinks Connector for SharePoint Installation and Configuration Guidepage 2
to SharePoint 2016 .22Before you migrate content . 22Migration best practices. 22Post Migration. 23Troubleshooting steps during Migration process . 24An error occurs when a user tries to add the app, or the app is not visible to the user .24Application error when access / layouts/15/appredirect.aspx, Error The app apprealm " does not exist. 24A 403 or 401 error occurs while redirecting from the app . 24A SQL error occurs while restoring a database: "Exclusive access could not be obtained because the database is in use" . 25Appendix A: Understanding the input.xml file .26Appendix B: Bill of Materials and installation components .29Overview. 29Bill of Materials . 29What components are installed by the script?. 30Appendix C: List of components and their installation location .33Appendix D: IntralinksConnector.config configuration settings.34Intralinks Connector for SharePoint Installation and Configuration Guidepage 3
Chapter 1: IntroductionOverviewThis guide provides an overview of Intralinks Connector for SharePoint , alongwith instructions for installing it on your SharePoint server, configuring it for use,and testing it.This guide is intended for the Intralinks Connector administrator or serveradministrator who is responsible for the hardware and software platform for theIntralinks Connector, and for the SharePoint site administrator who is responsiblefor configuring the SharePoint site and mapping the Intralinks Connector to theassociated Intralinks exchange and resources.This guide assumes a basic familiarity with standard SharePoint procedures suchas adding folders, deleting documents, and adding groups.For information about using the Intralinks Connector once it is installed andconfigured, see the Intralinks Connector for SharePoint User Guide.Intralinks Connector for SharePoint Installation and Configuration Guidepage 4
Chapter 2: PrerequisitesPrerequisites PreparingforInstallation Installation PostInstallationRead this chapter for detailed information about the prerequisites required forinstallation and configuration of the Intralinks Connector for SharePoint.Microsoft SharePointThe current version of Intralinks Connector for SharePoint is compatible withSharePoint 2013 and SharePoint 2016. It cannot be used with SharePoint 2010 orearlier versions.Hardware requirementsThis section describes the hardware requirements for setting up the IntralinksConnector for SharePoint.Server typeMinimumconfigurationrequirementsWeb servers 8GB RAM Two disks: C: 100GB,D: 100GB Windows Server 2012R2 Microsoft IIS 8.5 8GB RAM Two disks: C: 100GB,D: 100GB Windows Server 2012R2 Microsoft .NetFramework 4.6.1 orhigherApp serversComments64-bit, 4 processorcoresMicrosoft .NetFramework 4.6.1 orhigher64-bit, 4 processorcoresMore app servers canbe added to scale outthe servers.Intralinks Connector for SharePoint Installation and Configuration Guidepage 5
Server se servers 20GB RAM 64-bit, 4 processorcoresHighly availablecluster environment. Two disks: C: 100GB,D: 100GBAn existing databaseserver can beleveraged. Windows Server 2012R2 Microsoft SQL Server2012 StandardNote: These specifications reflect the minimum requirement. They can bescaled up based on your organization’s requirements. App, web and database server components can be hosted on a singleserver, but it is recommended that they be on separate servers. Virtual machines can be used for environment setup.Active DirectoryDomain accountsIntralinks Connector installation requires four domain (service) accounts: one forthe sync service (Windows service) and three for the app pool identity for each IISwebsite. You can use same account in all four cases, or you can use a differentservice account in each case. You can specify another name during configuration.When you create the accounts, be sure that their passwords are set to neverexpire. Also be sure that the account user for the sync service is assigned the Login as a service right.Review the table below for an explanation of the permissions required for eachaccount.Permissions ertificateStoreLogsDirectorySyncServiceDb OwnerConnect toIntralinksSite OwnerFull AccessFull ControlSync AdminDb OwnerConnect toIntralinksNoneFull AccessFull ControlConnectorAdminDb OwnerNoneNoneFull Access*Full ControlIntralinks Connector for SharePoint Installation and Configuration Guidepage 6
Permissions ertificateStoreLogsDirectoryConnectorServiceDb datareaderNoneNoneFull Access*Full Control*These accounts do not require full access if the Connector Admin and Connector Servicewebsites are not secured. (That is, they use the HTTP protocol.)Active Directory groupAn Active Directory group needs to be created to ensure that Intralinks Connectoradministrators accessing the administrator portal are authorized. All users whowill act as Intralinks Connector administrators must be part of this group in orderto access the administrator portal.Note: An existing Active Directory group can be used for the IntralinksConnector administrator group. If you want to use an existing Active Directorygroup, select the group name in the Intralinks Connector configuration screenduring installation and configuration.The group type must be Security groups.Log network path and accessSync logs for the Intralinks Connector will be stored under a network path. Pleaseensure that this network path is always available for the Connector to access andlog information.You can specify the path for the logs during installation and configuration.Note: This network path should be shared with read/write permission and fullcontrol of the folder should be given to all of the service accounts and the ActiveDirectory group created above.Proxy requirementsIf the Intralinks Connector is located behind the corporate firewall, it will need tobe provided access to https://services.intralinks.com. The service account isused for this. The required access should be provided to this service accountthrough your network’s proxy/firewall settings.WCF service requirementIn Server Manager, the HTTP Activation feature in .Net Framework 4.5 must beenabled.Intralinks Connector for SharePoint Installation and Configuration Guidepage 7
On the server that hosts web components, use Server Manager to enable theWeb server (IIS) server role.On the server that hosts web components, use Server Manager to enable theWindows authentication server role.Note: On the Server Roles page, expand Web Server (IIS), expand WebServer, expand Security, and then select Windows Authentication.Intralinks Connector for SharePoint Installation and Configuration Guidepage 8
IIS server level requirementIn addition to the requirements described above, Anonymous Authenticationmust be enabled on the IIS server level. This is required because Intralinks runsits WCF service using anonymous authentication.Certificate requirementsDigital certificate for high trust appA high-trust app uses digital certificates to establish trust between the remote webapplication and SharePoint 2013.The certificate needs to be signed. Certificates that can be used for Internet-facingweb servers can also be used for intranet web servers. The certificate should bein two formats, Personal Information Exchange (pfx) and Security Certificate (cer).Installing the certificate to the Certificate StoreEnsure that the certificate is installed in the certificate store on all servers in theConnector server farm.SharePoint Provider hosted app requirementsSharePoint services requirementIn order to run apps on the SharePoint farm, the following services must berunning on the server: App Management Service Claims to Windows Token Service User Profile Service User Profile Synchronization Service Microsoft SharePoint Foundation Subscription Settings Service /Subscription Settings ServiceIntralinks Connector for SharePoint Installation and Configuration Guidepage 9
SharePoint service application requirementsEnsure the following service applications are provisioned and started. This isrequired for any provider-hosted app on SharePoint 2013. App Management ServiceNote: Be sure the App catalog and app URL are configured. Secure Token Service User Profile Service application Subscription Settings Service ApplicationUser profile requirementsEnsure that the SharePoint user profile service and user profile synchronizationservice are provisioned to the organization’s Active Directory.Registering the App in the SharePoint Farm1. Access any site and append / layouts/15/appregnew.aspx2. Click the Generate buttons for both App Id and App Secret fields.3. The App Domain is the domain name set on the remote web applicationserver’s IIS Site that will be hosting this app.4. Be sure the Redirect URI field displays the URL for the SyncAdmin portal,including the port number where the app will be redirected.Very Important: Copy the output. It will be needed during the packaging phase.Also be sure to save following values: AppId and AppSecret, Update thesevalues in the CLIENT ID and CLIENT SECRET fields in input.xml beforeinstallation.Intralinks Connector for SharePoint Installation and Configuration Guidepage 10
Setting permissions for executing installation scriptsEnsure that the accounts used for installation have the appropriate level ofaccess: The user account used for installing SharePoint components must haveFarm Administrator access The user account used for installing SharePoint components must havefull control permission for the User Profile Service Application, as shownbelow. To display this screen, select Central Administration Manageservice applications User Profile Service Application Permissions The user account used for installing connector components must haveLocal administrator access and database creator access on the SQLserverSetting the time zone of the SharePoint servers, IntralinksConnector servers and the SharePoint site(s)For the Intralinks Connector to work correctly, be sure that the time zone settingson the servers and SharePoint site(s) are the same.1. First, check the time zone of the servers on which SharePoint and IntralinksConnector are installed. Click on the time and then click Change date andtime settings.Intralinks Connector for SharePoint Installation and Configuration Guidepage 11
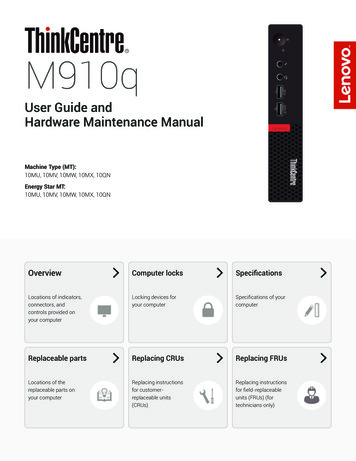
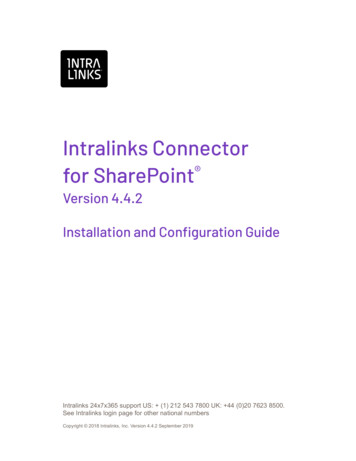
The Windows calendar widget.2. When the Date and Time screen opens, check the time zone setting.The Date and Time screen.3. Next, check the time zone of the SharePoint Home Site of Site Collection.Click the Site settings iconin the upper right corner of the screen.4. Click Site settings. The Site Settings screen appears.5. Under Site Administration, select Regional settings. The Site Settings –Regional Settings screen appears.Intralinks Connector for SharePoint Installation and Configuration Guidepage 12
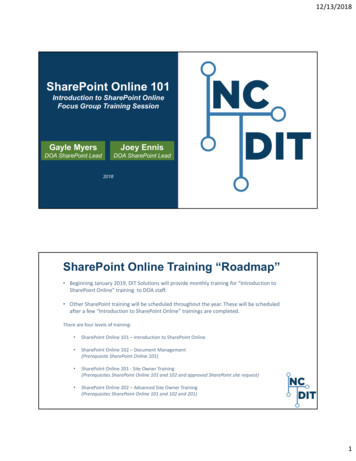
The Site Settings – Regional Settings screen.6. The setting in the Time zone field should be the same as the setting used forthe server on which Microsoft SharePoint is Installed. If it is not, update thesetting so that the time zone selections match.Upgrading the Intralinks Connector for SharePointPrerequisitesBefore starting the upgrade process, use the Halt Syncing screen to stop syncingfor all sites.Uninstallation1. Log into the Connector App servers (wherever the Intralinks Sync Service isinstalled).2. Run Windows PowerShell as an administrator.3. Navigate to the SyncService folder specified in the Connector installationpath.4. Run the Uninstall Sync Service.bat file to uninstall Intralinks Sync Service.5. Log into IIS Web Servers (wherever Connector websites are hosted).6. Remove Connector websites and application pools from IIS Manager.7. Delete the existing Connector installation folder.Upgrading the Intralinks Connector from 4.4.0 to higher versionsPerform the following steps if you are upgrading from 4.4.0 to a higher version;otherwise, skip to the Preparing for installation section.1. Download the UpgradeScript 4.4.0 To 4.4.x.sql file that was included withthe installation package from the distribution exchange.2. Copy the UpgradeScript 4.4.0 To 4.4.x.sql file onto the connectordatabase server.3. Open the UpgradeScript 4.4.0 To 4.4.x.sql file using any text editor.Intralinks Connector for SharePoint Installation and Configuration Guidepage 13
4. Change the database name in the following line to the name of the actualinstance of the connector database.USE [ database name ]For example, USE [SPIN4.0]5. Save the file.6. Using SQL Server Management Studio, connect to the database engine.7. Select Open File (Ctrl-O) and open the UpgradeScript 4.4.0 To 4.4.x.sqlfile.8. From the Query menu, click Execute.9. When the “Command(s) completed successfully” message is displayed,continue with the Preparing for installation section below.Preparing for installation1. Copy the SPINWeb and SyncService folders from the current version of theInstallation package into the working directory that was used to install theprevious version.2. Update the installation path in the Input.xml file if required.Installation1. Run the PowerShell script.2. Install only the Connector Web and Connector App server components ontothe relevant servers.Post installationUse the Halt Syncing screen to restart syncing for all sites.Installing the Intralinks Connector for multiple web applicationsIf you are installing the Intralinks Connector app for multiple web applications, besure to complete the following steps:1. Register the app for another web application, as described in “Registering theApp in the SharePoint Farm” on page 10. Be sure to use the same App ID,App Secret, Title, App Domain and Redirect URI that you used whenregistering the first web app for each additional app.2. Repeat the SharePoint app installation process (describe in step number 2and substep D of “To execute the scripts” on page 16) for each webapplication; change the App Catalog URL parameter in the input.xml file,which is described in Appendix A, Understanding the input.xml file, onpage 26.Intralinks Connector for SharePoint Installation and Configuration Guidepage 14
Chapter 3: Preparing for installationPrerequisites Preparing forInstallation Installation PostInstallationBefore executing the installation scriptsComplete the following steps before you begin the installation process. To prepare for installation1. Begin by downloading the installation folder from the location provided byIntralinks and copy the folder to a local drive.2. Ensure that the installation folder has been copied to all server(s) thatrequires installation on a separate folder. Also copy the .pfx and .cer versionsof the certificates into the installation folder before installation.3. Ensure that Windows PowerShell is installed on the servers where the scriptwill be executed. Open a PowerShell prompt in administrator mode. Run thefollowing command to make the downloaded package ready for installation:Get-Childitem path for sync service folder Unblockfile4. Ensure that input xml has been updated. For details on populating theinput.xml file, please see Appendix A, Understanding the input.xml file, onpage 26.5. Navigate to the location where DeploySPIN4O.ps1 is present.6. From this point forward, the script expects only a single input to understandwhich component should be installed on a server. The script presents thefollowing questions. Enter Y to install each component that you want installedon each server. Enter N to skip a component.Would you like to install DB components?Enter [Y] for Yes; [N] for No OR Hit ENTER button for Yes:Would you like to install Connector APP server componentson this server?Enter [Y] for Yes; [N] for No OR Hit ENTER button for Yes:Would you like to install Connector Web server componentson this server?Enter [Y] for Yes; [N] for No OR Hit ENTER button for Yes:Would you like to install SharePoint APP components onthis server?Enter [Y] for Yes; [N] for No OR Hit ENTER button for Yes:Refer to Appendix C, List of components and their installation location, onpage 33 for a list of components that will be installed on the selected servers.Intralinks Connector for SharePoint Installation and Configuration Guidepage 15
Chapter 4: Installing the IntralinksConnector for SharePointPrerequisites Preparing forInstallation Installation PostInstallationExecuting the installation scriptsNote: Please ensure that all the steps outlined in Chapter 2, Prerequisites, andChapter 3, Preparing for installation, have been completed. Installation of theIntralinks Connector cannot be completed if any of these steps is not complete. To execute the scripts1. Navigate to the installation folder and run the PowerShell script.2. Install the components in the following order (they must be installed asindicated):a. Connector Database component– The database component can be installed remotely from anotherserver that has connectivity to the SQL server.b. Connector app components– When you install the app components, if you have not provided thepassword for the service account, you will be presented with a dialogbox asking you to enter the credentials for the service account. Theywill be used to start the Windows service.App component:c.Connector Web components– When you install the web components, if you have not provided thepassword for the service accounts for the websites, you will bepresented with a dialog box asking you to enter the credentials for theservice accounts. They will be used to set the App Pool identity foreach IIS website.Intralinks Connector for SharePoint Installation and Configuration Guidepage 16
Web component:If you press Cancel or ESCAPE, or click the x button to close thewindow, the following message will appear:d. SharePoint app componentIntralinks Connector for SharePoint Installation and Configuration Guidepage 17
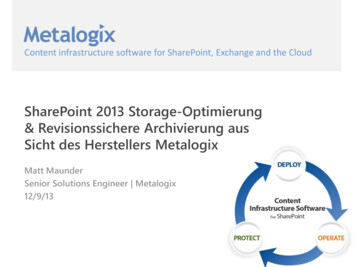
Chapter 5: Post-installationconfiguration of the IntralinksConnectorPrerequisites Preparing forInstallation Installation PostInstallationUpdating the certificate storeReview the settings in the certificate store to be sure that all service accountshave full control permission for the certificate.Updating the server IDModify the server ID in IntralinksConnector.config for all servers where theconnector has been installed. For detailed information about these parameters,see Appendix D, IntralinksConnector.config configuration settings, on page 34.Updating the Intralinks Connector web service configurationIf you have chosen ConnectorService WCF WebService to be HTTP (NonSecure site), locate the web.config file for the Intralinks Connector service(web.config can be found in the ConnectorService website's virtual directory) andchange the security mode to None instead of Transport under Bindings.In this case, your configuration should look like this: security mode "None"/ SMTP settings1. Log into the Intralinks Connector administrator portal and click the Navigationiconin the bar on the left side of the screen. A panel appears. SelectSMTP Settings; the SMTP Settings screen appears.Intralinks Connector for SharePoint Installation and Configuration Guidepage 18
The SMTP Settings screen.2. Enter your organization’s SMTP settings. Required fields are indicated by ared asterisk. Server Name — Enter the name of your SMTP server in the formatx.x.com. User Name — If your SMTP server requires authentication, enter theuser name. Password — If your SMTP server requires authentication, enter thepassword. Days to Intralinks Password Reset — Indicate the frequency, in days,with which your Intralinks password should be reset. The defaultfrequency is 60 days.3. Click Save to save your changes and close the SMTP Settings screen.Updating the Farm IdentifierIf you are upgrading the Intralinks Connector database from version 4.1 to thelatest version, you must update the default GUID value on the Instance Catalogscreen to show the correct farm ID for the SharePoint server, as shown below.Restarting syncingAfter upgrading, use the Halt Syncing screen to restart syncing for all sites.Proxy server settingsIf your company uses a proxy server, enter the settings in SharePoint.Intralinks Connector for SharePoint Installation and Configuration Guidepage 19
1. Log into the Intralinks Connector administrator portal and click the Navigationiconin the bar on the left side of the screen. A panel appears. SelectProxy Settings; the Proxy Settings screen appears.The Proxy Settings screen.2. Enter the information required for your configuration. Use system settings (recommended) — Select this option if you wantthe Intralinks application to detect and use the proxy settings used byyour computer system. No additional entries are required. Automatic proxy configuration URL — Select this option if proxysettings will be provided in a Proxy Automatic Configuration (PAC) file. Ifyou select this option, you must provide users with the address for thePAC file (for example, http://proxy.Intralinks.com/pacfile.pac). Noadditional entries are required.When users log in, they will select the automatic proxy configuration URLoption and enter the address for the PAC file in the field that appearsbelow the option. Manual Proxy Settings — Select this option if users will enter proxysettings manually. If you select this option, you must provide users withthe following information:– Authentication type — BASIC or NTLM– The IP address or URL for the proxy, (for example, 192.192.192.192)– The port used for the proxy (for example, 8080)– The proxy user ID and password, if the proxy server requires logincredentialsUsers will have to enter these values in the appropriate fields in theManual Proxy settings section of the login screen.3. Click Save to save your changes and close the Proxy Settings screen.For more information, see Appendix B, Bill of Materials and installationcomponents, on page 29.Intralinks Connector for SharePoint Installation and Configuration Guidepage 20
Chapter 6: Verifying the ConnectorInstallationFirst, validate that SharePoint can connect to the Intralinks Platform: Log into the SharePoint server using your username and password. Using Internet Explorer, navigate to https://services.Intralinks.com andhttps://webservices.Intralinks.com.– Verify that the pages load immediately and that no warning messagesappear.– If you encounter certificate warnings, fix them by manually installing theIntralinks certificates. You may need assistance from yourorganization’s server administrators.Next, validate that the Intralinks Connector is installed correctly: If you have access to an Intralinks exchange and own a SharePoint site,create a test connection between the SharePoint site and the Intralinksexchange and verify that all components sync as expected. Additionally, log into the Connector administrator portal and verify that allthe settings provided in the input.xml file have been set correctly. To learnmore about the parameters in input.xml, see Appendix A, Understandingthe input.xml file, on page 26. Once you have launched the portal, selectSite Configuration Settings from the navigation panel on the left side ofthe screen.For more information about establishing a connection and logging into theadministrator portal, see the Intralinks Connector for SharePoint User Guide.Intralinks Connector for SharePoint Installation and Configuration Guidepage 21
Chapter 7: Migrating the Intralinks
required for any provider-hosted app on SharePoint 2013. App Management Service Note: Be sure the App catalog and app URL are configured. Secure Token Service User Profile Service application Subscription Settings Service Application User profile requirements Ensure that the SharePoint user profile service and user profile .