Transcription
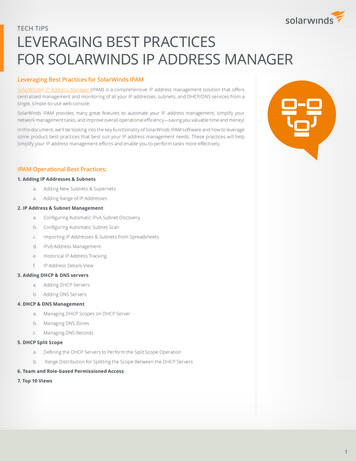
TECH TIPSLEVERAGING BEST PRACTICESFOR SOLARWINDS IP ADDRESS MANAGERLeveraging Best Practices for SolarWinds IPAMSolarWinds IP Address Manager (IPAM) is a comprehensive IP address management solution that offerscentralized management and monitoring of all your IP addresses, subnets, and DHCP/DNS services from asingle, simple-to-use web console.SolarWinds IPAM provides many great features to automate your IP address management, simplify yournetwork management tasks, and improve overall operational efficiency—saving you valuable time and money!In this document, we’ll be looking into the key functionality of SolarWinds IPAM software and how to leveragesome product best practices that best suit your IP address management needs. These practices will helpsimplify your IP address management efforts and enable you to perform tasks more effectively.IPAM Operational Best Practices:1. Adding IP Addresses & Subnetsa.Adding New Subnets & Supernetsa.Adding Range of IP Addresses2. IP Address & Subnet Managementa.Configuring Automatic IPv4 Subnet Discoveryb.Configuring Automatic Subnet Scanc.Importing IP Addresses & Subnets from Spreadsheetsd.IPv6 Address Managemente.Historical IP Address Trackingf.IP Address Details View3. Adding DHCP & DNS serversa.Adding DHCP Serversb.Adding DNS Servers4. DHCP & DNS Managementa.Managing DHCP Scopes on DHCP Serverb.Managing DNS Zonesc.Managing DNS Records5. DHCP Split Scopea.Defining the DHCP Servers to Perform the Split Scope Operationb.Range Distribution for Splitting the Scope Between the DHCP Servers6. Team and Role-based Permissioned Access7. Top 10 Views1
TECH TIPS#1 Adding IP Addresses & SubnetsSolarWinds IPAM allows you to add IP addresses to existing subnets, as well as add additionalsubnets for automated monitoring and management.What you can add and monitor: New subnet or supernet New IP addresses to existing subnet Import subnet and add IP addresses A range of IP addresses to any defined and existing subnet Import IP addresses and allocate them to new/existing subnets IPv6 sites, addresses, and subnets for IPv6 migration and planning purposesNOTE: In order to help you maintain an organized network, IPAM doesn’t allow adding individual IPaddresses, unless they exist within a subnet previously designated for monitoring.a.) Adding New Subnets & SupernetsTo add a new subnet or supernet, click IP Addresses tab Manage Subnets & IP Addresses tab Addbutton Choose Subnet or Supernet.Adding a Subnet or Supernet to SolarWinds IPAMIn the Add Subnet or Add Supernet window, you can fill in the applicable details.Adding Subnet to SolarWinds IPAMAdding Supernet to SolarWinds IPAM2
TECH TIPSb.) Adding Range of IP AddressesTo add a range of IP addresses, click IP Addresses tab Manage Subnets & IP Addresses tab Choosea subnet from the left-hand column Click Add IP Range button.This will open up a window to add your IP address ranges within the selected subnet. You can enter thestarting and ending IP addresses, and IPAM will add the range of IP addresses to the subnet.Adding a Range of IP Addresses to IPAM#2 IP Address & Subnet ManagementSolarWinds IPAM allows you to perform automated IP address scans on all your subnets with customintervals and makes it easy to create your own scan job from scratch. Each job performs a scan of networkdevices based on the subnet. You can automate IP address scanning for all your subnets, a group of subnets,or for an individual subnet.There are three scanning modes used to scan IP addresses: ICMP scan (ping sweep) SNMP scan Neighbor scan (using ARP tables)a.) Configuring Automatic IPv4 Subnet DiscoveryCreate an up-to-date “IP address map” of the network, by directly pulling data from router configurationsand connected machines.3
TECH TIPSProvide SNMP credentials for polling devices and discovery settings for auto discovery.b.) Configuring Automatic Subnet ScanSolarWinds IPAM is capable of using both SNMP and ICMP scanning to continuously determine the statusof your monitored network. The Subnet Scan Settings view allows you to select how IPAM automaticallyscans your network for changes.4
TECH TIPSYou can configure the scan while adding a new subnet or by editing the properties for any existing subnet.On the Manage Subnets & IP Addresses tab, select the subnet(s) that you want to run on anautomated scan.On the right pane, click Edit to open the Edit Subnet Properties window.Subnet & IP Address Management Screen in SolarWinds IPAMYou can enter the Scan Interval field to set the automated scan frequency (in minutes, hours, or days)between 10 minutes to 7 days.Automatic Subnet Scanning in SolarWinds IPAMc.) Importing IP Addresses & Subnets from SpreadsheetsSolarWinds IPAM software simplifies the process of importing all your IP addresses and subnets. Using asimple-to-use Import Wizard, you can now upload all your IP addresses and subnets from Excel or .csvspreadsheets. The wizard will walk you through a series of simple steps and provide the functionality tomanage the spreadsheet data that gets uploaded.Step 1: Preparing to Import a SpreadsheetIPAM offers Excel spreadsheet templates to have your IP addresses and subnets formatted to astandard pattern that makes the importing process easier. You can download these templates, andconvert your existing spreadsheets with IP addresses and subnets into this form for the import.Step 2: Selecting the Spreadsheet (.xls or .xlsx, or .csv) for ImportIPAM allows you to import spreadsheets with multiple worksheets—each of which can denote aspecific subnet and contain the IP address allocation for that subnetYou can import IP addresses and subnets into IPAM for: Adding more IP addresses to an existing subnet Replacing/overwriting the existing subnet with new IP address data Creating new subnets by just importing subnet and IP address data into IPAM5
TECH TIPSStep 3: IP Address & Subnet Column MatchingSolarWinds IPAM tool allows you to choose the appropriate column from your spreadsheet for eachIPAM option.You may have different column header names in your spreadsheet if you’re not using the IPAMrecommended template. IPAM enables you to map those fields from your spreadsheet with defaultdata fields that are required for the import.SolarWinds IPAM gives you two options to choose from: Automatically create subnet hierarchy based on information provided Place new subnets in Imported Subnet/Supernet/Group folder so you can organize themafter importIP Address Column Matching in SolarWinds IPAMStep 4: Selecting Custom Fields to be Imported with the SpreadsheetWith Select Custom Fields, IPAM allows you to choose and customize what you want to import fromyour spreadsheet.Step 5: Importing the Spreadsheet on IPAMOnce you have all the details locked and loaded, you can just hit the Import button.All the IP addresses and subnets will now be available in the Manage Subnets & IP Addresses tab,and you can immediately start managing them using IPAM’s centralized web console.IPAM also provides you with the functionality of importing bulk IP addresses and subnets just by typing orcopying them in a text field.6
TECH TIPSd.) IPv6 Address ManagementIPAM routinely discovers IPv6 addresses by examining router tables. Once an IPv6 address is found, IPAMwill assess ongoing operational status using ICMPv6. Specify the neighbor routers and IPv6 addresses forexisting subnets in IPAM and start managing your IPv6 address blocks with automated discovery. You cannow view data in the same interface as your IPv4 addresses.Step 1: To discover IPv6 subnets, click on the “Discover IPs” buttonStep 2: Specify the neighbor routers and fill-in IP addresses for existing subnets.IPAM provides a consolidated view for IPv6 addresses with status, device details, and vendor details.7
TECH TIPSe.) Historical IP Address TrackingIPAM offers the historical tracking of addresses to see how certain properties have changed over time. Forexample, you can track MAC addresses and hostnames previously assigned to an IP address.From the IP Addresses tab Manage Subnets & IP Addresses page Select a specific IP address fromany existing subnet Click View Details.Selecting an IP Address to View History using SolarWinds IPAMf.) IP Address Details ViewSimilarly, select an individual IP address from the IP Address View, and click the View Details button. Thiswill display all the details associated with the selected IPv4 or IPv6 address, including MAC and Hostnameassignment history.Historical IP Address Tracking & IP Address Detail View in SolarWinds IPAM8
TECH TIPS#3 Adding & Configuring DHCP & DNS ServersSolarWinds IPAM can manage all of your Microsoft , ISC, and Cisco DHCP services, and Microsoft BIND DNSservers from a single, consolidated interface.Using the Network Sonar Discovery wizard, DHCP and DNS servers can automatically be discovered andadded as nodes in so they can be managed by IPAM. You also have the option of manually adding nodes.a.) Adding DHCP ServersOnce the DHCP server is added as a node in (as indicated above), you can add it to the IPAM web consoleby clicking IP Addresses tab DHCP & DNS Management DHCP Servers tab Add New DHCPServer button.Adding DHCP Server in SolarWinds IPAM (Step 1)This will open up the Add DHCP Server page. Now, you can choose the required DHCP server fromthe list of nodes (already discovered by Network Sonar Discovery or manually added) and create orchoose credentials.Click Test, and once the test is successful, click Add DHCP Server to IPAM web console.Adding DHCP Server in SolarWinds IPAM (Step 2)9
TECH TIPSYou can also edit and configure the DHCP server settings from the IPAM web console. Just click on the EditServer button on the DHCP Servers tab, and you can modify settings on the selected DHCP server.SolarWinds IPAM solution also provides support for ISC (Internet Systems Consortium) DHCP. It simplifiesthe creation and addition of ISC subnets to a few clicks. This means you’ll no longer need to log on to CLIevery time you need to make a change. Click here to learn more on ISC DHCP- Quick Install with IPAM.b.) Adding DNS ServersOnce the DNS server is added as a node, you can add it to the IPAM web console.When you add a DNS server in IPAM, it changes the Transfer Zone Configurations on the DNS server. Forexample, if you have Allow zone transfers selected for servers listed on the Name Servers tab, IPAM willset this configuration to, Only to the Following Servers.To add a new DNS server, click IP Addresses tab DHCP & DNS Management DNS Servers tab Add New DNS Server button.Adding DNS Server in SolarWinds IPAM (Step 1)This will open up the Add DNS Server page. Now, you can choose the required DNS server from thelist of nodes (already discovered by Network Discovery Wizard or manually added) and create or choosecredentials.Click Test, and once the test is successful, click Add Server to IPAM web console.10
TECH TIPSAdding DNS Server in SolarWinds IPAM (Step 2)For modifying DNS server settings, click on the Edit DNS Server button on the DNS Servers tab. This willallow you to edit and configure the properties and settings of the selected DNS server.SolarWinds IPAM also helps simplify the management of your BIND DNS servers by leveraging the userfriendly GUI of IPAM to—Add/Edit/Delete DNS servers, Add/Edit/Delete DNS Zones, Assign Views, andRecords to these Zones. Learn more about BIND with IPAM.#4 DHCP & DNS ManagementSolarWinds IP Address Manager provides consolidated, “single-pane-of-glass” management of MicrosoftDHCP/DNS, ISC DHCP/BIND DNS, as well as Cisco DHCP and ASA devices.You can add new or edit existing Microsoft, ISC, and Cisco DHCP servers and scopes; set, update, or deletereservations, reservation status and DHCP properties. You can also add, modify, or delete Microsoft andBIND DNS servers, zones and records—all directly from the IPAM console.a.) Managing DHCP Scopes on DHCP ServerSolarWinds IPAM software enables you to make changes in your DHCP server directly from the IPAM webconsole with just a few clicks. From the DHCP & DNS Management tab, select DHCP Scopes tab, selectthe DHCP scopes as required, and click Edit Scope Details. This will open up the Edit DHCP Scope page.Editing DHCP Scopes using SolarWinds IPAM11
TECH TIPSOn the Edit DHCP Scope page, you can: Define DHCP scope by specifying the DHCP server details Specify IP address range by providing a set of consecutive IP addresses Define how long the scope lease should lastOnce finished, click the Update Scope button to have these updates reflected in the DHCP server.Editing Scope Details from SolarWinds IPAMBest practices dictate the following: Networks that utilize many mobile devices should have a shorter duration Networks with computers at fixed locations can have a longer durationb.) Managing DNS ZonesIn addition to DHCP management, SolarWinds IPAM provides comprehensive DNS management. With IPAM,you can: Manage Microsoft DNS servers right alongside DHCP servers Create, modify, or delete DNS zones and records directly from the IPAM web console View all DNS information, including outdated/obsolete DNS records from one central spotFrom the DHCP & DNS Management tab, select DNS Zones tab, select a single DNS Zone as required, andclick Edit Zone Details which will open up the Edit DNS Zone page.12
TECH TIPSConsolidated DNS Zone ManagementThe edit DNS zone page has a simple wizard to help you edit the following: Zone Name Zone Type– Primary Zone: Choose this option if the DNS server is the authoritative source for all thedomains in the zone.– Secondary Zone: Choose this option if the DNS server is the secondary source for informationabout this zone. Secondary zones are read-only and can only be updated through zone transfer.Specifically used to help load balance and provide fault tolerance.– Stub Zone: Choose this option to provide name resolution in domains, if the local DNSserver is not authoritative. The stub zone contains the resource records needed to identifythe authoritative DNS servers, including Name Server (NS), Start of Authority (SOA), and glueaddress (A) records. Lookup Type– Forward Lookup: Resolves the fully qualified domain name to IP address.– Reverse Lookup: Resolves the IP address to the fully-qualified domain name. Can be a primaryor secondary zone. Zone File Name Zone Transfers: Allows you to set Zone Transfer intervalEditing DNS Zones from SolarWinds IPAM13
TECH TIPSOnce finished, click the Update Zone button to have these updates reflected in the DNS server.Additionally, you can use the Scan option to schedule periodic syncs with the DNS server. The Scan button on the DNS Servers tab will sync all DNS Zone updates from the DNS Server withthe IPAM web console The Scan button on the DNS Zones tab will sync all DNS Record updates from the selected DNSZone on the DNS Server with the IPAM web consolec.) Managing DNS RecordsSolarWinds IPAM allows you to add, edit, and remove DNS records for all your DNS zones.From the DNS Zones tab, select a single DNS Zone and click DNS Records. This will display all the DNSrecords for the selected DNS zone. Using the Add New, Edit, and Delete buttons, you can manage DNSrecords on your Microsoft DNS servers from the centralized IPAM web console.Consolidated DNS Records ManagementClicking on the Edit button will open up the Edit Record window where you can modify the Record Name,Record type, and Record data. Once finished, click Save which will update the DNS server.Consolidated DNS Records Management14
TECH TIPSDNS Record Types Supported by SolarWinds IPAM A Record type: An FQDN is the primary record type for resolving DNS queries. In IPv4, the host isdenoted by an “A” and in IPv6 by “AAAA” “CNAME” (canonical name) records are aliases and points towards their real name “MX” (mail transfer) records indicate the mail server(s) accepting messages on that DNS server “NS” (name server) records indicate the authoritative domain name servers “PTR” (pointer) records are simply data that’s mainly used to record host names for reverse DNSlookups “SOA“ start of [a zone of] authority record—specifies authoritative information about a DNS zone,including the primary name server, the email of the domain administrator, the domain serial number,and several timers relating to refreshing the zone#5 DHCP Split ScopeIPAM simplifies the process of creating and managing split scopes to help ensure high availability andprovide load balancing for your DHCP services. SolarWinds IPAM supports both Microsoft and Cisco DHCPsplit scope functionality.Using SolarWinds IPAM, you can quickly and easily configure your DHCP split scope with a simple twostep wizard. Additionally, you can view related scopes and scope distribution across your subnets, all fromIPAM’s centralized web console.IPAM helps you to: Manage and monitor Microsoft and Cisco DHCP services and scopes directly from the IPAM console Quickly and easily configure DHCP split scope scenarios utilizing a simple two-step wizard View related DHCP scopes and scope distribution across your DHCP serversa.) Defining the DHCP Servers to Perform the Split Scope Operation The split scope wizard shows you the source DHCP server selected for the split scope operation, andallows you to select the target DHCP server to where the scope and its IP addresses need to be split.Note: Only the DHCP servers added to IPAM will be displayed for selection in the split scope operation To perform the DHCP split scope operation, you need to have at least two DHCP servers added toIPAMb.) Range Distribution for Splitting the Scope Between the DHCP ServersSolarWinds IPAM software allows you to specify the percentage of IP addresses to allocate to the sourceand target DHCP scope servers.You can just drag the percentage scale to set the split percentage as required. The IP addresses within theDHCP scopes will be changed accordingly to reflect the percentage split.Or, if you have specific IP address ranges decided for both servers, you can just enter them in the IncludeIP Addresses & Exclude IP Addresses text fields, and the percentage scale will be adjusted accordingly.Recommendations: An 80/20 split is recommended for high availability scenarios (80 for the server that needs to beavailable at all times and 20 for the other DHCP server). In this case, you also have to specify thedelay time in the Offer Delay text field. This will ensure that your backup server starts with IP addressprovisioning only when the primary DHCP server doesn’t respond in a given time. A 50/50 split is recommended for load-balancing purposes.15
TECH TIPSDHCP Split Scope WizardISC DHCP & BIND DNS with SolarWinds IPAMLearn more on BIND DNS Management and ISC DHCP Management with SolarWinds IPAM.#6 Team & Role-Based Permissioned AccessSolarWinds IPAM allows you to easily define and use role definitions to restrict user access and maintainsecurity without limiting your ability to delegate required network management activities. You can defineaccess roles per subnet, group, supernet, DHCP scope, or even individual IP addresses. User delegationdefines the visibility of subnets and supernets and the choice of actions that can be performed. Further, IPAMprovides you with the option to select from various IPAM Roles & Permissions for the selected user login.You can select a subnet and choose from any of the four options below to limit the subnet or DHCP scopeto be accessible and controllable by only the required users. Power User – Read/Write and Initiate Scans Operator – Rea/Write Access Read Only – Read Only Access Hide Access – Restrict All Access16
TECH TIPSModifying User Login Roles and Permissions for Individual Subnets using SolarWinds IPAMIPAM Navigation Summary for Modifying User Role DefinitionIPAM Settings Accounts Manage Accounts ”Select User Login” Edit IP Address Manager Settings Custom Edit “Modify User Roles & Permissions” Submit#7 Top 10 ViewsYou can also leverage intuitive dashboards and the Top 10 Views from SolarWinds IPAM to quickly view IPaddress utilization, including DHCP scope and subnet utilization. All these views are entirely customizable soyou can create your own Top 10 View based on what monitoring metrics you want displayed on the dashboard.17
TECH TIPSTop 10 Views in SolarWinds IPAMWhy SolarWinds IP Address Manager?Eliminate Complexity, Improve Reliability, Save Time and Money! Manage and monitor Microsoft DHCP/DNS, ISC DHCP/DNS, and Cisco DHCP servers Automatic subnet discovery and IP address scanning for the most accurate real-time discoveryand verification Easily search an address for history, op status, MAC, device type, DHCP, DNS properties, and more Optional UDT integration shows where an end-point device is connected to the network and who isusing the device Delegate tasks to network and system administrators based on role Supports IPv4 and IPv6 networks Alert notifications help prevent your subnets & DHCP scopes from filling up Historical IP address tracking for trend analysis and IP capacity planning Automatically discovers used and unused addresses and typically deploys in less than an hourTEST DRIVE DEMODOWNLOAD FREE TRIALFully Functional for 30 DaysSolarWinds IP Address Manager18
TECH TIPSSolarWinds provides powerful and affordable IT management software to customers worldwide,from Fortune 500 enterprises to small businesses, managed service providers (MSPs), governmentagencies, and educational institutions. We are committed to focusing exclusively on IT, MSP, and DevOpsprofessionals, and strive to eliminate the complexity that our customers have been forced to accept fromtraditional enterprise software vendors. Regardless of where the IT asset or user sits, SolarWinds deliversproducts that are easy to find, buy, use, maintain, and scale while providing the power to address key areasof the infrastructure from on-premises to the cloud. This focus and commitment to excellence in endto-end hybrid IT performance management has established SolarWinds as the worldwide leader in bothnetwork management software and MSP solutions, and is driving similar growth across the full spectrum ofIT management software. Our solutions are rooted in our deep connection to our user base, which interactsin our THWACK online community to solve problems, share technology and best practices, and directlyparticipate in our product development process. Learn more today at www.solarwinds.com.For additional information, please contact SolarWinds at 866.530.8100 or email sales@solarwinds.com.To locate an international reseller near you, visit http://www.solarwinds.com/partners/reseller locator.aspx. 2014 SolarWinds Worldwide, LLC. All rights reserved.The SolarWinds, SolarWinds & Design, Orion, and THWACK trademarks are the exclusive property ofSolarWinds Worldwide, LLC or its affiliates, are registered with the U.S. Patent and Trademark Office, andmay be registered or pending registration in other countries. All other SolarWinds trademarks, servicemarks, and logos may be common law marks or are registered or pending registration. All other trademarksmentioned herein are used for identification purposes only and are trademarks of (and may be registeredtrademarks) of their respective companies.19
In this document, we'll be looking into the key functionality of SolarWinds IPAM software and how to leverage some product best practices that best suit your IP address management needs. These practices will help simplify your IP address management efforts and enable you to perform tasks more effectively. IPAM Operational Best Practices: 1.