Transcription
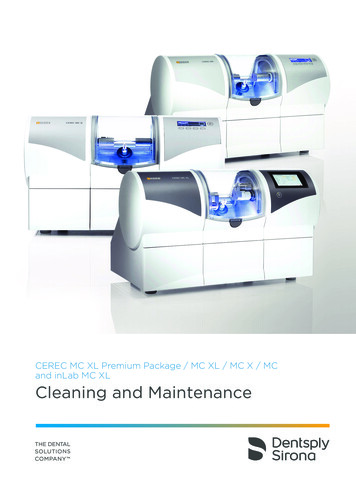
CEREC MC XL Premium Package / MC XL / MC X / MCand inLab MC XLCleaning and Maintenance
Contents03 Maintenance Schedule04 Water System04 Changing the Filter Bag (CEREC Suction Device)05 Changing the HEPA Filter (CEREC Suction Device)06 Using the Cleaning Hose and Wet Cleaning Process07 Clamping Cones for Instruments07 Manual Block Clamp07 Ball Pressure Screw in Manual Block Clamp08 Set Screw (MC and MC X only)08 Chamber Door09 Instruments09 Calibration09 Annual Maintenance09 Approved Accessories10 Important Order Numbers12 Maintenance Documentation15 NotesIntroductionDear Customer,Thank you for your purchase of a milling and grinding unit from DentsplySirona. The purpose of this document is to assist you with conducting routinecleaning and maintenance on your unit. This will result in optimizing the unit’sperformance and extending its lifetime.Additionally, to keep up to date on the latest CEREC news and information,we welcome you to visit https://my.cerec.com.Your CEREC Team022
Maintenance ScheduleBefore every wet machining process Ensure that the water and Dentatec solution completely coversthe filter(s) in the water tankWeekly Change water in water tank and add 75ml DentatecMonthly Clean water filter monthly or as needed depending onusage (change filter every 3-4 cleanings) Check and clean water jets to ensure that water is strikingthe tools during wet machining Clean manual block clamp inside of the block axle Clean motor clamping cones for instruments without chuckYearly Annual maintenance carried out by a Service TechnicianDry milling zirconia only:Every 10 dry milled zirconia restorations Vacuum chamber and run wet cleaning programEvery 120 dry milled zirconia restorations Change filter bag (change HEPA filter every 3-4 filter bags)033
Water SystemChange the water at least once a week or when prompted by the system after240 minutes wet machining time. Add 75ml Dentatec to the tank Fill the tank with water until the filter(s) is/are completely immersed(up to the bottom edge of the cover thread, approx. 3 liters)Clean the filter(s) when changing the water or when the “water pressure toolow“ message appears. Remove the filter(s) from tank and hold under warmwater while washing out material.Change the filter(s) immediately if damaged; otherwise every 3 months orafter 3-4 filter cleanings.Clean the cooling water jets if they do not strike the machining instruments bycarefully removing any foreign particles from the water nozzles with a cleaningwire or probe. This will help to extend the life of the instruments.Changing the Filter Bag (CEREC Suction Device)If there is a significant fall in suction power when dry milling zirconia, the filterbag (REF 65 78 095) could be full and will need replacing. Typically a filterbag should offer capacity for ca. 120 restoration units. This number can varydepending on the amount of zirconia material milled and extracted. To changethe filter bag:1. Loosen and remove the two knurled nuts on the maintenance cover.2. Remove the cover.3. Remove the full bag from the nozzle and replace with a new one.4. Place the cover back on and screw tighten the two knurled nuts.Note: ensure that the cap is sealed properly and the filter bag is not jammed.104Removing the cover2Replacing the filter bag
Changing the HEPA Filter (CEREC Suction Device)If the suction power is still weak after replacing the filter bag, then alsoreplace the HEPA filter (REF 63 85 277). The HEPA filter is located behindthe filter bag. It is recommended to change the HEPA filter every 3-4 filterbags. This number can vary depending on the amount of zirconia materialmilled and extracted. To change the HEPA filter:1. Loosen and remove the two knurled nuts on the maintenance cover.2. Remove the cover.3. Remove the filter bag from the nozzle.4. Then remove the two Phillips screws on the perforated sheet on the insideof the suction device.5. Take out the perforated sheet and remove the HEPA filter.6. Place a new HEPA filter in thedesignated area.7. Insert the perforated sheet andtighten the two Phillips screws.8. Put the filter bag back on again.9. Place the cover back on andtighten the two knurled nuts.1Removing the cover2Removing the filter bag3Unscrewing the Phillips screws4Removing the perforated sheet5Replacing the HEPA Filter05
Using the Cleaning Hose and Wet Cleaning ProcessThe milling chambers of units used for dry milling zirconia should be regularlycleaned to avoid a build-up of excess zirconia dust. A cleaning hose withnozzle can be used for this. This hose is ordered separately as a spare part(REF 65 89 795). When dry milling zirconia, it is recommended to use the wetcleaning process or wet grind a restoration at least once a week or after everyten dry-milled restorations.To use the cleaning hose and wet cleaning process:1. Remove the milling unit hose from the top of the suction device.2. Connect the cleaning hose to the top opening of the suction device.3. Activate the suction device’s manual function by changing the switch settingon top of the device from “Auto” to “On”.4. Vacuum excess dust from the chamber as needed.5. Remove excess dust from the block shaft and the underside of the baffleplate located on the block axis. (See both arrows in picture 4)6. After the chamber has been vacuumed the wet cleaning process in thesoftware should be used 2-3 times as needed to remove excess dust. In the software’s system menu, navigate to “Configuration“, thenclick on the “Devices“ button. Select the applicable unit. Click on the option “Service“ then “Start a cleaning process“.Notes: A restoration can be wet grinded to achieve a similar cleaning effect.A nylon brush can also be used to remove zirconia dust from around thebase of the block shaft in between wet cleaning processes.1Cleaning hose2Removing and connecting the hoses3Vacuuming the chamber4Block shaft base and baffle plate06
Motor Clamping Cones for InstrumentsClean the clamping cones of the tools once a month as follows:1. Using the software, initiate a tool change.2. Unscrew and remove the tool.3. Clean the inside of the clamping conewith a pointed cotton swab includedwith the Cleaning Set and undilutedethanol (commercially availablecleaning alcohol). When doing this,rotate the cotton swab counterclockwise in order to push the dirt out.4. Do not grease the thread. Insert thetool and screw it tight with the torquewrench.Cleaning the clamping cones1Manual Block ClampClean the inside of the block axle once a month with a round (green) cottonswab included with the Cleaning Set and undiluted ethanol (commerciallyavailable cleaning alcohol).1MC XL block clamp2MC/MC X block clampBall Pressure Screw in Manual Block ClampThe high clamping forces cause wear of the ball pressure screw. Replace theball pressure screw (REF 62 58 987) after every 500 clamping procedures.1Block clamp2Ball pressure screw07
Set Screw (MC and MC X only)Replace the set screw (REF 62 35 126) after every 1000 clampingprocedures or if the pin has broken off.Note: do not confuse the set screw with the ball pressure screw! (See picture 1)1Replacing the set screw2Set screw1. Remove block from holder if inserted.2. In the software’s system menu, navigate to “Configuration“, then click onthe “Devices“ button.3. Select the applicable unit.4. Click on the button “Change set screw“. The block axis will move into 12 o’clock position. The software will inform to replace the set screw and close the door.5. Remove the worn set screw using the block clamp tool.6. Insert a new set screw and secure in place with the block clamp tool.7. Click on the “Ok“ button in the software.Chamber DoorThe door should only be cleaned with a microfiber cloth. Paper towels shouldnot be used as they can reduce the transparency of the door over time.08
InstrumentsChange the grinding burs and milling instruments when prompted bythe software. Diamond burs (wet grinding): typically after ca. 25 restorations at thelatest. However the type of material, size of blocks used and machiningoption can impact lifetimes. Shaper 25 (dry milling): after 50 restorations Shaper 25 RZ (wet milling): after 30 restorations Finisher 10 (dry and wet milling: after 50 restorationsCalibrationThe unit is calibrated at the factory. No additional calibration is requiredduring initial startup.Subsequent calibrations should be carried out once a year as part of annualmaintenance or if production results are faulty.Annual MaintenanceIt is recommended to have maintenance performed on your unit annually by atrained technician. Please contact your local dealer for details.Approved AccessoriesIn order to ensure reliable and high-quality results as well as product safetyand durability, our portfolio of CEREC MC / MC X / MC XL / MC XL PremiumPackage and inLab MC XL milling and grinding units may be only operatedwith original Dentsply Sirona accessories or third-party accessories expresslyapproved by Dentsply Sirona. In particular, only the power cable supplied withthe unit or the corresponding original spare part may be used with the unit. Theuser assumes the risk of using non-approved accessories.Approved accessories also include grinding burs, milling instruments, blocksand coolants. The current range of approved blocks and corresponding burs/cutters can be found in the latest software as well as in the “Bur Tables” available in the Downloads area at:https://my.cerec.comThese lists will be updated from time to time.09
Important Order NumbersLeft SideStep Bur 12 S (Qty. 6)Step Bur 12 (Qty. 6)Cylinder Bur 12EF (Qty. 6)*REFREF62 40 167Right SideCylinder Pointed Bur 12 S (Qty. 6)62 40 15962 60 02565 35 18665 35 17862 59 59762 59 589Cylinder Pointed Bur 12 EF (Qty. 6)**Extra Fine Burs require a 4-motor unitStep Bur 20 (Qty. 6)Shaper 25 (Qty. 3) - dry milling**Shaper 25 RZ (Qty. 3) - wet milling**Cylinder Pointed Bur 20 (Qty. 6)Finisher 10 (Qty. 3) -62 99 395dry & wet milling**62 99 38764 33 440** Milling is only approved for units from the following serial numbers: inLab MC XL 129001,CEREC MC XL 129001, CEREC MC XL Premium Package 302001, CEREC MC X 231001,CEREC MC 231001 or upgrade of the left motor on 2-motor machines or of the left motorin the motor set 1 on 4-motor machines.Dry milling of zirconia requires dry milling configuration and CEREC Suction Unit.DescriptionREFDentatec 1000ml58 09 640Filter MC/MC X (Qty. 1) – “Top-loading”63 87 067Filter MC/MC X (Qty. 6) – “Top-loading”64 29 950Filter (Qty. 1) – “Side-loading”61 29 519Filter (Qty. 6) – “Side-loading”61 29 40210
DescriptionREFFilter Bag, CEREC (Qty. 2)65 78 095HEPA Filter (Qty. 1)63 85 277Second Hose for Cleaning65 89 795Torque Wrench, Spare64 79 849Torque Wrench HT, Spare(only for Shaper 25RZ)64 79 856Ball Pressure Screw Set (Qty. 5)(for manual block clamp)62 58 987Set Screw (Qty. 1)(for MC and MC X units only)62 35 126Cleaning Set(for manual block clamp)63 05 614Milling chamber sieve, Spare62 99 40311
Maintenance DocumentationNo.12Task DescriptionTask DatePerson Responsible
Maintenance DocumentationNo.Task DescriptionTask DatePerson Responsible13
Maintenance DocumentationNo.14Task DescriptionTask DatePerson Responsible
Notes15
Dentsply SironaSirona Dental Systems GmbHFabrikstraße 31, 64625 Bensheim, Deutschlanddentsplysirona.com16Enabling TechnologiesCAD/CAMImaging SystemsTreatment CentersInstrumentsBestell-Nr. 66 35 556, Ä.-Nr.: 000 000Procedural icsImplantsProsthetics
Loosen and remove the two knurled nuts on the maintenance cover. 2. Remove the cover. 3. Remove the filter bag from the nozzle. 4. Then remove the two Phillips screws on the perforated sheet on the inside of the suction device. 5. Take out the perforated sheet and remove the HEPA filter. 6. Place a new HEPA filter in the
