Transcription
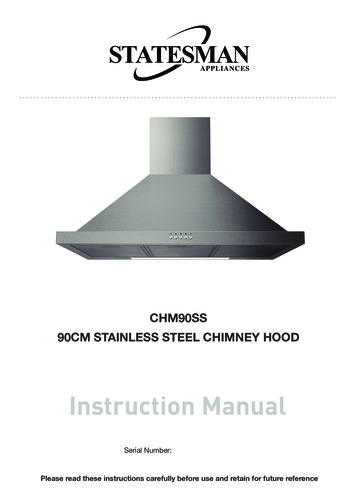
CHM90SS90CM STAINLESS STEEL CHIMNEY HOODInstruction ManualSerial Number:Please read these instructions carefully before use and retain for future reference
Thank you for purchasing our product. We hope you enjoy using the many features andbenefits it provides. Before using this product please study this entire Instruction Manualcarefully. Keep this manual in a safe place for future reference. Ensure that other peopleusing the product are familiar with these instructions as well.WARNING The installation and repair work must be undertaken by a qualified and competent person. The manufacturer disclaims all liability for any damage or injury caused as a result ofnot following the instructions of installation. The cooker hood supply should be 220V-240V 50Hz Children less than 8 years of age shall be kept away unless continuously supervised. This appliance can be used by children aged from8 years and above and persons withreduced physical, sensory or mental capabilities or lack of experience and knowledge if theyhave been given supervision or instruction concerning use of the appliance in a safe wayand understand the hazards involved. Children shall not play with the appliance. Cleaningand user maintenance shall not be made by children without supervision. Cleaning and user maintenance shall not be mage by children without supervision. When the hood is in repair, maintenance, replacement of parts, please pull out the plugto ensure the safety of people.CAUTION: Accessible parts may become hot when used with cooking appliance
COMPONENTS876NumberNameNumberName1Grease filter13Adjustable bracket2Control box cover14Adjustable decorating trim3Junction box15Power cord groupware4Connection box16Control box cover5Plate type lamp shadeFront plate17Bracket18Lamp19E14 Lamp socket8Switch boxSwitch20Junction box9Switch box cover21Motor10Body groupware22Volute feet11Smoke duct23Capacitor12u-shaped section67
Feature The cooker hood is made of high quality materials in a streamlined design. Equipped with high power and low noise electric motor, the cooker hood producesstrong suction and low noise. Special wind tunnel construction, free dirt will be absorbed in a second.Installation The cooker hood should be places 65-75cm above the cookingplane for safe and effective use. see Fig.1 There must be adequate ventilation of the room when thecooker hood is working. Fix the outlet on the motor box. See Fig 2 Drill 3 holes with a diameter of 8mm to accommodatethe bracket, and the holes must be aligned. Insert screws into the holes and tighten.80390-630 Fix the drilling template. See Fig 3 Hang the cooker hood on the bracket. See Fig 4 Fix an extra screw to prevent the cooker hood inadvertentlysliding off the bracket. See Fig 5330160
Fix the external vent to the outlet, then feed it through tothe external wall. See Fig 6 Put the U-shaped section on the suction. See Fig.7 Adjustable decorating hood can be used to adjust the height.If necessary, please insert it into the U-shaped section andpull upward to a suitable height. Fix the grease filter at the bottom of the cooker hood.(If removed at the beginning.)Notice of Installation It can not share the same air ventilation tube with other appliances such as gas tube,warmer tube, and hot wind tube. There will be a hazard of pressure, combustion,impaired and harmful gases drawn back. The bending of ventilation tube should be 120 , parallel or above the start point/ shouldbe connected to the external wall. Please make sure the bracket is placed horizontally. After installation, make sure that the extractor is placed horizontally to avoid greasecollection at one end. See Fig 8. After installation, make sure that the plug can be accessed if necessarySafety Warning This appliance is not intended for use by young children or infirm personswithout supervision. Plug the power chord into the power socket outlet with earthing continuity terminal. The cooker hood is for home use only, not suitable for barbecue commercial purposes. The cooker hood and its filter mesh should be cleaned regularly according tothe instructions. Do not use open flame, or allow oil to go beneath the appliance. If any fault occurs with the appliance, please call after-sale service department. Please keep the kitchen well ventilated when in use. Prior to any maintenance or cleaning, ensure the power is off.
If the supply chord is damaged, it must be replaced by the manufacturer, service agentor similarly qualified person in order to avoid a hazard. The replaced power cord shouldbe provided by manufacturer or seller. If the plug or cord is damaged, please call after-sale service centre. There is a fire risk if cleaning is not carried out in accordance with the instructions. In case of a damaged connecting wire, please refer to the manufacturer, after-saleservice personnel or other qualified technicians. Use the unit according to the instructions to avoid fire hazard. The exhaust air must be not be introduced into a smoke flue or chimney that is usedfor exhausting fumes from appliances burning gas. Follow the local laws applicable for external air evacuation. There shall be adequate ventilation of the room when the range hood is used at thesame time as appliances burning gas or other fuels. There is a fire risk if cleaning is not carried out in accordance with the instructions. Do not flambé under the range hood The air must not be discharged into a flue that is used for exhausting fumes fromappliances burning gas or other fuels.UseSpeed adjustment. See Fig 9 Press Stop button, the motor will stop running. Press the Low (speed) button, the motor runsStopLowat low speed Press the Mid (speed) button, the motor runsat mid speed Press the High (speed) button, the motor runs at high speed. Press the Light button, the 2 lighting lamps will come on.Press it again and the lamps will be turned off.MidHighLightMaintenanceThe cleaning of the carbon grease filter meshThe filter mesh is made of high density aluminium. Please do not use corrosive detergent forcleaning. The proper function of the unit is conditioned by the regularity of the maintenance.Please strictly follow the guidelines below:Method 1: Put the mesh into 40-50 C warm, soapy water and soak for about 2-3 minutes.Wear gloves and clean with a soft brush. Please do not apply too much pressure, as the meshis delicate and can be damaged easily.Method 2: The filter can be cleaned in the dishwasher, set the temperature at around 60 C.
The Installation drawing of filter A1-Clean the fan and other surfaces ofthe appliance regularly using a clothmoistened with rubbing alcohol ornon abrasive liquid detergentReplace Halogen LampAllow the lamp to cool down before replacing. First, remove the lamp cover Unscrew the defective halogen lamp and replace it with a new one (power:40W) Replace the lamp cover carefully; making sure it’s in position.Cleaning the Cooker Hood To protect the main body from corrosion caused by long term accumulation of dirt,the cooker heads should be cleaned with hot water and non-corrosive detergentevery 2 months. Please do not use abrasive detergent as it will damage the body Never immerse the motor and any other electrical parts in water or other liquid. Before cleaning, ensure the power is off. The carbon filters are neither washable nor reusable and must be replaced every 4 months.TroubleshootingFaultCauseLight on, but motor doesnot workThe blades are blockedThe capacitor is damagedThe motor is damagedThe internal wiring of motoris cut off/disconnected. Anunpleasant smell may produceBoth light and motor donot workApart from the above mentioned, check the following:Replace capacitorReplace motorReplace motorLight damagedReplace lightsOutlet and the air ventilationentrance are not tightly sealedTake down the outlet andseal with glueLeakage from the connection ofU-shaped section and coverTake U-shaped sectiondown and sealPower cord looseOil leakageSolutionConnect the wires as per theelectrical diagram
FaultCauseSolutionVibrationThe blade, if damaged, cancause vibratingReplace the bladeThe motor is not tightly fastenedThe cooker hood is not tightlyfixedFasten the motor tightlyFix the cooker hood tightlyThe distance between the cookerand the cooker top is too largeReadjust the distanceToo much ventilation from opendoors or windowsChoose a new place to installthe appliance or close somedoors/windowsThe fixing screws are not tightenoughTighten the fixing screwand make it horizontalThe hanging screws are nottight enoughTighten the hanging screwand make it horizontalInsufficient SuctionThe machine inclinesLWhiteEBlack(H)Blue(M)Orange(L)LightMain ParametersVoltage220-240 50HzRated Power205WLighting Power40W X 2Motor Power125WMotorSingle MotorInner diameter of Air tube150mmAir output400m3/h 65dBNoisePOWER BOARDN
MAINS PLUG FUSE REPLACEMENTFuse Replacement (Class I)This appliance must be earthed. Remove the central screw on the plug andopen the shell. Take out the fuse and replace with a new fuse of the same Amp.Install the shell again and tighten the screws.This appliance is marked according to the European directive 2012/19/E on WasteElectrical and Electronic Equipment (WEEE).By ensuring this product is disposed of correctly, you will help prevent potential negativeconsequences for the environment and human health, which could otherwise be causedby inappropriate waste handling of this product. The symbol on the product indicatesthat this product may be treated as household waste. Instead it shall be handed over tothe applicable collection point for the recycling of electrical and electronicequipment. Disposal must be carried in accordance to with local environmentalregulations for waste disposal. For more detailed information about treatment,recovery and recycling of this product, please contact your local city office,your household waste disposal service or the shop where you purchased it.SERVICE AND SPARE PARTSShould you experience any difficulty in using your Statesman appliance at any time, you maycontact your Statesman Retailer or call our Customer Service Department on:0844 848 5861Please have the following details ready; Model Name/ Model Number Serial Number Date of Purchase Where Purchased Customer Name and address including post code Contact Telephone Number Accurate description of the faultSpare Parts information can be obtained by calling our Spare Parts Department on:0844 848 5862
If the supply chord is damaged, it must be replaced by the manufacturer, service agent or similarly qualified person in order to avoid a hazard. The replaced power cord should be provided by manufacturer or seller. If the plug or cord is damaged, please call after-sale service centre.