Transcription
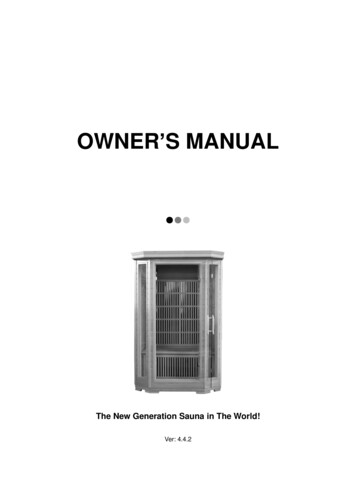
OWNER’S MANUAL The New Generation Sauna in The World!Ver: 4.4.2
WelcomeThanks for using the saunas. Please read the instruction thoroughly before usingit. To avoid any damages, please use it follow the instruction.WarningTo prevent any fire or electrical shocks. Please do not expose the electricappliance part under the rain or in the moist place! To prevent electric shock, donot open the electric appliance lid! Only maintain by qualified technician!Dear Customer,Congratulations on your purchase of the sauna, the new generation Sauna in the world. We areconfident that you will enjoy the many benefits of using the sauna for years to come.Carefully and thoroughly read this manual in its entirety before using the sauna for the first time.We recommend keeping this manual for regular review and future reference.I attribute this growth and success entirely to our customer satisfaction, the recognized healthbenefits, and the quality of our workmanship. we use only the finest materials coupled withstate-of-the-art construction and the highest safety standard in the industry.You will be surprised at the noticeable effects on pain relief, weight control, skin stimulation, andstress reduction due to an increased blood circulation when using the sauna.Whatever your needs, we invite you to experience the difference with the sauna: A difference inhealth benefit, a difference in quality, and a difference in attitude of our team service and support.The whole team is looking forward to serving your needs.1
Table Of Contents Table Of Contents . 2 Conditions Of Use . 3 General Technical Characteristics . 3 Packaging and Individual Panel Information . 3 Installation Information . 4 Assembly Instructions. 5 Digital Control Operating Instructions . 13 Digital Color Therapy Operating Instructions(Optional) . 15 Oxygen Ionizer Application Guide . 16 Enjoying Your Sauna . 16 Tips for Use . 17 Safety Instructions . 18 Limited Warranty . 19 Frequently Asked Questions . 20 Maintenance . 22 Transportation And Storage . 23* The information contained in this manual is subject to change without notice.2
Conditions Of Use1. Temperature from 5 40 ( 41 104 )2. Relative humidity 85%3. Depression: 700 1060 hpa4. Main supply: AC 110V 120V 220V 230V 240VFrequency: 60Hz 1 50Hz 1 General Technical Characteristics1. Functions processed by microprocessors2. Temperature adjustable from 30 to 60 (86 140 )3. Adjustable dwell time from 0 to 60 minutes4. Soft touch key5. Long-live heater Packaging and Individual Panel InformationThe sauna is packed in 2 boxes or 3 boxes:PLEASE FIND OUT THE SAME NUMBER OF THE CARTON BOX.FOR EXAMPLE: "NO. 001 1 OF 2" FIT "NO. 001 2 OF 2" ON CARTON PACKAGE.(OR"NO. 001 1 OF 3" FIT "NO. 001 2 OF 3", "NO. 001 3 OF 3")THEN YOU CAN ASSEMBLE OUR SETS EASILY.NOTE: PLS DO NOT MIX PACKAGE (MEANS PARTS FROM DIFFERENT NUMBERBOXES CAN NOT BE INSTALLED TOGETHER, OR EXCHANGED).3
Parts list of a sauna roomBottom PanelBack PanelRight PanelLeft PanelRight Front PanelLeft Front PanelFront PanelTop PanelBench PanelBench Heater PanelAccessoriesWARNING: The receptacle provided by the manufacturer must be installed by aqualified electrician only.1. Left Panel4. Bottom Panel7. Right Panel10. Oxygen Ionizer2. Digital control panel5. Bench Heater Panel8. Back Panel11. Light12. Cup holder3. Front Panel6. Bench Panel9. Top Panel13. Stereo Installation Informationa. Do not plug any other appliances into the power socket with your sauna.b. the sauna should always be placed on a level surface.c. the sauna must be placed indoors and in a dry area. (Except outdoor sauna).d. Do not spray the exterior with water. If the floor is damp, install a floor separator to keep thesauna high & dry.e. Do not store flammable objects or chemical substances near the sauna.4
Assembly InstructionsAssembly of the sauna requires at least 2 adults to complete. Please read the instructionsthoroughly before and during assembly to ensure proper installation of the unit. If you encounterany problems or have questions during assembly, please feel free to call our Customer Service orlocal dealers.(1) LOCATION OF SAUNAWhen determining a location for your sauna, please keep in mind the following:1. The Main Power Cord on the sauna must be easily accessible.2. The location must be dry and leveled.(2) PLACING BOTTOM PANELPlace the Bottom Panel on the ground and make sure that the "FRONT" sticker is facing thedirection where the front of the sauna would be.(3) CONNECTING BACK PANEL TO BOTTOM PANELConnect the Back Panel to the Bottom Panel by lining up the Back Panel on the groove of theBottom Panel.Keep in mind that the Back Panel will not have enough support from the buckles alone until theSide Panels have been installed in place.5
External BuckleInterlock bracket(4) CONNECTING RIGHT PANELSConnect the Right Side Panel to the Back Panel by lining up external buckles and fastening them.1. Each Side Panel has a white label to identify which side it is. The panel with "RIGHTPANEL" label should be placed on the right side when facing the sauna from the front.2. Attach the Right Front Panel to the Right Side Panel by lining up the Right Front Panelsliding into the Right Side Panel interlock brackets.6
(5) CONNECTING FRONT PANELPlace the Front Panel on the Bottom Panel. Attach the Front Panel to the Right Front Panel bylining up the Front Panel sliding into the Right Front Panel interlock brackets.(6) CONNECTING LEFT FRONT PANELPlace the Left Front Panel on the Bottom Panel. Attach the Left Front Panel to the Front Panel bylining up the Left Front Panel sliding into the Front Panel interlock brackets.7
(7) PUT THE WOOD FOOT GRID ON THE BOTTOM PANEL(8) INSTALLING BENCH HEATER PANELSlide down the Bench Heater Panel by lining up its right with the Vertical Guides.1. Bench Heater Panel must be positioned so that the "TOP" sticker is facing up and the heaterfacing outward.2. Be careful not to scratch the Side Panels when positioning the Heater Panel.8
(9) PLUGGING BENCH HEATER CABLEPlug in the Bench Heater Cable to the Outlet located on the Back Panel. Make sure connection issecure.(10) INSTALLING BENCH PANELInstall the Bench Panel by sliding it over the Horizontal Guide on Back Panel. Be careful not toscratch the Side Panels when doing so.Make sure to position the Bench so that the "BACK" sticker is facing back, the smooth and9
finished sides of the Bench are facing up and forward. Fix the Bench Panel to the Bench HeaterPanel with two screws.(11) CONNECTING LEFT PANELPlace the Left Panel on the Bottom Panel. Attach the Left Panel to he Left Front Panel by lining upthe Left Panel sliding into the Left Front Panel interlock brackets. Connect the Left Side Panel tothe Back Panel by lining up external buckles and fastening them.(12) PLACING TOP PANEL1. Put the Top Panel on the assembled panels.2. Plug the heater wires and control wires through the holes around the Top Panel3. Gently place the Top Panel onto the rest of the assembled panels. When all four corners are inplace, gently push down the Top Panel until it is snugly fit over the rest of the panels.4. Make sure that the cables around the corners do not get pinched between the panels.10
(13) WIRES CONNECTIONS1. Please connect the heater wire terminals and control wires as follow pictures.2. Screw the Top Panel to the side panels.3. Put the Dust Cover on the Top Panel and screw it.11
(14) INSTALLING OXYGEN IONIZER1、plug the power.2、Hang up ionizer on a screw hook at the designation of oxygen ionizer.12
(15) INSTALLING CUP HOLDERAttach cup holders in the fore left corner and the fore right corner (when sitting in the sauna).(16) DOORKNOB INSTALLATION1. Align the Outside Doorknob against 2 holes on the outside of the door, hold it at an angleagainst the door.2. Insert the Screw into the hole located on the inside of the door. Screw until it is tightly fit.(17) PLUG YOUR SAUNA INTO THE WALL OUTLET AND IT'S READY TOBE ENJOYED BY YOU AND YOUR FAMILY! Digital Control Operating InstructionsButton and IndicatorFunction13
Temperature “ / -” buttonTime “ / -” button“Inside”, “outside” light button“Power” buttonIndicatorTemperature will increase or decrease byone degree at a time. By holding down the“ /-” keys, you can speed the rate ofchange.Time will increase or decrease by onedegree at a time. By holding down the “ /-”keys, you can speed the rate of change.Light switch (outside light is optional)Power on/off"Power" light: starting up status."Heat" light: Lights up when heated."Set” light: light when settings."C"/"F” light: Displays the currenttemperature mode.1. START-UPa) Device powers plug in a separate well-grounded three-hole outlet, "Power"indicator lights.b) Press “Power” button, turn on the equipment, left window display temperature,the right one display time.c) During working time, this equipment needs somebody’s attention, please poweroff on time when leaving.2. ENJOYING SAUNAa) SET THE TEMPERATUREPress the TEMPERATURE “ or –” buttons to adjust the temperature.Temperature display window show actual time when there is no operate, it willshow set temperature when adjusting.b) SET THE TIMEPress the TIME “ or –” to set the sauna time. When it is remaining 1 minute,beep reminds, then you can reset the time. Time is 0, automatic shutdown.C) The temperature and time set last time will be automatic memory and it will beboot automatically use in the next time.3. READING LIGHTPress “Inside” button or “outside” to turn on or off light. It is not control by theremaining time and “power” button.4. SWITHCING BETWEEN AND Press the temperature “ ” and “-” key together, the corresponding indicator lights.5. TURN OFF THE SAUNA14
Press POWER button to turn off the sauna. If not use sauna for a long time, pleaseunplug the power plug.6. CONTINUOUS WORK:To extend the sauna using life, please make rational use of the equipment afterevery 3 hours of continuous work should be shut down for 30 minutes.7. WARNING CODE:Built-in automatic detection of the sauna, the meaning of the code is as followinga) High temperature protectionThe temperature display twinkle "H" and the buzzer alarm, and then please turn offand turn on sauna again after cooling down.b) Show “EP”Temperature sensor failure, confirmed that the sensor is connected properly orcontact after-sells institution. Digital Color Therapy Operating Instructions(Optional)(Only suitable for the Independent Control-panel)1. Press the "Power" button, tum on the Digital Color Therapy system.2. When light display the color you need, press the "Select" button to choose.Press the button "Set", and press the button " ”,"-" to adjust the time, press the button "Set" again,it's counting down.3. Press the "Power" button again, tum of the Digital Color Therapy system.(Only suitable for the Integrated control-panel)1. Power onPress “color therapy” button, power on, will shows the color which set finally during last time.2. Color selectionKeep pressing the therapy button for 2 seconds, then right side will show “2n”, means it is inchanging-over state, since then the color mode will change when press therapy button each time,meanwhile the left side will show 1L 9L:a) 1L: quick color changing modeb) 2L: slow color changing modec) 3L: white color, can be used as reading lightd) 4L 9L: colorful modeIf here is no set for 5 seconds, the screen will return TIME and TEMPERATURE display model. Ifwant set color light again, keep pressing the therapy button will be ok.3. Power offPress color therapy button to turn off it while the display is in “TIME” and “TEMPERATURE”15
mode. Oxygen Ionizer Application Guide(Only suitable for the models that chosen Oxygen Ionizers)Ionizer releases negative ion to purify the air, dispense natural floral fragrances to enhancepeople's mood and help stimulate relaxationThe type of oxygen ionizer:1. Turn to ION, Prevent air conditioner disease.2. Turn to O3, Ozone disinfection.Warning: O3 is harmful, please don't step into the sauna whenturn on the O3.Replacing the fragrance piece1. Take off the oxygen ionizer2. Open the back piece of it3. Replace the floral fragrance piece inside of it. Enjoying Your SaunaINSTRUCTIONS FOR USEReview all health and safety instructions. If in doubt as to the advisability of using your sauna,consult with your physician. If you feel light-headed or heat-exhausted during a session, exit thesauna immediately.16
1. Set the temperature to a comfortable level, normally, 40-50 .2. Allow approximately 8-15 minutes for the sauna to warm up before beginning a session.3. Perspiration will begin within 6 to 15 minutes after stepping into the unit. We recommend that asauna session does not exceed 30 minutes.4. When the temperature reaches the level set on the thermostat, the heaters will turn off and onperiodically to maintain the desired temperature level inside of the sauna.5. The front door/window and/or ceiling vent can be opened at any time to introduce fresh air intothe sauna.6. Unique property of direct penetration into the body without heating the intervening airin-between allows sauna users to enjoy all its benefits while the door or window of a sauna is openfor ventilation.7. Always drink plenty of water before, during, and after a sauna session. Doing so will replenishlost fluids from the body through perspiration.8. Choosing to take a hot shower or bath prior to the sauna session will further promoteperspiration. However, dry off thoroughly before going into the sauna because excessive waterwill stain or warp the wood. A shower after the session is refreshing and rinses perspiration fromthe body.9. To absorb perspiration and keep the sauna tidy during the session, place a towel on the benchand floor of the sauna. Keep one towel handy to wipe excessive sweat from your body. Tips for Use1) To regulate the temperature inside the sauna during your session, use the roof vent or the doorwindow (by setting it at an angle).2) If you feel the need for more cooling, simply leave the door open until the air around you feelscomfortable enough.3) Drink plenty of fluids prior to, during, and after your session.4) If you take a hot/warm shower or bath before your sauna session, you may perspire more. Try itwith and without bathing or showering first to determine which way you prefer.5) To utilize the sauna's heat therapy effect, give your hair a hot oil treatment while in the sauna.Put oil or treatment into your hair and wrap it with towel. After the session is over, rinse your hairthoroughly.6) Use at least 2-3 towels. Sit on one towel folded over several times for added cushioning. Putanother towel on the floor to absorb extra sweat. A third towel draped over the knees may aid youin comfort and is useful to towel off sweat.7) Be sure to towel off excess sweat during your session to help the body perspire more freely.8) To help relieve sore and tense muscles, massage the affected areas while in sauna to help healfaster.9) Shaving your face or legs with a razor while profusely sweating in a sauna yields an incrediblysmooth result without the use of gels or foams.10) Do not eat anything at least an hour before your sauna session. It is better to go in the sauna onan empty stomach. You are more likely to feel uncomfortable sitting in a sauna with a fullstomach.11) To make the most out of your sauna session, work your muscles while in the sauna. Stretch17
your arms and legs, massage your neck, massage your feet, etc.12) You can benefit from the relaxing and soothing effects of a regular sauna session by going tosleep afterwards. The peaceful and relaxed state rendered by a sauna session will help you sleepeasier and better.13) At the first sign of cold or flu, increasing your sauna sessions may be beneficial in boostingyour immune system and decreasing the reproductive rate of the viruses.14) Consult your physician for the proper treatment for this or any other conditions.15) To treat your ankles and feet more effectively, you must elevate them while inside the sauna.Any area that you wish to achieve a specific deep heating effect in should be moved as close toone of the heaters as feels comfortable.16) After the session is over, do not immediately jump into the shower. Since your body washeated up during the session, it will continue to sweat even after the heaters are off. Sit in thesauna with the door open and let the body sweat a little more while it cools off. After you feelcomfortable enough, take a warm shower and finish it off with a cold shower to cool offcompletely.Warnings:This appliance is not intended for use by persons (including children)with reduced physical, sensory or mental capabilities, or lack ofexperience and knowledge, unless they have been given supervision orinstruction concerning use of the appliance by a person responsible for their safety.Children should be supervised to ensure that they do not play with the appliance! Safety Instructions1. Read and follow all instructions carefully.2. When installing and using this electrical equipment, basic safety precautions should always befollowed.3. Do not use the sauna immediately following strenuous exercise. Wait at least 30 minutes toallow the body to cool down completely.Safety precautions:a. To avoid fire, do not dry clothes or leave any towels in the sauna.b. To prevent burns or electric shocks, do not touch or use metal tools on the net cover of theheater elements. While in the sauna, do not touch the light bulb. If the bulb needs to be changed,switch it off and wait until the sauna is shut off and the bulb is cool.d. Do not spray water on the heater. This activity may result in electric shock or damage to theheater elements.e. Do not use the sauna if you have any of the following conditions:1) Open wounds2) Eye diseases3) Severity sunburns4) Elderly & weak people, especially those suffering from a disease, pregnant women and infants18
are prohibited. Children over the age of 6 years of age may use the sauna under the supervision ofadults.5) If suffering from a disease directly related to temperature, seek the advice of a doctor beforeuse.6) Persons suffering from obesity or with a medical history of heart disease, low or high bloodpressure, circulatory system problems, or diabetes should consult a physician prior to using thesauna.7) Persons using medications should consult a physician before using the sauna since somemedications may induce drowsiness while others may affect heart rate, blood pressure, andcirculation.8) Do not place pets in the sauna.9) Do not use the sauna if you are under the effects of alcohol. The use of alcohol, drugs, ormedications prior to or during the sauna session may lead to unconsciousness. Limited WarrantyWe warrant the sauna to be free of defects in material and workmanship.1) Heaters18 months2) Workmanship18 months3) Electrical Components18 months4) Radio/CD player12 monthsThis warranty extends only to the original retail purchaser of the sauna and terminates upontransfer of ownership. Freight charges to and from the customer are the responsibility of thecustomer. This includes freight charges for parts shipped to enable the services of your sauna.This warranty is void if the sauna has been altered, misused, or abused. Such instances shallinclude operation or maintenance of the sauna in deviation to the published instructions. Thewarranty extends only to the manufacturing defects and does not cover any damages resultingfrom mishandling of the product by the owner.We shall not be liable for the loss of use of the sauna or other incidental or consequential damages.Under no circumstances shall we or any of its representatives be held liable for injury to anypersons or damages to any properties. Some states do not allow exclusion or limitation ofincidental or consequential damages, so the above limitations or exclusions may not apply to you.This warranty gives you specific legal rights, and you may also have other rights that vary fromstate to state. Specifications are subject to change without notice.For your record, please complete the following information.Date of PurchaseDate of delivery19
Model NumberSerial numberDealer Information(Name & Phone) Frequently Asked QuestionsPS: MAKING SURE SHUT OFF ELECTRICITY BEFORE YOUDOING IT.If the supply cord is damaged, it must be replaced by the manufacturer, itsservice agent or similarly qualified persons in order to avoid a hazard.The control panel does not workProblem12The power indicator is not on.The soft keys do not work.ExplanationSolutionOvercurrent protector isworking.Reset the overcurrentprotector.Program crash.Unplug sauna. wait aminute, and plug back intopower source.Reset the overcurrent protector1.open the cover on the Top Panel.2.Press the button of the overcurrent protector on the side of Main Power Box.3.Close the cover on the Top Panel.LED light does not workProblemSolution20
1LED light is burned out.Change the LED light ( 3W, DC12V)Change the bulbPush down the bulb together with the cover from the Top Panel, then pull down the plug, replace anew bulb, put on the plug and install onto the top.Circuit DiagramThe heater does not heat up21
Problem123ExplanationSolutionThe heater is defective.Part of the heater doesA portion of the heater is notwarm up.connected well.Replace with a new heaterThe control panel is damaged.The entire room doesThe plug is not plugged innot heat upcorrectly.Replace the control panel.Bench heater does notheatThe bench heater cable is notplugged tightly into the outleton the Back Panel.Connect them tightly.Re-plug in the machine.Plugged tightlyChange the carbon heater.1. Removing the screws around the wooden frame, unplug the connector, then removing thebroken carbon heater.2. Change the new carbon heater, plug the connector, and screw the wooden frame on the saunapanel. MaintenanceClean the faceplate with a wet towel, or clean with a small amount of hand-soap missed withwarm water if necessary. Clean the sauna room with a wet cotton towel, dry with a clean dry towel.Do no use benzene, alcohol, or strong cleaning chemicals on sauna.NOTE: Any chemical that can damage wood material willdamage the sauna and the protection layer that is on the wood.22
Transportation And Storage1. Avoid exposure to rain, snow or strong collisions during transport.2. Do not store in damp environments.23
C) The temperature and time set last time will be automatic memory and it will be boot automatically use in the next time. 3. READING LIGHT Press "Inside" button or "outside" to turn on or off light. It is not control by the remaining time and "power" button. 4. SWITHCING BETWEEN AND
