Transcription
CONFIGURATION GUIDETitan T3000DD BoostFS for Windows Dell TechnologiesOverlandTandberg.com
Dell EMC DD BoostFS for WindowsConfiguration Guide 7.8Version 7.8February 2022Rev. 01
Notes, cautions, and warningsNOTE: A NOTE indicates important information that helps you make better use of your product.CAUTION: A CAUTION indicates either potential damage to hardware or loss of data and tells you how to avoidthe problem.WARNING: A WARNING indicates a potential for property damage, personal injury, or death. 2022 - 2022 Dell Inc. or its subsidiaries. All rights reserved. Dell, EMC, and other trademarks are trademarks of Dell Inc. or its subsidiaries.Other trademarks may be trademarks of their respective owners.
ContentsFigures.5Tables. 6Chapter 1: Introduction to BoostFS for Windows. 7Revision history. 7Introduction to BoostFS.7Supported environments.7Supported applications.8Chapter 2: Preparing the PowerProtect or Data Domain system for BoostFS. 9Prepare the system for BoostFS. 9Set the system hostname and domain name. 10Prepare the system for Kerberos authentication.10Join a PowerProtect or Data Domain system to an Active Directory domain. 10BoostFS and existing DD OS commands. 11Assign multiple users to BoostFS.11Create storage units.12Logical stream limits for storage units (optional). 13Client Groups and BoostFS. 13Distributed segment processing option. 13Chapter 3: Installing BoostFS for Windows. 14Installation overview.14Prerequisites.14CBFS driver. 14Components of BoostFS for Windows. 15Upgrade the BoostFS client. 15Uninstall the BoostFS client. 15Chapter 4: Configuring and using BoostFS for Windows. 16BoostFS for Windows configuration overview. 16BoostFS for Windows command overview. 17BoostFS parameters.18BoostFS and high availability.18Authentication methods. 18RSA Lockbox-based authentication. 18Sharing a BoostFS Lockbox file on multiple clients. 18Kerberos-based authentication.20Considerations for Kerberos authentication. 22Mounting the BoostFS file system.23Command options for boostfs mount.23Mount on startup.24BoostFS client connection details. 24Compressed restoration. 25Contents3
Maximum connections for boostfs mount.25Unmounting the BoostFS file system.25File security.26ACL requirements.26User identity. 26ACL default permissions. 26Chapter 5: Troubleshooting.28Log information.28Known issues.28Appendix A: Appendix. 31References.314Contents
Figures1Windows Security warning for the EldoS Corporation device driver. 142ddboost show connections display.25Figures5
Tables61Revision history of BoostFS for Windows Configuration Guide, version 7.8.72Command options for boostfs mount. 233Troubleshooting mount issues. 29Tables
1Introduction to BoostFS for WindowsTopics: Revision historyIntroduction to BoostFSSupported environmentsSupported applicationsRevision historyThe following table presents the revision history of this document.Table 1. Revision history of BoostFS for Windows Configuration Guide, version 7.8RevisionDateDescription01February 2022Initial 7.8 Release.Introduction to BoostFSDD Boost Filesystem (BoostFS) 7.8 provides a general file-system interface to the DD Boost library, allowing standard backupapplications to take advantage of DD Boost features.Advantages of BoostFSBy leveraging the DD Boost technology, BoostFS helps reduce bandwidth, can improve backup-times, offers load-balancing,allows in-flight encryption, and supports the DD multi-tenancy feature set.In-flight encryption supported via DDBoost allows applications to encrypt in-flight backup or restore data over LAN from theprotection system. When configured, the client is able to use TLS to encrypt the session between the client and the protectionsystem. DD 7.8, 7.7, 7.6.0.5, and later versions support GCM based ciphers in both Boost client and DD. Details can be found inthe DD Boost for OpenStorage Administration Guide, DD Boost Partner Integration Guide, DD Boost SDK Programmers Guide,and DD Security Configuration Guide.As a file server system implementation, the BoostFS workflow is similar to CIFS but also leverages the DD Boost protocol. Inaddition, BoostFS improves backup times compared to CIFS and various copy-based solutions.BoostFS supports single-node Data systems, high-availability (HA) systems, DD Virtual Edition, and Extended DistanceProtection.PurposeThis document describes how to install and configure BoostFS on client systems.Supported environmentsEnvironments that use BoostFS 7.8 must meet the following specifications.BoostFS for Windows requires the following: DD OS version 6.1.2 or laterIntroduction to BoostFS for Windows7
Windows Server 2012, Windows Server 2012 R2, Windows Server 2016, or Windows Server 2019Supported applicationsThe Dell EMC DD BoostFS support matrix, available from E-Lab Navigator at https://elabnavigator.emc.com/eln/elnhome, liststhe supported applications. From the E-Lab Nabigator home page, select Data Protection And Availability Solutions PowerProtect DD series appliances.Boost features supported by BoostFSTransport Layer Security (TLS) anonymous authentication is supported to provide encryption.NOTE: If you select TLS, be aware that there is no configuration option to enable TLS from the client. It must be enabledthrough the PowerProtect or Data Domain System.Boost features not supported by BoostFS Managed File Replication (MFR) DD Boost-over-Fibre Channel (DFC) Retention LockCompatibilityBoostFS for Windows does not support accessing files and directories that are created by other means, such as BoostFS forLinux, other Boost-enabled applications, NFS, or CIFS.If you use ACL functionality with BoostFS for Windows, changing file permissions by a protocol other than BoostFS for Windowscauses the ACLs to be lost.Unsupported file system featuresBoostFS for Windows does not support the following NTFS features through the file system interface: Alternate data streams File links Quotas8Introduction to BoostFS for Windows
2Preparing the PowerProtect or Data Domainsystem for BoostFSTopics: Prepare the system for BoostFSSet the system hostname and domain namePrepare the system for Kerberos authenticationBoostFS and existing DD OS commandsAssign multiple users to BoostFSCreate storage unitsLogical stream limits for storage units (optional)Client Groups and BoostFSDistributed segment processing optionPrepare the system for BoostFSEvery system that is enabled for DD Boost deduplication must have a unique name. You can use the system DNS name, which isalways unique.PrerequisitesEnsure that all your systems can access the Key Distribution Center (KDC). In a Windows environment, the Windows server thathosts the Microsoft Active Directory service acts as the KDC and the domain name system (DNS). If the systems cannot reachthe KDC, check the DNS settings at /etc/resolv.conf.Steps1. On the PowerProtect or Data Domain system, log in as an administrative user.2. Verify that the file system is enabled and running by entering: filesys statusThe file system is enabled and running.3. Verify that DD Boost is already enabled: ddboost statusDD Boost status: enabledIf the DD Boost status is reported as disabled, enable it by entering: ddboost enableDD Boost enabled4. Verify that distributed segment processing is enabled:ddboost option showYou should see the following isablednonePreparing the PowerProtect or Data Domain system for BoostFS9
-------medium---------If distributed segment processing is shown as disabled, enable it by entering:ddboost option set distributed-segment-processing enabledNOTE: If secure multi-tenancy (SMT) is used, the user role must be set as none. Users who run backup applications that connect to Power Protect or Data Domain systems must have their usernames configured on that system. For more information, see the DD OS Administration Guide. Multiple applications can use DD Boost to access a Power Protect or Data Domain system, and multiple users can beconfigured for DD Boost access. The username, password, and role must have already been set up using the DD OSuser add command:user add user [password password ][role {admin limited-admin security user backup-operator data-access}][min-days-between-change days ] [max-days-between-change days ][warn-days-before-expire days ] [disable-days-after-expire days ][disable-date date ] [force-password-change {yes no}]For example, to add a user with a login name of jsmith and a password of mP34 muk*E with administrative privilege,enter: user add jsmith password mP34 muk*E role adminOnce the user has been created, the user must be made a DD Boost user. To add jsmith to the DD Boost user list, enter: ddboost user assign jsmithSet the system hostname and domain nameSet the system host name and the domain name in DD OS using the net set CLI command.StepsIn DD OS, type the following:# net set hostname [host]# net set {domain name [local-domain-name]}For more information on net commands, see the DD OS Command Reference Guide.Prepare the system for Kerberos authenticationJoin a PowerProtect or Data Domain system to an Active DirectorydomainAbout this taskJoining the system to an Active Directory domain is required for access control list (ACL) support and Kerberos authentication.If you do not plan to use ACLs or Kerberos in your implementation, this procedure is not required.For more information about ACLs, see File security. For more information about Kerberos authentication, see Configure theBoostFS client for Kerberos authentication.10Preparing the PowerProtect or Data Domain system for BoostFS
Steps1. To join a system to an Active Directory domain, type the following command:# authentication kerberos set realm domain kdc-type windowsYou are prompted to type credentials for the domain.2. Type the domain username and password.ResultsIf the credentials are valid, the system is joined to the Active Directory domain. The use of this command does not enable CIFS.BoostFS and existing DD OS commandsYou must create one or more storage units on each PowerProtect or Data Domain system enabled for BoostFS. Systemadministrators can use existing DD OS CLI commands to create and manage storage units used by BoostFS.Assign multiple users to BoostFSWhen, as a system administrator, you create the storage units that users employ with the backup applications, you associate ausername with each storage unit. This associated username can be changed after creation of the storage unit.Storage units are accessible only to applications with the username that owns the storage unit.Each storage unit is owned by one username, and the same username can own multiple storage units. The application passes theusername and password to BoostFS, and DD Boost passes them to the PowerProtect or Data Domain system when attemptingto connect to the system. The system then authenticates the username and password. The username and password can beshared by different applications.When a storage unit is created with a valid local user but not assigned to DD Boost, the user is automatically added to the DDBoost users list in the same way that a user is added via the ddboost user assign command.Assign one or more users to the DD Boost users list: ddboost user assign user1 user2User "user1" assigned to DD Boost.User "user2" assigned to DD Boost.To verify and display the users in the users list, enter: ddboost user showDD Boost 7user8-------------Default ----Using Token Access-----------------YesYesYes------------To unassign the user from the users list, enter: ddboost user unassign user1User "user1" unassigned from DD Boost.Preparing the PowerProtect or Data Domain system for BoostFS11
Create storage unitsYou need to create one or more storage units on each PowerProtect or Data Domain system enabled for BoostFS.Steps1. Create a storage unit in DDOS: ddboost storage-unit create NEW STU1 user user1Created storage-unit "NEW STU1" for "user1".A storage unit name must be unique on any given PowerProtect or Data Domain system. However, the same storage unitname can be used on different systems.The username owns the storage unit and ensures that only connections with this username's credentials are able to accessthis storage unit. See the section on ddboost storage-unit commands in the DD OS Command Reference Guide for details oncommand options.2. Repeat the previous step for each storage-unit needed in DD OS.3. If you want to modify a DD OS storage unit, enter: ddboost storage-unit modify NEW STU1 user user2Storage-unit "NEW STU1" modified for user "user2".The ddboost storage-unit modify command allows the backup application to change the username ownership of thestorage unit. Changing the username does not require that attributes of every file on the storage unit be changed.4. Display the users list for the storage units: ddboost storage-unit showAfter entering the command, the output you see should be similar to the following:# ddboost storage-unit showNamePre-Comp (GiB)-----------------------------backup3.0DDBOOST STRESS SU60.0task20.0tasking10.0DD10.0D65.0TEST ---D: DeletedQ: Quota DefinedRO: Read OnlyRW: Read WriteRD: Replication nsysadmin--------Report PhysicalSize (MiB)--------------200---------------Next stepsIf you are using Kerberos authentication in your implementation, you must create an Active Directory user with the same nameas the storage-unit user.12Preparing the PowerProtect or Data Domain system for BoostFS
Logical stream limits for storage units (optional)BoostFS is restricted to the same stream limit and storage quota features as DD Boost. See the DD Boost for PartnerIntegration Administration Guide for more information.Client Groups and BoostFSThe Client Group feature identifies specific client loads when clients are associated with groups.The client group command set is supported only for clients that use DD Boost or NFS protocols. For more informationabout Client Groups, see the DD OS Command Reference Guide.Distributed segment processing optionBoostFS supports distributed segment processing as supported by DD Boost. For more information, refer to the DD OSAdministration Guide.NOTE: Enabling or disabling the distributed segment processing option does not require a file system restart.Preparing the PowerProtect or Data Domain system for BoostFS13
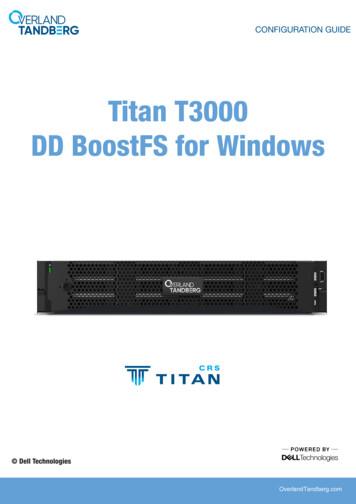
3Installing BoostFS for WindowsTopics: Installation overviewPrerequisitesCBFS driverComponents of BoostFS for WindowsUpgrade the BoostFS clientUninstall the BoostFS clientInstallation overviewInstall or upgrade BoostFS for Windows by using the provided MSI installer. Do not change the default settings.NOTE: If you are prompted to restart after installing, failure to do so can cause features such as Explorer integration to notwork correctly. If you are not prompted to restart, restarting is not necessary.PrerequisitesWhen installing or upgrading BoostFS for Windows: Use an account with administrator rights to run the installer. Ensure that there is enough free space to complete the installation, which requires approximately 7 MB of disk space. Deactivate all BoostFS mount points. If any mount points are active, the upgrade and removal processes fail.CBFS driverThe MSI installer includes several binary files as well as a device driver from EldoS Corporation.BoostFS for Windows uses CBFS, a software interface from EldoS that enables file systems to exist in user space and not onlywithin a driver in kernel space. This functionality is similar to that of FUSE on UNIX operating systems. To install BoostFS forWindows, you must install the CBFS driver from EldoS Corporation.Figure 1. Windows Security warning for the EldoS Corporation device driver14Installing BoostFS for Windows
If another program on the system previously installed the CBFS driver, the driver that BoostFS installs is installed alongside itand does not affect operation of the other program.Components of BoostFS for WindowsComponents in the installation locationThe BoostFS for Windows installation includes the following files at the installed location: boostfs.exe—An executable that supports various commands including establishing a BoostFS mount.Shared libraries that enable boostfs.exe.The RSA Lockbox libraries.The Universal C Runtime Library (UCRT). If the UCRT is already installed on the system, boostfs.exe uses the systemversion of the UCRT. HTML files that provide basic guidance on the use and configuration of boostfs.exe. If not already installed, the 2012 and 2015 Visual C redistributables are installed.Entries on the Start MenuThree links are added to the Start Menu under Programs BoostFS.These links open: A command prompt at the installed location of BoostFS. The BoostFS help file. The BoostFS configuration help file.Files in C:\BoostFSA directory is created at C:\BoostFS. This directory is the default location for BoostFS logs, Lockbox containers, and the solelocation of the configuration file C:\BoostFS\boostfs.conf. The Lockbox and Logs directories may be configured to beplaced elsewhere after installation, but the configuration file must exist in this location.A sample configuration file, C:\BoostFS\boostfs sample.conf, is provided.Upgrade the BoostFS clientTo upgrade BoostFS, run the MSI installer of the new BoostFS release.About this taskNOTE: If you are prompted to restart after upgrading, failure to do so can cause features such as Explorer integration tonot work correctly. If you are not prompted to restart, restarting is not necessary.Uninstall the BoostFS clientAbout this taskTo uninstall BoostFS for Windows, use either of the following methods: Run the MSI installer and select Remove. Use the Add or remove programs interface in the Control Panel.Installing BoostFS for Windows15
4Configuring and using BoostFS for WindowsTopics: BoostFS for Windows configuration overviewBoostFS for Windows command overviewBoostFS and high availabilityAuthentication methodsMounting the BoostFS file systemUnmounting the BoostFS file systemFile securityBoostFS for Windows configuration overviewSpecify BoostFS configuration parameters by using the command line interface (CLI), the configuration file, or both.The BoostFS configuration file location is C:\BoostFS\boostfs.conf.The configuration file has sections for global and mount-point–specific parameters. Mount-point–specific parameter valuesoverride global parameter values. If the global section does not define data-domain-system and storage-unitparameters, those parameters must be passed to the mount command by using the CLI.Parameters that are configured by using the CLI override conflicting values in the configuration file.The following is a sample configuration ################################# BoostFS example config file for Windows## The configuration file is divided into sections, delineated by brackets [].# Options that are to apply to all mount points are in the [global] section.# More details on the various configuration options can be found in the# BoostFS manual. Command line options override what is in this file.## Format:# # - Identifies a comment line, and must be at the start. Configuration# parameters can be disabled by adding a “#” to the start of the line.## Values which contains spaces should use double quotations around the# entire value.## No whitespace is allowed between the option and the value, i.e.# log-dir \path is not allowed.## Comments are not allowed after the option value #################################[global]# Data Domain Hostname or IP address# data-domain-system dd2500-1.yourdomain.com# Storage Unit# storage-unit su-name# Security option used for authentication (default: lockbox)# security krb5 lockbox # Storage Unit Username (should only be used in conjunction with Kerberos authentication)# storage-unit-username sysadmin16Configuring and using BoostFS for Windows
# Lockbox path (default: C:\BoostFS\Lockbox\boostfs.lockbox)# lockbox-path C:\lockbox-name# Enable logging (default: true)# log-enabled true false # Log level (default: info)# log-level debug info warning error # Directory for log files (default: C:\BoostFS\Logs)# log-dir C:\directory-name# Log file name (default: ddboostfs ddr-name su-name.log)# A unique log file name should be used for each mount point.# log-file unique-file-name.log# Maximum log size in MB (default: 100MB)# log-maxsize 100# Number of log files to save (default: 8)# log-rotate-num 10# Text string that describes the application using boostfs with additional informationsuch as the version.# app-info "text string"# Maximum number of connections that can be used at the same time (default: 128)# Min value is 64. Max value is 256.# max-connections 128#######Enable compressed restoration (default: false).When set to true, the server conducts data compression before sending to the client.Correspondingly, when the client receives data, it needs to conduct decompression first.By sending compressed data over the network, bandwidth usage can be reduced. However,use this option with caution since it requires significant amount of CPU power to conductcompression on the server and to conduct decompression on the client.ddboost-read-compression true false # Allow for Windows ACLs to be set on files in the mountpoint# NOTE: Unless the client is joined to an AD domain, this parameter cannot be set to true.#When using Kerberos, this parameter value is ignored.# local-user-security true false (default: false)# Expose the mount to user sessions other than the user session in which the mount wasestablished# allow-others true false (default: true)# Automatically renew Kerberos tickets when Kerberos authentication is used (default: true)# krb-auto-renew true false # UNC Mount point sections are delineated by [UNC Path]# The UNC Path must be of the form [\\ddr-name\su-name].# Forward slashes and extra slashes must not be used.# [\\ddr-name\su-name]# Drive Letter specifies the Windows drive to map to this UNC mount point# drive-letter h:BoostFS for Windows command overviewUse the Windows command prompt or PowerShell to issue BoostFS commands.The BoostFS installation includes a shortcut on the Start menu to open the command prompt in the directory containing theexecutable. During the installation process, the installer can automatically add the location of th
boostfs lockbox set -u storage-unit-username -d data-domain-system -s storage-unit -l Z:\boostfs.lockbox You can also specify the . lockbox-path. in the configuration file. 2. Repeat the lockbox set command for each PowerProtect or Data Domain system or storage unit that needs to be accessed by the Lockbox. Use the shared Lockbox on other .