Transcription
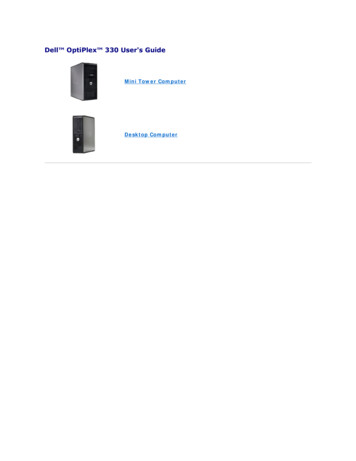
Dell OptiPlex 330 User's GuideMini Tower ComputerDesktop Computer
Back to Main PageAdvanced FeaturesDell OptiPlex 330 User's GuideLegacySelect Technology ControlManageabilityPower ManagementLegacySelect Technology ControlLegacySelect technology control offers legacy-full, legacy-reduced, or legacy-free solutions based on common platforms, hard-drive images, and help deskprocedures. Control is provided to the administrator through system setup, Dell OpenManage IT Assistant, or Dell custom factory integration.LegacySelect allows administrators to electronically activate or deactivate connectors and media devices that include serial and USB connectors, a parallelconnector, a floppy drive, PCI slots, and a PS/2 mouse. Connectors and media devices that are deactivated make resources available. You must restart thecomputer to effect the changes.ManageabilityDell OpenManage IT AssistantIT Assistant configures, manages, and monitors computers and other devices on a corporate network. IT Assistant manages assets, configurations, events(alerts), and security for computers equipped with industry-standard management software. It supports instrumentation that conforms to SNMP, DMI, and CIMindustry standards.Dell OpenManage Client instrumentation, which is based on DMI and CIM, is available for your computer. For information on IT Assistant, see the DellOpenManage IT Assistant User's Guide available on the Dell Support website at support.dell.com.Dell OpenManage Client InstrumentationDell OpenManage Client Instrumentation is software that enables remote management programs such as IT Assistant to do the following:lAccess information about your computer, such as how many processors it has and what operating system it is running.lMonitor the status of your computer, such as listening for thermal alerts from temperature probes or hard-drive failure alerts from storage devices.lChange the state of your computer, such as updating its BIOS or shutting it down remotely.A managed system is one that has Dell OpenManage Client Instrumentation set up on a network that uses IT Assistant. For information about DellOpenManage Client Instrumentation, see the Dell OpenManage Client Instrumentation User's Guide available on the Dell Support website at support.dell.com.Power ManagementYour computer can be set to use less power when you are not working. You control the power usage through the operating system installed on your computerand certain option settings in system setup. These periods of reduced power are called "sleep modes," in Windows Vista , and "standby," in Windows XP.NOTE: All components installed in the computer must support the hibernate and/or standby mode feature(s) and have the appropriate drivers loaded toenter either of these sleep modes. For more information, see the manufacturer's documentation for each component.lStandby. In this sleep mode, power is reduced or turned off for most components, including the cooling fans. However, system memory remains active.lHibernate. This sleep mode reduces power consumption to a minimum by writing all data in system memory to a hard drive and then removing systempower. Waking up from this mode restarts the computer, and the memory contents are restored. Operation then resumes where the computer left offwhen it entered the hibernation mode.lShutdown. This sleep mode removes all power from the computer except a small auxiliary amount. As long as the computer remains connected to anelectrical outlet, it can be automatically or remotely started. For example, the Auto Power On option in system setup allows the computer toautomatically start at a specified time. Also, your network administrator can remotely start your computer using a power management event such asRemote Wake Up.The following table lists the sleep modes and the methods you can use to wake the computer from each mode.Sleep Mode Wake-Up Methods (Windows XP)StandbyllllPress the power buttonAuto power onMove or click the mouseType on the keyboard
llHibernatelllShutdownlllUSB device activityPower management eventPress the power buttonAuto power onPower management eventPress the power buttonAuto power onPower management eventNOTE: For more information on power management, see your operating system documentation.Back to Main Page
Back to Main PageAppendixDell OptiPlex 330 User's GuideFCC Notice (U.S. Only)FCC Notice (U.S. Only)FCC Class BThis equipment generates, uses, and can radiate radio frequency energy and, if not installed and used in accordance with the manufacturer's instructionmanual, may cause interference with radio and television reception. This equipment has been tested and found to comply with the limits for a Class B digitaldevice pursuant to Part 15 of the FCC Rules.This device complies with Part 15 of the FCC Rules. Operation is subject to the following two conditions:1.This device may not cause harmful interference.2.This device must accept any interference received, including interference that may cause undesired operation.NOTICE: The FCC regulations provide that changes or modifications not expressly approved by Dell Inc. could void your authority to operate thisequipment.These limits are designed to provide reasonable protection against harmful interference in a residential installation. However, there is no guarantee thatinterference will not occur in a particular installation. If this equipment does cause harmful interference with radio or television reception, which can bedetermined by turning the equipment off and on, you are encouraged to try to correct the interference by one or more of the following measures:lReorient the receiving antenna.lRelocate the system with respect to the receiver.lMove the system away from the receiver.lPlug the system into a different outlet so that the system and the receiver are on different branch circuits.If necessary, consult a representative of Dell Inc. or an experienced radio/television technician for additional suggestions.The following information is provided on the device or devices covered in this document in compliance with the FCC regulations:lProduct name: OptiPlex 330lModel number: DCSM and DCNElCompany name:Dell Inc.Worldwide Regulatory Compliance & Environmental AffairsOne Dell WayRound Rock, TX 78682 USA512-338-4400NOTE: For further regulatory information, see your Product Information Guide.Back to Main Page
Back to Contents PageBefore You BeginDell OptiPlex 330 User's GuideThis section provides procedures for removing and installing the components in your computer. Unless otherwise noted, each procedure assumes that thefollowing conditions exist:lYou have performed the steps in Turning Off Your Computer and Before Working Inside Your Computer.lYou have read the safety information in the Dell Product Information Guide.lA component can be replaced or—if purchased separately—installed by performing the removal procedure in reverse order.Recommended ToolsThe procedures in this document may require the following tools:lSmall flat-blade screwdriverlSmall Phillips screwdriverlSmall plastic scribelFlash BIOS update program CDTurning Off Your ComputerNOTICE: To avoid losing data, save and close all open files and exit all open programs before you turn off your computer.1.Shut down the operating system:a.Save and close all open files and exit all open programs.b.In the Microsoft Windows XP operating system, click Start Shut Down Shut down.In Microsoft Windows Vista , click the Windows Vista Start buttoncorner of the Start menu as shown below, and then click Shut Down., in the lower-left corner of the desktop, click the arrow in the lower-rightThe computer turns off after the operating system shutdown process is complete.2.Ensure that the computer and all attached devices are turned off. If your computer and attached devices did not automatically turn off when you shutdown your operating system, press and hold the power button for about 4 seconds to turn them off.Before Working Inside Your ComputerUse the following safety guidelines to help protect your computer from potential damage and to help to ensure your own personal safety.CAUTION: Before you begin any of the procedures in this section, follow the safety instructions in the Product Information Guide.CAUTION: To guard against electrical shock, laceration by moving fan blades, or other unexpected injuries, always unplug your computer fromthe electrical outlet before opening the cover.CAUTION: Do not operate your computer with any covers removed, such as the computer cover, bezels, filler brackets, and front panels.NOTICE: Handle components and cards with care. Do not touch the components or contacts on a card. Hold a card by its edges or by its metalmounting bracket. Hold a component such as a processor by its edges, not by its pins.NOTICE: Only a certified service technician should perform repairs on your computer. Damage due to servicing that is not authorized by Dell is notcovered by your warranty.NOTICE: When you disconnect a cable, pull on its connector or on its pull-tab, not on the cable itself. Some cables have connectors with locking tabs; ifyou are disconnecting this type of cable, press in on the locking tabs before you disconnect the cable. As you pull connectors apart, keep them evenlyaligned to avoid bending any connector pins. Also, before you connect a cable, ensure that both connectors are correctly oriented and aligned.NOTICE: To avoid damaging the computer, perform the following steps before you begin working inside the computer.1.Turn off your computer (see Turning Off Your Computer).CAUTION: Never apply power to the computer when the cover has been removed.
NOTICE: To disconnect a network cable, first unplug the cable from your computer and then unplug the cable from the network device.CAUTION: Disconnect all telephone or network cables from the computer.2.Disconnect your computer and all attached devices from their electrical outlets.3.Press the power button to ground the system board.NOTICE: Before touching anything inside your computer, ground yourself by touching an unpainted metal surface, such as the metal at the back of thecomputer. While you work, periodically touch an unpainted metal surface to dissipate static electricity, which could harm internal components.Back to Contents Page
Back to Contents PageDell OptiPlex 330 User's GuideCleaning Your ComputerCleaning Your ComputerCAUTION: Before you begin any of the procedures in this section, follow the safety instructions in the Product Information Guide.Computer, Keyboard, and MonitorCAUTION: Before you clean your computer, disconnect the computer from the electrical outlet. Disconnect the network or modem cable. Cleanyour computer with a soft cloth dampened with water. Do not use liquid or aerosol cleaners, which may contain flammable substances.lUse a can of compressed air to remove dust from between the keys on the keyboard.Floppy DriveNOTICE: Do not attempt to clean drive heads with a swab. You might accidentally misalign the heads which prevents the drive from operating.Clean your floppy drive using a commercially available cleaning kit. These kits contain pretreated floppy disks to remove contaminants that accumulate duringnormal operation.CDs and DVDsNOTICE: Always use compressed air to clean the lens in the CD/DVD drive, and follow the instructions that come with the compressed-air product.Never touch the lens in the drive.If you notice problems, such as skipping, with the playback quality of your CDs or DVDs, try cleaning the discs.1.Hold the disc by its outer edge. You can also touch the inside edge of the center hole.NOTICE: To avoid damaging the surface, do not wipe in a circular motion around the disc.2.With a soft, lint-free cloth, gently wipe the bottom of the disc (the unlabeled side) in a straight line from the center to the outer edge of the disc.For stubborn dirt, try using water or a diluted solution of water and mild soap. You can also purchase commercial products that clean discs and providesome protection from dust, fingerprints, and scratches. Cleaning products for CDs are also safe to use on DVDs.Back to Contents Page
Back to Contents PageDell OptiPlex 330 User's GuideClearing Forgotten PasswordsClearing CMOS SettingsFlashing the BIOSClearing Forgotten PasswordsCAUTION: Before you begin any of the procedures in this section, follow the safety instructions located in the Product Information Guide.NOTICE: This process erases both the system and administrator passwords.1.Follow the procedures in Before You Begin.2.Remove the computer cover.3.Locate the 2-pin password jumper (PSWD) on the system board. By default, Pin1 and Pin2 should be connected. You will need to remove the jumper andboot rhe system, as follows.4.Remove the jumper.5.Replace the computer cover (see Replacing the Computer Cover).6.Connect your computer and monitor to electrical outlets, and turn them on.7.After the Microsoft Windows desktop appears on your computer, shut down your computer (see Turning Off Your Computer).8.Turn off the monitor and disconnect it from the electrical outlet.9.Disconnect the computer power cable from the electrical outlet, and press the power button to ground the system board.10.Open the computer cover.11.Locate the 2-pin password jumper (PSWD) on the system board and attach the jumper to reenable the password feature.12.Replace the computer cover (see Replacing the Computer Cover).NOTICE: To connect a network cable, first plug the cable into the network wall jack and then plug it into the computer.13.Connect your computer and devices to electrical outlets, and turn them on.NOTE: This procedure enables the password feature. When you enter system setup (see Entering System Setup), both system and administratorpassword options appear as Not Set—meaning that the password feature is enabled but no password is assigned.14.Assign a new system and/or administrator password. Replace the computer cover (see Replacing the Computer Cover).NOTICE: To connect a network cable, first plug the cable into the network device and then plug it into the computer.
15.Connect your computer and devices to electrical outlets, and turn them on.Clearing CMOS SettingsCAUTION: Before you begin any of the procedures in this section, follow the safety instructions located in the Product Information Guide.1.Follow the procedures in "Before You Begin" on page 21.2.Remove the computer cover.3.Reset the current CMOS settings:4.a.Locate the password (PSWD) and CMOS (RTCRST) jumpers on the system board (see Clearing Forgotten Passwords).b.Remove the password jumper plug from its pins.c.Place the password jumper plug on the RTCRST pins and wait approximately 5 seconds.d.Remove the jumper plug from the RTCRST pins and place it back on the password pins.Replace the computer cover (see "Replacing the Computer Cover" on page 323).NOTICE: To connect a network cable, first plug the cable into the network wall jack and then plug it into the computer.5.Connect your computer and devices to electrical outlets, and turn them on.Flashing the BIOSThe BIOS may require flashing when an update is available or when replacing the system board.1.Turn on the computer.2.Locate the BIOS update file for your computer at the Dell Support website at support.dell.com.3.Click Download Now to download the file.4.If the Export Compliance Disclaimer window appears, click Yes, I Accept this Agreement.The File Download window appears.5.Click Save this program to disk, and then click OK.The Save In window appears.6.Click the down arrow to view the Save In menu, select Desktop, and then click Save.The file downloads to your desktop.7.Click Close when the Download Complete window appears.The file icon appears on your desktop and is titled the same as the downloaded BIOS update file.8.Double-click the file icon on the desktop and follow the on-screen instructions.Back to Contents Page
Back to Contents PageDell OptiPlex 330 User's GuideDell DiagnosticsDell DiagnosticsCAUTION: Before you begin any of the procedures in this section, follow the safety instructions in the Product Information Guide.When to Use the Dell DiagnosticsIf you experience a problem with your computer, perform the checks in Lockups and Software Problems (see Lockups and Software Problems) and run the DellDiagnostics before you contact Dell for technical assistance.It is recommended that you print these procedures before you begin.NOTICE: The Dell Diagnostics works only on Dell computers.NOTE: The Drivers and Utilities media is optional and may not ship with your computer.See System Setup to review your computer's configuration information, and ensure that the device that you want to test displays in the system setup programand is active.Start the Dell Diagnostics from your hard drive or from the Drivers and Utilities media.Starting the Dell Diagnostics From Your Hard DriveThe Dell Diagnostics is located on a hidden diagnostic utility partition on your hard drive.NOTE: If your computer cannot display a screen image, see Contacting Dell.1.Ensure that the computer is connected to an electrical outlet that is known to be working properly.2.Turn on (or restart) your computer.3.When the DELL logo appears, press F12 immediately. Select Diagnostics from the boot menu and press Enter .NOTE: If you wait too long and the operating system logo appears, continue to wait until you see the Microsoft Windows desktop; then, shut downyour computer and try again.NOTE: If you see a message stating that no diagnostics utility partition has been found, run the Dell Diagnostics from the Drivers and Utilities media.4.Press any key to start the Dell Diagnostics from the diagnostics utility partition on your hard drive.Starting the Dell Diagnostics From the Drivers and Utilities media1.Insert the Drivers and Utilities media.2.Shut down and restart the computer.When the DELL logo appears, press F12 immediately.NOTE: If you wait too long and the operating system logo appears, continue to wait until you see the Microsoft Windows desktop; then, shut downyour computer and try again.NOTE: The next steps change the boot sequence for one time only. On the next start-up, the computer boots according to the devices specified inthe system setup program.3.When the boot device list appears, highlight CD/DVD/CD-RW and press Enter .4.Select the Boot from CD-ROM option from the menu that appears and press Enter .5.Type 1 to start the CD menu and press Enter to proceed.
6.Select Run the 32 Bit Dell Diagnostics from the numbered list. If multiple versions are listed, select the version appropriate for your computer.7.When the Dell Diagnostics Main Menu appears, select the test you want to run.Dell Diagnostics Main Menu1.After the Dell Diagnostics loads and the Main Menu screen appears, click the button for the option you want.NOTE: It is recommended that you select Test System to run a complete test on your computer.OptionFunctionTest Memory Run the stand-alone memory testTest SystemRun System DiagnosticsExitExit the Diagnostics2.After you have selected the Test System option from the main menu, the following menu appears:NOTE: It is recommended that you select Extended Test from the menu below to run a more thorough check of devices in the computer.OptionFunctionExpress TestPerforms a quick test of devices in the system. This typically can take 10 to 20 minutes.Extended Test Performs a thorough check of devices in the system. This typically can take an hour or more.Custom TestUse to test a specific device or customize the tests to be run.Symptom Tree This option allows you to select tests based on a symptom of the problem you are having. This option lists the most common symptoms.3.If a problem is encountered during a test, a message appears with an error code and a description of the problem. Write down the error code andproblem description and see Contacting Dell.NOTE: The S
Dell Inc. Worldwide Regulatory Compliance & Environmental Affairs One Dell Way Round Rock, TX 78682 USA 512 -338 -4400 Back to Main Page NOTICE: The FCC regulations provide that changes or modifications not expressly approved by Dell