Transcription
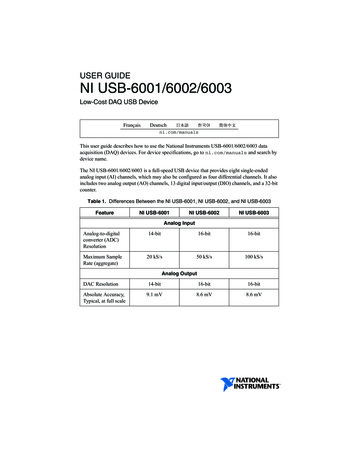
USER GUIDENI USB-6001/6002/6003Low-Cost DAQ USB DeviceFrançaisDeutschni.com/manualsThis user guide describes how to use the National Instruments USB-6001/6002/6003 dataacquisition (DAQ) devices. For device specifications, go to ni.com/manuals and search bydevice name.The NI USB-6001/6002/6003 is a full-speed USB device that provides eight single-endedanalog input (AI) channels, which may also be configured as four differential channels. It alsoincludes two analog output (AO) channels, 13 digital input/output (DIO) channels, and a 32-bitcounter.Table 1. Differences Between the NI USB-6001, NI USB-6002, and NI USB-6003FeatureNI USB-6001NI USB-6002NI USB-6003Analog InputAnalog-to-digitalconverter (ADC)Resolution14-bit16-bit16-bitMaximum SampleRate (aggregate)20 kS/s50 kS/s100 kS/sAnalog OutputDAC Resolution14-bit16-bit16-bitAbsolute Accuracy,Typical, at full scale9.1 mV8.6 mV8.6 mV
Figure 1. NI USB-6001/6002/6003 Top and Side Views211Screw Terminal Connector Plug2LED Indicator33Micro-B USB ConnectorSafety GuidelinesOperate the NI DAQ device only as described in this document.Refer to the NI USB-6001/6002/6003 Safety, Environmental, andRegulatory Information document included with your kit for important safety andelectromagnetic compatibility information. To obtain a copy of this document online,visit ni.com/manuals and search for the document title.CautionDo not operate the device in a manner not specified in this document.Misuse of the device can result in a hazard. You can compromise the safety protectionbuilt into the device if the device is damaged in any way. If the device is damaged,contact National Instruments for repair.CautionDo not substitute parts or modify the device except as described in thisdocument. Use the device only with the chassis, modules, accessories, and cablesspecified in the installation instructions.CautionDo not operate the device in an explosive atmosphere or where there maybe flammable gases or fumes. If you must operate the device in such an environment,it must be in a suitably rated enclosure.CautionCaution You must have all covers and filler panels installed during operation of thedevice. Do not operate the device without verifying that the cover is correctlyattached and the device is completely closed.2 ni.com NI USB-6001/6002/6003 User Guide
Electromagnetic Compatibility GuidelinesThis product was tested and complies with the regulatory requirements and limits forelectromagnetic compatibility (EMC) stated in the product specifications. These requirementsand limits provide reasonable protection against harmful interference when the product isoperated in the intended operational electromagnetic environment.This product is intended for use in industrial locations. However, harmful interference mayoccur in some installations, when the product is connected to a peripheral device or test object,or if the product is used in residential or commercial areas. To minimize interference with radioand television reception and prevent unacceptable performance degradation, install and use thisproduct in strict accordance with the instructions in the product documentation.Furthermore, any modifications to the product not expressly approved by National Instrumentscould void your authority to operate it under your local regulatory rules.To ensure the specified EMC performance, the length of any wire or cableconnected to the screw terminal connector must be no longer than 0.5 m (20 in.).CautionUnpackingThe NI DAQ device ships in an antistatic package to prevent electrostatic discharge (ESD). ESDcan damage several components on the device.CautionNever touch the exposed pins of the connectors.To avoid ESD damage in handling the device, take the following precautions: Ground yourself with a grounding strap or by touching a grounded object. Touch the antistatic package to a metal part of your computer chassis before removing thedevice from the package.Remove the device from the package and inspect it for loose components or any other signs ofdamage. Notify NI if the device appears damaged in any way. Do not install a damaged devicein your computer.Store the device in the antistatic package when the device is not in use.Packing ListThe NI DAQ device is shipped in a box that contains: NI USB-6001/6002/6003 Two screw terminal connector plugs Hi-Speed Micro USB cable NI-DAQmx DVD NI USB-6001/6002/6003 Quick Start document NI USB-6001/6002/6003 Safety, Environmental, and Regulatory Information documentNI USB-6001/6002/6003 User Guide National Instruments 3
Setting Up the NI USB-6001/6002/6003Complete the following steps to get started with the NI USB-6001/6002/6003.Installing the Software1.Install the application software (if applicable), as described in the installation instructionsthat accompany your software.2.Install NI-DAQmx. NI USB-6001/6002/6003 devices are supported by NI-DAQmx 9.9 andlater.Note The NI-DAQmx software is included on the disk shipped with your kit and isavailable for download at ni.com/support. The documentation for NI-DAQmx isavailable after installation from Start»All Programs»National Instruments»NI-DAQmx. Other NI documentation is available at ni.com/manuals.3.Register your products when the NI Product Registration Wizard appears.Preparing the Hardware1.Insert the screw terminal connector plugs into the connector jacks on the device. Refer toFigure 2.2.The Hi-Speed Micro USB cable has two different connectors. Plug the smaller connectorinto the device, and plug the larger connector into the USB port on the computer whereNI-DAQmx is installed.Figure 2. Hardware Setup for NI USB-6001/6002/600312114Screw Terminal Connector Plugs ni.com NI USB-6001/6002/6003 User Guide2Hi-Speed Micro USB Cable
Verifying the Installation1.Complete the following to launch NI Measurement and & Automation Explorer (NI MAX): (Windows 7/Vista)—Double-click the NI MAX icon on the desktop. (Windows 8)—Click NI Measurement & Automation Explorer from NI Launcher.2.Expand My System»Devices and Interfaces and verify that the NI USB-6001/6002/6003is listed. If your device does not appear, press F5 to refresh the view in NI MAX. If yourdevice is still not recognized, refer to ni.com/support/daqmx for troubleshootinginformation.3.To self-test your device in NI MAX, right-click your device and select Self-Test. Self-testperforms a brief test to determine successful device installation. When the self-test finishes,a message indicates successful verification. If an error occurs, refer to ni.com/support/daqmx.To ensure the specified EMC performance, operate this product only withshielded cables and accessories.Caution4.Connect the wires (0.08 to 1.31 mm2 [28 to 16 AWG]) of a shielded, multiconductor cableto the screw terminals by stripping 6 mm (0.25 in.) of the insulation, inserting the strippedwires into the screw terminals, and securely tightening the screws with a flatheadscrewdriver to a torque of 0.22 to 0.25 N · m (2.0 to 2.2 lb · in.). Refer to Figure 4 for theNI USB-6001/6002/6003 pinout.If using a shielded cable, connect the cable shield to a nearby GND terminal.5.Run a test panel in NI MAX by right-clicking your device and selecting Test Panels.Click Start to test the device functions, or Help for operating instructions. If an errormessage occurs refer to ni.com/support/daqmx. Click Close to exit the test panel.Using the NI USB-6001/6002/6003 in anApplicationExample ProgramsNI-DAQmx driver software includes example programs to help you get started programmingwith the NI USB-6001/6002/6003. You can modify example code and save it in an application,use examples to develop a new application, or add example code to an existing application.To locate NI software examples, go to ni.com/info and enter the Info Code daqmxexp.To run examples without the device installed, use an NI-DAQmx simulated device. For moreinformation, open NI Measurement & Automation Explorer (NI MAX), select Help»HelpTopics»NI-DAQmx»MAX Help for NI-DAQmx, and search for simulated devices.NI USB-6001/6002/6003 User Guide National Instruments 5
NI-DAQ AssistantYou can use the NI-DAQ Assistant through many NI application software programs to configurevirtual and measurement channels. Table 2 lists NI-DAQ Assistant tutorial locations forNI applications.Table 2. NI-DAQ Assistant Tutorial LocationsNI ApplicationSoftwareTutorial LocationLabVIEWGo to Start»All Programs»National Instruments»NI-DAQmx»NI-DAQmx Help»Getting Started.LabWindows /CVI Go to Help»Contents. Next, go to Using LabWindows/CVI»Data Acquisition»Taking an NI-DAQmx Measurement inLabWindows/CVI.Measurement StudioGo to NI Measurement Studio Help»Getting Started with theMeasurement Studio Class Libraries»Measurement StudioWalkthroughs»Walkthrough: Creating a Measurement StudioNI-DAQmx Application.SignalExpressGo to Help»Taking an NI-DAQmx Measurement inSignalExpress.ANSI C without NI Application SoftwareThe NI-DAQmx Help contains API overviews and general information about measurementconcepts. Select Start»All Programs»National Instruments»NI-DAQmx»NI-DAQmx Help.The NI-DAQmx C Reference Help describes the NI-DAQmx Library functions. Select Start»All Programs»National Instruments»NI-DAQmx» Text-Based Code Support»NI-DAQmxC Reference Help.NET Languages without NI Application SoftwareWith the Microsoft .NET Framework version 2.0 or later, you can use NI-DAQmx to createapplications using Visual C# and Visual Basic .NET without Measurement Studio. You needMicrosoft Visual Studio .NET 2005 or later for the API documentation to be installed.The installed documentation contains the NI-DAQmx API overview, measurement tasks andconcepts, and function reference. To view the NI-DAQmx .NET documentation, go to Start»All Programs»National Instruments»NI-DAQmx»Text-Based Code Support. For functionreference, refer to the NationalInstruments.DAQmx Namespace and NationalInstruments.DAQmx.ComponentModel Namespace topics. For conceptual help, refer to the Using theMeasurement Studio NI-DAQmx .NET Library and Developing with Measurement StudioNI-DAQmx sections.To get to the same help topics from within Visual Studio 2005 or 2008, go to Help»Contentsand select Measurement Studio from the Filtered By drop-down list. To get to the same helptopics from within Visual Studio 2010, go to Help»View Help and select NI MeasurementStudio Help from the Related Links section.6 ni.com NI USB-6001/6002/6003 User Guide
FeaturesBlock DiagramFigure 3 shows key functional components of the NI DAQ device.Figure 3. NI USB-6001/6002/6003 Block DiagramP0.0I/O ConnectorDigital I/OP2.0PFI 1PFI 0Counters& PFI5VD GND5 V SupplyUSB o-B)I/O ConnectorAI 0Analog InputAI 7AI GND80 MHz ClockAO 0AO 1Analog OutputAO GND16-PositionScrew TerminalPlugNI USB-6001/6002/6003 User Guide National Instruments 7
LED IndicatorThe NI DAQ device has a blue LED that indicates device status, as listed in Table 3.Table 3. LED State/Device StatusLED StateDevice StatusOffDevice is not connected or is in suspend mode.On, not blinkingDevice is connected and functioning normally.BlinkingDevice has encountered an error. Wait 10 seconds to allow thedevice to attempt to recover from the error. If the LEDcontinues blinking, disconnect and reconnect the device. Ifthe error persists, contact National Instruments. Refer to theWorldwide Support and Services section for contactinformation.Screw Terminal Connector PlugsThe NI USB-6001/6002/6003 ships with two detachable screw terminal connector plugs: one foranalog signals and one for digital signals. These screw terminal connectors provide16 connections that use 0.08 to 1.31 mm2 (28 to 16 AWG). Refer to the Pinout and SignalDescriptions section for the device pinout and signal descriptions.Cables and AccessoriesTable 4 contains information about cables and accessories available for theNI USB-6001/6002/6003. For a complete list of accessories and ordering information, refer tothe pricing section of the NI DAQ device product page at ni.com.Table 4. NI USB-6001/6002/6003 Cables and AccessoriesAccessoryPart NumberDescriptionUSB-600x Accessories782703-01Four additional screw-terminal connectorsand a screwdriver.USB-600x SeriesPrototyping Accessories779511-01Unshielded breadboarding accessory forcustom-defined signal conditioning andprototyping. You can use up totwo accessories per device.Hi-Speed Micro USBCable, A to Micro-B782909-01,782909-021 m and 2 m lengthsCaution: To ensure the specified EMC performance, the length of any wire or cableconnected to the screw terminal connector must be no longer than 0.5 m (20 in.).8 ni.com NI USB-6001/6002/6003 User Guide
Pinout and Signal DescriptionsFigure 4 shows the NI DAQ device pinout. Analog input signal names are listed as single-endedanalog input name, AI x, and then the differential analog input name, (AI x /-). Refer to Table 5for a detailed description of each signal.Figure 4. NI USB-6001/6002/6003 Pinout0120P1.x2 1 3–3 7P2.x0 3 2–2 676 1–1 5P0.0P0.1P0.2P0.3P0.4P0.5P0.6P0.7P1.0P1.1/PFI 1P1.2P1.3P2.0/PFI 0D GND 5VD GNDP0.x4 3AI 0 –0 4AI GNDAI 0 (AI 0 )AI 4 (AI 0–)AI GNDAI 1 (AI 1 )AI 5 (AI 1–)AI GNDAI 2 (AI 2 )AI 6 (AI 2–)AI GNDAI 3 (AI 3 )AI 7 (AI 3–)AI GNDAO 0AO 1AO GNDRIGHT VIEW5LEFT VIEWDIOPFI xAO15V0Table 5. Signal DescriptionsSignalNameReferenceDirectionAI GND——AI 0.7 AI GNDInputDescriptionAnalog Input Ground—The reference pointfor single-ended analog input measurements.Analog Input Channels 0 to 7—Forsingle-ended measurements, each signalcorresponds to one analog input voltage channel.For differential measurements, AI 0 and AI 4 arethe positive and negative inputs of differentialanalog input channel 0. The following signalpairs also form differential input channels:AI 1,5 , AI 2, 6 , and AI 3, 7 . Refer to theAnalog Input section for more information.NI USB-6001/6002/6003 User Guide National Instruments 9
Table 5. Signal Descriptions (Continued)SignalNameReferenceDirectionDescrip
NI USB-6001/6002/6003 Safety, Environmental, and Regulatory Information document. 4 ni.com NI USB-6001/6002/6003 User Guide Setting Up the NI USB-6001/6002/6003 Complete the following steps to get started with the NI USB-6001/6002/6003. Installing the Software 1. Install the application software (if applicable), as described in the installation instructions that accompany your software .
