Transcription
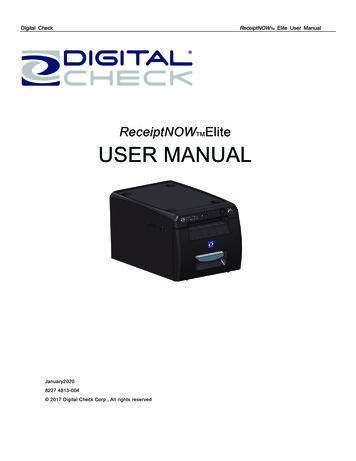
Digital CheckReceiptNOWTM Elite User ManualReceiptNOWTMEliteUSER MANUALJanuary20208227 4813-004 2017 Digital Check Corp., All rights reserved
Digital CheckReceiptNOWTM Elite User ManualNO WARRANTIES OF ANY NATURE ARE EXTENDED BY THIS DOCUMENT. Any product or relatedinformation described herein is only furnished pursuant and subject to the terms and conditions of a dulyexecuted agreement to purchase or lease equipment or to license software. The only warranties made by DigitalCheck Corp., if any, with respect to the products described in this document are set forth in such agreement.Digital Check cannot accept any financial or other responsibility that may be the result of your use of theinformation in this document or software material, including direct, special, or consequential damages.You should be very careful to ensure that the use of this information and/or software material complies with thelaws, rules, and regulations of the jurisdictions with respect to which it is used. The information contained hereinis subject to change without notice. Revisions may be issued to advice of such changes and/or additions.Notice to U.S. Government End Users: This is commercial computer software or hardware documentationdeveloped at private expense. Use, reproduction, or disclosure by the Government is subject to the terms ofDigital Check standard commercial license for the products, and where applicable, the restricted/limited rightsprovisions of the contract data rights clauses.FCC StatementThe statement below is included in this document to comply with a Federal Communications Commission (FCC)regulation. The FCC is an agency of the United States government; thus, the statement below applies tocomputing equipment installed in the United States of America. Digital Check is taking appropriate steps to be incompliance with FCC regulations and similar regulations of other countries.Note: This equipment has been tested and found to comply with the limits for a Class B digital device, pursuantto part 15 of the FCC Rules. These limits are designed to provide reasonable protection against harmfulinterference in a residential installation. This equipment generates uses and can radiate radio frequency energyand, if not installed and used in accordance with the instructions, may cause harmful interference to radiocommunications. However, there is no guarantee that interference will not occur in a particular installation. Ifthis equipment does cause harmful interference to radio or television reception, which can be determined byturning the equipment off and on, the user is encouraged to try to correct the interference by one or more of thefollowing measures:Reorient or relocate the receiving antenna.Increase the separation between the equipment and receiver.Connect the equipment into an outlet on a circuit different from that to which the receiver is connected.Consult the dealer or an experienced radio/TV technician for help.CautionChanges or modifications not expressly approved by Digital Check could void your authority to operate thisequipment.
Digital CheckReceiptNOWTM Elite User ManualCanadian Regulatory StatementCAN ICES-3 (B)/NMB-3(B)VCCI Regulatory StatementTrademarksDigital Check is a registered trademark licensed to Digital Check Corp. in the United States and other countries.SmartSource is a registered trademark of Digital Check Corp. ReceiptNOW is a trademark of Digital Check Corp.All other brands and products referenced in this document are acknowledged to be the trademarks or registeredtrademarks of their respective holders.
Digital CheckReceiptNOWTM Elite User ManualContentsFCC STATEMENT . 1CAUTION. 1CANADIAN REGULATORY STATEMENT . 2VCCI REGULATORY STATEMENT . 2TRADEMARKS . 25 JK-W03 MODULE HTTP WEB . 205.1 O VERVIEW . 205.2 I NTERFACE S TATUS . 215.3 P RINT S TATUS . 215.4F IRMWARE U PDATE . 215.5 W IRED TCP/IP . 201 SUMMARY . 31.1 B RIEF I NTRODUCTION . 36 PRINTER ROUTINE MAINTENANCE . 211.2 M AIN F EATURES . 36.1 C LEARING J AMMED PAPER . 212 TECHNICAL SPECIFICATIONS . 46.2 C LEAN P RINT H EAD AND R OLLER . 232.1 P RINTER T ECHNICAL S PECIFICATIONS . 42.2 C UTTER T ECHNICAL S PECIFICATIONS . 52.3 P RINTING C ONSUMABLE M ATERIAL T ECHNICALS PECIFICATIONS . 52.4 P RINT P OSITION . 66.3 C LEAN PAPER S ENSOR . 237 INTERFACE SIGNALS . 247.1 USB I NTERFACE . 247.2 E THERNET I NTERFACE . 247.3 P OWER I NTERFACE D EFINITION . 253 APPEARANCE AND COMPONENTS . 78 RECOVERING FROM ERRORS. 264 PRINTER INSTALLATION . 88.1 P RINTER DOES NOT WORK . 264.1 U NPACKING THE P RINTER . 84.2 P RINTER I NSTALLATION . 94.3 P RINTER P OWER C ONNECTION . 98.2 E RROR I NDICATOR L IGHT AND B UZZER A LARM –S EE S ECTION 7.3 FOR D ESCRIPTIONS . 268.3I NDICATOR L IGHT AND B UZZER I NFORMATION . 26ATTENTION : . 98.4 T ROUBLESHOOTING PRINTING PROBLEMS . 274.4 C ONNECTING I NTERFACE C ABLE . 99 INSTALLATION OF SMARTSOURCE ELITE . 264.5 PAPER R OLL I NSTALLATION AND P RINT C HECK . 104.6 P RINTER POWER ON AND SELF TEST . 114.7 E THERNET IP A DDRESS C ONFIGURATION . 1110 POWER MANAGEMENT . 26APPENDIX A: PARAMETER SETTING BY FEEDBUTTON . 27
Digital CheckReceiptNOWTM Elite User ManualSafety InstructionBefore operating the printer, please read following notes carefully.Safety warningsWarning: Do not touch the cutter on the printerWarning: Do not touch the print head and its surrounding parts during or just after printing as theprint head is hot.Attention1) Printer should be placed on a flat and stable location.2) Leave enough space for operation and maintenance around the printer.3) Printer should be kept away from water. Avoid direct sunlight, strong lights and heat.4) Avoid getting water or conductive material (such as metal) into the interior of the printer. If this happens,disconnect the printer power supply immediately.5) Do not allow condensation to form on the surface of the printer. If condensation has formed, the printershould not be powered on until the condensation has been eliminated.6) Do not use or store printer in conditions of high temperature, high humidity or serious pollution.7) Avoid placing printer in a location that would subject it to vibration or impact.8) Connect the printer power cable to a properly grounded socket. Avoid using the same socket with largemotors or other devices which could cause power supply voltage fluctuations.9) If the printer is not to be used for an extended period, unplug the power cord.10) Do not attempt to print without paper. This will seriously damage the print rollers and thermal print head.11) To ensure print quality and product life, use the recommended paper or the same quality of paper.12) Turn off the printer power switch before plugging in or unplugging power or interface cables. Failure todo so may damage the printer.13) To maximize the life of the printer, it is suggested that users use the lowest level print density thatmeets print quality requirements.14) There are no user-serviceable parts inside the printer. Disassembling the printer will void the warranty.15) Keep this manual for reference.16) The DHCP function of network interface printer is enabled by default. The default timeout time of DHCPis 20 seconds (customers can set the time as required). If no IP address is obtained within 20 seconds,the default IP address is 192.168.1.251.17) The network interface does not support disconnection detection.18) Plugging and unplugging the network cable will not start DHCP to obtain an IP address.- 2 -
Digital CheckReceiptNOWTM Elite User Manual1. Summary1.1. Brief IntroductionReceiptNOW Elite is high-performance thermal printer which can be integrated with the Digital CheckSmartSource Elite check scanner to save desk space. It can be used for a wide range of financialtransactions to print receipts, notes, vouchers, financial slips and transaction list printing.ReceiptNOW Elite uses front-end paper exit, drop-in paper replacement, and provides a customsupport platform for SmartSource Elite scanners. The ReceiptNOW Elite detects print-head-in-place, outof paper, paper low, and low supply voltage conditions. The standard data interface is USB 2.0. It supportsStandard Font A (12 24), Font B (9 17), Kanji Font A (24 24), Thai, Simplified Chinese, Korean andother languages, supports multiple code pages to print, one-dimensional bar code : UPC-A, UPC-E, CODE39, CODE 93, CODE 128, EAN8, EAN13, ITF, CODABAR; two-dimensional bar codes: PDF417, QR-CODE;using ESC / POS command set, automatic state return. With the user Custom Sample function, users canset print format and fix content of printing by firmware settings. Paper width can be set in a row, compatiblewith EPSON TM-88IV.1.2. Main Features Quiet, high-speed printing Supports two-tone printing, watermark and gray level printing Easy, drop-in paper loading Easy to use and maintain Paper width can be adjusted from 56-82.5mm Supports full cut and partial cut USB 2.0 interface/Ethernet interface (optional) Compatible with ESC / POS commands or Windows Print Paper-saving Low power consumption design (minimum power consumption less than 1W). Automatically defaults to‘sleep’ mode after 5 minutes of inactivity.- 3 -
Digital CheckReceiptNOWTM Elite User Manual2. Technical Specifications2.1. Printer Technical SpecificationsItemsParameterPrint methodThermal print by linePrint resolution203*180DPIPrint speedMaximum print speed is 250mm/sec,two-color printing speed100mm/sec,gray print speed 100mm/sec.Depending on print content, theprinter will automatically adjust print speedPrint SpanMaximum is 80mm; paper width is from 56-82.5mm.Paper typeSupport Bar code typeCharacter supportEnlarge characterPaper thickness is 0.06 0.10mm, Maximum paper roll OD is 83mmContinuous thermal paper or thermal paper tagsBarcode 1D: UPC-A, UPC-E, CODE 39, CODE 93, CODE 128, EAN8,EAN13, ITF, CODABARBarcode 2D symbols: PDF417, QR-CODE,MAXICODE,GS1U.S.A., France, Germany, U.K., Denmark I, Denmark II, Italy, Sweden,Spain I, Spain II, Japan, Norway, Latin America, Korean etc. optionalAll characters can be enlarged from level 1-6 both in the horizontal andvertical direction.Character rotationFour selectable print orientations(0 , 90 , 180 , 270 )Paper detectionPhotoelectric sensors (out of paper, paper low)Front cover position detectionMicro switchPrint head temperature detectionThermistorGraphics processingDownload bitmapPrint bitmap directlyDownload buffer size:RAM:128KBSupport bitmap mode, fast graphic printingFLASH:512KBUSB 2.0 interface/ Ethernet interface (optional)Communication interfaceMemoryPowerPrint head lifetimeOperating temperature andhumidityStorage temperature andhumidityDimensionsFLASH Memory Capacity: Maximum 4MB;SDRAM memory total capacity: Maximum 2MB;Data receive buffer size: 64K, 4KB, 45 bytes selectable;RAM bit map area: 128KB;Area available to the user FLASH: 512KB;AC 110-240V 50/60 Hz, 1.5A (Power supply)DC 24V 5% average current 2.0AMaximum instantaneous current 8APrint head lifetime, thermal single color print: 100 KilometersPrint head lifetime, thermal two color print: 50 KilometersPrint duty cycle: 12.5%5 C-40 C (41 F-113 F). When used with a scanner, specification ofscanner may be different. Specification of scanner does not modifyspecification of this product and vice-versa.Relative humidity 20% -90% (40 C/104 F)-40 C - 60 C (-40 F- 140 F), 10% 93% (40 C/104 F)241mm 146mm 135mm (9.5in 5.7in 5.3in)(L W H)- 4 -
Digital CheckReceiptNOWTM Elite User Manual2.2. Cutter Technical SpecificationsItemCutting methodCutting timeCutting intervalType of paperOperating voltageMaximum operating currentCutter lifetimeParameterSliding blade500ms2s0.06 0.1mm24VDC1.2A1.5 million times (0.06mmthick paper)NoteCutter cuts for one time.30 cuts / min (maximum)Thermal paper or equivalent thickness paper24VDC*Includes full-cut, partial cutFull cut: Completely severs paperPartial cut: Partially severs paper, leaves cut end attached with tear-off tab2.3. Printing Consumable Material Technical Specifications2.3.1 Thermal Paper ParametersType of Paper: Continuous thermal paper Paper Feeding Method: Paper Roll Paper Width: Maximum 80mm, width can be adjusted between 56-82.5mm Paper Thickness: 0.06mm-0.1mm Thermal Layer: External Paper Roll Size: OD (Max): 83 mm Inside Diameter (Min) 12.5mm Recommended Paper:Part NumberManufacturer401095994Digital hi Paper Mill CO., LTDFD210,PD150R,PD160ROJI Paper CO., LTD.F70NAFUJI PHOTO FILM CO., LTDAttention: Please use recommended paper or equivalent quality paper. The use of other types of paper mayaffect print quality and print head life. If the paper is contaminated by chemicals or oil, the paper may become discolored or printing result may not be clear.Do not scratch the thermal paper with any sharp or hard object. This may cause the printing to beobscured or unclear. All thermal printer paper will degrade and produce poor quality printing if exposed to temperaturesgreater than 70 C (158 F), high humidity or strong light. Store thermal printer paper in a cool, dryplace and in its original wrapping until ready for use.- 5 -
Digital CheckReceiptNOWTM Elite User Manual2.4. Print Position2.4.1Print Location On The PaperL1 Maximum Paper Width:82.5 0.5mmL2 Maximum Effective Print Width:80mmL3 Distance from print head to left side of paper pocket (fixed width): 1.75 1mmL4 Distance from print head to right side of paper pocket (fixed width): 1.75 1mmL5 Left margin: Set by command (see Programming Manual), the printer default is 8mmL6 Width of print area: Set by command (see Programming Manual), the printer default is 64mmL7 Right margin: Set by command (see Programming Manual), the printer default is 8mm- 6 -
Digital CheckReceiptNOWTM Elite User Manual3. Appearance and Components1—Top Cover2—Power Indicator Light - Indicates power status.3—Error Indicator Light - Reports warning or error status(such as out of paper, etc.).Indicator light flashes.Under normal conditions, the light remains off.4—Paper Feed Button- 7 -Paper Feeder : If there are no errors orwarnings, pressing this button will feedpaper.Print Configuration Function: To reviewprinter configuration settings - Holddown this button at the same time whileturning on power. Printer will print theconfiguration settings (such as printlength and width, print speed and othersettings).5—Paper Pocket6—Paper pocket width adjustment - Rollthumbwheel to adjust the paper pocketwidth. The range of adjustment is 56 82.5mm7—Out of paper sensor - continuouslydetects presence of paper roll.8—Roller9—Cutter10—Handle11—Paper low sensor (inside the printer) Detects how much paper remains.Error indicator flashing rapidly meanspaper roll is low and needs to bereplaced soon. The printer will continueto work until out of paper.12—Ethernet Interface (optional)13—USB Interface14—Power Interface15—Power Switch - Press “O” to turn off thepower, press “-” to turn on the power
Digital CheckReceiptNOWTM Elite User Manual4. Printer Installation4.1. Unpacking the PrinterPlease check the package contents when unpacking the printer. If something is missing or damaged,please contact Digital Check at 847-446-2285.- 8 -
Digital CheckReceiptNOWTM Elite User Manual4.2. Printer Installation1)Printer should be installed on a flat surface.2)Printer should be kept away from water.3)Avoid placing printer in a location that would subject it to vibration or impact.4)The printer should only be plugged into an electrical outlet that has a safety ground.5)Allow the proper clearance for printer operation and maintenance. Please see picture below showingthe printer open, and ensure adequate clearance.6)Follow the Instructions on the ReadMe First! document to complete the installation and to printsample receipts.For more detailed installation instructions and toprint a test configuration printout, proceed with the nextInstallation section.4.3. Printer Power Connection1) Make sure that the printer power switch is turned off.2) Connect power plug into power socket behind the printer.Attention:If the printer is not to be used for an extended period, unplug the power cord.4.4. Connecting Interface Cable1) Make sure printer power switch is turned off.2) Plug USB cable into the USB socket on the printer.3) Connect the other end of cable to the computer.- 9 -
Digital CheckReceiptNOWTM Elite User Manual4.5. Paper Roll Installation and Print Check4.5.1Check Printing PaperPaper may be installed while the power and interface cables are connected. Please check paper typebefore printing.4.5.21)Install/Change Paper RollPull the handle and open front cover.2) Using the paper width adjustment wheel, adjust to fit the width of the paper being installed, as shownbelow. Roll the adjustment wheel towards the rear of the unit to adjust for wider rolls. Roll the adjustmentwheel towards the front of the unit to adjust for narrower rolls. After the paper roll is installed, it shouldrotate freely.3) Put paper roll into printer according to directions shown on the label.4) Pull out paper end and close front cover.- 10 -
Digital CheckReceiptNOWTM Elite User Manual4.6. Printer power on and self test1) Make sure power cable is connected to the printer and the paper roll is loaded.2) Make sure POWER INDICATOR LIGHT is off and printer is powered off.3) Hold down the feed key while turning the printer on. Keep on holding the button till ‘Interface isconfiguring .’is printed out, which lasts around 2 seconds. After waiting for 15 seconds(old PCBA:JK-E02 around 10 seconds, new PCBA JK-W03 around 15 seconds), the printer will perform aself-test and then print ‘Press and Release FEED key to print characters’ and ‘Press and Hold FEEDkey to configure the printer’. The printer will change to holding state and PAPER INDICATOR LIGHTblinks.4) When the self-test page is finished, press the FEED key briefly to print test characters or hold theFEED key down to configure the printer. For specific function and operational approach for using theFEED button to configure the printer, please refer to Appendix A “Parameter Setting by FEED Button”.4.7. Ethernet IP Address ConfigurationReceiptNow printers that have an Ethernet interface are factory configured for a default turning-onDHCP mode. To turn off the unit for DHCP mode or changes to the unit’s default IP address can bedone by communicating with the unit via a web browser set to the default IP address as shown in thescreen shot below. The web browser utility can also provide printer and interface status.The current IP address of the printer can be determined by powering on the printer while holding thefeed button down which will cause the printer to print out a test form which lists various hardware andcommunication interface parameters.If the printer does not appear to respond to the proper IP address, the most likely cause is that theprinter is not currently configured in a manner that is compatible with the network to which it isconnected. Check with your network system administrator to insure that the settings for ‘DHCP’, ‘GateWay’ and ‘IP Address’ are compatible with the network- 11 -
Digital CheckReceiptNOWTM Elite User Manual5. JK-W03 Module HTTP Web5.1. OverviewThe interface module provides HTTP service. The status of printer and interface module can display basedon WEB page at the host end through browser, and can also carry out the operation of configuring theinterface module and printing the test page. This service adopts the TCP port of port 80.When the user adopts this service:Firstly, the user needs to get the IP address of interface module through self-test page or specialconfiguration tool;Secondly, enter IP address of interface module in location bar of browser. Then you can inquire the printerstatus and maintain the interface module through WEB page. The following is the detailed explanation ofWEB page.- 12 -
Digital CheckReceiptNOWTM Elite User Manual5.2. Interface StatusStart Internet browser, enter IP address of printer and you can see window of interface status. Then click“Refresh” button to refresh current status (see Figure 1):Figure 1 Interface status5.3. Printer StatusClick “Printer Status” link to check status of printer connected to the interface. If there is abnormal status,the letters in the page will show in red. Click “Refresh” button to refresh current status and click “Print TestPage” to print the self-test page through printer (see Figure 2):- 13 -
Digital CheckReceiptNOWTM Elite User ManualFigure 2 Printer statusNote: When printer is busy or there is error in the printer, then the printer cannot print the self-test page.5.4. Firmware updatePress the “Firmware update” link to load the firmware update web page.If a password has beenpreviously set, you must enter the password first, then you will be allowed to enter the firmware updateweb page (see Figure 3). Next, press the “Browse ” button to select the firmware update and press the“Update” to begin updating the firmware. When the update process is completed, a message box willappear indicating that the firmware is successfully updated, and the printer will restart automatically. (seeFigure 4). If an invalid firmware file is loaded or the update fails, a message box will appear indicating thatthe file format is invalid or the update has failed.- 14 -
Digital CheckReceiptNOWTM Elite User ManualFigure 3 Firmware updating page- 15 -
Digital CheckReceiptNOWTM Elite User ManualFigure 4 Firmware updating successfullyAfter clicking Yes, the printer will remind you to “Please wait for printer to reboot”, as shown in Figure 5.- 16 -
Digital CheckReceiptNOWTM Elite User ManualFigure 5 Wait for printer to rebootDon’t do anything to the web page until the page reminds you “Reset is complete”, as shown in Figure 6.Figure 6 Reset is complete- 17 -
Digital CheckReceiptNOWTM Elite User ManualAfter the firmware updated, JK-W03 PCBA needs to be restored to factory default settings before you can usesome of the new features. If you want to return to the factory default setting, after the power is cut off, press thePCBA button and power up at the same time and hold it in the down state for 5 seconds before releasing the button.After that, you may use it normally.Figure 7 Password loginAfter setting the password in the configuration page, the login page will appear when visiting the upgrade page andthe configuration page.Note: During the update process, do not power off printer or disconnect from the network.Also, makesure not to refresh the web page until the update process is complete.5.5. Wired TCP/IPClick “Wired TCP/IP” or “Wireless TCP/IP” link to enter page of wired interface or wireless interface (if youhave set the safety password, you can enter only when you have entered correct password).“Print Port” is used to set the print port number.“Inactivity time” is used to set the overtime time of TCP connection, unit: min. If setting the “Inactivity time”to 0, it indicates that the connection is always on.“New Password” is used to set the safety password of web page and configuration tool. After selecting thisitem, the test box can be edited, and you can set the safety password (only digit and letter can be used assafety password, and the maximum length of password is 10 bits).“IP Address” provides two methods to change the configuration. Method one: select “DHCP Client”, then- 18 -
Digital CheckReceiptNOWTM Elite User Manualyou can get the IP address, subnet mask, and gateway address automatically through DHCP protocol.Select “DHCP Client:”, then the DHCP Timeout field can be modified to enter the new timeout value forDHCP (unit: s). If the IP address cannot be retrieved within the specified timeout, adopt the default IPaddress 192.168.1.251; Method two: Select “Fixed IP Address”, then the input box below can be editedand you can set the IP address, subnet mask and gateway address manually.“IPv6 Assignment Method” is used to set the obtaining method of IPv6 address. It can display only whenIPv6 function has been activated, and the methods that can be set: DHCPv6, Auto, Manual. Whenselecting Manual, then you can input the IPv6 address to be set in edit box of “IPv6 address”, and input theIPv6 subnet prefix length in the edit box behind “/”."Disable Web Server" is used to turn off the Web Server function of JK-W03. After closing the Web Serverfunction, you will not be able to access the JK-W03 configuration page through the Web page. You need torestore this function by restoring the factory default settings.After making the change, click “Save” to save the setting and you can also restore the factory settingsthrough clicking “Restore Defaults” button.After changing the configuration, restart the printer to make new configuration valid. The restarting ofprinter can be carried out through clicking the “Reboot” button on the left, or through turning off/on theprinter power. The configuration page Figuer 8 is as follows:Figure 8 TCP/IP configuration pageNote: Use only letters and numbers for the password and special characters or symbols are not allowed.”- 19 -
Digital CheckReceiptNOWTM Elite User Manual6. Printer Routine MaintenanceAttention: Use only Thermal Printer Cleaning Swabs (Digital Check part number 757300999 or 751920912),isopropyl alcohol or ethanol for cleaning print head, rollers and sensors. Do not use solvents such asgasoline, acetone, or any abrasive cleanser. When cleaning sensors, do not turn on printer until cleanser has totally evaporated. The printer should be cleaned as needed, indicated by degraded print quality. The cleaning intervaldepends on the environment in which the printer is operated, print usage, paper quality and other factors.A typical cleaning interval is one month.6.1. Clearing Jammed PaperSteps for clearing paper jam are as follows:1. Open front cover.2. Clear jammed paper and close front cover.- 20 -
Digital CheckReceiptNOWTM Elite User Manual6.2. Clean Print Head and RollerThe printer should be cleaned as needed, indicated by degraded print quality. The cleaning intervaldepends on the environment in which the printer is operated, print usage, paper quality and otherfactors. A typical cleaning interval is one month. Steps for cleaning print head and rubber covered rollerare as follows:1)Turn off power. Open front cover.2)Wait approximately 5 minutes until the print head is totally cooled down after printing.3)Wipe out stains and dust on print head and rubber covered roller with Thermal Printer CleaningSwab (Digital Check part number 757300999 or 751920912) or a soft cotton cloth moistened withisopropyl alcohol or ethanol.Cutter 1Cutter24)Do not close front cover until alcohol evaporates.6.3. CleanPaper SensorIf ‘out of paper’ errors are reported when there is still paper on the roll, the paper sensors may need tobe cleaned. Cleaning steps are as follows:1)Turn off power.2)Open front cover. Remove transparent cover plate over sensors (shown in bright yellow below).- 21 -
Digital Check3)ReceiptNOWTM Elite User ManualUse Thermal Printer Cleaning Swab (Digital Check part number 757300999 or 751920912) or a softcotton cloth moistened with isopropyl alcohol or ethanol to wipe away dust and stains on the sensorsurface;4)Do not install transparent cover plate until cleanser has evaporated. Close front cover.7. Interface Signals7.1. USB Interface1)ParameterData transmission: Supports USB2.0 high-speed protocol.Connector (Printer End): USB B serial socket, support USB HUB2)Interface signal definition and function description1SignalNameVBUS23DATADATA Printer data transmission negative phase sidePrinter data transmission normal phase side4GNDGroundPin No.3)Description 5VInterface Connector7.2. Ethernet Interface1) ParameterSupport of 10/100M BASE-T communicationCompatible with Ethernet II standard frame typeIndicator shows network connecting status and data transmission statusSupports 9100 port printSupports status backSupports parameter configurationSupports firmware update on-line- 22 -
Digital CheckReceiptNOWTM Elite User ManualSupports printer status query and interface module maintenance based on HTTP2) Interface signal definition and function descriptionInterface adopts 10/100M BASE-T standard in accordance with IEEE802.3. The interface signal is defined asbelow:PINSignal NameInstruction1TX Data transmission 2TX-Data transmission -3RX Data receiving 4NCReserve5NCReserve6RX-Data receiving -7NCReserve8NCReserve3) Interface ConnectorSocket figure of Interface module7.3. Power Interface DefinitionPower interface signa
SmartSource Elite check scanner to save desk space. It can be used for a wide range of financial transactions to print receipts, notes, vouchers, financial slips and transaction list printing. ReceiptNOW Elite uses front-end paper exit, dropin paper replacement, and provides a custom - support platform for SmartSource Elite scanners. The