Transcription
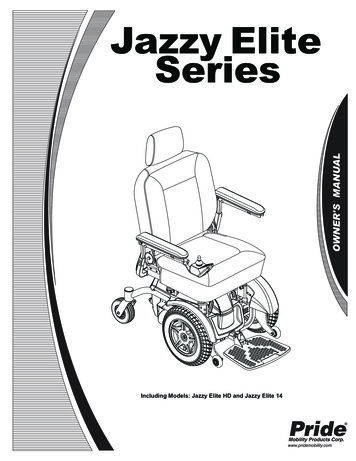
VIVE Cosmos Elite User guide
2ContentsContentsSystem requirementsWhat's inside the box?5What are the system requirements?5Headset and headphonesHeadset7Headphones27Common solutions39ConverterAbout the converter for VIVE Cosmos Elite41Connecting the headset to your computer via the converter41Restarting the converter for VIVE Cosmos Elite42Can I use a laptop with VIVE Cosmos Elite?43My computer monitor and headset are turned on but why can't I see anything?43Base stationsAbout the VIVE base stations44Installing the base stations45Tips for setting up the base stations47Using the mounting kit48Updating base station firmware via cable connection49Updating base station firmware via Bluetooth49What does the status light on the base stations mean?50What should I do if any of the base stations is not detected?50Can I use the older version of the base stations together with SteamVR Base Station 2.0?50Which VIVE hardware is compatible with my base stations?51Are the base stations covered by warranty if accidentally damaged?51ControllersAbout the VIVE controllers52Charging the controllers53Turning the controllers on or off53Pairing the controllers with the headset53Attaching the lanyards to the controllers54Updating controller firmware54What does the status light on the controllers mean?55What should I do if any of the controllers is not tracked?55How do I know which of the controllers is not being tracked?55What can I do if the controller's trackpad is oversensitive?56What should I do if my controller won't turn on?56The controller automatically turns off. What should I do?56My controller won't turn on after I accidentally unplugged it during firmware update. What should I do?57
3ContentsPlay areaWhat is the play area?58Planning your play area58Choosing the play area59Setting up VIVE Cosmos Elite for the first time60Setting up a standing-only play area60Setting up a room-scale play area61Resetting the play area61Verifying your setup62After setting up, how do I turn the VIVE system on?62What is the recommended space for the play area?63Can I include space occupied by furniture for the play area?63Will VR apps for seated/standing-only experiences work with room-scale setup?63How do I resolve download errors during VIVE Setup installation?63I can't complete the room setup. What should I do?63SettingsSystem Dashboard64Changing the Chaperone settings64How can I capture screenshots in VR?65Disabling Volume limit65Enabling motion compensation65Updating the firmware66Troubleshooting VIVE Cosmos Elite66Joining the VIVE Cosmos Elite beta program66Seeing real surroundings67What do the error codes and messages mean? What can I do?67Trademarks and copyrightsIndex
4About this guideAbout this guideWe use the following symbols to indicate useful and important information:This is a note. It provides detailed information for setup, common questions, and what to do inspecific situations.This is a tip. It will give you an alternative way to do a particular step or procedure that you mayfind helpful.This indicates important information that you need in order to accomplish a certain task or toget a feature to work properly.This is a warning. Take note to avoid potential problems or prevent damage to your hardware.Information contained in this guide may have changed. For the most up-to-date information,including the latest version of this guide, go to VIVE Support.Before using the product, carefully review VIVE safety information and follow all product safetyand operating instructions on https://www.vive.com/legal/.
5System requirementsSystem requirementsWhat's inside the box?Your VIVE Cosmos Elite comes with the following items, which you'll use to experience immersiveVR environments:MaincomponentAccessoriesVIVE Cosmos § Headset cable (attached)Elite§ Audio cable (attached)§ Top strap (attached)§ Face cushion frame with cushions (attached)§ Cleaning cloth§ On-ear headphones (attached)To use your own headphones with VIVE Cosmos Elite, you'll need the replacement kit forheadphones. For details on how to order the kit, contact customer care.Converter§ Power adapter§ DisplayPort cable§ USB 3.0 cable§ Mini DisplayPort to DisplayPort adapterVIVE controllers(x2)§ Power adapters (x2)§ Lanyards (attached, x2)§ Micro-USB cables (x2)Base stations § Power adapters (x2)(x2)§ Mounting kit (2 mounts, 4 screws, and 4 wall anchors)What are the system requirements?To use VIVE Cosmos Elite, your computer must meet the following system requirements.ComponentMinimum system requirementsRecommended systemrequirementsProcessorIntel Core i5-4590/AMD FX 8350 equivalent or betterIntel Core i5-4590/AMD FX 8350equivalent or better
6System requirementsComponentMinimum system requirementsRecommended systemrequirementsGPUNVIDIA GeForce GTX 970 4GB,AMD Radeon R9 290 4GBequivalent or better VR Readygraphics card.NVIDIA GeForce GTX 1070/QuadroP5000 equivalent or better, AMDRadeon Vega 56 equivalent or betterVR Ready graphics card.Refer to AMD or NVIDIA's VR Readywebsite for a list of VR Readygraphics cards.Refer to AMD or NVIDIA's VR Readywebsite for a list of VR Ready graphicscards.Memory4 GB RAM or more8 GB RAM or moreVideo outputDisplayPort 1.2 or newerDisplayPort 1.2 or newerUSB port1x USB 3.0 or newer1x USB 3.0 or newerOperatingsystemWindows 10Windows 10
7Headset and headphonesHeadset and headphonesHeadsetAbout the VIVE Cosmos Elite headsetThe headset is your window to the VR environment.The cameras on the headset are sensitive. Do not cover or scratch the cameras. Thesecameras are used for inside-out tracking and to view real surroundings when the headset isusing a supported front cover. By default, VIVE Cosmos Elite does not use these cameras andneeds base stations for tracking.Front and side views1. Dual cameras2. Front cover3. Tracking sensor4. Headset band5. Top strap6. Headset cable7. Headset cable strip
8Headset and headphones8. On-ear headphone9. Side cameras10. Status light11. Headset buttonBack and bottom views1. Adjustment dial2. Side cushion3. Front pad4. Mic5. Visor6. Nose rest7. Interpupillary distance (IPD) knob8. Face cushion frame9. Face cushion10. Back pad11. Headset bandInner view (face cushion frame removed)1. Front cover lock button2. Headset cable3. Audio cable4. USB Type-C cable slot5. Lenses
9Headset and headphonesPutting on the VIVE Cosmos Elite headsetBefore wearing the headset for the first time, make sure to:§ Peel off the protective film on the lenses.§ Fully loosen the band and peel off the protective film starting from the left side of the band.1.Detach the velcro fastener on the top strap, and then loosen the band by turning theadjustment dial counter-clockwise.2.While holding the visor with one hand, pull up the band.
10Headset and headphones3.Hold the visor to your eyes. Adjust the position of the visor until you see a clear imageinside the headset.4.Pull down the headset band around the back of your head until you hear a click. The clickindicates that the headset band has locked into place.When you pull down the band, make sure the headset cable is not caught in between the bandand your head. Let the headset cable run straight down your back.
115.Headset and headphonesTurn the adjustment dial clockwise until the headset fits snugly.Make sure the visor faces straight ahead. If the band sits too low or high on the back ofyour head, the visor will be tilted. It will also be difficult to position the on-ear headphonesproperly on your ears. If there's light leakage around the areas of your nose or cheeks,adjust the position of the band.6.Adjust the top strap until snug, and then fasten the velcro strap.
12Headset and headphonesIf there's light leakage around the areas of your nose or cheeks, readjust the strap andreposition the band.Can I wear my prescription glasses while using VIVE Cosmos Elite?Most glasses fit inside the headset.Make sure that no part of your glasses scratch the headset lenses.Adjusting the IPD on the headsetInterpupillary distance (IPD) is the distance between the centers of your pupils. A quick way to getan estimate is by facing a mirror and holding a millimeter ruler against your brow. Use thismeasurement as a guide to adjust the distance between the lenses of the headset so that you'llhave a better viewing experience.To increase the distance between the lenses, rotate the IPD knob clockwise. To decrease, rotatethe IPD knob counterclockwise.As you adjust the IPD, you'll see a prompt indicating the current distance between the centers ofthe lenses.
13Headset and headphonesFlipping up the visorQuickly take a break from VR to check your surroundings.While wearing VIVE Cosmos Elite, hold the visor with one or both hands, and then gently flip it up.To return it to its original position, tilt the visor down until it completely covers your eyes.If you wear large glasses, you may need to adjust the headset to sit higher on your head whenflipping the visor up or down.
14Headset and headphonesConnecting a USB device to VIVE Cosmos EliteYou can connect a compatible USB Type-C device to VIVE Cosmos Elite using a USB cable.1.While holding the visor with one hand, pull up the band.2.Detach the face cushion frame from the headset. To release the frame from its latches,gently pull on any side of the frame starting from the bottom, and then pull one side at atime on the top.Avoid pulling or squeezing on the sides of the face cushion frame to prevent damaging theframe.
15Headset and headphones3.Insert the cable connector of the device into the USB Type-C port on the headset.4.Align and push the tabs on the face cushion frame into their corresponding slots on theheadset. Make sure to position the ridge of the face cushion frame below the headset,audio, and USB cables. You'll hear a click when the face cushion frame locks in place.5.Connect the other end of the USB cable to USB Type-C device.
16Headset and headphonesRemoving the face cushionsYou can remove the face cushions for cleaning. To learn how to clean the face cushion, seeCleaning the face cushions on page 24.1.To remove the face cushions, gently peel starting from the bottom ends of each facecushion until they detach from the face cushion frame.2.To reattach, align one end of the face cushion with the marker on the bottom part of theface cushion frame. Press down the face cushion against the outline of the frame, and thencheck that the other end of the face cushion lines up with the marker on the top part of theframe.Make sure that the velcro and adhesive strips attach firmly.
17Headset and headphonesRemoving the front and back padsYou can remove the front and back pads from the headset band for cleaning.To remove the front and back pads, peel starting from the ends of each pad until they detachfrom the headset band.
18Headset and headphonesReattaching the front and back pads to the headsetAlways make sure that the front and back pads are attached to the headset.1.While holding the visor with one hand, pull up the band.2.Starting from the middle, align the front pad tabs with their corresponding slots on theband, and then press along the front pad. You may need to gently bend the ends of thefront pad to align the outermost tabs with the slots on the band.Make sure to minimize the gap between the pad and the band and that all tabs are fullylocked into place.3.Align the back pad tabs with their corresponding slots on the band, and then press alongthe back pad to reattach.
19Headset and headphonesCheck that the headset cable strip is properly attached. For details, see Reattaching theheadset cable strip to the back pad on page 20.You'll hear a click when the tabs are inserted.Make sure to minimize the gap between the pad and the band.
20Headset and headphonesReattaching the headset cable strip to the back padThe fabric strip guides the headset cable, and is inserted on the back pad.1.Insert the back pad tabs second to the left-most corner tabs into the holes of the headsetcable strip with its flap down. Make sure that the strip is firmly attached.12.2Reattach the top strap to the headset band. For details, see Attaching the top strap to theheadset band on page 23.
21Headset and headphones3.Align the back pad tabs with their corresponding slots on the band, and then press alongthe back pad to reattach. You'll hear a click when the tabs are inserted.4.Make sure to minimize the gap between the pad and the band.
22Headset and headphonesDetaching the top strap from the headset bandIf you want to, you can detach the top strap from the headset band.You'll need to first remove the front and back pads on the headset. For details, see Removingthe front and back pads on page 17.1.Starting from the rear of the headset band, pull down the strap to unhook it.2.On the other end of the strap, pull down and out the strap to unhook it.3.Reattach the front and back pads to the headset. For details, see Reattaching the front andback pads to the headset on page 18.
23Headset and headphonesAttaching the top strap to the headset bandFor added comfort, attach the top strap before wearing the headset. You can adjust the top strapby using the velcro strip.You'll need to first remove the front and back pads on the headset. For details, see Removingthe front and back pads on page 17.1.Starting from the rear of the headset band, align the hooks of the top strap (side withoutthe clasp) to its corresponding slots. Gently pull up the strap to hook into place.2.Align and insert the hooks on the other end of the top strap with the inner slots of theheadset band, and then pull up on the strap to hook into place.3.Reattach the front and back pads to the headset. For details, see Reattaching the front andback pads to the headset on page 18.Cleaning the headset lenses1.Use the cleaning cloth provided in the box to wipe the lenses.2.Wipe in a circular motion from the center to the outer edges of the lenses.While cleaning the lenses, do not scratch the lenses nor disassemble other parts of theheadset.
24Headset and headphonesCleaning the face cushions1.Before cleaning the face cushions, remove it first from the VIVE Cosmos Elite headset.2.When cleaning the face cushions, remember to:§ Dampen a clean smooth cloth with cold water and gently wipe the area you want toclean.§ Air dry at room temperature. Don't tumble dry, iron, or expose it to direct sunlight.§ Don't scrub, wring, or bleach.§ Don’t dip or soak in water.Caring for your VIVE Cosmos EliteFollow these tips to properly care for your VIVE Cosmos Elite.§ Keep the headset lenses away from sharp objects, including cable tips. This will preventthe headset lenses from being scratched.§ When not in use, store the headset in a cool, dark, and low humidity environment.
25Headset and headphones§ When not in use, store the headset with the lenses pointed away from direct sunlight.Failure to do so may damage the headset display.§ When storing the headset, it is recommended to cover the lenses with the paper cover tohelp prevent accidental scratches.Replacing the front coverYou can replace the front cover on the headset.1.Slide down and hold the lock button inside the compartment to unlatch the front cover.2.Pry open the front cover starting from the bottom right corner with the visor facing you.3.Carefully pull out the front cover until it detaches from the visor.4.Grab the replacement cover.
26Headset and headphones5.Insert the tabs on the front cover into the slots on the visor.6.Press the right side of the front cover first, and then press the left side of the front cover.7.With the front cover attached to the visor, press the center of the front cover.8.Make sure to minimize the gap between the front cover and the visor, and that all tabs arefully locked into place.You'll hear a click when the front cover locks in place.
27Headset and headphonesWhat does the status light on the headset mean?The status light turns:§ Green when the headset is in normal mode§ Dim green when the headset is on standby§ Red when the headset is in sleep modeHeadphonesAdjusting the fit of the on-ear headphonesWhile wearing the VIVE Cosmos Elite headset, adjust the on-ear headphones to a comfortableposition over your ears, then press the headphones into place.Is the fit too loose or tight? In case you feel pressure around your temples, adjust the position ofthe on-ear headphones for a more comfortable fit. To do so, flip open the metal clasp on eachheadphone and reposition the headphone clip on the headset band.
28Headset and headphonesDetaching the on-ear headphones from the headset bandTo use your own headphones with VIVE Cosmos Elite, you'll need the replacement kit forheadphones. For details on how to order the kit, contact customer care.Before using your own earphones, you first need to detach the on-ear headphones from theheadset band.1.On the right side of the band, disconnect the audio plug from the audio cable connector.2.Remove the side cushions and front pad from the headset band. For details, see Removingthe front and back pads on page 17.3.On the front section of the band, carefully pull out the cable of the on-ear headphonesfrom the groove.4.On the left and right sides of the band, flip open the metal clasp of each headphone todetach it.After detaching the on-ear headphones, you need to attach cable guides before plugging in yourown earphones. For details, see Attaching the cable guides to the headset band on page 37.
29Headset and headphonesReattaching the on-ear headphones to the headset bandYou can reattach the on-ear headphones if you've used your own earphones with VIVE CosmosElite.Before attaching the on-ear headphones to the headset band, do the following:1.Remove the cable guides, screws, and rubber pad, which are part of the replacement kitfor earphones, as well as the side cushions from the headset band. For details, seeDetaching the cable guides from the headset band on page 38.Use a cross-shaped screwdriver (PH00) to detach the screws. Make sure to keep theseparts in a safe place.
30Headset and headphones1. Audio cable guide2. Rubber pad3. Screws4. Side cushions5. Headset cable guide6. Cable stopper2.Flip open the metal clasps on the left and right on-ear headphones.
31Headset and headphonesAttaching the right on-ear headphoneAttach the right headphone with the audio plug to the right side of the headset band.1.Hook the headphone clip over the top of the band.The screw holes and line marker on the band are helpful guides for positioning the clip.While the clasp is loose, you can reposition the headphone clip for a more comfortable fit.Just make sure that the other clip is similarly placed on its side of the band.2.Make sure the audio cable is firmly pressed and not falling out of the groove.3.Make sure the audio cable runs under the band, and not over the top. Check that it isn'talso wedged between the clip and the band.
32Headset and headphones4.Close the clasp around the band, and then snap into place.5.Connect the audio cable connector to the headphone plug.
33Headset and headphonesAttaching the left on-ear headphoneAttach the left headphone to the left side of the headset band.1.Pin the headset cable along the cable guide on the left headphone.2.Hook the headphone clip over the top of the band.The screw holes and line marker on the band are helpful guides for positioning the clip.While the clasp is loose, you can reposition the headphone clip for a more comfortable fit.Make sure that the other clip is similarly placed on its side of the band.3.Make sure the audio cable is firmly pressed in place and not falling out of the groove.4.Make sure that the stopper on the headset cable isn't caught in the clasp, and is on thevisor side to prevent damage to the visor while gaming.
34Headset and headphones5.Make sure the audio cable runs under the band, and not over the top. Check that it isn'talso wedged between the clip and the band.6.Close the clasp around the band and snap into place.
35Headset and headphonesAttaching the headphone audio cableAfter the left and right on-ear headphones have been attached, attach the headphone audiocable to the headset band.1.Remove the front pad from the headset band. For details, see Removing the front and backpads on page 17.2.On the front section of the band, press the audio cable marker into the slot at the center.Then press the cable along the groove until flush with the band.3.Reattach the front pad and side cushions to the headset band. Make sure that the sidecushions cover the metal clasps on the band.
36Headset and headphonesPlugging in your earphonesIf you prefer, you can use your own earphones with VIVE Cosmos Elite. To do this, you'll need thereplacement kit for earphones. Contact customer care for details on how to order it.1.Detach the on-ear headphones. For details, see Detaching the on-ear headphones fromthe headset band on page 28.2.Attach the cable guides to the headset band. For details, see Attaching the cable guides tothe headset band on page 37.3.Insert the earphone plug into the 3.5mm audio cable connector on the right side of theheadset band.
37Headset and headphonesAttaching the cable guides to the headset bandTo use your own headphones with VIVE Cosmos Elite, you'll need the replacement kit forheadphones. For details on how to order the kit, contact customer care.Before plugging in your earphones, you need to attach the audio cable guide and headset cableguide to the headset band. The cable guides are included in the replacement kit for earphones.Before you attach the cable guides, make sure to remove the on-ear headphones from theheadset band, including the front pad and side cushions. For details, see Detaching the onear headphones from the headset band on page 28.Use a cross-shaped screwdriver (PH00) to attach the screws.1. Audio cable guide2. Rubber pad3. Screws4. Side cushions5. Headset cable guide6. Cable stopper1.On the right side of the band, place the audio connector between the rubber pad and audiocable guide. Align the holes on the band, rubber pad, and audio cable guide, and thenscrew in place.2.On the left side of the band, align the headset cable guide holes with the holes on theband, then screw in place. Make sure that the headset cable passes through the headsetcable guide. The stopper on the headset cable must also be placed on the visor side of thecable guide.3.Reattach the front pad and side cushions to the headset band. Make sure that each sidecushion is aligned with the curvature on the band.
38Headset and headphonesAfter attaching the cable guides, you can now plug in the earphones. For details, see Plugging inyour earphones on page 36.Detaching the cable guides from the headset bandIf you want to reattach the on-ear heaphones, you first need to detach the audio cable guide andheadset cable guide from the headset band. The cable guides are included in the replacement kitfor earphones. For details on how to order the replacement kit for earphones, contact customercare.Make sure to keep these parts in a safe place.Detaching the audio cable guideYou can remove the audio cable guide from the right side of the band.1.Remove the side cushion.2.Remove the screws using a cross-shaped screwdriver (PH00).3.Remove the rubber pad that holds the audio cable connector against the audio cableguide.
39Headset and headphones1. Side cushion2. Screws3. Rubber pad4. Audio connector5. Audio cable guideDetaching the headset cable guideYou can remove the headset cable guide from the left side of the band1.Remove the side cushion.2.Remove the screws using a cross-shaped screwdriver (PH00).3.Detach the headset cable guide.1. Side cushion2. Screws3. Cable stopper4. Headset cable guideCommon solutionsI can't place the on-ear headphones on my ears. What can I do?You can move the position of the headphones along the headset band so they can be placed onyour ears.Flip open the metal clasp on each headphone and reposition it on the headset band. SeeAdjusting the fit of the on-ear headphones on page 27 for more details.You can also try adjusting the top strap and headset band so that you can position the on-earheadphones properly on your ears. See Putting on the VIVE Cosmos Elite headset on page 9for details.
40Headset and headphonesI can't hear anything from the headphones. What can I do?If there is no sound coming out of the headphones, go through the list below and see if it fixes theproblem.Check the following:§ Make sure the headphones are plugged into the 3.5mm audio cable connector of theheadset.§ The volume level is not 0. See System Dashboard on page 64.§ Make sure the USB cable is connected to a USB 3.0 or higher port on your computer. If theUSB cable is connected to a lower-speed USB port, move and plug it to a USB 3.0 or higherport. Restart the computer and converter. See Restarting the converter for VIVE CosmosElite on page 42.§ If the USB cable is already connected to a USB 3.0 or higher port on your computer, tryswitching to a different USB 3.0 or higher port. After switching, restart the computer andconverter. See Restarting the converter for VIVE Cosmos Elite on page 42.Can I use VIVE Cosmos Elite when SteamVR is in Safe mode?No, you cannot. Make sure that SteamVR is not running in Safe mode before using VIVE CosmosElite.
41ConverterConverterAbout the converter for VIVE Cosmos EliteUse the converter to connect the headset to your computer.1Headset cable port2Power port3DisplayPort cable4USB 3.0 cableConnecting the headset to your computer via theconverter1.Connect the power adapter cable to its corresponding port on the converter forVIVE Cosmos Elite.2.Plug the power adapter into an electrical outlet.3.Connect the opposite end of the USB 3.0 cable to a USB 3.0 port on your computer.
42Converter4.Connect the other end of the DisplayPort cable to the DisplayPort port on the graphicscard of your computer where the monitor is also connected. Do not connect theDisplayPort cable to ports on the motherboard.5.Insert the headset cable connector (side with triangle mark up) to the port on the converterwith the corresponding triangle mark.Restarting the converter for VIVE Cosmos EliteIf you need to restart the converter, follow these steps.1.Close the VIVE Console app as well as SteamVR app on your computer.2.Unplug the power cable from the converter.3.Wait for a few seconds, and then plug the power cable back in. On your computer, youmight see a notification that drivers are being installed. Wait for the installation to finish.4.To verify that VIVE hardware are detected, restart the VIVE Console app on your computer.
43ConverterCan I use a laptop with VIVE Cosmos Elite?As long as your laptop meets the system requirements, you can use it with VIVE CosmosElite.If your laptop does not have a DisplayPort port but has a Mini DisplayPort port instead,you can use a Mini DisplayPort-to-DisplayPort adapter. If you require one, contact HTCcustomer care.A Mini DisplayPort-to-DisplayPort adapter may block another port on your laptop.My computer monitor and headset are turned on but why can't Isee anything?Try the following steps to fix the problem.1.Disconnect the headset cable from the converter.2.Restart your computer.3.Reconnect the headset cable to the converter.
44Base stationsBase stationsAbout the VIVE base stationsThe hardware may be purchased separately from the Accessories tab on www.vive.com/product/.§ The base stations beam signals to the headset and controllers. Do not cover the front panelwith any material.§ When the base stations are turned on, they may affect some nearby infrared sensors, such asthose used by an IR TV remote control.1Status light2Front panel3Channel indicator (recessed)4Power port5Channel button6Sync cable port (optional)7Micro-USB port (for firmware updates)§ Do not attempt to pry open the base stations as doing so could injure you or damage theproduct.§ If the front panel is cracked or damaged, stop using the base stations.
45Base stationsInstalling the base stationsThe hardware may be purchased separately from the Accessories tab on www.vive.com/product/.Before installing the base stations, decide first whether you want to set up a room-scale orseated/standing-only play area. See Planning your play area on page 58.During unboxing, remove the thin film that covers the front panel of the base stations.1.Mount the base stations diagonally at opposite corners of your space.For details on how to use the mounting kit, see Using the mounting kit on page 48.You can also use tripods, light stands, or cargo poles when mounting the base stations, oreven place it on stable book cases. Just avoid using unstable mounting solutions orsurfaces that are prone to vibration.2.Adjust the base stations so that the front panels are facing toward the center of the playarea.3.Attach the power cables to the base stations, and then plug them each into a power outletto turn them on. The status lights should be green.4.Connect the base stations and set the channels.For details on how to get the sync cable, contact customer care.Without the synccablePress the Channel buttons at the back of the base stations sothat one base station is set to channel “b”, while the other is setto channel “c”.With the sync cable(optional for addedreliability)Press the Channel buttons at the back of the base stations sothat one base station is set to channel “A”, while the other is setto channel “b”.
46Base stationsOnce turned on, do not move or adjust the angles of the base stations as it could disrupt thetracking process. Otherwise, you will need to set up the play area again.
47Base stationsTips for setting up the base stationsThe hardware may be purchased separately from the Accessories tab onwww.vive.com/product/.You may set up the base stations in a way that's suitable for your place. For best results,you may fol
Elite §Headset cable (attached) §Audio cable (attached) §Top strap (attached) §Face cushion frame with cushions (attached) §Cleaning cloth §On-ear headphones (attached) To use your own headphones with VIVE Cosmos Elite, you'll need the replacement kit for headphones. For details on h
