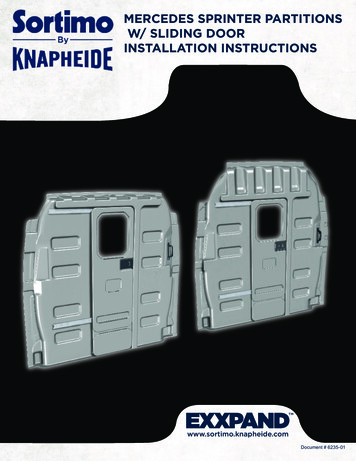
Transcription
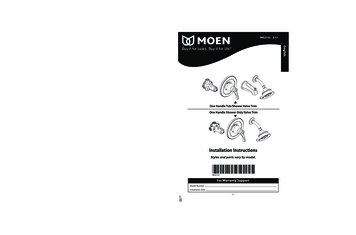
INS2152-English INS2152 english spreads 4/26/11 2:13 PM Page 1INS2152 - 3/11To preserve the finish on the metallic parts of your Moen faucet, apply non-abrasive wax, such as car wax.Any cleaners should be rinsed off immediately.6. Post Installation - Troubleshooting GuideProblemPossibleCauseHot/cold reversedLines reversed/cartridge installedupside downHot/cold reversedRotate cartridge stem 180 so that the notch is facingdown towards the drain.No water/low flowOne or bothsupplies not onto the unitNo water/low flowTurn both water supply valvescounterclockwise to the onpositionLeak or dripfrom spoutGrommets notsealing properlyLeak/drip from spoutReplace cartridgeOnly hot/no cold –Only cold/no hotBalancing spoolstuckOnly hot/no cold –Only cold/no hotReplace cartridgeStacking (Watercomes out of theshowerhead duringtub fill mode)Choice of pipe/Water comes out of spoutdistance betweenand showerhead at thevalve and showerhead same timeless than 46"/multipleelbows/anythingrestricting flow ofwater exiting valveChange pipe to IPS orcopper/distance fromshowerhead and valvemoved to at least 46"/change or remove anythingrestrictiveFlow restrictionbetween valve andtub spoutWater comes out of spoutand showerhead at thesame time causingrestrictionRemove tub spout and flushout debris – Replaceundersized line or fittingsValve installedupside downRemove cartridge and verifythat the outlet hole is inproper location (should bedown). "Up" is on the topof the valveRemove valve and reinstallin the proper orientationHandle (morecommon in knobmodels) is installedupside downIn the off position, able toturn the handle bothclockwise andcounterclockwiseRemove handle, rotate 180 ,re-installTemperature limitstop out of positionRemove handle andsee Step 5.3Position temperature limitstop to desired temperaturepositionNot able to installhandle/handlerubs up againstescutcheonValve installed too farback from finishedwallHandle does not installContact Moen for assistance.Handle is hardto turnCartridge stem isdifficult to rotateDifficult movement fromhandleReplace cartridgeor lubricateRestrictedtemperature rangeTo DiagnoseRemedy One Handle Tub/Shower Valve TrimOne Handle Shower Only Valve Trim EnglishEnglishCare InstructionsInstallation InstructionsStyles and parts vary by model.For further assistance, contact Moen at:USA: 1-800-289-6636 or visit www.moen.comCanada: 1-800-465-6130 or visit www.moen.caFor Warranty SupportModel NumberINS2152 - 3/11Installation DatePrinted in U.S.A. 2011 Moen IncorporatedE12www.moen.comE1
INS2152-English INS2152 english spreads 4/26/11 2:13 PM Page 2Visit Moen.com for product specific parts diagrams.Styles and parts vary by model.Tub/Shower Parts SuppliedPlease Contact Moen FirstAFor Installation Help, Missing or Replacement PartsUSACANADA1-800-BUY-MOEN1-800-289-6636Mon. - Fri. 8:00 a.m. to 8:00 p.m. EST1-800-465-6130Mon. - Fri. 7:30 a.m. to 5 :00p.m. ESTwww.moen.caSat. 9:00 a.m. to 5:30 p.m. ESTwww.moen.comInstalls behind wall.Installs on wall exterior.BHCIDEFMNx2 GJTable of ContentsTub/Shower Parts Supplied.E3Shower Only Parts Supplied .E3Rough-in Plumbing VariationsCopper .E4A.B.C.D.E.F.G.H.Shower Arm Flange4 Port Valve and Stop TubeKey StopAdjustable Temperature Limit StopPlaster GroundEscutcheonEscutcheon Screws (2-3/16”)Shower ArmI.J.N.ShowerheadTub SpoutProduct Identification LabelShower Only Parts SuppliedInstalls behind wall.Installs on wall exterior.IPS.E4APEX .E5BHCVPC .E5CIHelpful Tools.E4-E5DEInstallation Schematics .E6KThin Wall/Thick Wall and Plaster Ground Installation .E7-E8FTrim Installation.E8-E9x2 GCare Instructions .E12Troubleshooting Guide.E12E2MNSetting the Temperature Limit Stop .E10Warranty.E11LA.B.C.D.E.F.G.H.Shower Arm Flange4 Port Valve and Stop TubeKey StopAdjustable Temperature Limit StopPlaster GroundEscutcheonEscutcheon Screws (2-3/16”)Shower ArmI.K.L.M.N.ShowerheadLever HandlePhillips Screw - Lever (2-1/8”)Lever CapProduct Identification LabelE3EnglishEnglishThank you for choosing Moen.
INS2152-English INS2152 english spreads 4/26/11 2:13 PM Page 2Visit Moen.com for product specific parts diagrams.Styles and parts vary by model.Tub/Shower Parts SuppliedPlease Contact Moen FirstAFor Installation Help, Missing or Replacement PartsUSACANADA1-800-BUY-MOEN1-800-289-6636Mon. - Fri. 8:00 a.m. to 8:00 p.m. EST1-800-465-6130Mon. - Fri. 7:30 a.m. to 5 :00p.m. ESTwww.moen.caSat. 9:00 a.m. to 5:30 p.m. ESTwww.moen.comInstalls behind wall.Installs on wall exterior.BHCIDEFMNx2 GJTable of ContentsTub/Shower Parts Supplied.E3Shower Only Parts Supplied .E3Rough-in Plumbing VariationsCopper .E4A.B.C.D.E.F.G.H.Shower Arm Flange4 Port Valve and Stop TubeKey StopAdjustable Temperature Limit StopPlaster GroundEscutcheonEscutcheon Screws (2-3/16”)Shower ArmI.J.N.ShowerheadTub SpoutProduct Identification LabelShower Only Parts SuppliedInstalls behind wall.Installs on wall exterior.IPS.E4APEX .E5BHCVPC .E5CIHelpful Tools.E4-E5DEInstallation Schematics .E6KThin Wall/Thick Wall and Plaster Ground Installation .E7-E8FTrim Installation.E8-E9x2 GCare Instructions .E12Troubleshooting Guide.E12E2MNSetting the Temperature Limit Stop .E10Warranty.E11LA.B.C.D.E.F.G.H.Shower Arm Flange4 Port Valve and Stop TubeKey StopAdjustable Temperature Limit StopPlaster GroundEscutcheonEscutcheon Screws (2-3/16”)Shower ArmI.K.L.M.N.ShowerheadLever HandlePhillips Screw - Lever (2-1/8”)Lever CapProduct Identification LabelE3EnglishEnglishThank you for choosing Moen.
INS2152-English INS2152 english spreads 4/26/11 2:13 PM Page 3If you are replacing your plumbing valve, see below for four commonplumbing methods. Specific rough-in fittings are not supplied. These maybe required for installation. Remove existing handle and valve trim beforereplacing your valve. Please follow all local building and plumbing codes.EnglishEnglish1. Determining Your Existing Rough-In Plumbing InstallationPEXCopperHelpful ToolsHelpful ToolsFor safety and ease of faucet replacement,Moen recommends the useof these helpful tools.For safety and ease of faucet replacement,Moen recommends the useof these helpful tools.Safety GlassesMeasuring TapePi p e J o i n tCo m po u ndTorchSafety GlassesFront ViewFront ViewWire BrushPhillips ScrewdriverMeasuring TapePipe Joint CompoundTube CutterCrescent Wrench Thread Seal Tape Phillips ScrewdriverLead-free Solder KitThermometerThread Seal TapeFull Circle Crimping Tool ThermometerPi p e J o i n tCo m po u ndBack ViewTubing CutterPipe Joint CompoundCrescent WrenchFlashlightBack ViewKey Hole SawIPS – (Galvanized Iron Pipe/Threaded Connections)FlashlightKey Hole SawCPVCHelpful ToolsHelpful ToolsFor safety and ease of faucet replacement,Moen recommends the useof these helpful tools.For safety and ease of faucet replacement,Moen recommends the useof these helpful tools.Pi p e J o i n tCo m pou ndSafety GlassesFront ViewMeasuring TapeThermometerSafety GlassesFront ViewMeasuring TapeCrescent WrenchCrescent Wrench Thread Seal Tape Phillips ScrewdriverPipe Joint CompoundThread Seal Tape Phillips ScrewdriverCPVCCle a n erCP VCC e m e ntPi p e J o i n tCom po u ndAdjustable WrenchBack ViewFlashlightPipe Joint CompoundKey Hole SawCAUTION – TURN HOT & COLD WATER SUPPLIES OFF BEFORE REMOVING YOUR CURRENT FAUCET OR DISASSEMBLING YOUR CURRENTVALVE. OPEN FAUCET HANDLE TO RELIEVE WATER PRESSURE ANDENSURE COMPLETE WATER SHUT-OFF HAS BEEN ACCOMPLISHED.E4CPVC Cement Thermometer CPVC Cleaner Tubing CutterFlashlightBack ViewKey Hole SawCAUTION – TURN HOT & COLD WATER SUPPLIES OFF BEFORE REMOVING YOUR CURRENT FAUCET OR DISASSEMBLING YOUR CURRENTVALVE. OPEN FAUCET HANDLE TO RELIEVE WATER PRESSURE ANDENSURE COMPLETE WATER SHUT-OFF HAS BEEN ACCOMPLISHED.E5
INS2152-English INS2152 english spreads 4/26/11 2:13 PM Page 3If you are replacing your plumbing valve, see below for four commonplumbing methods. Specific rough-in fittings are not supplied. These maybe required for installation. Remove existing handle and valve trim beforereplacing your valve. Please follow all local building and plumbing codes.EnglishEnglish1. Determining Your Existing Rough-In Plumbing InstallationPEXCopperHelpful ToolsHelpful ToolsFor safety and ease of faucet replacement,Moen recommends the useof these helpful tools.For safety and ease of faucet replacement,Moen recommends the useof these helpful tools.Safety GlassesMeasuring TapePi p e J o i n tCo m po u ndTorchSafety GlassesFront ViewFront ViewWire BrushPhillips ScrewdriverMeasuring TapePipe Joint CompoundTube CutterCrescent Wrench Thread Seal Tape Phillips ScrewdriverLead-free Solder KitThermometerThread Seal TapeFull Circle Crimping Tool ThermometerPi p e J o i n tCo m po u ndBack ViewTubing CutterPipe Joint CompoundCrescent WrenchFlashlightBack ViewKey Hole SawIPS – (Galvanized Iron Pipe/Threaded Connections)FlashlightKey Hole SawCPVCHelpful ToolsHelpful ToolsFor safety and ease of faucet replacement,Moen recommends the useof these helpful tools.For safety and ease of faucet replacement,Moen recommends the useof these helpful tools.Pi p e J o i n tCo m pou ndSafety GlassesFront ViewMeasuring TapeThermometerSafety GlassesFront ViewMeasuring TapeCrescent WrenchCrescent Wrench Thread Seal Tape Phillips ScrewdriverPipe Joint CompoundThread Seal Tape Phillips ScrewdriverCPVCCle a n erCP VCC e m e ntPi p e J o i n tCom po u ndAdjustable WrenchBack ViewFlashlightPipe Joint CompoundKey Hole SawCAUTION – TURN HOT & COLD WATER SUPPLIES OFF BEFORE REMOVING YOUR CURRENT FAUCET OR DISASSEMBLING YOUR CURRENTVALVE. OPEN FAUCET HANDLE TO RELIEVE WATER PRESSURE ANDENSURE COMPLETE WATER SHUT-OFF HAS BEEN ACCOMPLISHED.E4CPVC Cement Thermometer CPVC Cleaner Tubing CutterFlashlightBack ViewKey Hole SawCAUTION – TURN HOT & COLD WATER SUPPLIES OFF BEFORE REMOVING YOUR CURRENT FAUCET OR DISASSEMBLING YOUR CURRENTVALVE. OPEN FAUCET HANDLE TO RELIEVE WATER PRESSURE ANDENSURE COMPLETE WATER SHUT-OFF HAS BEEN ACCOMPLISHED.E5
2. Installation Schematics –Measuring for Ideal Tub/Shower PerformanceInstallation of this product at non-recommended measurements maylead to issues such as water discharge from the showerhead duringtub fill mode.2.13. Installing Your Valve3.132" (813m6“ (m)159" 2m(229 m)mm Min.) Max.Use 1/2” Copper orIPS Pipe Only78" (1981mm)2-1/4" min.(57mm)3-1/2" max.(89mm)E45(114 "- 48"3-1219mm)Thin Wall InstallationFor Walls Thinner Than 1/4 inch3.1 The “Thin Wall” method is used when thetub/shower wall is less than 1/4 inches thick(such as fiberglass tub surround) and willbe the main source of support for the valve.Ensure cartridgeThe plaster ground (E) remains attached toretainer clip isthe valve. A 2-1/4 inches to 3-1/2 inches diaminstalled prior toeter hole is cut thru the wall for this method.escutcheon3.2Break away the black plastic protective coverinstallation.using pliers and rotating clockwise.3.3 Remove the escutcheon screws (G), place productidentification label (P) on back of escutcheon, makesure wall is clean, place the escutcheon (F) over thestop tube (B), then reinstall the screws (G). A gasketon the back of the escutcheon provides a sealagainst the finished wall.See step 4.3 for tub spout tube length.The center of the valve should be 45 inches to 48 inchesabove the shower stall floor. The shower arm shouldbe placed 78 inches above the floor of the shower stallfloor (recommended installation of the shower arm iswith a flanged elbow fitting – not included – andattached to a wood brace).E3/4"(19mm)Position the valve body 32 inches from the floor of thetub basin. The shower arm should be placed 78 inchesabove the floor of the tub basin (recommendedinstallation of the shower arm is with a flanged elbowfitting – not included – and attached to a wood brace).The tub spout is to be no less than 6 inches and nogreater than 11 inches below the valve. If installing athreaded tub spout, connect to the valve with 1/2 inchpipe or 1/2 inch copper tubing with a threadedadapter. If installing a slip-fit tub spout, connect tothe valve with only copper tubing – no threadedadapter is needed.Shower Only2.23.3BFP12FGo To Step 4.13G3.4more than 1/4"(6mm)4-1/2"(114mm)EE63.2less than 1/4"(6mm)Tub/Shower78" (1981mm)EnglishEnglishINS2152-English INS2152 english spreads 4/26/11 2:13 PM Page 4Thick Wall InstallationFor Walls Thicker Than 1/4 inch3.4 The “Thick Wall” installation method is used whenthe tub/shower wall is greater than 1/4 inches thick.“Thick Walls” are usually built up with materials such ascement board, drywall, tile, etc. The valve is secured bystraps (not included) holding the water inlet lines tothe framing members (2X4’s) as shown in steps 2.1 and2.2. The valve also features mounting holes to screw thevalve to a cross member attached behind the valve ifdesired.Attach the plaster ground (E) to the valve body usingthe 2-3/16 inches escutcheon screws (G). Keep the plaster ground (E) attached to the valve until the valve hasbeen positioned and secured. The plaster ground (E) ispositioned so that it is flush with the finished wall. Thisensures that the valve will be at the correct position toaccept the trim.The hole in the wall should be the same size (4-1/2inches) as the plaster ground (E). This hole will allowaccess for future servicing if necessary.E7
2. Installation Schematics –Measuring for Ideal Tub/Shower PerformanceInstallation of this product at non-recommended measurements maylead to issues such as water discharge from the showerhead duringtub fill mode.2.13. Installing Your Valve3.132" (813m6“ (m)159" 2m(229 m)mm Min.) Max.Use 1/2” Copper orIPS Pipe Only78" (1981mm)2-1/4" min.(57mm)3-1/2" max.(89mm)E45(114 "- 48"3-1219mm)Thin Wall InstallationFor Walls Thinner Than 1/4 inch3.1 The “Thin Wall” method is used when thetub/shower wall is less than 1/4 inches thick(such as fiberglass tub surround) and willbe the main source of support for the valve.Ensure cartridgeThe plaster ground (E) remains attached toretainer clip isthe valve. A 2-1/4 inches to 3-1/2 inches diaminstalled prior toeter hole is cut thru the wall for this method.escutcheon3.2Break away the black plastic protective coverinstallation.using pliers and rotating clockwise.3.3 Remove the escutcheon screws (G), place productidentification label (P) on back of escutcheon, makesure wall is clean, place the escutcheon (F) over thestop tube (B), then reinstall the screws (G). A gasketon the back of the escutcheon provides a sealagainst the finished wall.See step 4.3 for tub spout tube length.The center of the valve should be 45 inches to 48 inchesabove the shower stall floor. The shower arm shouldbe placed 78 inches above the floor of the shower stallfloor (recommended installation of the shower arm iswith a flanged elbow fitting – not included – andattached to a wood brace).E3/4"(19mm)Position the valve body 32 inches from the floor of thetub basin. The shower arm should be placed 78 inchesabove the floor of the tub basin (recommendedinstallation of the shower arm is with a flanged elbowfitting – not included – and attached to a wood brace).The tub spout is to be no less than 6 inches and nogreater than 11 inches below the valve. If installing athreaded tub spout, connect to the valve with 1/2 inchpipe or 1/2 inch copper tubing with a threadedadapter. If installing a slip-fit tub spout, connect tothe valve with only copper tubing – no threadedadapter is needed.Shower Only2.23.3BFP12FGo To Step 4.13G3.4more than 1/4"(6mm)4-1/2"(114mm)EE63.2less than 1/4"(6mm)Tub/Shower78" (1981mm)EnglishEnglishINS2152-English INS2152 english spreads 4/26/11 2:13 PM Page 4Thick Wall InstallationFor Walls Thicker Than 1/4 inch3.4 The “Thick Wall” installation method is used whenthe tub/shower wall is greater than 1/4 inches thick.“Thick Walls” are usually built up with materials such ascement board, drywall, tile, etc. The valve is secured bystraps (not included) holding the water inlet lines tothe framing members (2X4’s) as shown in steps 2.1 and2.2. The valve also features mounting holes to screw thevalve to a cross member attached behind the valve ifdesired.Attach the plaster ground (E) to the valve body usingthe 2-3/16 inches escutcheon screws (G). Keep the plaster ground (E) attached to the valve until the valve hasbeen positioned and secured. The plaster ground (E) ispositioned so that it is flush with the finished wall. Thisensures that the valve will be at the correct position toaccept the trim.The hole in the wall should be the same size (4-1/2inches) as the plaster ground (E). This hole will allowaccess for future servicing if necessary.E7
3.5E3.5 Once the valve is secured in place, removethe escutcheon screws (G) and the plasterground (E). Keep the escutcheon screws (G)for installation of the escutcheon (F) anddiscard the plaster ground (E).3.6 Place product identification label (P) on backof escutcheon, make sure wall is clean,place the escutcheon (F) over the stop tube(B) then re-install the screws (G).A gasket on the back of the escutcheonprovides a seal against the wall.G Ensure cartridgeretainer clip isinstalled prior toescutcheoninstallation.Threaded Tub Spout Installation4.3If this is a shower onlyinstallation, skip tostep 4.4.Tub Spout Installation1JThread seal tape2xy3.6(y) (x) 1/4” Pipe LengthTo determine the proper pipe length, measure from the inside elbowshoulder to the wall (y) and from the threaded adapter inside of thetub spout to the base of the tub spout (x), then add 1/4”.BFP123FIPS (threaded) spouts aredesigned to screw onto apipe with 1/2 inch malepipe threads. To determine the proper pipelength, measure from theinside elbow shoulder tothe wall (y) and from thethreaded adapter insideof the tub spout to thebase of the tub spout (x),then add 1/4”. Placethread seal tape aroundthe pipe threading and asealant (plumbers puttyor caulk) around the baseof the pipe to preventleaking behind the wall.Go To Step 4.1GMoen suggests testing for functionality and checking for leaks before sealing walls.An access panel behind the valve is recommended.4. Installing Your Moen Tub/Shower Trim4.2A4.11A1A12H3Thread Seal TapeCThread Seal TapeWrap thread seal tapearound the threads ofthe shower arm (H) thenscrew the arm into thethreaded connection inthe wall.If there is a rubber washerinside the threadedadapter on the showerhead, continue to step4.2A. If there is no rubberwasher, then proceed tostep 4.2B.22I4.5NO4.4HOR3HHandle InstallationCartridge Orientation4.2BIKDCYES4.2A Plastic Shower BallSeal around the shower armhole with sealant (caulk) thenslide shower flange (A) overshower arm (H). Remove anydebris from the shower armto ensure proper flow. Then,simply thread showerhead (I)onto shower arm (H).E84.2B Metal Shower BallSeal around the showerarm hole with sealant(caulk) then slide showerflange (A) over shower arm(H). Wrap thread seal tapearound threads at bottomof shower arm (H). Removeany debris from the showerarm to ensure proper flow.Thread showerhead (I) ontoshower arm (H).Place the lever (K) ontothe cartridge.Now you are ready to attachthe handle. Rotate so thenotch at the end of the stemis facing down towards thedrain. Insert the key stop (C)and the adjustable limit stop(D) into stop tube as shown.E9EnglishEnglishINS2152-English INS2152 english spreads 4/26/11 2:13 PM Page 5
3.5E3.5 Once the valve is secured in place, removethe escutcheon screws (G) and the plasterground (E). Keep the escutcheon screws (G)for installation of the escutcheon (F) anddiscard the plaster ground (E).3.6 Place product identification label (P) on backof escutcheon, make sure wall is clean,place the escutcheon (F) over the stop tube(B) then re-install the screws (G).A gasket on the back of the escutcheonprovides a seal against the wall.G Ensure cartridgeretainer clip isinstalled prior toescutcheoninstallation.Threaded Tub Spout Installation4.3If this is a shower onlyinstallation, skip tostep 4.4.Tub Spout Installation1JThread seal tape2xy3.6(y) (x) 1/4” Pipe LengthTo determine the proper pipe length, measure from the inside elbowshoulder to the wall (y) and from the threaded adapter inside of thetub spout to the base of the tub spout (x), then add 1/4”.BFP123FIPS (threaded) spouts aredesigned to screw onto apipe with 1/2 inch malepipe threads. To determine the proper pipelength, measure from theinside elbow shoulder tothe wall (y) and from thethreaded adapter insideof the tub spout to thebase of the tub spout (x),then add 1/4”. Placethread seal tape aroundthe pipe threading and asealant (plumbers puttyor caulk) around the baseof the pipe to preventleaking behind the wall.Go To Step 4.1GMoen suggests testing for functionality and checking for leaks before sealing walls.An access panel behind the valve is recommended.4. Installing Your Moen Tub/Shower Trim4.2A4.11A1A12H3Thread Seal TapeCThread Seal TapeWrap thread seal tapearound the threads ofthe shower arm (H) thenscrew the arm into thethreaded connection inthe wall.If there is a rubber washerinside the threadedadapter on the showerhead, continue to step4.2A. If there is no rubberwasher, then proceed tostep 4.2B.22I4.5NO4.4HOR3HHandle InstallationCartridge Orientation4.2BIKDCYES4.2A Plastic Shower BallSeal around the shower armhole with sealant (caulk) thenslide shower flange (A) overshower arm (H). Remove anydebris from the shower armto ensure proper flow. Then,simply thread showerhead (I)onto shower arm (H).E84.2B Metal Shower BallSeal around the showerarm hole with sealant(caulk) then slide showerflange (A) over shower arm(H). Wrap thread seal tapearound threads at bottomof shower arm (H). Removeany debris from the showerarm to ensure proper flow.Thread showerhead (I) ontoshower arm (H).Place the lever (K) ontothe cartridge.Now you are ready to attachthe handle. Rotate so thenotch at the end of the stemis facing down towards thedrain. Insert the key stop (C)and the adjustable limit stop(D) into stop tube as shown.E9EnglishEnglishINS2152-English INS2152 english spreads 4/26/11 2:13 PM Page 5
5. Setting The Temperature Limit Stop and Finishing YourTub/Shower InstallationMoen products have been manufactured under the highest standards of quality andworkmanship. Moen warrants to the original consumer purchaser for as long as the originalconsumer purchaser owns their home (the “Warranty Period” for homeowners), that this faucetwill be leak- and drip-free during normal use and all parts and finishes of this faucet will be freefrom defects in material and manufacturing workmanship. All other purchasers (includingpurchasers for industrial, commercial and business use) are warranted for a period of 5 yearsfrom the original date of purchase (the “Warranty Period” for non-homeowners).5.25.1120F(49C)HOTTESTRotate the lever counterclockwise until the water is to themaximum desired temperature, not to exceed 120 degreesF (49 degrees C). Seasonal maintenance of the maximumoutlet temperature may be required due to changes ingroundwater temperature.TURN LEVER TO THE OFF POSITION ONCE THETEMPERATURE IS SET.Turn on the hot and coldwater supply to check forleaks and set temperaturelimit stop.If temperature exceeds 120 degrees, go to step 5.3.If temperature is less than 120 degrees, go to step 5.4.15.3D5.55.4KK1L1K2Moen Lifetime Limited WarrantyIf this faucet should ever develop a leak or drip during the Warranty Period, Moen will FREE OFCHARGE provide the parts necessary to put the faucet back in good working condition and willreplace FREE OF CHARGE any part or finish that proves defective in material and manufacturingworkmanship, under normal installation, use and service. Replacement parts may be obtainedby calling 1-800-289-6636 (Canada 1-800-465-6130), or by writing to the address shown. Proofof purchase (original sales receipt) from the original consumer purchaser must accompany allwarranty claims. Defects or damage caused by the use of other than genuine Moen parts is notcovered by this warranty. This warranty is applicable only to faucets purchased after December,1995 and shall be effective from the date of purchase as shown on purchaser’s receipt.This warranty is extensive in that it covers replacement of all defective parts and finishes.However, damage due to installation error, product abuse, product misuse, or use of cleanerscontaining abrasives, alcohol or other organic solvents, whether performed by a contractor,service company, or yourself, are excluded from this warranty. Moen will not be responsible forlabor charges and/or damage incurred in installation, repair or replacement, nor for anyindirect, incidental or consequential damages, losses, injury or costs of any nature relating tothis faucet. Except as provided by law, this warranty is in lieu of and excludes all otherwarranties, conditions and guarantees, whether expressed or implied, statutory or otherwise,including without restriction those of merchantability or of fitness for use.Some states, provinces and nations do not allow the exclusion or limitation of incidental orconsequential damages, so the above limitations or exclusions may not apply to you. Thiswarranty gives you specific legal rights and you may also have other rights which vary fromstate to state, province to province, nation to nation. Moen will advise you of the procedure tofollow in making warranty claims. Simply write to Moen Incorporated using the address below.Explain the defect and include proof of purchase and your name, address, area code andtelephone number.Moen Incorporated25300 Al Moen Drive, North Olmsted, Ohio 44070-8022 U.S.A.3 -D2MDRemove the lever (K). Notethe position of the stop.Position the adjustabletemperature limit stop (D)so the lever stops at thatposition. This preventsthe lever or knob frombeing turned into anunsafe temperature.After setting the adjustabletemperature limit stop to thedesired position, reattachlever (K).E10OR insert 2-1/8 inches Phillipsscrew (L). Tighten screw andinsert cap (M).E11EnglishEnglishINS2152-English INS2152 english spreads 4/26/11 2:13 PM Page 6
5. Setting The Temperature Limit Stop and Finishing YourTub/Shower InstallationMoen products have been manufactured under the highest standards of quality andworkmanship. Moen warrants to the original consumer purchaser for as long as the originalconsumer purchaser owns their home (the “Warranty Period” for homeowners), that this faucetwill be leak- and drip-free during normal use and all parts and finishes of this faucet will be freefrom defects in material and manufacturing workmanship. All other purchasers (includingpurchasers for industrial, commercial and business use) are warranted for a period of 5 yearsfrom the original date of purchase (the “Warranty Period” for non-homeowners).5.25.1120F(49C)HOTTESTRotate the lever counterclockwise until the water is to themaximum desired temperature, not to exceed 120 degreesF (49 degrees C). Seasonal maintenance of the maximumoutlet temperature may be required due to changes ingroundwater temperature.TURN LEVER TO THE OFF POSITION ONCE THETEMPERATURE IS SET.Turn on the hot and coldwa
fitting - not included- and attached to a wood brace). The tub spout is to be no less than 6 inches and no greater than 11 inches below the valve. If installing a threaded tub spout, connect to the valve with 1/2 inch pipe or 1/2 inch copper tubing with a threaded adapter. If installing a slip-fit tub spout, connect to