Transcription
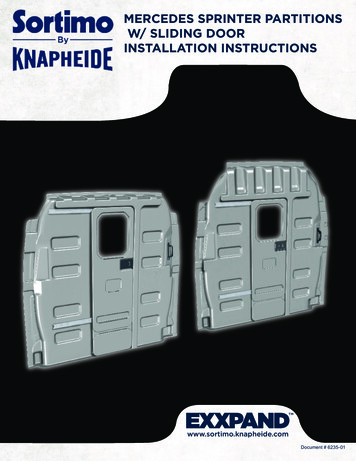
MERCEDES SPRINTER PARTITIONSW/ SLIDING DOORINSTALLATION INSTRUCTIONSwww.sortimo.knapheide.comDocument # 6235-01
MERCEDES SPRINTER PARTITIONSW/ SLIDING DOORINSTALLATION INSTRUCTIONSThe following instructions detail the procedure for installing a Sortimo By Knapheide ProtexxPartition in a Mercedes Sprinter. This guide is intended to walk you through a step bystep installation. Please read these instructions thoroughly prior to beginning the partitioninstallation.ContentsHardware . 3Partition Preparation . 4Partition Installation . 5-11Warranty and Limitation of LiabilitySORTIMO N.A. warrants its van interior equipment to be free from defects in materialand workmanship, under normal use and service for a period of three years or 36,000miles, whichever occurs first, after the date of delivery to the original retail purchaser,when installed by an authorized SORTIMO Distributor and/or SORTIMO N.A. Upfit facility.Products not installed by an authorized SORTIMO Distributor and/or SORTIMO Upfitfacility will not be subject to any warranty whatsoever and ANY AND ALL WARRANTIESWHATSOEVER RELATIVE TO SUCH SALES ARE HEREBY FULLY AND EXPRESSSLYDISCLAIMED. This warranty only provides for the following remedy: repairs at the pointof SORTIMO N.A.’s main place of business or any of its Distributor locations, or partreplacements in part or in full to correct any defects related to material and workmanship.This warranty does not apply to products not installed by an authorized SORTIMODistributor and/or SORTIMO N.A. Upfit facility.2Document # 6235-01
MERCEDES SPRINTER PARTITIONSW/ SLIDING DOORINSTALLATION INSTRUCTIONSHARDWARE & COMPONENTS(15) Ribbed Riv-nut1/4-20(15) Sealing Washer.43 x 1.00(9) Whiz Bolt1/4-20 x 1(6) Flange Bolt1/4-20 x 1-1/2(1) Partition ShimPart# 26268227CAUTION: Use of hardware other than provided, or alternative installation methods otherthan outlined herein, may void the product warranty. Fasteners should be snug, but notovertightened. Use caution when using air or battery operated tools.Document # 6235-013
MERCEDES SPRINTER PARTITIONSW/ SLIDING DOORINSTALLATION INSTRUCTIONSPARTITION PREPARATION1.1 After removing the partition from itspackaging, check for pre-drilled holes atthese locations.If holes are not present, drill a3/16” hole at each dimple location. Hole sizemay need to be increased during installationto align with holes in the sheet metal.1.2 Prior to installing the partition in the van,remove both D-rings.4Document # 6235-01
MERCEDES SPRINTER PARTITIONSW/ SLIDING DOORINSTALLATION INSTRUCTIONSPARTITION INSTALLATIONWARNING!Prior to drilling into any part of a vehicle, check behind andunderneath drilling and mounting locations for electrical wire, fuellines, brake lines, and other critical vehicle components. Adjust thedrilling location as required to avoid these components. Failure to doso can result in death or serious injury in addition to impairing criticalvehicle functions.IMPORTANT NOTICE:THE PARTITION IS DESIGNED TO SITON TOP OF THE FACTORY SUBFLOOR(SHOWN). IF NO FACTORY FLOOR ISPRESENT, SEE STEP 2.1.Document # 6235-015
MERCEDES SPRINTER PARTITIONSW/ SLIDING DOORINSTALLATION INSTRUCTIONSPARTITION INSTALLATION2.1 When a factory floor is not present, positionthe partition shim (P/N 26268227) as shown.If a factory floor is present, discard the shimand proceed to Step 2.2.2.2 If the van is equipped with B-pillar trim (asshown), it must be modified before positioningthe partition.6Document # 6235-01
MERCEDES SPRINTER PARTITIONSW/ SLIDING DOORINSTALLATION INSTRUCTIONSPARTITION INSTALLATION2.3 The rear portion of factory installed B-pillartrim must be removed with a cutting wheelto expose the steel mounting surface of theB-pillar.Remove the rubber door seal and pull backthe B-pillar trim to check for items behind thetrim that could be damaged by the cuttingwheel.Completely remove the plastic B-pillar trim, ifnecessary, to modify it outside of the vehicle.REMOVERe-install the modified trim on the B-pillar.2.4 The partition must attach directly to theB-pillar steel (NOT to, or through theplastic trim).Document # 6235-017
MERCEDES SPRINTER PARTITIONSW/ SLIDING DOORINSTALLATION INSTRUCTIONSPARTITION INSTALLATION2.5 Position the partition in the van. Tilt the topof the partition forward and slide the bottomfirmly in place all around.NOTE: The partition must fit firmly in placeprior to marking mounting holes to be drilledin the van structures.2.6 This photo shows the partition in a van notequipped with an OEM cargo subfloor.SHIM2.7 Use the partition as a template to markmounting hole locations all around.Be sure to mark the mounting hole locationson the cab side floor.WARNING!Prior to drilling into any part of avehicle, install a drill bit collar onthe drill bit at the minimal requiredcutting depth.8Document # 6235-01
MERCEDES SPRINTER PARTITIONSW/ SLIDING DOORINSTALLATION INSTRUCTIONSPARTITION INSTALLATION2.8 Remove the partition from the van.Use a 25/64” drill bit equipped with a drill bitcollar to drill mounting holes for 1/4-20 rivnuts in all the previously marked locations.2.9 Install riv-nuts in all mounting hole locations.2.10 Drill pilot holes in marked locations throughthe subfloor only!DO NOT drill through the metal floor of thevan at this time!2.11 In the pre-drilled locations, use a 1” hole sawto cut through the subfloor only.Document # 6235-019
MERCEDES SPRINTER PARTITIONSW/ SLIDING DOORINSTALLATION INSTRUCTIONSPARTITION INSTALLATION2.12 Use a 25/64” drill bit equipped with a drillbit collar to drill mounting holes through themetal van floor for 1/4-20 riv-nuts.Install (4) 1/4-20 ribbed riv-nuts in the vanfloor.2.13 Reposition the partition in the van as donepreviously.2.14 Secure the partition to the van at bothB-Pillars and across the roof with 1/4-20 x 1”flange bolts and sealing washers.2.15 Secure the partition to the van floor with 1/420 x 1-1/2” flange bolts and sealing washers.10Document # 6235-01
MERCEDES SPRINTER PARTITIONSW/ SLIDING DOORINSTALLATION INSTRUCTIONSPARTITION INSTALLATION2.16 Re-install both cargo D-rings.Low roof partition installation complete.High roof partition installation complete.Document # 6235-0111
sortimo.knapheide.com 844-EXXPANDThe Knapheide Manufacturing Company1848 Westphalia StrasseQuincy, IL 62305Sortimo North America3055 Northwoods Circle NWNorcross, GA 30071126235-01June 2017Document # 6235-01
INSTALLATION INSTRUCTIONS www.sortimo.knapheide.com Document # 6235-01. MERCEDES SPRINTER PARTITIONS W/ SLIDING DOOR INSTALLATION INSTRUCTIONS . MERCEDES SPRINTER PARTITIONS W/ SLIDING DOOR INSTALLATION INSTRUCTIONS Document # 6235-01 3 HARDWARE & COMPONENTS (15) Sealing Washer.43 x 1.00 (15) Ribbed Riv-nut 1/4-20 (9) Whiz Bolt