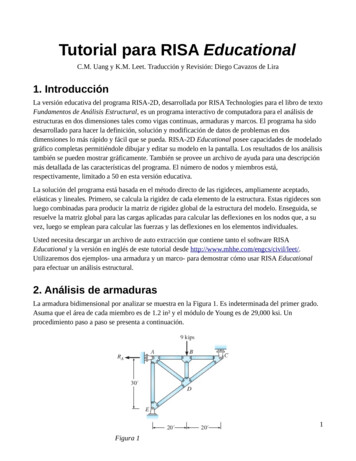
Transcription
RISA-2DRapid Interactive Structural Analysis – 2-DimensionalVersion 8.1 User’s Guide26632 Towne Centre Drive, Suite 210Foothill Ranch, California 92610(949) 951-5815(949) 951-5848 (FAX)www.risatech.com
Copyright 2008 by RISA Technologies, LLC. All rights reserved.No portion of the contents of this publication may be reproduced or transmitted in any means without the expresswritten permission of RISA Technologies, LLC.We have done our best to insure that the material found in this publication is both useful and accurate. However,please be aware that errors may exist in this publication, and that RISA Technologies, LLC makes no guaranteesconcerning accuracy of the information found here or in the use to which it may be put.
Table of ContentsTable of ContentsBefore You Begin1How to Use the Manuals .1License Agreement .2Installation .4Technical Support .4Maintenance .4Overview5Defining the Model .5Solving the Model.5Reviewing the Results .5Important Assumption! .6Conventions Used in the Tutorials .6Multiple Windows .43Entering Spreadsheet Data .46Drawing Concrete Members .47Boundary Conditions .49Saving Your Data .52Tutorial 2 – Modifying53Making Changes to an Item .53Model View .55Plot Options .57Multiple Views .58Selection Tools.59Making Changes to Selections .62Modify Members.63First Look at RISA-2D7Starting RISA-2D.7Main Menu .8Toolbars .9Workspace .11Windows .11Status Bar .14Getting Help .14What’s Ahead .15Tutorial 1 – Modeling17Starting a New File .17Automatically Generating with Templates .17Global Parameters .18Members .21Drawing Grid .23Drawing Members .24Physical Members .33Material Properties .34Design Rules – Size/UC .35Design Rules – Concrete Rebar.36Model Rendering .64Copying Model Elements .65Connecting Along Members .66Model Merge .69Selecting By Properties .70Modify Members.71Scaling Elements .73Design Parameters .75Sorting .76Tutorial 3 – Loading79Load Cases, Categories and Combinations . 79Load Direction Options .80Joint Loads .80Distributed Loads .82Basic Load Case Spreadsheet .83Copying Loads .84Self-weight .85Load Categories .85Load Combinations .86Displaying Loads .89Section Sets Spreadsheet .36I
RISA-2D 8.1 User’s GuideTutorial 4 – Solving & Results91Solving the Model . 91Graphic Results . 93Plotting Deflected Shapes . 94Animation . 94Color-Coding Member Results . 95Member Detail Report . 96Printing Graphic Results . 98IITiling Results Windows . 99Batch Solution . 99Envelope Solution . 101Code Check Results . 101Optimizing Member Sizes. 101Excluding Results . 102Printing Desired Results . 103Conclusion106
Before You BeginBefore You BeginHow to Use the ManualsThis Guide is designed to be read in two ways. If you are already familiar with structural modeling in general youcan skip the supporting text and read only the underlined action items to move through the tutorials very quickly.To do this read the rest of this Before You Begin section and then skip to page 7 and look for the underlined actionitems. If you want more thorough explanations of the modeling process you may read all or some of the supportingtext as you see fit.The tutorials are intended for the first time user of RISA-2D or those who need a refresher on how the programworks. To complete this guide in its entirety will take less than an hour if you perform only the underlined actionitems mentioned above or 2 to 3 hours if you read all of the supporting text. We’ve broken the tutorials up so youdon’t have to do it all at once.The tutorial is intended to teach you the basics of defining and solving models in RISA-2D, and also how to reviewthe results. We won’t go into a lot of depth regarding the analytical aspects of RISA-2D here; that’s what theRISA-2D General Reference manual and on-line help file are for. What we will cover is how and when to applyRISA-2D features to help you be most productive. For example, we’ll perform steel, wood, and concrete code checksin this tutorial, but we won’t discuss the specifics of how those code checks are calculated; that is covered inexcruciating detail in the General Reference manual and also in the help file.After you have gone through the User’s Guide, use the General Reference and On-line Help for detailedinformation on any topic. The topics are summarized in the table of contents and are thoroughly indexed.1
RISA-2D 8.1 User’s GuideLicense AgreementEND-USER LICENSE AGREEMENT FOR RISA TECHNOLOGIES, LLC SOFTWARE:The RISA-2D software product (SOFTWARE PRODUCT) includes computer software, the associated media,any printed materials, and any electronic documentation. By installing, copying or otherwise using theSOFTWARE PRODUCT, you agree to be bound by the terms of this agreement. If you do not agree with theterms of this agreement RISA Technologies, LLC is unwilling to license the SOFTWARE PRODUCT to you. Insuch event you must delete any installations and destroy any copies of the SOFTWARE PRODUCT and returnthe SOFTWARE PRODUCT to RISA Technologies, LLC within 60 days of purchase for a full refund.Copyright 2008 by RISA Technologies, LLC. All rights reserved. The SOFTWARE PRODUCT is protected byUnited States copyright laws and various international treaties. All rights not specifically granted under thisagreement are reserved by RISA TECHNOLOGIES, LLC.1. SOFTWARE LICENSE. The SOFTWARE PRODUCT is licensed, not sold. All right, title and interest isand remains vested in RISA TECHNOLOGIES, LLC. You may not rent, lease, or lend the SOFTWAREPRODUCT. You are specifically granted a license to the use of this program on no more than one CPU at anygiven time. The Network Version of the SOFTWARE PRODUCT is licensed for simultaneous use on a certainmaximum number of network stations that varies on a per license basis. As part of the license to use theSOFTWARE PRODUCT, the program user acknowledges the reading, understanding and acceptance of all termsof this agreement. The SOFTWARE PRODUCT may not be reviewed, compared or evaluated in any manner inany publication without expressed written consent of RISA Technologies, LLC. You may not disassemble,decompile, reverse engineer or modify in any way the SOFTWARE PRODUCT. If the SOFTWAREPRODUCT was purchased at a discounted price for educational purposes it may in no event be used forprofessional design purposes. The terms of this license agreement are binding in perpetuity.2. DISCLAIMER. We intend that the information contained in the SOFTWARE PRODUCT be accurate andreliable, but it is entirely the responsibility of the program user to verify the accuracy and applicability of any resultsobtained from the SOFTWARE PRODUCT. The SOFTWARE PRODUCT is intended for use by professionalengineers and architects who possess an understanding of structural mechanics. In no event will RISA Technologies,LLC or its officers be liable to anyone for any damages, including any lost profits, lost savings or lost data. In noevent will RISA Technologies, LLC or its officers be liable for incidental, special, punitive or consequential damagesor professional malpractice arising out of or in connection with the usage of the SOFTWARE PRODUCT, even ifRISA Technologies, LLC or its officers have been advised of or should be aware of the possibility of such damages.RISA TECHNOLOGIES, LLC' entire liability shall be limited to the purchase price of the SOFTWAREPRODUCT.3. LIMITED WARRANTY. RISA Technologies, LLC warrants that the SOFTWARE PRODUCT will operatebut does not warrant that the SOFTWARE PRODUCT will operate error free or without interruption. RISATechnologies, LLC sole obligation and your exclusive remedy under this warranty will be to receive software support2
Before You Beginfrom RISA Technologies, LLC via telephone, e-mail or fax. RISA Technologies, LLC shall only be obligated toprovide support for the most recent version of the SOFTWARE PRODUCT. If your version of the SOFTWAREPRODUCT is not the most recent version RISA Technologies, LLC shall have no obligation to provide support inany form. Except as stated above the SOFTWARE PRODUCT is provided without warranty, express or implied,including without limitation the implied warranties of merchantability and fitness for a particular purpose.4. PROTECTION DEVICE. In the event the SOFTWARE PRODUCT requires the use of a PROTECTIONDEVICE to operate, you are specifically prohibited from attempting to bypass the functionality of thePROTECTION DEVICE by any means. If the PROTECTION DEVICE becomes broken or inoperable itshould be returned to RISA TECHNOLOGIES, LLC for a replacement. The replacement will not be provided ifRISA TECHNOLOGIES, LLC can not affirm that the broken PROTECTION DEVICE was originallyprovided by RISA TECHNOLOGIES, LLC for use with the SOFTWARE PRODUCT. A lost or stolenPROTECTION DEVICE will not be replaced by RISA TECHNOLOGIES, LLC.5. TERMINATION. RISA TECHNOLOGIES, LLC may terminate your right to use the SOFTWAREPRODUCT if you fail to comply with the terms and conditions of this agreement. In such event you must deleteany installations and destroy any copies of the SOFTWARE PRODUCT and promptly return the SOFTWAREPRODUCT to RISA Technologies, LLC.6. CHOICE OF LAW. By entering into this Agreement in accordance with Paragraph 1, above, you have agreedto the exclusive jurisdiction of the State and Federal courts of the State of California, USA for resolution of anydispute you have relating to the SOFTWARE PRODUCT or related goods and services provided by RISATechnologies, LLC. All disputes therefore shall be resolved in accordance with the laws of the State of California,USA and all parties to this Agreement expressly agree to exclusive jurisdiction within the State of California, USA.No choice of law rules of any jurisdiction apply."RISA" as applied to structural engineering software is a trademark of RISA Technologies, LLC.3
RISA-2D 8.1 User’s GuideInstallationTo install RISA-2D please follow these instructions:1) Put the RISA-2D CD in your computer CD drive.2) If the CD starts automatically go to step 4. If the CD does not start after 10 seconds click the WindowsStart button and select Run.3) In the Run dialog box type “d:\launch” (where “d” is the label of your CD drive) and then click the OKbutton.4) Follow the on-screen instructions.Technical SupportComplete program support is available to registered owners of RISA-2D and is included in the purchase price. Thissupport is provided for the life of the program. See the RISA-2D General Reference or Help file for a list of yoursupport options.The “life of the program” is defined as the time period for which that version of the program is the current version.In other words, whenever a new version of RISA-2D is released, the life of the previous version is considered to beended.RISA Technologies, LLC will support only the current version of RISA-2D.MaintenanceProgram maintenance provides all upgrades to RISA-2D.When your maintenance expires, you will be given the opportunity to continue program maintenance on an annualbasis. You are under no obligation to continue program maintenance, of course, but if you decide to discontinuemaintenance you will no longer receive RISA-2D program upgrades and technical support.4
OverviewOverviewUsing computer software to perform structural design is essentially a three-step process. First, you define yourmodel. Next you solve that model to obtain solution results. Last, you review those solution results to see how yourmodel performed and determine if changes are needed. Usually you will need to repeat the cycle several times beforeyou arrive at a final design. The purpose of RISA-2D is to speed up this process.RISA-2D mainly has two complimentary sets of tools; graphics based drawing tools and customized spreadsheets.We say “complimentary” because these tools work together very closely. Everything that you do graphically isautomatically recorded in the spreadsheets for you. You may view and edit these spreadsheets at any time. Theconverse is also true; what you enter and view in the spreadsheets may be viewed and edited graphically at any time.You will be thoroughly exposed to both sets of these tools in this tutorial.Defining the ModelSome data such as cross section properties, load combinations, oddball joint coordinates, etc. are most easily enterednumerically, and the best tool for numeric input is a spreadsheet. Other data such as regularly spaced joints, memberconnectivity, regular loadings and wholesale changes are better handled using graphic drawing tools.Typically you’ll use the spreadsheets to define some preliminary information such as material and section properties.Then you will proceed to the drawing grid and graphically draw the bulk of your model and apply loads.Other graphic edit features are built around RISA-2D’s graphic selection tools. These features let you graphicallyedit the model or parts of it. For example, to modify boundary conditions, you would choose the condition you wantto apply and select the joints to modify.Keep in mind that almost all the model data can be edited either way (graphically or numerically in the spreadsheet).You can decide for yourself which method is preferable.Solving the ModelOnce you’ve got the model defined, you’ll need to solve the model. RISA-2D features fast 32-bit solution speed, soyour model solutions will be pretty quick. Once the model is solved you’ll be presented with the results.Reviewing the ResultsYou can review your results graphically or with the spreadsheets. Spreadsheet solution results (displacements, forces,stresses, etc.) are listed on the Results menu. You can sort and filter these results to get exactly what you want. Inthe graphic views you can click on the Plot Options button and choose the results that you want to display; forcediagrams, deflected shapes, etc.5
RISA-2D 8.1 User’s GuideImportant Assumption!The tutorial is written with the assumption that RISA-2D has not been customized and is in the default, installedstate. RISA-2D allows you to customize its settings so that it best suits your needs. If the installation of RISA-2Dthat you are using has been customized then the options may not agree with those that are assumed here, which maylead to some confusion. You may reset the program defaults by selecting this option in the Preferences on the Toolsmenu.Conventions Used in the TutorialsAction ItemsThis tutorial builds upon itself from start to finish and it is important that you do not miss a step and get off track.To help you avoid overlooking a step we have underlined the action items that call for you to actually do somethingon your computer. If you wish to work through the tutorial quickly you may scan for the action items and read thedetails that interest you.Using the MouseWhen we say to “click” something with the mouse, we mean move the mouse so the mouse pointer on the screen ison the object, once there, press and release the left mouse button. Occasionally we will want you to click theRIGHT button. In this case we will expressly say to click the RIGHT button. If we say click something withoutmentioning which button, click the left button.Using the KeyboardDuring the tutorial, entries you are to type will be shown like this:12 , 10 , .When you see an entry such as this, type it in exactly as listed, except don't type the commas! When something is listedin brackets ([ ]), it means press the particular key. For example, [Enter] means press the “Enter” key, [Spacebar]means press the space bar, etc. “Alt-”and “Ctrl-” mean press the listed key while holding down the Alt or Ctrlkey. [F1], [F2], . mean press the indicated function key at the top of the keyboard.6
First Look at RISA-2DFirst Look at RISA-2DStarting RISA-2DSo lets take a quick first look at RISA-2D and then we’ll begin the tutorial.Start the program as shown below by clicking on the Start button and then choose Programsand then RISA and finally RISA-2D.The remainder of this chapter will give an overall guide of what you have in front of you. (The next action item is onpage 17.)7
RISA-2D 8.1 User’s GuideThe RISA-2D logo image in the center of the screen will disappear after a few seconds. Lets take a moment toexplain what you have in front of you.Title BarThe bar along the top of the screen is called the title bar. It contains the name of the file that is currently open inRISA-2D. The three buttonson the far right side of the title bar are used to control the main window. Thebutton will shrink RISA-2D to a button on the taskbar. Theyour screen. Thebutton will shrink the RISA-2D window onbutton will close RISA-2D, prompting you to save changes if necessary. You will also see thesebuttons in other RISA-2D windows and they have basically the same functions there as well.Main MenuJust beneath the title bar is the RISA-2D main menu beginning with File on the far left and ending with Help onthe far right. These menus provide access to all of the features RISA-2D has to offer. Clicking on each of thesemenus will display sub-menus that contain options that you may choose from. The toolbar buttons mentioned in thenext section provide easy access to many of these menu options.File Menu – The File menu helps you access file operations such as opening and saving, importing, exporting andappending files.Edit – The Edit menu provides editing tools that help you modify and manipulate the spreadsheets. You may usethis menu to add or remove information from the spreadsheets or to sort and mathematically operate currentspreadsheet data.Global – The Global parameters allow you to set options that apply to the entire model such as steel code, sheardeformation and warping effects, p-delta options and model descriptions and notes.Units – This option takes you to the Units dialog where you can choose different units and convert existing data.View – Use the View menu to open a new model view or to adjust the current view.Insert – The Insert menu is used to insert joints, members, plates and loads into the model. All of these items maybe input graphically or entered in the spreadsheets. This menu gives access to the graphical methods that RISA-2Dprovides and the Spreadsheet menu helps you access the spreadsheets.Modify – The Modify menu gives access to the graphic editing features and may be used to modify existing joints,members, plates and loads.Spreadsheets – You may open any of the input spreadsheets from this menu.Solve – Use this menu to access the analysis options provided with RISA-2D.8
First Look at RISA-2DResults – All analysis result spreadsheets may be accessed from this menu.Tools – RISA-2D provides features to help you organize identify and correct problems as you model the structure.Program preferences are also located here.Window – The Window menu can be used to manage all of the windows that you have open in RISA-2D whetherthey are spreadsheets or model views. Special tiling options are provided here that are geared to specific modelingtasks.Help – Use this menu to access the extensive on-line help system provided with RISA-2D.ToolbarsRISA-2D has toolbars with buttons to help you access common commands and popular options. All you need tonote at this time is where the toolbar is. If at any time you are not sure what a particular button does, simply let yourmouse hover over the button and a helpful tip will pop up and explain the button.RISA ToolbarThe RISA Toolbar is the first horizontal row of buttons beneath the menu. These buttons perform general actionssuch as opening and closing files, changing design parameters, printing, and solving the model.Now is a good time to note that there are many ways to access the features available to you in RISA-2D and themethod that you will use will simply be a matter of personal preference. The good news is that RISA-2D gives youthe options. The tutorial will tend to lean to the use of toolbar buttons but be aware that the menu contains thesame options and there are shortcut keys and hot keys that can’t be beat in the interest of speed.Window ToolbarThe Window Toolbar is the second horizontal toolbar. It gets its name because the buttons change as you movefrom window to window in order to help you with what you are currently doing. When you are working in a graphicmodel view the buttons above provide tools, such as rotate and zoom, to assist you with that view.When you are working in a spreadsheet, this toolbar will contain the buttons similar to those below, which providespreadsheet tools such as Fill and Math.Drawing Toolbar9
RISA-2D 8.1 User’s GuideThe Drawing Toolbar is the third horizontal toolbar and is displayed in the figure above. This toolbar may beturned on and off as needed to help you with graphic editing.Selection ToolbarThe Selection Toolbar is the vertical toolbar along the left side of the screen. It provides selection tools to helpyou work with parts of the model. You will make selections when you do things like graphically edit only part ofthe model or print only part of the results. This toolbar only works with the model view windows so if you areworking in another window such as a spreadsheet, this toolbar will not be seen.10
First Look at RISA-2DSpreadsheet ToolbarsThe vertical toolbar on the left of your screen is the DataEntry Toolbar. It looks a bit different because it has largerbuttons with text on them, instead of pictures. This toolbar isto assist you in accessing the spreadsheets while building amodel. The buttons are generally in the order in which youwould typically build a model. We will use this toolbarfrequently as we work through the tutorial.A similar Results Toolbar (right) is presented after the modelhas been solved to help you access the result spreadsheets.These toolbars may be turned on and off by clickingWorkspaceandon the RISA Toolbar.The actual work that you do in RISA-2D will be in the main area on the screen, which we will call the workspace.Currently the workspace contains a white model view with the default drawing grid and the New Model options.(We will see how to change the default grid and many other defaults as we go along.) As we open new model viewsand spreadsheets they will also appear in the workspace. This brings us to the types of windows that we can workwith.WindowsYou will work within model views and spreadsheets, each in their own window that may be moved around theworkspace and sized as you wish. A powerful feature of RISA-2D is the ability to have multiple model views and11
RISA-2D 8.1 User’s Guidemultiple spreadsheets open at one time. The options in the Window menu are provided to help you manage thesewindows.Notice in the windows above, the same three buttonsare located in the upper right corner to help youminimize, maximize and close the window. There are also scroll bars to help you view information that is outside ofthe window viewing area. Click the scroll bar buttons or drag the scroll box to advance the display in one directionor another.ViewsYou may open as many model view windows as you like. This is especially helpful when working in close on largemodels. You might have one overall view and a few views zoomed in and rotated to where you are currentlyworking. You may have different information plotted in each view.One thing to remember is that the toolbars that RISA-2D displays depend upon what window is active. The activewindow is the one with the colored title bar. For example, if you are looking for the zoom toolbar button and theactive window is a spreadsheet. You need to select a model view first before you can access the zooming tools.12
First Look at RISA-2DSpreadsheetsSpreadsheets are made up of rows and columns of data cells. If you wish to add or edit data in a spreadsheet cell youclick on the cell, making it the “active” cell and then edit the cell. There is always one and only one active cell, whichis the cell that has the “attention” of the keyboard. This “active cell” is simply the green cell that moves around thespreadsheet as you hit the cursor keys ( , ), Page Up, Page Down, Home, End, etc.You may also select blocks of cells to work on. To select a block of cells, click and hold the mouse button on the firstcell in the block and then drag the mouse to the opposite corner of the block and release the mouse. To select anentire row or column simply click the row or column button. You may select multiple rows or columns by clickingand dragging the mouse across multiple row or column buttons.DialogsDialog windows are windows that help you perform a specific function within the program. For example if you wereto select Open from the File menu you will be presented with the dialog box above, which helps you find the fileyou wish to open. You will find that dialogs are very easy to work with. There are Help buttons that will bring you13
RISA-2D 8.1 User’s Guidedirectly to the relevant topic in the help file. You may also click on thebutton in the title bar, and then click onany item in the dialog to get help for that item.Status BarThe status bar across the bottom of the screen is to pass information to you as you work with RISA-2D. This barhas four parts. The left side of the bar has the letters “S”, “D” and “R” to indicate the solved state of the model forStatic, Dynamic and Response Spectra solutions. The letters are currently gray to indicate that none of thesesolutions have been performed. After performing a solution you will notice these letters become blue and acheckmark is placed in front of them.To the right of the solved status flags are three boxes which will pass you information while you work. These arecalled status boxes. The first status box is used to pass general information that is relevant to what you are currentlydoing. Look to this box for help as you need it.The middle message box is used to report the units of the current spreadsheet cell. As you move from cell to celllook to the middle status box for the appropriate units. Currently the box is empty because we are not working in aspreadsheet.The status box on the right is used to pass the mouse coordinates to you as you work in the model view. We willpoint this out again and use it to help us throughout the tutorial.Getting HelpRISA-2D offers a variety of ways to find help with the program in general or with a specific feature. There are threetypes of help available within RISA-2D: General Help, Window Help and “What’s This?”.Help TopicsUse thetoolbar button to open the three-tabbed help window below and search on your own. The first tab,Contents, displays the list of major content areas that you may choose from by double clicking on them. The Indextab allows you to search for help topics based on keywords. The third tab, Search, is a more detailed search thatallows you to search the actual text of the topics to locate the keywords that you enter.14
First Look at RISA-2DOnce you have a topic open there are a number of options available to you that make Help even more useful. Clickthe menu o
END-USER LICENSE AGREEMENT FOR RISA TECHNOLOGIES, LLC SOFTWARE: The RISA-2D software product (SOFTWARE PRODUCT) includes computer software, the associated media, any printed materials, and any electronic documentation. By installing, copying or otherwise using the SOFTWARE PRODUCT, you agree to be bound by the terms of this agreement.
