Transcription
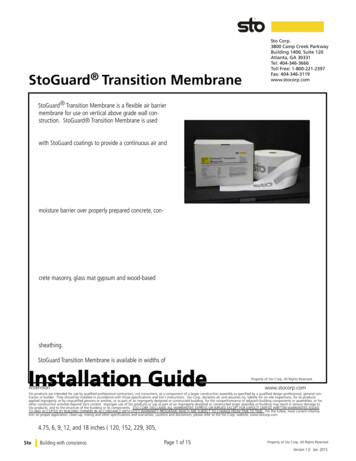
RStoGuard Transition MembraneSto Corp.3800 Camp Creek ParkwayBuilding 1400, Suite 120Atlanta, GA 30331Tel: 404-346-3666Toll Free: 1-800-221-2397Fax: 404-346-3119www.stocorp.comStoGuard Transition Membrane is a flexible air barriermembrane for use on vertical above grade wall construction. StoGuard Transition Membrane is usedwith StoGuard coatings to provide a continuous air andmoisture barrier over properly prepared concrete, con-crete masonry, glass mat gypsum and wood-basedsheathing.StoGuard Transition Membrane is available in widths ofI n st a l l a t i o n G u i d eAttentionProperty of Sto Corp. All Rights Reserved.www.stocorp.comSto products are intended for use by qualified professional contractors, not consumers, as a component of a larger construction assembly as specified by a qualified design professional, general contractor or builder. They should be installed in accordance with those specifications and Sto‘s instructions. Sto Corp. disclaims all, and assumes no, liability for on-site inspections, for its productsapplied improperly, or by unqualified persons or entities, or as part of an improperly designed or constructed building, for the nonperformance of adjacent building components or assemblies, or forother construction activities beyond Sto’s control. Improper use of Sto products or use as part of an improperly designed or constructed larger assembly or building may result in serious damage toSto products, and to the structure of the building or its components. STO CORP. DISCLAIMS ALL WARRANTIES EXPRESS OR IMPLIED EXCEPT FOR EXPLICIT LIMITED WRITTEN WARRANTIES ISSUEDTO AND ACCEPTED BY BUILDING OWNERS IN ACCORDANCE WITH STO‘S WARRANTY PROGRAMS WHICH ARE SUBJECT TO CHANGE FROM TIME TO TIME. For the fullest, most current information on proper application, clean-up, mixing and other specifications and warranties, cautions and disclaimers, please refer to the Sto Corp. website, www.stocorp.com.4.75, 6, 9, 12, and 18 inches ( 120, 152, 229, 305,StoBuilding with conscience.Page 1 of 15Property of Sto Corp. All Rights ReservedVersion 1.0 Jan. 2015
RInstallation GuideStoGuard Transition MembraneContentsSubjectPageSubjectGeneral Installation Using a StoGuard CoatingGeneral Installation Using a StoGuard SealantMembrane Width SelectionLap Installation InstructionsJoints with Movement AccommodationTypical joints Requiring Movement AccommodationInside Corners at Dissimilar SubstratesRectangular Mechanical PenetrationsParapet CapWide ParapetTransition at FoundationTransition at Foundation Corner with Overlapping SheathingGeneral Notes3456789101112131415StoBuilding with conscience.Page 2 of 15Property of Sto Corp. All Rights ReservedVersion 1.0 Jan. 2015
RInstallation GuideStoGuard Transition MembraneOPTION 1: General Installation Steps with StoGuard CoatingsApplication Steps:1. Apply StoGuard coating liberally by roller, brush, or spray. Limit length ofapplication as needed for Step 2 to becompleted before coating dries.12. Press StoGuard Transition Membraneinto wet coating. Smooth wrinkles orfish-mouths.23. Cover StoGuard Transition Membranewith second application of StoGuardcoating. Use sufficient coating tohold StoGuard Transition Membranein place.4. After the coating applied in Step 3has dried, apply StoGuard coating toentire wall area, recoating the transition membrane.5. Ensure all laps, seams and edges arefully embedded in coating.3Notes:41. High-temperature, low humidity, directsunlight, and windy conditions willreduce working time for the coating.2. Pre-cut StoGuard Transition Membraneto length, for most efficient installation.3. Pins or staples may be used to temporarily support long runs of membranebetween steps 2 and 3.4. Installation process is the same for vertical and horizontal orientations on thewall. (Except for sealing of top horizontal edge seams - see page 8.)StoBuilding with conscience.Page 3 of 15Property of Sto Corp. All Rights ReservedVersion 1.0 Jan. 2015
RInstallation GuideStoGuard Transition MembraneOPTION 2: General Installation Steps with StoGuard RapidSeal or StoGuard RapidFillApplication Steps:11. Apply StoGuard Rapidseal (or StoGuard RapidFill) to substrate22. Spread StoGuard RapidSeal (or StoGuard RapidFill) sufficiently to provideadhesion of full width of StoGuardTransition Membrane.3. Press StoGuard Transition Membraneinto wet StoGuard sealant. Smoothwrinkles or fish-mouths with plasticspreading tool until membrane is fullyadhered and flat.4. Top-coat with StoGuard coating.Notes:341. Ambient conditions affect workingtime. StoGuard RapidSeal and StoGuard RapidFill have moisture curingcharacteristics which may be anadvantage in high humidity conditionsand most climate zones.2. Pre-cut StoGuard Transition Membrane to length, for most efficientinstallation.3. Apply top coat after the material skinsand within 48 hours of drying.4. Installation process is the same forvertical and horizontal orientations onthe wall. (Except for sealing of tophorizontal edge seams - see page 8.)StoBuilding with conscience.Page 4 of 15Property of Sto Corp. All Rights ReservedVersion 1.0 Jan. 2015
RInstallation GuideStoGuard Transition MembraneWidth Selection and Lap WidthMembrane Width Selection:1. Select width of StoGuard TransitionMembrane which will provide minimum 2-inches (51 mm) bonded widthalong both sides of gap to be bridged.2-inch (51 mm)Minimum2. For wide gaps that function as movement joints, increase width of StoGuard Transition Membrane asrequired to “loop” the membraneinto the gap as shown in the detail onPage 7 of this Installation Guide.2-inch (51 mm)MinimumLap Width:1. Minimum lap width is 2 inches(51 mm).2. Shingle lap where StoGuard TransitionMembrane is installed vertically andwhere vertical transition membraneinstallation intersects horizontal transition membrane installation.3. See lapping instructions on page 6 ofthis Installation Guide for completeinstructions.NOTE: Required topcoat with StoGuardcoating is not shown.See Page 6 for completelapping instructions.2-inch (51 mm)MinimumStoBuilding with conscience.Page 5 of 15Property of Sto Corp. All Rights ReservedVersion 1.0 Jan. 2015
RInstallation GuideStoGuard Transition MembraneLap InstructionsApplication Steps:1. Install StoGuard Transition Membraneper instructions on Page 3 or 4 of thisInstallation Guide.2. Where a lap is required, overlap transition membrane minimum 2 inches(51 mm). SHINGLE LAP vertical applications. Apply StoGuard coating liberally between layers of transition membrane to fully seal between layers.(StoGuard RapidSeal or StoGuardRapidFill may be used as alternate toStoGuard Coating.)Minimum 2-in. (51 mm)overlap of transitionmembrane3. Apply top coat of StoGuard Coatingas soon as the material used toadhere the transition membrane hasdried. (The top coat can be applied aspart of the overall wall surface coatingprocess.)Notes:1. High-temperature, low humidity,direct sunlight, and windy conditionswill reduce working time for the coating.2. Precut StoGuard Transition Membraneto length, for most efficient installation.3. Pins or staples may be used to temporarily support long runs of membraneduring application.4. Installation process is the same forvertical and horizontal orientations onthe wall.5. Top-coat not shown.StoBuilding with conscience.Page 6 of 15Property of Sto Corp. All Rights ReservedVersion 1.0 Jan. 2015
RInstallation GuideStoGuard Transition MembraneJoints with Movement Accommodation (For joints up to 1 inch (25 mm) and up to 50% movement)Application Steps:Looped StoGuardTransition Membrane(see section at bottom ofthis page)1. Place backer rod in joint sized to friction fitin the joint (diameter 25% greater thanjoint width).2. Install StoGuard Transition Membrane perinstructions on Pages 3 - 6 of this Installation Guide.3. IMPORTANT: Press StoGuard TransitionMembrane into joint to form a “loop” toaccommodate movement. See the sectionsketch below for guidance regarding theinstalled profile of the looped transitionmembrane.4. Ensure air barrier continuity at membranelaps. Verify full embedment and bond oftop layer in StoGuard coating or apply abead of StoGuard RapidSeal or StoGuardRapidFill to seal outer surface of lappedends.Notes:1. This application applies to vertical and horizontal joints.2. This application applies to joints betweendissimilar substrate construction.3. Choose size of StoGuard Transition Membrane based on joint width anticipatedmovement 4 inches (102 mm) to obtainminimum 2 inch (51 mm) adhesion on eachside of joint.4. Combination of StoGuard RapidSeal andSto EmeraldCoat is shown. Additional layerof StoGuard coating is required as shownon page 3 where coating is used to adhereStoGuard Transition Membrane.“Loop” formed intransition membraneSECTION THROUGH JOINTStoBuilding with conscience.Page 7 of 15Property of Sto Corp. All Rights ReservedVersion 1.0 Jan. 2015
RInstallation GuideStoGuard Transition MembraneTypical Joints requiring movement accommodationFloor line joint:1. Use where deflection is anticipated.2. Use where nested or slotted deflection track isused in frame construction (shown).3. Use between concrete frame andmasonry infill if compressible fill is used at topof in-fill to accommodate dead-load settlement,creep, and deflection.4. Use at floor lines in multi-floor wood-frameconstruction to accommodate cross-grainshrinkage in floor members.Joint between dissimilar construction:1. Use where framing abuts masonry or concrete,and at other substrate transitions.Control or expansion joint in masonryconstruction:1. Use where control or expansion joints (softjoints) occur in masonry construction.2. Masonry joints shall be struck flush in preparation for StoGuard installation.Notes:1. All substrate possibilities are not shown. However, the installation of the StoGuard TransitionMembrane will generally be the same for anyjoint which is constructed for the purpose ofaccommodating building movements.2. Combination of StoGuard RapidSeal and StoEmeraldCoat is shown. Additional layer ofStoGuard coating is required as shown onpage 3 where coating is used to adhere StoGuard Transition Membrane.StoBuilding with conscience.Page 8 of 15Property of Sto Corp. All Rights ReservedVersion 1.0 Jan. 2015
RInstallation GuideStoGuard Transition MembraneInside Corner with Dissimilar SubstratesStatic Connections1. Install StoGuard Transition Membrane asdescribed on page 2 or page 3 of thisInstallation Guide.2. Center StoGuard Transition Membranealong the interface of the two substrates.3. Shingle lap vertical applications.Corners with movement accommodation1. Install StoGuard Transition Membrane asdescribed on page 6 of this InstallationGuide.2. Create a loop of StoGuard TransitionMembrane in the gap between substrates.3. Shingle lap vertical applications.4. StoGuard coatings, StoGuard RapidSealor StoGuard RapidFill may be used toadhere the transition membrane.(StoGuard RapidSeal shown for illustration purposes).Note: Combination of StoGuard RapidSealand Sto EmeraldCoat is shown. Additionallayer of StoGuard coating is required asshown on page 3 where coating is used toadhere StoGuard Transition Membrane.StoBuilding with conscience.Page 9 of 15Property of Sto Corp. All Rights ReservedVersion 1.0 Jan. 2015
RInstallation GuideStoGuard Transition MembraneInstallation at rectangular mechanical penetrations1. Install StoGuard Transition Membraneusing methods described on page 3 orpage 4 of this Installation Guide.FOLD2. Apply StoGuard Transition Membrane tobottom of projecting element first.CUTWFigure AW(from above)3. Pre-cut length of StoGuard TransitionMembrane to run continuously alongbottom and up minimum 2-inches (51mm) on both sides of penetration.14. Cut as shown in Figure A, to allow folding at corners.25. Install pre-cut membrane to bottom sideof penetration. Install diagonal strips oftransition membrane at corners.6. Repeat application steps 3 through 5 attop of penetration. Cut length of transition membrane to fully lap over the initialinstallation on sides of penetration.(from below)7. Apply StoGuard RapidSeal (or StoGuardRapidFill) to topmost edges of transitionmembrane and tool the sealant.8. Apply StoGuard coating.9. StoGuard coatings, StoGuard RapidSealor StoGuard RapidFill may be used toadhere the transition membrane.(StoGuard RapidSeal shown for illustration purposes).310.This detail is applicable to all rectangularly shaped penetrations and projections.4StoBuilding with conscience.Note: Combination of StoGuard RapidSeal and Sto EmeraldCoat is shown.Additional layer of StoGuard coating isrequired as shown on page 3 wherecoating is used to adhere StoGuardTransition Membrane.Page 10 of 15Property of Sto Corp. All Rights ReservedVersion 1.0 Jan. 2015
RInstallation GuideStoGuard Transition MembraneParapet Cap2-inch(51 mm)Minimumonto wall1. Select width of StoGuard Transition Membrane to cover top of parapet wall andextend down both faces of parapet wallminimum 2 inches (51 mm). (See Page12 for very wide walls where standardwidths of transition membrane do notpermit a single-piece application.)2. Install StoGuard transition membraneacross top of wall assembly and downonto both faces of the parapet wall minimum 2 inches (51 mm) using techniquesdescribed on pages 2 through 5 of thisInstallation Guide.3. For permanent weather protection extendroofing material over blocking and connect to air barrier on face of wall (typical)or as detailed by contract documents. Seesection at bottom of this page for typicalcondition.4. Slope parapet tops to provide drainage.5. Combination of StoGuard RapidSeal andSto EmeraldCoat is shown. Additionallayer of StoGuard coating is required asshown on page 3 where coating is usedto adhere StoGuard TransitionMembraneMetal Cap FlashingRoofing Membrane (continuousonto back of parapet)BlockingStoGuard Transition Membrane inStoGuard RapidSealStoGuard EmeraldCoatCompatible MasticCladdingStoBuilding with conscience.Page 11 of 15Property of Sto Corp. All Rights ReservedVersion 1.0 Jan. 2015
RInstallation GuideStoGuard Transition MembraneWide Parapets1. Select StoGuard Transition Membranewith a minimum width of 1/2 the wallwidth plus 4 inches (102 mm).2. Install StoGuard transition membranealong one side of the top of the parapetand down onto the adjoining wall minimum 2 inches (51 mm) using techniquesdescribed on pages 3 through 6 of thisInstallation Guide.2-inch(51 mm)Minimumonto wall3. Repeat step number 2 along other edgeof parapet wall, providing a minimum 2inch (51 mm), fully bonded lap of themembrane that is already in-place, andminimum 2 inch (51 mm) extension ontothe adjoining wall surface.4. Complete cap flashing assembly steps asshown on page 11, or as detailed by thecontract documents.2-inch(51 mm)MinimumOverlap5. StoGuard coatings, StoGuard RapidSealor StoGuard RapidFill may be used toadhere the transition membrane.(StoGuard RapidSeal shown for illustration purposes).6. Slope parapet tops to provide drainage.7. Top coating not shown. Refer to page 11for additional information regarding parapet treatment and integration with roofing and flashing.StoBuilding with conscience.Page 12 of 15Property of Sto Corp. All Rights ReservedVersion 1.0 Jan. 2015
RInstallation GuideStoGuard Transition MembraneTransition at Foundation1. Install StoGuard Transition Membraneusing methods described on page 3 orpage 4 of this Installation Guide. 2. 6-inch (152 mm) wide StoGuardTransition Membrane suggested.3. Install transition membrane along base ofwall centered along the joint betweensheathing and foundation.4. StoGuard RapidSeal (or StoGuardRapidFill) is recommended for conditionswhere sheathing overlaps foundation.5. Apply generous bead of StoGuard RapidSeal along bottom edge of overlappingsheathing. Press and tool transitionmembrane into wet StoGuard RapidSealand lap minimum 2 inches (51 mm) ontoadjoining wall and foundation surfaces.Sheathing Flushwith FoundationSheathing OverlappingFoundation6. StoGuard coatings, StoGuard RapidSealor StoGuard RapidFill may be used toadhere the transition membrane.7. Slope brick ledges or projecting foundations away from the building for drainage.8. Combination of StoGuard RapidSeal andSto EmeraldCoat is shown. Additionallayer of StoGuard coating is required asshown on page 3 where coating is usedto adhere StoGuard Transition Membrane.Brick Ledge, Projecting Foundationor Balcony SlabStoBuilding with conscience.Page 13 of 15Property of Sto Corp. All Rights ReservedVersion 1.0 Jan. 2015
RInstallation GuideStoGuard Transition MembraneTransition at Foundation Corner with Overlapping Sheathing1. Install StoGuard Transition Membraneusing methods described on page 3 orpage 4 of this Installation Guide.2. Follow general instructions on page 13 ofthis Installation Guide. Coatings or sealants are not shown in this detail to focuson installation steps that are unique tothis condition.FoldCut 13. Run StoGuard Transition Membrane pastoutside corner minimum 2 inches (51mm).Cut 2Fold4. Cut transition membrane from corner offoundation outward, perpendicular towall (Cut 1).Tuck tab againstbottom of sheathingCut 3(Under sheathing)Fold5. Cut transition membrane along fold atoutside edge of sheathing parallel withwall (Cut 2).6. Fold transition membrane around corner.Tuck folded portion of transition membrane and secure to the bottom of thesheathing, as shown in step 2.7. Run transition membrane from oppositeside of corner to the sheathing corner.Cut along the bottom edge of thesheathing from the foundation corneroutward (cut 3).8. Fold tab below the sheathing aroundcorner and secure.9. Seal underside sheathing corner withgenerous application of StoGuard RapidSeal or StoGuard RapidFill.Seal withStoGuard RapidSealor StoGuard RapidFillStoBuilding with conscience.Page 14 of 15Property of Sto Corp. All Rights ReservedVersion 1.0 Jan. 2015
RInstallation GuideStoGuard Transition MembraneGeneral Notes:1.Surfaces must be structurally sound, clean, dry and free of frost, damage, and all bond-inhibiting materials including dirt, dust,mildew, algae, laitance, efflorescence, form oil, curing compounds, coatings, chalking and other foreign matter. Sheathing musbe code compliant Exterior Grade or Exposure 1 wood-based sheathing or glass mat gypsum in compliance with ASTM C1177.Sheathing must be installed in compliance with the building codes and manufacturer’s recommendations. CMU surfaces shouldhave flush joints. Concrete and CMU surfaces must be without projecting ridges, form ties or other surface irregularities. Seesurface preparation instructions for StoGuard air and moisture barrier coatings for additional guidance.2.StoGuard Transition Membrane is available in nominal widths of 4.75, 6, 9, 12, and 18 inches (120, 152, 229, 305, 457 mm).Select thewidth of StoGuard Transition Membrane that provides minimum 2-inches (51 mm) bonding along both sides of the application.3.Use StoGuard Transition Membrane for air barrier continuity of transitions:- Sheathing to foundation- Dissimilar materials (e.g. CMU to frame wall)- Wall to balcony floor slab or ceiling- Shingle lap transition onto flashing- Floor line deflection joints- Masonry control joints- Through-wall joints in masonry or frame construction.4.Always apply StoGuard Transition Membrane with the roll direction parallel to joints and seams.5.Cut lengths of StoGuard Transition Membrane with scissors or sharp utility knife. Long runs of StoGuard Transition Membranemay be temporarily supported with tacks or staples during installation. Tacks or staples must be removed before applying thefinal top-coat of StoGuard Coating.6.StoGuard Transition Membrane may be secured by embedding in any StoGuard coating, including Sto Gold Coat, Sto EmeraldCoat, StoGuard VaporSeal, and Sto Air Seal. StoGuard RapidSeal or StoGuard RapidFill may be used as an option to StoGuardcoatings.7.StoGuard sealants (StoGuard RapidSeal and Sto Guard RapidFill.) are recommended where changes in plane are required overshort distances. They are also advantageous in high humidity conditions and moist climate zones.8.If “fish-mouths” or loose edges of StoGuard Transition Membrane remain after application of the StoGuard top coat, treatwith StoGuard RapidSeal or StoGuard RapidFill to provide a continuously sealed transition membrane edge.9.Comply with the published Sto instructions for storing, handling, mixing, and use of the Sto coatings and sealants that arebeing used with the StoGuard Transition Membrane. Refer to the most current specifications and product literature, which areavailable at www.stocorp.com. Use only when surface and ambient temperatures are and will remain above 40 F (4 C) andbelow 100 F (38 C) during application and the drying period.10. Apply top coat within 30 days of membrane installation. See applicable product literature for exposure limitations based onthe Sto top-coat material used. If top coating with StoGuard RapidSeal or StoGuard RapidFill, top coat after material skins andwithin 48 hours of drying.11. Not recommended for moving joints in excess of 1-inch width or 50% movement.12. Comply with “looped” construction details (page 7) for joints where movement is anticipated.13. Do not used on surfaces with standing water, below grade, or surfaces subject to water immersion.14. Not recommended as primary outer weather seal or where exposed permanently to weather. Maximum exposure period is 30days if left unprotected.15. Not recommended at service temperature exposures lower than -20 F (-30 C) or higher than 194 F (90 C).StoBuilding with conscience.Page 15 of 15Property of Sto Corp. All Rights ReservedVersion 1.0 Jan. 2015
3800 Camp Creek Parkway Building 1400, Suite 120 Atlanta, GA 30331 Tel: 404-346-3666 Toll Free: 1-800-221-2397 Fax: 404-346-3119 www.stocorp.com StoGuard Transition Membrane is a flexible air barrier membrane for use on vertical above grade wall con-struction. StoGuard Transition


