Transcription
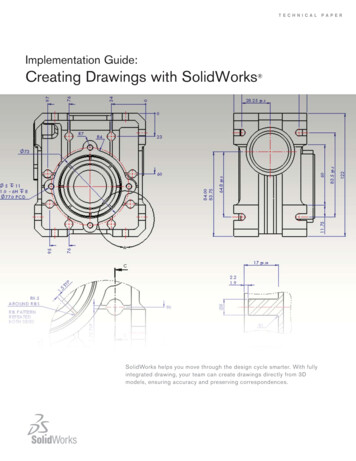
Annotation Scaling: Making Drawings Smarterwith Intelligent TextDavid CohnGD315-1PDo you find it confusing that you draw everything full-size in AutoCAD , but when it comesto text and annotations, you’ve got to think about the scale at which the drawing willeventually be plotted? Well, no more. The Annotation Scaling functionality in AutoCAD letsyou create text, dimensions, hatch patterns, and other annotation objects that automaticallychange their size and placement to match the scale of the viewport. In other words,annotation scale is now automated. See how easy it is to apply annotation properties totext, dimensions, leaders, tolerances, blocks, attributes, and hatches. In this class you willlearn everything you need to know to create annotation styles and apply annotation scalesto layout viewports and model space. The annotation scaling tools can save you hours oftime previously spent calculating scale factors, and creating, editing, and managing drawingannotations at multiple scales.About the Speaker:David has more than 20 years of hands-on experience with AutoCAD as a user, developer, author andconsultant. He is an independent CAD consultant, a contributing editor to Desktop Engineering magazine, theformer publisher and editor-in-chief of CADCAMNet and Engineering Automation Report, the former senioreditor of CADalyst magazine, and the author of more than a dozen books on AutoCAD. A licensed architect,David was also one of the earliest AutoCAD third-party software developers, creating numerous AutoCADadd-on programs. As an industry consultant, David has worked with many companies including Autodesk. Heteaches college-level AutoCAD courses and is always a popular presenter at Autodesk University.david@dscohn.com
Annotation Scaling—Making Drawings Smarter with Intelligent Text2
Annotation Scaling—Making Drawings Smarter with Intelligent TextIntroduction to Annotation ScalingAnnotations are a crucial part of almost anydrawing, and creating them can consume aconsiderable amount of your workday. In earlierversions of AutoCAD, creating annotations inmodel space required manual calculations andyou often had to recreate and copy annotationsto multiple layers in order to display themappropriately at different scales. Maintainingmultiple copies of the same data was difficultand prone to error.This drawing contains multiple viewports atdifferent scales. The geometry is drawn at fullscale, but each view of that geometry is scaled tofit on the sheet of paper. Using a traditional approach, in order to create dimensions that appearedat a uniform size in relation to the overall drawing sheet, you would have to use a differentdimension scale factor and draw on a different layer in for each viewport. But annotation scalingeliminates these additional steps.Definition of Annotation ScalingAnnotation scaling is a process in which objects such as text, dimensions, and hatch patternsare automatically scaled based on the scale of the view in which they are displayed. You createan annotation scale for each view you use to display the object.The illustration below shows how annotation scaling works. The drawing contains one square,one circle, and two dimensions. The same objects are viewed through two viewports at differentscales. While the viewport scale factors present the geometry at different scales, the dimensionsare displayed at exactly the same size. This occurs because there are two scale representationsfor each dimension. One representation is equal to 1:1 and is only visible in the viewport that isscaled at 1:1, while the other scale representation is equal to 1:2 and is only visible in the viewportthat is scaled to 1:2.With annotation scaling enabled, AutoCAD automatically calculates and applies properties, suchas text height, based on the current annotation scale. It also uses the annotation scale todetermine which annotations are visible in which viewports. You can control the location ofindividual scale representations while having the information itself coming from a single source.3
Annotation Scaling—Making Drawings Smarter with Intelligent TextAnnotation scaling is like having multiple versions of annotation objects all at different scales, andtheir visibility is controlled automatically based on the scale of the viewport through which they areseen.Annotative ObjectsYou can apply annotative scaling functionality to any of the following object types: Text (Text, Mtext) Dimensions (Dimensions, Leaders, Tolerances) Multileaders Hatches Blocks AttributesAs you create new drawings, you should use the annotative options or styles supported bythese object types. You can also easily convert existing instances of any of these object typesinto annotative objects.How do you scale annotations now?To better understand how to use annotation scaling, think about how you create dimensions andtext annotations in model space using traditional methods.1.2.3.4.5.6.Set the viewport scale (i.e. 1/8” 1’-0”)Calculate the scale factor (i.e. 1/8”x12” 96)Set the dimension text (DIMTXT) to the proper height (i.e. 3/32”)Set the dimension scale (DIMSCALE) to the scale factor (i.e. 96)Calculate the model space height for text (i.e. 3/32”x96 9”)Set the text size (TEXTSIZE) to the model space height (i.e. 9”)What if you want to change the viewport/plot scale?Perhaps a scale of 1/8” 1’-0” won’t fit on the sheet. In that case, you’d have to repeat theprevious process for the new scale.What if you want to display the annotations at several different scales?1. Copy the annotations to a new layer for each different scale.2. Repeat the previous process for each scale.3. Turn layers on and off for appropriate scales in each viewport.What if you want to edit the content?A. Give up?B. Bill by the hour?C. Use annotation scaling!How does annotation scaling compare to the traditional method?1.2.3.4.5.6.Set the annotation scale (i.e. 1/8” 1’-0”)Calculate the scale factor (i.e. 1/8”x12” 96)Set the dimension text (DIMTXT) to the proper height (i.e. 3/32”)Set the dimension scale (DIMSCALE) to the scale factor (i.e. 96)Calculate the model space height for text (i.e. 3/32”x96 9”)Set the text size (TEXTSIZE) to the proper height (i.e. 3/32”)4
Annotation Scaling—Making Drawings Smarter with Intelligent TextAnnotative StylesIn the following image, annotative styles are shown on the ribbon bar. These styles are availablein any drawing created from one of the templates provided.Select Annotation ScaleThe first time you create an annotative object, theSelect Annotation Scale dialog box is displayed.You select an annotation scale from the list andclick OK. The selected scale becomes the defaultannotation scale for the current drawing.The selection you make here is also displayed onthe status bar, next to Annotation Scale.This dialog box is displayed once per session of AutoCAD on your first attempt tocreate an annotative object. The scale setting can be changed at any time on thestatus bar by selecting a scale on the Annotation Scale list.Annotation Scaling ToolsTo begin using the annotation scaling functionality, you will need tofamiliarize yourself with several new annotation scaling toolsincluding the Viewport Lock, Viewport Scale, and AnnotationScale.The Viewport Lock is displayed on the Status Bar when a layout viewport is selected or active.You can lock and unlock a viewport using this button or using other methods, including the rightclick menu and the Properties or Quick Properties palettes. Locking a viewport after setting anappropriate viewport scale prevents you from inadvertently zooming or changing the scale.The Viewport Scale is also displayed on the Status Bar when a layout viewport is selected oractive. It enables you to view and edit the scale at which the active viewport is displayed. Youcan change the viewport scale using this button or using other methods, including the Viewportstoolbar and the Properties or Quick Properties palettes.The Annotation Scale is displayed on the Status Bar when the Model Space tab is active. TheAnnotation Scale sets the CANNOSCALE system variable, which is what tells AutoCAD the scale to usewhen creating annotations (and is initially set when you create the first annotative object in the drawing).Typically, you want AutoCAD to assume an annotation scale that is the same as the viewportscale. When you set either the Viewport Scale or Annotation Scale using the tools on the StatusBar, AutoCAD automatically updates both the viewport and annotation scale, keeping them insync. When a Layout tab is active, if you change the viewport scale by zooming, however, theviewport and annotation scale can get out of sync. In that case, the Sync button becomesactive; clicking this button resets the viewport scale so that it once again matches the annotationscale.5
Annotation Scaling—Making Drawings Smarter with Intelligent TextAnnotative ObjectsAll objects that support annotation scaling (Text, Mtext, Dimensions, Leaders, Tolerances,Multileaders, Hatches, Blocks, and Attributes) include a new Annotative object property. Youcan view and modify the Annotative property using the Properties or Quick Properties palettesas well as the object-specific editing tools, such as the Multiline Text Editor, the Hatch dialogbox, and so on.In addition, for objects that use styles (Text, Dimensions, Multileaders), you can create andapply annotative styles.When an object’s Annotative property is enabled, a new Annotative Scale property isautomatically applied to the object. Every annotative object must include one or more annotativescales. These are the scales at which you want the object to be represented. Using traditionalmethods, if you wanted an object, such as text, to be displayed at several different scales whilemaintaining the same height, you would have created several copies of the object, each on itsown layer. Each object would have been created at a different model space height based on thescale at which you were going to display it and the paper space height at which you wanted itdisplayed. Annotative objects perform the same function with fewer steps and without having tocreate duplicate copies of the object.You can differentiate between annotative objects and non-annotative objects by the presence ofan annotative icon. When you pass your cursor over an annotative object, an annotative icon isautomatically displayed near the cursor. A single icon indicates that the object currentlysupports only one annotative scale; a double-icon indicates that the object currently supports6
Annotation Scaling—Making Drawings Smarter with Intelligent Texttwo or more annotative scales. Similar annotative icons are also used to indicate which styles ina style list are annotative.You can view, add, and delete the object scales supported by an object using the AnnotationObject Scale dialog box, which is displayed using the OBJECTSCALE command. Thiscommand appears on the Annotation Scaling panel on the Annotate ribbon tab. The list ofavailable scales displayed in this dialog box comes from the general AutoCAD Scale List, whichyou can customize using the SCALELISTEDIT command. This command also appears on theAnnotation Scaling panel on the Annotate ribbon bar.The annotative scales of an object determine the size as well as the visibility of the object’sscale representations. When a viewport or the Model tab is set to a particular annotation scale,only the annotative objects that support the current annotation scale are normally displayed.Status IndicatorsSince the visibility of annotative objects is determined by the current Annotation Scale and thesupported Annotative Scales of the various objects, it is possible for some or all of the objects todisappear when you change the annotation scale to a value for which the objects have norepresentation. You can use two tools on the Status Bar to remedy this situation.You can quickly display all annotative objects, regardless of theirsupported annotative scales, using the Annotation Visibility control(the annotative light bulb button, which toggles the ANNOALLVISIBLEsystem variable). You can then select any of the objects and add ordelete Annotative Scales. To avoid confusion caused by havingannotative objects display when they are not supported by the currentAnnotation Scale, you should disable Annotation Visibility except whenneeded.The second tool (the annotative lightning bolt button, which toggles the ANNOAUTOSCALEsystem variable) enables you to automatically add scales to annotative objects when theannotation scale changes. For example, if the annotations in the current viewport only includean Annotative object scale of 1:50 and you want to change the viewport/annotation scale to7
Annotation Scaling—Making Drawings Smarter with Intelligent Text1:100, you can turn this button on so that the new scale (1:100) is automatically added to all ofthe annotative objects within that viewport. If you are experimenting with various viewport sizes,it is best to disable this option until you settle on a size. Otherwise, you might inadvertently addunwanted annotative scales to the objects. Each of these status indicators can be in one of twomodes.IconDescriptionWhen the status indicator is in this mode, AutoCAD shows annotation objects for all scales.When the status indicator is in this mode, only the scale representations that matchthe current annotation scale setting are shown.When the status indicator is in this mode, new scale representations are createdautomatically if the annotation scale changes.When the status indicator is in this mode, scale representations are not createdautomatically as the annotation scale changes.Additional Annotation Scaling ToolsWhen you select an annotative object that has more than oneannotative scale, AutoCAD may temporarily display all of itsscale representations in the current viewport. If this isobjectionable, you can change the value of theSELECTIONANNODISPLAY system variable so thatAutoCAD displays the annotative object only at the currentscale (a value of 0 turns off the display of alternate scalerepresentations).Another feature of annotative objects is the ability to move the objects to different positions foreach scale representation. In the following illustration, the callout text (an annotativemultileader) is located in one position when viewed at a small scale and in a different positionwhen viewed at a larger scale.You can use the ANNORESET command to reset the location of all scale representations for anannotative object to that of the current scale representation.8
Annotation Scaling—Making Drawings Smarter with Intelligent TextYou can also add or delete scale representations by using the tools on the Annotation Scalingpanel of the Annotate ribbon tab, or by right clicking on an annotative object and selecting thedesired tool from the shortcut menu. (Note that the OBJECTSCALE and ANNORESETcommands also appear on this shortcut menu.)Transitioning to Annotation ScalingThe steps for implementing annotation scaling will vary slightly depending on the types ofobjects and whether they are being created as new objects or already exist in your drawing.Text, Dimensions, and MultileadersTo implement annotation scaling for objects that use styles—including text, dimensions, andmultileaders—you should first create annotative styles. You can create new styles or edit yourexisting ones. If you’ve created multiple styles for the sole purpose of producing annotations atdifferent scales, you can delete the extra styles.To create/edit styles:1. Access the style definition by creating a new one or modifying an existing one. Set the desired size for text, arrowhead, etc. This is the real (paper) size of theobjects. Enable the Annotative property. The location of this control varies for each typeof style.2. Save the updated style definition.After you’ve defined the annotative styles, you can quickly create new annotative objects basedon those styles:1. Set an Annotative Style.2. Set the Annotation Scale for the current viewport or Model tab to an appropriate size.This is what determines the default annotative scale for the new objects you create.3. Create the text, dimensions, or multileaders.4. Add/remove annotative scales for selected objects as needed.9
Annotation Scaling—Making Drawings Smarter with Intelligent TextTo update existing text, dimensions, and multileaders:1. Edit the associated styles so that they are annotative.2. Set the Annotation Scale for the current viewport or Model tab to the scale that youassumed when creating the original annotations. For example, if you created text at aheight of 9” because you wanted it to be 3/32” tall when scaled at 1/8” 1’-0”, you shouldset the Annotation Scale to 1/8” 1’-0”.3. Use ANNOUPDATE and select the objects that you want to support the currentAnnotation Scale.4. Repeat steps 1-2 for objects you want to support a different Annotation Scale.5. Add/remove annotative scales for selected objects as needed.Of course, you could also simply change the annotative object property of the existing objects,but then you would need to modify each object individually to convert it into an annotativeobject; changing the style is much more efficient.HatchesUsing annotation scaling makes it easy to create hatch objects that automatically maintain thehatch size even when the viewport scale changes.To create new hatches:1. Set the Annotation Scale for the current viewport or Model tab to an appropriate size.This is what determines the default annotative scale for the new objects you create.2. Access the Hatch and Gradient dialog box, ensure that the Annotative property isenabled, and apply the other hatch properties as you normally would.To update existing hatches:1. Set the Annotation Scale for the current viewport or Model tab to the scale that youassumed when creating the original hatches.2. Select the hatch objects that you want to support the current annotation scale andenable the Annotative property using the Hatch Edit dialog box or the Properties orQuick Properties palette.3. Repeat steps 1-2 for hatch objects that you want to support a different Annotation Scale.4. Add/remove annotative scales for selected hatch objects as needed.BlocksAnnotative block definitions enable you to insert block references that are consistently sizedregardless of the viewport scale. In general, annotative blocks would be symbols that are notdrawn at real sizes for actual objects. For example, a chair or table in a floor plan would not beannotative, because you would want them to scale up or down with the rest of the geometry. Buta window tag or an electrical receptacle symbol would likely be an annotative object becauseyou would want those objects to remain at the same size even when the viewport scalechanges.For example, in the illustration below, notice that the stove and sink in the kitchen appear largerin the 1/4” 1’-0” view on the left than in the 1/8” 1’-0” view on the right, but the room labels,window tags, and electrical receptacles are the same size in both views.10
Annotation Scaling—Making Drawings Smarter with Intelligent TextYou can apply the annotative property to block definitions within a drawing file or to individualdrawing files that can be inserted as blocks. Although the Annotative property is stored in theblock definition, the object’s Annotative Scales are applied to each individual block reference.To create/update block definitions:1. Access the block definition in the Block Editor. Set the Annotation Scale at 1:1. Ensure block geometry is drawn at the size you want it represented. Enable the Annotative property in the Property palette.2. Save the updated block definition.To create/update block drawing files:1. Create/Open the block geometry in the drawing editor. Ensure block geometry is drawn at the size you want it represented. Enable the ANNOTATIVEDWG system variable. (Note that you can only enablethe ANNOTATIVEDWG variable for drawings that contain no annotative objects.)2. Save the updated drawing file.To insert new block references:1. Ensure that the block definition is annotative.2. Set the Annotation Scale for the current viewport or Model tab to an appropriate size.This is what determines the default annotative scale for the blocks you insert.3. Insert blocks with a unit scale of 1.4. Add/remove annotative scales for selected block objects as needed.To update existing block references:1. Ensure that the block definition is annotative.2. Ensure the inserted scale of block references is 1.3. Add/remove annotative scales for selected block insertions as needed.AttributesYou can apply the annotative property to attribute definitions to ensure that the attribute textwithin non-annotative blocks automatically adjusts based on the viewport’s annotation scale.11
Annotation Scaling—Making Drawings Smarter with Intelligent TextYou cannot include annotative attributes or any other annotative objects within an annotativeblock.To create new attribute definitions:1. If you are adding attributes to an existing block, access the block definition in the BlockEditor.2. Set the Annotation Scale at 1:1.3. Access the Attribute Definition dialog box. Ensure that the Annotative Property is enabled. Set the Text Height to the proper paperspace text height. Apply other attribute properties as usual.4. Insert the attribute definition into the block definition.5. Save the block definition.6. If modifying an existing block, use ATTSYNC to synchronize existing block insertionswith the new attributes.To update existing attribute definitions:1. Open the block definition in the Block Editor.2. Set the Annotation Scale at 1:1.3. Select the attribute definitions and open the Properties palette. Enable the Annotative property. Set the Text Height to the proper paperspace text height.4. Save the updated block definition.5. Use ATTSYNC to synchronize existing block insertions with the updated attributes.Annotative OrientationAnnotative blocks and text can be set so that their orientation matches the orientation of thelayout. The orientation of annotative hatches always matches the orientation of the layout.Even if the view in the layout viewport is twisted or if the viewport is non-planar, the orientationof these objects in the layout viewports will match the orientation of the layout.12
Annotation Scaling—Making Drawings Smarter with Intelligent TextUsing Visual Fidelity ControlMaintaining visual fidelity for annotation scaling objects is critical ifyou are sharing your drawings with others who may be usingAutoCAD 2007 or earlier versions of AutoCAD. Because annotationscaling was not available in versions of AutoCAD prior to 2008,considerations must be taken to successfully view drawings in anolder release and then return them to the current release.Description of Visual FidelityWhen you open a drawing that contains annotative objects in AutoCAD 2007 or an earlierversion, for each annotation scale representation that exists, a separate layer is created todisplay the annotation object specific to that scale.For example, suppose you create annotative objects on a layer called Annotation. In thatdrawing, annotative scale representations exist for the 1:1, 1:20, 1:30, and 1:40 scales. If theMaintain Visual Fidelity option is chosen, when the drawing is opened in a previous version ofAutoCAD, additional layers appear in the Layer Properties Manager. In this example, you wouldsee the following layers: Annotation Annotation @ 1 Annotation @ 20 Annotation @ 30 Annotation @ 40Annotation layer viewed in AutoCAD2008 or laterAnnotation layers as viewed in AutoCAD2007 or earlierManaging Annotative Object Visibility in a Previous Release of AutoCADFor each annotative object that exists, an anonymous block is displayed when the drawing isopened in a version of AutoCAD prior to AutoCAD 2008. To control the visibility of scalerepresentations, you freeze the layers that you do not want to be seen.In the following illustration, a single anonymous block contains three annotative scalerepresentations. By freezing the Annotation @ 20 and Annotation @ 40 layers, only the 1:30scale representation remains visible.13
Annotation Scaling—Making Drawings Smarter with Intelligent TextAll scales visible by defaultFreezing the unnecessarylayersOnly the 1:30 scalerepresentation is visibleNote that in the illustrations, the annotation objects were spaced intentionally for clarity. In anactual drawing, the scale representations could be positioned on top of one another.The Maintain Visual Fidelity for Annotative Objects option is available on the Open and Save tabof the Options dialog box. Selecting or clearing this option sets the SAVEFIDELITY systemvariable to 1 (on) or 0 (off).The following steps give an overview for using visual fidelity control to round trip edit drawingsthat use annotation scaling to early versions of AutoCAD and back:1. Open a drawing that contains annotative objects.2. Access the Open and Save tab of the Options dialog box and make sure the MaintainVisual Fidelity for Annotative Objects option is selected. Click OK.3. Save the drawing.4. Open the drawing in a previous version of AutoCAD. Open the Layer Property Manager and freeze the annotation layers that are notrequired. Make the required edits to the drawing. Save the Drawing.5. Open the drawing in the current version of AutoCAD. The annotative objects shouldremain intact and unaffected by the round trip editing.14
Annotation Scaling—Making Drawings Smarter with Intelligent TextGuidelines for Using Visual Fidelity ControlWhen round tripping drawings that contain annotative objects, consider the following: If you work primarily in model space, you should turn off visual fidelity by clearing theoption in the Options dialog box or setting the SAVEFIDELITY system variable 0. Whenset to 0, annotative objects are treated as their non-annotative equivalent when thedrawing is opened in a version of AutoCAD that does not support annotation scaling. Forexample, an annotative text object is treated as standard text and an annotativedimension is treated as a standard associative dimension. If your work utilizes layouts with scaled viewports, and you need to share your drawingswith others using AutoCAD 2007 or earlier versions, you should maintain visual fidelityby selecting the option in the Options dialog box or set the SAVEFIDELITY systemvariable to 1. If the dimensions must be edited in a version of AutoCAD that does not supportannotation scaling, they must be exploded. Doing so creates a separate dimension foreach scale representation. The unused dimensions should then be deleted. Theremaining dimensions are still treated as annotative when the drawing is opened in aversion of AutoCAD that supports annotation scaling.Solving Annotation Scale SlowdownsSome users have experienced slowdowns when drawings contain multiple annotation scales.To correct this problem, you should reset the scale list using the Scale List Cleanup Utility. Thisutility allows you to specify a scale list template containing a user-defined scale list. When yourun the utility, unused scales are deleted from files and the scale list from the selected templateis applied. You can download the Scale List Cleanup Utility from the Autodesk website.For individual drawings, follow these steps to manually reset the scale list:1. On the command line, type –SCALELISTEDIT.2. Type R to select the Reset option, and press Enter.3. When prompted to reset scale list to defaults, type Y and press Enter.4. Type E to exit or press ESC.Resetting the scale list manually will cause all of your custom annotation scales to be lost andthe list will reset to the default list.Note that nested external references may produce excess scales. To correct this issue, youshould install AutoCAD 2008 Service Pack 1 or upgrade to AutoCAD 2009. The Scale ListCleanup Utility repairs files affected before the necessary service pack was installed.15
This dialog box is displayed once per session of AutoCAD on your first attempt to create an annotative object. The scale setting can be changed at any time on the Annotation Scaling Tools To begin u sing the annotation scaling functionality, you will need to familiarize yourself with several new annotation scaling tools
