Transcription
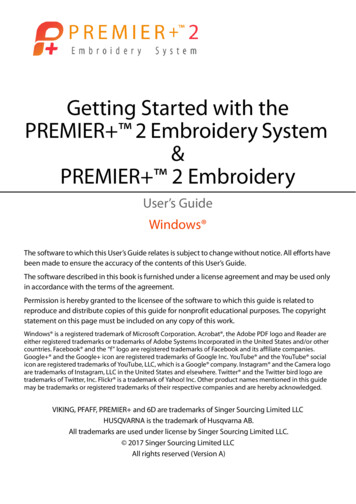
Singing Santa KitchenTowelsMake this quick project with yourCreative DRAWings embroiderysoftware. Great for Holiday gifts!Use one of the included designs from your Creative DRAWings software. Add a symbol and letters to personalize your design.1. Place your Creative DRAWings CD in your CD Rom drive. When thewindow appears to install the software, click cancel or close thewindow without installing.2. Open Creative DRAWings and Create New. Click Next.3. Choose From embroidery. Click the Browse button [ ]. Find the“Papa Noel” in D:\Designs\01\Winter\Papa Noel. Choose the hoopyou will be using to embroider. If your hoop is not in the list, clickAdd New and add your hoop size. Next.4. Choose the type of fabric on which youwill be stitching. Remember – the typeof fabric you choose will set the densityand compensation of your design.Choose Embroidery Normal Cotton ifyou are using a woven kitchen towel or aterry towel. Choose a light color so youcan see your design. Next.5. Leave the Threads to Use at 4 andchoose the Palette RGB. Finish.6. Make sure Santa fits in your hoop with a little room all around so wecan add music to the design. If Santa is too big or too small, selectSanta (Ctrl A). Click and drag on one of the corners of the sizing boxto make him bigger or smaller to fit your hoop.7. Move Santa to the bottom center part of your hoop.1Euro-Notions 2010 All rights reservedCreative DRAWings, DRAWings and DRAWstitch names and logos are trademarks and/or registered trademarks of DRAWstitch Ltd.Wings’ Modular is a registered trademark of Wings Systems Ltd.
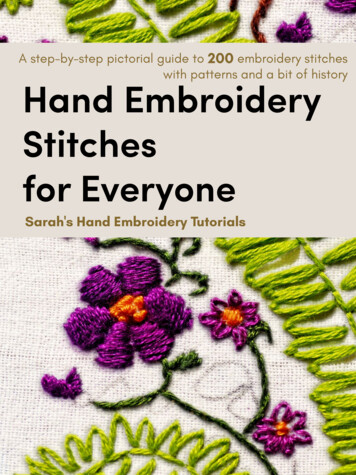
Let’s adjust the design!8. Click on Santa’s outline. You know you have the outline when youlook at the Thread palette, the bottom row (Threads in the design)and see a pen in the top left corner of the blue color box. Go to theupper row of threads (Threads available). Find the black box and leftclick in the top left corner of the box. There is a new color in thebottom row, black. It has a pen in the upper left corner. The outlinecolor has been changed.9. With the outline still highlighted, go to the Tool options. Change theOutline size to 0.9 mm. Enter. The outline is now a triple stitchrather than a running stitch.10.Left click on the belt buckle. Look at the Thread palette. See theblue pen color. Go to the upper row of threads (Threads available).Find the Gold/Yellow box and left click in the top left corner of thebox. The belt buckle has changed to gold.11.Now let’s change the color of Santa’s boots and mittens. Click onSanta’s left boot. In the bottom row, left click on the bottom rightpart of the black color box. The left boot changes to black.12.Repeat step 9 for Santa’s right boot and both mittens.Now change patterns in the Step fill and Satinareas.13. Depending upon the size of Santa, youmay need to add a pattern to your satinareas (the white cuffs on thesleeves and pants plus thebottom of the jacket). Usethe Measure tool andmeasure how long the satin stitches are.If the Satin stitches are longer than 0.6cm (6 mm), it is a good idea to use a pattern in your satin.14. Choose the Rectangular selection tool. Left clickon Santa’s left cuff. Make sure the Objectproperties show Satin. Go to the Patterns areaand choose Pattern /5.2Euro-Notions 2010 All rights reservedCreative DRAWings, DRAWings and DRAWstitch names and logos are trademarks and/or registered trademarks of DRAWstitch Ltd.Wings’ Modular is a registered trademark of Wings Systems Ltd.
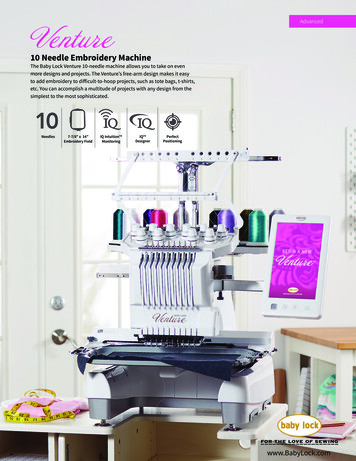
15.Follow Step 13 for the other cuffs (sleeve and pants) plus the jacketbottom.16.Click on Santa’s beard.17.Choose the Directions tool.18. Click and drag a line in Santa’sbeard to change the direction of his beardso it looks like his beard starts at his noseand goes to his chest.19.Click on the Rectangular selection tooldeselect the Directions tool. Santa’s beardshould be selected.20.Scroll down in the Patterns areauntil you find pattern R5. Leftclick on R5and Santa’s beard will change.21.If you choose, change thepattern inSanta’s suit. Follow the same process as you did for his beard –select the suit jacket, scroll until you see the pattern of your choice,click on it. Pattern Weave or Wool 1 add texture to his suit.We’re ready to add text and music notes to finish the design.22.Click on the Edit text tool. In the Tool options, set the Font size at 25mm and the Font name to Garamond. Choose the Bold option.23. Left click in the upper right part of your hoop. A text cursor will blinkwhere the lettering will be placed. If your background color is white,the cursor will not show up. Just type. You will see the letters andcan move them later.24.Type “Joy”. Click on the Rectangular selection tool to see your lettersin stitches.25.With “Joy” highlighted, go to the Thread palette. Left click on thebottom right half of the red color box in the bottom row (Threads inthe design). Now left click on the upper left part of the black colorbox to add an outline to the letters.26.In the Tool options, change the Outline to 0.9 mm to create a triplestitch around the letters.27.Click outside the letters in an empty spot in the work area.3Euro-Notions 2010 All rights reservedCreative DRAWings, DRAWings and DRAWstitch names and logos are trademarks and/or registered trademarks of DRAWstitch Ltd.Wings’ Modular is a registered trademark of Wings Systems Ltd.
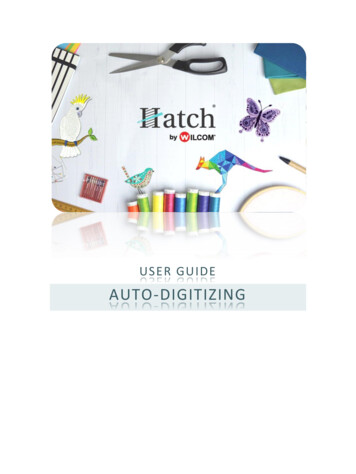
28.To Insert music notes, go to the main tool bar. Click on Tools InsertSymbol.29.In the font, choose Webdings. Scroll until you see the music notes.Click on the notes and click Insert.30. Your mouse is now a . Left click and drag inthe upper left part of the work area. You willsee your music notes start to appear. Draguntil your music notes are between 1.5 – 2.0mm in size and the angle is around 0.0 . Whenyou let go of the left mouse button the noteswill be set. If they are not quite the way youlike, delete the notes and click Insert again.Re-create your notes.31.Once your notes are how you like them, close the Insert symbolwindow.32.Change the color of the notes and add a triple stitch outline just asyou did for your lettering. Make sure the notes are highlighted.Follow steps 25 and 26 to adjust your notes.33. Let’s add some more notes to the design. Highlight the notes. ClickDuplicate in the Tool options window. Once you click Duplicate, anexact copy of the notes is place right on top of the original design!!!Only click Duplicate once. Each time you click another duplicate willbe placed on top.34.Move the duplicate notes to another part ofthe work area.35.Click and drag on a corner of the boundingbox to make these notes smaller.36.Go to File Save as, save your Santa as a.Draw file so you can easily adjust later.Then go back to File Save as your sewingmachine manufacturer format.Your Singing Santa is done! Now you are ready to stitch out on your towel.4Euro-Notions 2010 All rights reservedCreative DRAWings, DRAWings and DRAWstitch names and logos are trademarks and/or registered trademarks of DRAWstitch Ltd.Wings’ Modular is a registered trademark of Wings Systems Ltd.
Stitching Tips:- Always start a new project with a new sewing machine needle.Schmetz has needles made specifically for machine embroidery.Choose an Embroidery needle then choose the size. Use a size 75 forlight to medium weight towels and 90 for medium to heavier weighttowels. Go to www.schmetzneedles.com for more needleinformation.- If you are using a terry cloth towel (or towels with pile), use a watersoluble stabilizer on top of the towel. Hoop your normal tear awaystabilizer and fabric and simply set the water soluble on top of thehoop. This helps keep the embroidery foot from catching in theloops or pile.- Baste in the hoop if your sewing machine is capable – even if youhoop your fabric. This function will help to keep the fabric andstabilizer from shifting which provides for the best stitch out.5Euro-Notions 2010 All rights reservedCreative DRAWings, DRAWings and DRAWstitch names and logos are trademarks and/or registered trademarks of DRAWstitch Ltd.Wings’ Modular is a registered trademark of Wings Systems Ltd.
Creative DRAWings embroidery software. Great for Holiday gifts! Use one of the included designs from your Creative DRAWings software. Add a symbol and letters to personalize your design. 1. Place your Creative DRAWings CD in your CD Rom drive. When the window appears to install t