Transcription
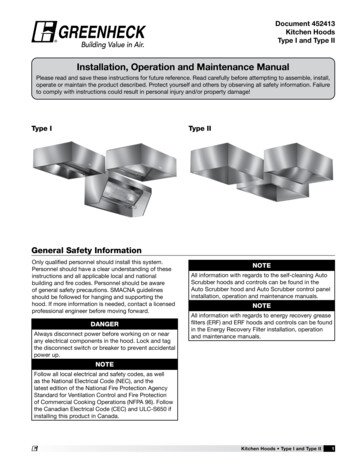
Document 452413Kitchen HoodsType I and Type II Installation, Operation and Maintenance ManualPlease read and save these instructions for future reference. Read carefully before attempting to assemble,install, operate or maintain the product described. Protect yourself and others by observing all safetyinformation. Failure to comply with instructions could result in personal injury and/or property damage!Type IType IIGeneral Safety InformationOnly qualified personnel should install this system.Personnel should have a clear understanding of theseinstructions and should be aware of general safetyprecautions. Improper installation can result in electricshock, possible injury due to coming in contact withmoving parts, as well as other potential hazards. Otherconsiderations may be required if high winds or seismicactivity are present. If more information is needed,contact a licensed professional engineer before movingforward.DANGERAlways disconnect power before working on or near afan. Lock and tag the disconnect switch or breaker toprevent accidental power up.CAUTIONWhen servicing the fan, motor may be hot enoughto cause pain or injury. Allow motor to cool beforeservicing.CAUTIONPrecaution should be taken in explosive atmospheres. 1. Follow all local electrical and safety codes, as well asthe National Electrical Code (NEC), the National FireProtection Agency (NFPA), where applicable. Followthe Canadian Electrical Code (CEC) and ULC-S650 inCanada.2. The rotation of the fan wheel is critical. It must be freeto rotate without striking or rubbing any stationaryobjects.3. Fan motor must be securely and adequatelygrounded.4. Do not spin fan wheel faster than maximumcataloged fan rpm. Adjustments to fan speedsignificantly affects motor load. If the fan RPM ischanged, the motor current should be checked tomake sure it is not exceeding the motor nameplateamps.5. Do not allow the power cable to kink or come incontact with oil, grease, hot surfaces or chemicals.Replace cord immediately if damaged.6. Verify that the power source is compatible with theequipment.7. Never open access doors to a duct while the fan isrunning.Kitchen Hoods Type I and Type II1
ReceivingUpon receiving the product, check to make sure allitems are accounted for by referencing the packinglist and ensuring all items were received. Inspecteach crate for shipping damage before acceptingdelivery. Notify the carrier if any damage is noticed.The carrier will make notification on the delivery receiptacknowledging any damage to the product. All damageshould be noted on all the copies of the bill of ladingwhich is countersigned by the delivering carrier. ACarrier Inspection Report should be filled out by thecarrier upon arrival and filed with the Traffic Department.If damaged upon arrival, file claim with carrier. Anyphysical damage to the unit after acceptance is not theresponsibility of Greenheck Fan Corporation.UnpackingVerify that all required parts and the correct quantityof each item have been received. If any items aremissing, report shortages to your local representativeto arrange for obtaining missing parts. Sometimes itis not possible that all items for the unit be shippedtogether due to availability of transportation and truckspace. Confirmation of shipment(s) must be limitedto only items on the bill of lading. Filters are shippedon a separate skid in their original packaging. Do notremove factory packaging or install filters until just priorto commissioning. Remove all other shipping/packingmaterials including fan tie down straps.HandlingUnits are to be rigged and moved by the lifting bracketsprovided or by the skid when a forklift is used. Locationof brackets varies by model and size. Handle in sucha manner as to keep from scratching or chipping thecoating. Damaged finish may reduce ability of unit toresist corrosion.StorageUnits are protected against damage during shipment. Ifthe unit cannot be installed and operated immediately,precautions need to be taken to prevent deterioration ofthe unit during storage. The user assumes responsibilityof the unit and accessories while in storage. Themanufacturer will not be responsible for damage duringstorage. These suggestions are provided solely as aconvenience to the user.INDOOR - The ideal environment for the storage ofunits and accessories is indoors, above grade, in alow humidity atmosphere which is sealed to preventthe entry of blowing dust, rain, or snow. Temperaturesshould be evenly maintained between 30 F (-1 C)and 110 F (43 C). Wide temperature swings maycause condensation and “sweating” of metal parts.All accessories must be stored indoors in a clean, dryatmosphere.Remove any accumulations of dirt, water, ice, or snowand wipe dry before moving to indoor storage. To avoid“sweating” of metal parts, allow cold parts to reachroom temperature. To dry parts and packages, use a2Kitchen Hoods Type I and Type IIportable electric heater to get rid of any moisturebuildup. Leave coverings loose to permit air circulationand to allow for periodic inspection.OUTDOOR - Units designed for outdoor applicationsmay be stored outdoors, if absolutely necessary. Roadsor aisles for portable cranes and hauling equipment areneeded.The unit should be placed on a level surface to preventwater from leaking into it. The unit should be elevatedon an adequate number of wooden blocks so that it isabove water and snow levels and has enough blockingto prevent it from settling into soft ground. Locate partsfar enough apart to permit air circulation, sunlight,and space for periodic inspection. To minimize wateraccumulation, place all unit parts on blocking supportsso that rain water will run off.Do not cover parts with plastic film or tarps as thesecause condensation of moisture from the air passingthrough heating and cooling cycles.Inspection and Maintenance during StorageWhile in storage, inspect fans once per month. Keep arecord of inspection and maintenance performed.If moisture or dirt accumulations are found on parts,the source should be located and eliminated. At eachinspection, rotate the fan wheel by hand ten to fifteenrevolutions to distribute lubricant on motor. Every threemonths, the fan motor should be energized. If paintdeterioration begins, consideration should be given totouch-up or repainting. Fans with special coatings mayrequire special techniques for touch-up or repair.Machined parts coated with rust preventive should berestored to good condition promptly if signs of rustoccur. Immediately remove the original rust preventivecoating with petroleum solvent and clean with lintfree cloths. Polish any remaining rust from surfacewith crocus cloth or fine emery paper and oil. Do notdestroy the continuity of the surfaces. Wipe thoroughlyclean with Tectyl 506 (Ashland Inc.) or the equivalent.For hard to reach internal surfaces or for occasionaluse, consider using Tectyl 511M Rust Preventive orWD-40 or the equivalent.Removing from StorageAs units are removed from storage to be installedin their final location, they should be protected andmaintained in a similar fashion until the equipment goesinto operation. Prior to installing the unit and systemcomponents, inspect the unit assembly to make sure itis in working order. Check all fasteners, set screws on the fan, wheel,bearings, drive, motor base, and accessories fortightness. Rotate the fan wheel(s), where applicable, by handand assure no parts are rubbing.
Table of ContentsReceiving, Unpacking, Handling and Storage .Inspection and Maintenance during Storage . .Removing from Storage . . . . . . . . . . . . .Hood Weight . . . . . . . . . . . . . . . . . . .InstallationWall or Single Island Style Hoods . . . . . . . .Hood Installation Overview . . . . . . . . . . .Hanging the Hood . . . . . . . . . . . . . . . .Filler Panel Installation . . . . . . . . . . . . . .Installing Back Supply Plenum . . . . . . . . .Installing the Supply Duct Collar . . . . . . .Hanging the Back Supply Plenum. . . . . . .Hood Hanging Height . . . . . . . . . . . . . .Double Island Style Hoods . . . . . . . . . . . .Installing U-Channel Strips . . . . . . . . . . .Continuous Capture Plenum Hoods . . . . . . .Electrical Connections . . . . . . . . . . . . . .Ductwork . . . . . . . . . . . . . . . . . . . . .Installing External Supply Plenums . . . . . . .Supply Plenum Clip . . . . . . . . . . . . . . .Uni-strut . . . . . . . . . . . . . . . . . . . . .Hanger Brackets and Threaded Rod . . . . . .Installing the Supply Duct Collar to the PlenumExternal Supply PlenumWeights and Dimensions . . . . . . . . . . . .Clearance Reduction Methods . . . . . . . . .2.2.2.3.4.4.4.5.5.5.5.5.6.6.6.6.6.7.7.7.7.7. . . .8. . . .8Installing Enclosure Panels . . . . . . . . . . .Installing End Skirts . . . . . . . . . . . . . . .Installing Backsplash Panels. . . . . . . . . . .Installing Duct CollarsExhaust Duct Collars . . . . . . . . . . . . . .Supply Duct Collars . . . . . . . . . . . . . . .Exhaust Air Balancing Baffles . . . . . . . . . .Balancing the Kitchen Exhaust System . . . . .Testing Hood Air Volume - Procedureswith Baffle Filters (GH Series) . . . . . . . . . .with High Velocity Cartridge Filters (GK Series).with High Efficiency Filters (GX Series) . . . . .WiringFire Suppression Wiring Diagrams. . . . . . . .Overall Wiring Plan View . . . . . . . . . . . . .Wiring for Hood Switch Panels . . . . . . . . .Circuit Diagrams . . . . . . . . . . . . . . . . .Maintenance . . . . . . . . . . . . . . . . . . .Hood Baffle and Air Diffusers . . . . . . . . . .Grease Grabber Filters . . . . . . . . . . . .Filter Cleaning and Maintenance . . . . . . .Filter Washing Frequency Guide . . . . . . .Troubleshooting. . . . . . . . . . . . . . . . . .Replacement Parts . . . . . . . . . . . . . . . .Maintenance Log . . . . . . . . . . . . . . . . .Our Commitment . . . . . . . . . . . . . . . . . . . .9. . . .9. . . 10. . 11. . 1111-12. . 12. 12-15. 16-17. 18-20.21-22. . 23. . 24. . 25. . 26. . 2626-27. . 27. . 2829-30. . 31. . 32. . 32Hood Depth (Multiply by Length) for Hood Weight*Hood Model2 ft.6096 m2.5 ft.762 m3 ft.914 m3.5 ft1.067 m4 ft1.219 m4.5 ft1.372 m5 ft1.524 mGH, GK, GXEW30 lbs/ft44.64 kg/m32 lbs/ft47.62 kg/m35 lbs/ft52.09 kg/m38 lbs/ft56.55 kg/m40 lbs/ft59.53 kg/mGH, GX, GXDW36 lbs/ft53.57 kg/m38 lbs/ft56.55 kg/m41 lbs/ft61.01 kg/m44 lbs/ft65.48 kg/m46 lbs/ft68.46 kg/mGH, GK, GXFW40 lbs/ft59.53 kg/m44 lbs/ft65.48 kg/m48 lbs/ft71.43 kg/m52 lbs/ft77.38 kg/mGH, GK, GXCW48 lbs/ft71.43 kg/m51 lbs/ft75.90 kg/m54 lbs/ft80.36 kg/m57 lbs/ft84.83 kg/mGH, GK, GXSW44 lbs/ft65.48 kg/m48 lbs/ft71.43 kg/m52 lbs/ft77.38 kg/m56 lbs/ft83.34 kg/m5.5 ft1.676 m6 ft1.829 m6.5 ft1.981 m58 lbs/ft86.31 kg/m61 lbs/ft90.78 kg/m63 lbs/ft93.75 kg/mGGEW39 lbs/ft58.04 kg/m41 lbs/ft61.01 kg/m44 lbs/ft65.48 kg/m47 lbs/ft69.94 kg/m49 lbs/ft72.92 kg/mGGDW45 lbs/ft66.97 kg/m47 lbs/ft69.94 kg/m50 lbs/ft74.41 kg/m53 lbs/ft78.87 kg/m55 lbs/ft81.85 kg/mGGFW49 lbs/ft72.92 kg/m53 lbs/ft78.87 kg/m57 lbs/ft84.83 kg/m61 lbs/ft90.78 kg/mGGCW57 lbs/ft84.83 kg/m60 lb/ft89.29 kg/m63 lbs/ft93.75 kg/m66 lbs/ft98.22 kg/mGGSW53 lbs/ft78.87 kg/m57 lbs/ft84.83 kg/m61 lbs/ft90.78 kg/m65 lbs/ft96.73 kg/mGH, GK, GXEV52 lbs/ft77.38 kg/m54 lbs/ft80.36 kg/m56 lbs/ft83.34 kg/mGH, GK, GXFV61 lbs/ft90.78 kg/m66 lbs/ft68 lbs/ft72 lbs/ft75 lbs/ft79 lbs/ft98.22 kg/m 101.20 kg/m 107.15 kg/m 111.61 kg/m 117.56 kg/m7.5 ft2.286 m81 lbs/ft84 lbs/ft87 lbs/ft90 lbs/ft120.54 kg/m 125.01 kg/m 129.47 kg/m 133.93 kg/mGH, GK, GXCV66 lbs/ft69 lbs/ft72 lbs/ft76 lbs/ft79 lbs/ft98.22 kg/m 102.68 kg/m 107.15 kg/m 113.10 kg/m 117.56 kg/mGH, GK, GXSV28 lbs/ft41.67 kg/m32 lbs/ft47.62 kg/m36 lbs/ft53.57 kg/m40 lbs/ft59.52 kg/m44 lbs/ft65.48 kg/mGD243 lbs/ft63.99 kg/m48 lbs/ft71.43 kg/m53 lbs/ft78.87 kg/m58 lbs/ft86.31 kg/m63 lbs/ft68 lbs/ft73 lbs/ft93.75 kg/m 101.20 kg/m 108.64 kg/mGD358 lbs/ft86.31 kg/m64 lbs/ft70 lbs/ft76 lbs/ft82 lbs/ft88 lbs/ft94 lbs/ft95.24 kg/m 104.17 kg/m 113.10 kg/m 122.03 kg/m 130.96 kg/m 139.89 kg/mGO/GD17 ft2.134 m20 lbs/ft29.76 kg/m24 lbs/ft35.72 kg/m48 lbs/ft71.43 kg/m52 lbs/ft77.38 kg/m*Hood weight calculations are based on standard selection. Hood height, accessories and material gauge affect overall hood weight. Kitchen Hoods Type I and Type II3
InstallationHanging the HoodWall or Single Island Style HoodsBefore hanging the hood according to the hoodinstallation instructions, please check the following ifapplicable:NOTEIf you have a back supply plenum (BSP), this must beinstalled before the hood. Please see page 5.1. Make sure the back supply plenum is properlysecured, as described on page 5.The installation of the canopy hoods shall be inaccordance with NFPA 96 (latest edition) Standard forVentilation Control and Fire Protection of CommercialCooking Operations and ULC-S650 in Canada.2. If the ductwork for the back supply will not interferewith the hood installation, it should be connectednow.Greenheck does not recommend walking or standingon the hood top as damage can result and mayvoid the warranty. If you must walk on the hood top,protect the hood with additional support and planksfor flooring.For wall/single island style hoods, prior to installation,check with local authorities having jurisdiction onclearances to combustible surfaces, etc.3. Any filler panels should be attached to the hoodbefore the hood installation. See page 5 forinstructions.4. Lift the hood, and position it so the filler panels areresting lightly on the top outside edges of the backsupply. The back supply is used to position thehood only, it is not intended to hold any hoodweight.With the hood still inside its packing crate, position theunit beneath its installation location. Carefully removethe packing crate. Place some protective material onthe floor next to the crate to avoid damaging the hoodas it is tipped on its side. Tip the hood carefully onto theprotective material. If you have filler panels, install themnow; refer to
Kitchen Hoods Type I and Type II 1 Only qualified personnel should install this system. Personnel should have a clear understanding of these instructions and should be aware of general safety precautions. Improper installation can result in electric shock, possible injury due to coming in contact with moving parts, as well as other potential hazards. Other considerations may be required .