Transcription
SQL Server Express Installation GuideVersion 01For SQL Server 2016 ExpressCopyright 2005 – 2016 Robert Schudy and Warren Mansur. Permission granted for any use of Boston University.Contributions from Adam Arakelian, Dhananjay Kulkarni, Jack Polnar, Beth Haines, and Pamela Farr
Table of ContentsIntroduction . 3SQL Server Overview . 3SQL Server Hardware Requirements . 3SQL Server Developer Edition . 3Downloading SQL Server . 4Step 1: Accessing the URL. 4Step 2: Downloading the Installer . 4Installing SQL Server . 6Step 3: Starting the Installer . 6Step 4: Progressing Through the Installation Wizard . 8Installing SQL Server Management Studio . 12Step 5: Downloading SSMS. 12Step 6: Completing the SSMS Install . 14Using your Database to Complete Assignments . 16Step 7: Connecting to your Database . 16Step 8: Creating a Database for your Assignments . 21Appendix A: How to Install SQL Server on a Mac . 26Dual Booting . 26Using a Virtual Machine . 27Dual Booting Versus Using a Virtual Machine . 28Copyright 2005 – 2016 Robert Schudy and Warren Mansur. Permission granted for any use of Boston University.Contributions from Adam Arakelian, Dhananjay Kulkarni, Jack Polnar, Beth Haines, and Pamela Farr
IntroductionAlthough it may seem initially daunting, installing and starting to use a real world database isnot difficult, and is not time consuming, especially with SQL Server. You can have SQL Server upand running in as little as 20 minutes by following these SQL Server installation instructions,which lead you through the process step‐by‐step. These instructions are used by studentsenrolled in the Master of Science in Computer Information Systems and other ComputerScience Department programs both on‐campus and online. The document begins with adiscussion of SQL Server, connecting to the SQL Server web site, downloading and installing SQLServer, then using a client to connect to your database. The examples in the main documentare for the Microsoft Windows family, including Windows Windows 7, Windows 8, andWindows 10. If you would like to install SQL Server on a Mac (OS X), please first follow theinstructions in Appendix A, then continue with the rest of this installation guide. It is our hopethat you find this install guide quick and easy to use.You may be surprised to know that SQL Server Express is quite usable for many of our classes.Although Express has limitations on database size, computing capacity, and available features,the core SQL engine is the same as with other SQL Server versions, and it provides for an easierinstall and a lighter load on your computer. Microsoft has mostly maintained upwardcompatibility for SQL between SQL Server versions for many years, so if you have ready accessto an older SQL Server installation, version 2008R2, 2012 or 2016, you will also be able to use it.Microsoft is continually updating Microsoft.com, so the screens that you see on Microsoft.comwill probably be a little different than what is shown in this document. If you can’t determinehow to proceed because what you see is too different, or if something goes wrong, ask yourfacilitator or instructor for help. Have fun!SQL Server OverviewYou or may not have various opinions about SQL Server and other database systems, but youcan be confident that SQL Server has many of the advanced features available in relational andobject‐relational database management systems, and that SQL Server is widely used worldwide.SQL Server supports many of the ANSI/ISO SQL standards, so when you learn SQL Server youare mainly close to the portable standards. SQL Server, developed by Microsoft, runs onWindows platforms, and recently on Linux as well. SQL Server runs on ordinary machines. SQLServer runs on the largest multiprocessors, but also runs very well on ordinary PCs. SQL Serveris scalable, and supports both clustering and cloud computing to surpass the performance andreliability of any single platform. SQL Server is an in‐demand, capable database system.SQL Server Hardware RequirementsSQL Server Express installations on Windows require at least 512MB of RAM, but preferably1GB.SQL Server Developer EditionThis guide covers installation of the Express edition of SQL Server which is suitable for mostclasses. If your class requires the full version, or if you would rather install the full edition foryour own learning, follow the instructions in the SQL Server Installation Guide instead of theinstructions in this document.Page 3 of 28
Downloading SQL ServerThis section guides you through downloading SQL Server Express from Microsoft’s website.Step 1: Accessing the URLBrowse to address .aspx?id 52679 (if theURL has become outdated, just search for “SQL Server Express 2016” on Google). You will see ascreen similar to the following:Step 2: Downloading the InstallerClick on the “Download” button, and you will then see a screen similar to the following:Page 4 of 28
The download file dialog should appear automatically. In this case we save to C:\tmp\sqlserver,but you can save the file any location you will remember:Page 5 of 28
Installing SQL ServerNow that you’ve downloaded the installer, you’ll need to execute it and follow the on‐screenprompts to install SQL Server.Step 3: Starting the InstallerMany web browsers give the option of executing a recently downloaded file directly from thebrowser. If your browser gives you that option, that will likely be the quickest and easiest. Forexample, Google Chrome gives the option as illustrated below, and all that’s needed is to clickon the filename.Page 6 of 28
Alternatively, browse to your download location in Windows Explorer, then execute the file bydouble‐clicking the file.Page 7 of 28
Step 4: Progressing Through the Installation WizardUpon execution, the installer will display an installation wizard as something similar to thefollowing:Click “Basic” to install the default version of SQL Server. Next, accept the license terms.Page 8 of 28
The wizard will present a choice of install locations as shown in the following screenshot.Page 9 of 28
The default location is fine, so just click the “Install” button. The installation process nowbegins. You will see a progress window similar the following until the installation is complete.Page 10 of 28
When the installation is complete, you will see a window similar to the following.Page 11 of 28
Do not close the window just yet! You’ll still need the window to install SQL ServerManagement Studio. However, you have successfully installed SQL Server Express at this point,so congratulations! It was really that easy!Installing SQL Server Management StudioYou may be curious as to why you need to install something else other than SQL Server itself.SQL Server, like other modern relational databases, uses a client‐server architecture. Thedatabase itself is the server and contains all of the data and the capability to add, modify,delete, and access the data. A client is needed to connect to the database and perform specificcommands. The most popular client by far for SQL Server is SQL Server Management Studio(SSMS), which you will install in this section. SSMS is very capable and provides many powerfulconveniences and capabilities.Step 5: Downloading SSMSOn the window that is up from step 4, click the “Install tools” button. Doing so will open adownload page in your web browser for SSMS, similar to the below.Page 12 of 28
Click the “Download SQL Server Management Studio ” link to download its installer, and savethe file to a location you can remember. In the screenshot below, we save it toC:\tmp\sqlserver, the same place as the SQL Server installer was saved.Page 13 of 28
Step 6: Completing the SSMS InstallOnce downloaded, run the SSMS installer from your browser, or directly by double clicking it inWindows Explorer. The first screen that appear is shown below.Click the “Install” button to begin. A progress screen will appear similar to the following.Page 14 of 28
Let it progress through until completion, then you will see a screen indicating successful setup,similar to the below.Page 15 of 28
Congratulations! SSMS is now installed. You may now close this window, as well as the SQLServer Express installation Window from Step 4.Using your Database to Complete AssignmentsYou have installed both SQL Server and SSMS. There are just a few more steps you need inorder to start using your database to complete assignments ‐‐ connecting to your database andcreating a database for assignments.Step 7: Connecting to your DatabaseTo do anything at all with your database, you must first connect to it. SSMS is accessible underAll apps/Microsoft SQL Server 2016/Microsoft SQL Server Management Studio, as illustrated inthe screenshot below.Page 16 of 28
Alternatively, you can use your operating system’s search function as well, as illustrated below.Page 17 of 28
Click on the icon to run SSMS. When SSMS first runs, it will ask you for the server name, asillustrated below.Page 18 of 28
Click the down arrow icon,name, as illustrated below., then select “ Browse for more to browse for your serverUnder “Local Servers”, expand “Database Engine” and select the SQL Server instance you justinstalled. It will be of the form YourMachineName\SQLEXPRESS, as illustrated below.Page 19 of 28
Click the “OK” button to fill in the server name, then click the “Connect” button to connect.After doing so, you will see a connection to your database on the left‐hand side, under “ObjectExplorer”, similar to the below screenshot.Page 20 of 28
You have just connected to your database through SQL Server Management Studio!Step 8: Creating a Database for your AssignmentsYou are almost ready to begin working on assignments, but one more step is needed: creating adatabase. Now to be sure, there is already a default database called “master”, but it is perilousto use that database for anything of substance. Master is a system database which containsinformation about the server’s configuration; that database is critical to the operation of SQLServer itself, and if it gets corrupted, or runs out of space, the entire SQL Server instance is atrisk. System databases are often located on drives with limited space, and if we need to failover our instance to another instance, we cannot usually restore the master itself since eachinstance has its own configuration. Suffice it to say, for assignments it is prudent to createanother database.To get started, first right‐click on “Databases” in the Object Explorer, and click “NewDatabase ” from the context menu, as illustrated below.When the New Database window appears, enter a database name, and leave everything elsedefaulted. In the screenshot below, we use “CS669” as the database name, though you can usesomething different if you’d like.Page 21 of 28
Then click the OK button to create the database. The window will process for a moment, thendisappear. Next, in the Object Explorer, expand “Databases” and locate your new database.This is illustrated below.Page 22 of 28
Right‐click on CS669 and select “New Query”, as illustrated.A new buffer appears, and in this buffer SQL commands can be typed, saved, and executed. Thewindow is illustrated below.Page 23 of 28
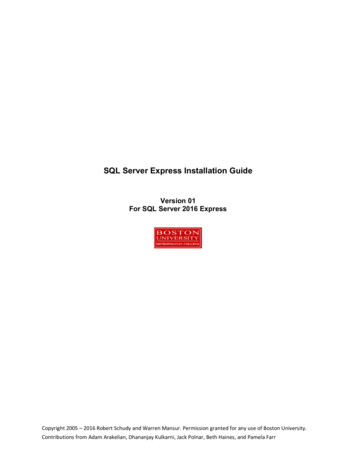
All of your assignment’s commands can be typed and executed in this type of buffer! Let’sexecute a single SQL command to verify that the database is running. In the buffer, typeSELECT DB NAME() as DatabaseNameand then click the “Execute” button just above. You may alternatively hit the F5 key to executethe command. You should see the results something like this:Page 24 of 28
Notice that the results listed out our database name, CS669. There are of course many morecommands that you will use in your course, but this gets us started. When you complete yourassignments, you will use a buffer just like this, type in your commands, and execute them toget your results.Congratulations! You have installed SQL Server and its client, connected to your database, andexecuted a command. You are now ready to complete assignments for your course!Page 25 of 28
Appendix A: How to Install SQL Server on a MacSQL Server can be installed and used on a Mac, but this requires some setup work. Manyconsider Mac computers to be the most user friendly computers available, and there are manydevoted Mac users today. Although Mac computers may be user friendly, the Mac platform isnot supported by the major, modern DBMS vendors, including Oracle and SQL Server. If youfind yourself in the situation where your home computer is a Mac, and you do not have areadily available Windows machine available for DBMS installation, there are two ways to runWindows on your Mac – dual booting and using a virtual machine.Dual BootingThe first solution, dual booting, is available to you if you have a modern Mac that runs on anIntel‐based processor. All new Macs run on Intel‐based processors, but older ones do not. Dualbooting is a fairly simple concept. Normally when you power on your computer, your operatingsystem starts booting immediately, and this happens seamlessly so that it appears youroperating system is just a natural part of the computer. In actuality, when your computer is firstpowered on, it first loads a boot loader program, and that boot loader tells the operatingsystem to start. If there is only one operating system, you may not even notice the work of theboot loader, because it always starts the same operating system. However, there is no reasonwhy one cannot install two operating systems on their computer. In such a case, each timeyour computer is powered on, the boot loader asks you which operating system you would liketo start, and also usually defaults to the first one if you do not select an option, after a timeoutperiod.All new Macs come with what Apple terms “Boot Camp”, which is a built‐in utility that supportsdual booting Mac OS X and Windows. To install Oracle in Windows on your Mac, you will needto:1. Review the prerequisites needed to run Boot Camp and to install Windows as asecond operating system on your Mac computer. The prerequisites are listed athttp://support.apple.com/kb/HT1461. Ensure that your computer meets therequirements before continuing.2. Obtain a licensed copy of Windows. If you do not have a licensed copy of Windows, youwill need to download one from the MSDNAA site. BU students are entitled to free, licensedcopies of the latest versions of Windows through the MSDNAA site, and details on how toaccess this site are available in your course’s syllabus.3. Burn the copy of Windows onto a CD, or copy the ISO image onto a USB stick. BootCamp supports installing Windows from either a CD or a USB stick.4. Follow the steps recommended by Apple to install Windows using Boot Camp.Instructions are included with the utility, and you can also start here as well:http://support.apple.com/kb/HT1461Page 26 of 28
5. After Windows is installed, reboot your computer then boot into Windows. Proceedwith the SQL Server install instructions, starting from the beginning of this install guide.When you need to run SQL Server, boot into Windows. When you need to use your Macapplications, boot into OS X.Using a Virtual MachineA virtual machine mostly behaves as any other application, but has some differences. Thevirtual machine has an application window that can be minimized and closed, the same as anyother application. What makes a virtual machine different from an ordinary application is thatan entire operating system is installed and executes inside of the virtual machine. The operatingsystem running inside of the virtual machine, termed a “guest” operating system, runs as if itwere to be on its own physical machine. This means we can install and use applications nativeto the guest operating system. Thus, once we are running a virtual machine, we are effectivelyrunning two operating systems at the same time – our machine’s operating system (termed the“host” operating system), and the guest operating system – and are using applications native toboth operating systems at the same time.In our case, we are interested in running Windows as a guest operating system on our Mac.There are many virtual machines available for Macs; however, perhaps the two most popularare VirtualBox and Parallels. VirtualBox, available at http://virtualbox.org, is free to downloadand use. Parallels, available at http://parallels.com, costs money, but offers more features.Students have successfully used both to run both Windows and SQL Server on a Mac in our BUprogram.Follow the steps below to install and use SQL Server on your Mac:1. Download and install your virtual machine of choice.2. If you do not have a licensed copy of Windows, you will need to download one from theMSDNAA site. BU students are entitled to free, licensed copies of the latest versions ofWindows through the MSDNAA site, and details on how to access this site are available inyour course’s syllabus.3. Install Windows inside of the virtual machine.4. Proceed with the SQL Server install instructions, starting from the beginning of this installguide, installing SQL Server into the guest operating system.Page 27 of 28
Dual Booting Versus Using a Virtual MachineAn obvious question is, which of these two options should you use? The answer depends uponyour computer hardware, and your personal preferences. The following table summarizes theadvantages of both options.Dual BootingAdvantagesDisadvantagesBecause both operating systems runnatively on the computer’s hardware,there is no performance overhead.You can only run one operating systemand its applications at a time.Because both operating systemsdirectly access the computer’shardware, there are not hardwarecompatibility issues.The setup is conceptually simpler.Simply boot the operating system youneed upon startup.VirtualMachineThe guest operating system and itsapplications run at the same time asthe host operating system and itsapplications.There is clipboard sharing betweenapplications in both operatingsystems. Text can be copied from anapplication in one operating system,and pasted into an application in thesecond operating system.To start the second operating system,you must reboot.There is no clipboard sharing betweenapplications in both operating systems.If text is to be shared acrossapplications, it must be saved in a filethen loaded by applications in theother operating system.Because the guest operating system isrunning under the control of virtualmachine software, the guest operatingsystem and its applications willexecute noticeably slower than if theywere running natively on thecomputer.Because both operating systems runconcurrently, the performance of thehost operating system may degrade.If your hardware is powerful enough to support running two operating systems simultaneously,and still perform reasonably well, you may want to use a virtual machine, so that you can runboth your Mac applications and your Windows applications at the same time. If you areconcerned about obtaining the best performance for both operating systems, you may want todual boot.A third advanced option, supported by the Parallels virtual machine, is to run the sameWindows installation under a dual boot configuration and a virtual machine configuration. Thisis an advanced setup, and will require two Windows license registrations, as running the sameinstallation both ways is the equivalent of running Windows on two different physical machines.Page 28 of 28
object‐relational database management systems, and that SQL Server is widely used worldwide. SQL Server supports many of the ANSI/ISO SQL standards, so when you learn SQL Server you are mainly close to the portable standards. SQL Server, developed by Microsoft, runs on