Transcription
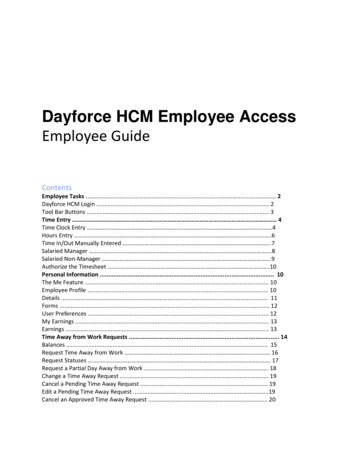
Dayforce HCM Manager TimesheetGuideContentsThe Timesheet Management Process. 2Timesheets and Pay Approval . 2Timesheet Overview . 3Load the Timesheet .3Timesheet Display Options .4Grid View Options .4Label Icons .5Review the Timesheet .5The View Pay Panel .6Problem Icons .7Timesheet Reports 7Resolve Timesheet Problems. 8Add Time to the Timesheet . 10Add Missing Punches. 11Remove Unworked Shifts . 13Add Pay Adjustment . 15Add a Shift Transfer . 16Authorize Time . 17Authorize Shifts . 17
Dayforce Manager Timesheet GuideThe Timesheet Management ProcessThere are four key steps involved in timesheet management. They are:Review the TimesheetResolve Time sheet ProblemsAuthorize TimeTimesheets and Pay ApprovalDayforce tracks employee time and attendance using Timesheets, making it easier for managers toreview time and detect exceptions. Employees might add their own time and attendance data intoDayforce (e.g. by punching in with a punch clock) or managers may add this information on their behalf.It is the manager’s job to monitor the timesheets for their location(s) to ensure that time andattendance information is accurate. This is very important because Dayforce Payroll uses the data fromemployee timesheets to calculate their pay!As a manager, you will use the My Timesheets page to (*reminder, “Employee Timesheet” is themanager’s time sheet):Monitor attendanceAdd/Edit time and correct problemsAdd pay adjustmentsView pay informationAuthorize timeRun timesheet reportsNote: if Schedules are used- The shifts that display in My Timesheets are based on the scheduled shiftinformation in My Schedules.2
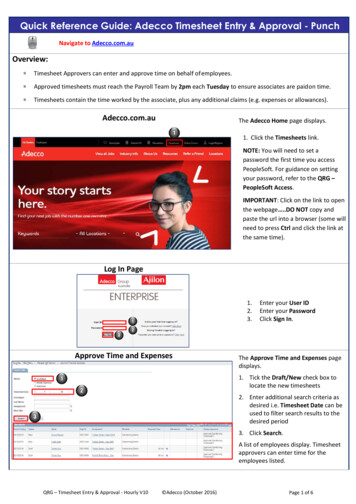
Dayforce Manager Timesheet GuideTimesheet OverviewThis section provides details on how to load the correct timesheet, read information on the timesheetand toggle timesheet display options.Load the TimesheetPath: My Timesheets [Select Location] [Select Date] LoadMy Timesheets is where all timesheet data is recorded. Timesheets are organized by location and date.Use the Org Picker on the Navigation Bar to select the location. Click on the location at the upper leftside of the screen, and a drop down will appear with all of the locations that are assigned. If there aremultiple locations, click on the plus ( ) sign next to each on to open the cost center desired.Imagine! timesheets have been configured to automatically load the current week, beginning onMonday, for the selected location. If it does not, click Load after a date is selected.Select the date for the week you’d like to view. To navigate the calendar:Scroll to the next or previous week using the green arrows.Select the week you’d like using the calendar tool.Type the start date for the week you wish to view into the date box.Once the date has been selected, click Load to load the schedule into the workspace.Note: Imagine! timesheets are loaded by desired week beginning on each Monday at 12:00 a.m.3
Dayforce Manager Timesheet GuideTimesheet Display OptionsPath: My Timesheets [Load the Timesheet]Once loaded, the timesheet lists employees against the days of the week. You may change the “view”of the time sheets by clicking on “View” in the top row. The “grid” view is recommended (See “GridView Options” below).Each cell represents a single time and attendance record for a specific employee and date. Whenreviewing “hourly” employee time sheets, each cell represents the employee’s work times andposition. Dayforce sums the shift’s hours and the total weekly totals reflect the “hours worked” andwill not reflect non-worked hours such as sick, vacation or non-worked holiday hours (unless there is aproblem with the shift's details that prevents the application from adding up the hours).Actual punch in/out times may be viewed as “raw punches”. To see “raw” punches, highlight the timesheet/s that you wish to see and click on the button “Punches” (clock icon) at the top, right side of thescreen.Grid View OptionsPath: My Timesheets [load timesheet] View Grid View OptionsAfter loading a timesheet you can switch between three levels of display details.Click View to display the Options panel.4
Dayforce Manager Timesheet GuideAdjust the Level of Detail slider bar to the desired level.View totals in hours: Displays the total hours scheduled in the hours: minutes format.Label IconsAs you edit and make adjustments to the timesheet, the application displays additional icons to label thekinds of edits made.PLEASE NOTE: Imagine! recommends that as “best practice” both employees and managers usethe “Time Away” request program rather than manually entering the non-worked hours ontothe time sheet. When the request goes to the manager, they may approve, edit or decline. Ifthe employee is either on a “schedule” or is salaried, when approving, it is recommended thatthe manager “edit” the request and select “fill schedule” so the hours automatically populatewithin the time sheet. If the “fill schedule” is not selected, the hours may still populate on thetime sheet, but they will not override the scheduled hours.Review the TimesheetPath: My Timesheets [Load the Timesheet]5
Dayforce Manager Timesheet GuideManagers must review timesheets regularly to ensure their accuracy and to detect any problems.Note: Imagine uses punch policies which include rounding rules. For example, if an employee punches inat 7:59 am, rounding rules display the punch time as 8:00 am.The View Pay PanelPath: My Timesheets [Load the Timesheet] View PayThe time and attendance data from the timesheet is used by Dayforce Payroll to calculate employeepaychecks. Therefore, it is important to preview employee pay in My Timesheets before approving it forthe pay run. Pay-related problems that might occur on the timesheet include:Employee hours are calculated incorrectlyPay is classified under the wrong pay code (For example, an employee should receive sick paybut instead receives regular pay)An employee worked at a different location or position for a shiftYou can look up and review your employees’ pay summaries for each week using the Pay Panel.Click View Pay to open the Pay Panel. The pay summary has two main tabs: Weekly and Daily.The Weekly tab displays pay details for each day the selected employee worked during the week. Thisview sorts pay information by day; where each day displays:The employee’s work location and positionNumber of hours worked per dayHow the time is categorized by pay categoryHow much the employee was paidThe Daily tab displays pay details for the exact employee and day highlighted in the timesheet. This vieworganizes pay information by hours spent per pay code; where each code displays:6
Dayforce Manager Timesheet GuideStart and end time for that pay codeLocation and positionPay codePay categoryRateTotal hours workedTotal amount per pay codeProblem IconsWhen there are discrepancies on an employee's time and attendance records, the application displaysone of the three following problem icons that represent the problem severity on the timesheet:Timesheet ReportsPath: My Timesheets ReportsRunning Timesheet Reports is another way to efficiently identify problems on the timesheet. Somecommonly used timesheet reports include:7
Dayforce Manager Timesheet GuideResolve Timesheet ProblemsPath: My Timesheets [Load the Timesheet]Now that you’ve found some problems on the timesheet, it’s time to fix them. This section describeshow to:Modify other details about the shift (i.e. change locations or position)Add a shift transferAdd missing punchesRemove unworked shifts (i.e. an accidental punch in)Correct early or late punchesMake a pay adjustment (i.e. add “sick”, “vacation”, etc.)Note: This guide covers how to deal with many timesheet issues, but does not cover all possibilities. Theerrors you see and the corrections you need to make will depend on your role.Select the shift and click Edit.The Edit Shift Window is displayed. Choose an alternate Location or Position for the shift from thedrop-down menus.8
Dayforce Manager Timesheet GuideClick Delete next to the meal Start and End times to delete the break. Modify the Start time or End timeto change the length of the shift.Override the pay code in the shift to indicate that the employee worked on a different task than his orher regular work.In the example above we are selecting ‘Training’ to indicate that the employee attended training for theentire shift.Close or click outside of the window to add the punches to the timesheet.Click Save when finished.9
Dayforce Manager Timesheet GuideAdd Time to the TimesheetPath: My Timesheets Add New ShiftEmployees may work extra hours that do not appear on their schedule or timesheet. In this case, themanager can add extra punches to the timesheet on a day without a scheduled shift.Scenarios where this might occur:An employee picks up extra hours outside of their regularly scheduled shiftsAn employee is called in to help on short noticeHow to detect the problem:Neither the shift nor the hours have been entered into Dayforce, so the manager must find theempty shift on the schedule manuallySelect the shift and click the Add Shift icon.The Add Shift window is displayed. Add the Start, End, and Break times by typing in the times andclicking the green check mark icon beside each time. Ensure that the location, position, and break timesare correct. Close or click outside of the window to add the shift to the timesheet.10
Dayforce Manager Timesheet GuideThe Worked (not scheduled) icon is displayed at the top of the cell to indicate that this shift was addedto the timesheet but did not originally appear on the schedule.Add Missing PunchesPath: My Timesheets ProblemsEmployees occasionally forget to punch in or out from their shift. Managers must correct the timesheetwhen this occurs to eliminate errors.Scenarios where this might occur:An employee forgets one or more punches throughout the day, but at least one punch isregistered on the timesheetHow to detect the problem:Depending on the policies configured, an Error is displayed when punches are missing from thetimesheetUse the Problems panel to locate the errorThere are two ways to correct this problem:11
Dayforce Manager Timesheet GuideAdd New PunchesUse the Edit IconAdd New Punch(es)Path: My Timesheets [select shift] Add New Punch(es)This option adds a single punch to the timesheet.Select the problem shift and click on the drop-down menu beside the Add Shift icon. Click Add NewPunch(es) from the list.The Add Punches window is displayed. Select the Punch Type to indicate which punch you are adding tothe timesheet. Specify the time of the punch and other parameters (such as location and job). Click Addto add the punch to the timesheet.The Edit icon appears beside the punch to indicate that it was added by the manager. Save whenfinished.Edit IconPath: My Timesheets [select shift] EditThis option adds either a single punch or multiple punches to the timesheet.Select the problem shift and click on the Edit icon. The Edit Shift window is displayed.12
Dayforce Manager Timesheet GuideModify the shift End time as necessary and click the green check mark to save the change. Click the Addicon beside the meal times to add a break that matches the scheduled one. Close or click outside of thewindow to add the punches to the timesheet.The Edit icon appears beside the corrected punches to indicate that they were added by the manager.Save when finished.The Add Shift window is displayed. The scheduled times for the shift appear as the default but may bemodified if needed. Close or click outside of the window to add the punches to the timesheet.Click Save when finished.Remove Unworked ShiftsPath: My Timesheets [select shift] Delete ShiftIf an employee punches in on a day where no shift is scheduled, the punch will appear on the timesheetas a problem punch. Managers must remove this punch from the timesheet to correct the problem.13
Dayforce Manager Timesheet GuideScenario where this might occur:An employee comes to work on the wrong day, punches in, realizes their error, and leaves againSelect the shift and click the Delete button.The punch is removed from the schedule.Click “Save”.Adjust TimeIf the manager knows that an employee did work the whole shift but punched at the wrong time, theactual start time can be adjusted. This removes the late punch from the employee’s attendance recordand pays them for the time missed.Select the shift and click the Edit icon.Edit the shift start time by typing in the Start time field or using the gre
Dayforce HCM Manager Timesheet Guide Contents The Timesheet Management Process . Dayforce sums the shifts hours and the total weekly totals reflect the hours worked and will not reflect non-worked hours such as sick, vacation or non-worked holiday hours (unless there is a problem with the shift's details that prevents the application from adding up the hours). Actual punch in/out times may .
