Transcription
MICROSOFT EXCEL 2016 STEP-BY-STEPGUIDEANDIE PHILO;MIKE ANGSTADTMONTGOMERY COUNTY-NORRISTOWN PUBLIC LIBRARY
MICROSOFT EXCEL 2016: STEP-BY-STEP GUIDERevised: 2/20/2020Table of ContentsINTRODUCTION . 4EXPLORING THE EXCEL 2016 ENVIRONMENT . 5TITLE BAR. 5QUICK ACCESS TOOLBAR . 5RIBBON . 6Active Tab . 6Contextual Tabs. 6Groups and Buttons. 6Buttons with Arrows . 7Dialogue Box Launcher . 7Ribbon Display Options button. 8Dynamic Resizing . 9File Tab . 10WORKSPACE . 11Status Bar . 12Current Information . 12Views . 12Zoom Slider. 12Customization . 12EXCEL CURSORS . 13CREATING AN EXCEL DOCUMENT AND SAVING IT . 14SORTING DATA . 33Custom Sort . 34Add a Sort Level . 35USING A FORMULA TO CALCULATE OUR SAVINGS . 36PRECEDENCE OF OPERATIONS . 36CONDITIONAL FORMATTING . 38COMMENTS. 40MANAGING WORKSHEETS. 43Copying a worksheet. 43Renaming a worksheet . 43Moving worksheets . 44Tab Color . 45Inserting worksheets . 45REFERENCING DATA ON ANOTHER WORKSHEET . 45DATA ENTRY TIPS . 46Auto fill and resize multiple columns to same width . 46Copy and Paste between worksheets . 46Entering a worksheet reference . 46AutoSum and fill formula . 47Line Break within a cell . 48Wrapping text . 48ENTERING A FUNCTION – AVERAGE. 48FREEZE PANES . 49CREATING AN EXCEL FILE . 14SAVING A WORKBOOK IN DIFFERENT FORMATS . 50PREPARING A SAVE TO LOCATION – A USB DEVICE. 14SAVING THE FILE . 15OLDER EXCEL FILE FORMAT (.XLS) . 50SAFE REMOVAL OF A USB DEVICE . 17PDF . 51CREATING A SIMPLE BUDGET SPREADSHEET. 19 CREATING A CHART . 53MERGE AND CENTER CELLS. 19INSERT A CHART . 53ENTER DATA AND NAVIGATE BETWEEN CELLS . 20SELECT DATA FOR CHART . 53FORMAT CELLS . 20FORMAT THE CHART . 54RESIZE COLUMN . 20PRINTING A WORKSHEET . 56Using the ribbon . 21Double-click Method . 21VIEWING THE PREVIEW. 56ENTER MORE DATA AND RESIZE COLUMNS . 22SCALING A PRINTOUT. 57APPLY CURRENCY STYLE FORMATTING . 23CHANGING ORIENTATION OF A PRINTOUT. 57ENTER A SIMPLE FORMULA . 23CREATING A HEADER AND FOOTER FOR A PRINTOUT . 59USE A FUNCTION . 24PRINTING COMMENTS . 60USE THE MOUSE TO EXPRESS A RANGE OF CELLS . 25LINKING WORKBOOKS . 61AUTOSUM. 25REFERENCING DATA FROM AN EXTERNAL WORKBOOK . 61ADD DATA TO A FORMATTED COLUMN . 26MANAGING LINKED WORKBOOKS. 62SPELL CHECK . 26ENHANCING THE BUDGET SPREADSHEET . 27 NUMBER FORMATS (SUPPLEMENTAL) . 63FORMATTING AS TEXT . 63CELL REFERENCING. 27FORMATTING AS PERCENTAGE . 64ADDING COLUMNS. 28FORMATTING DATES . 64COPY A FORMULA FROM ONE CELL TO ANOTHER . 28WHAT THE ##? . 29FILTERING (SUPPLEMENTAL CONTENT) . 66ENTER A NEW FORMULA AND COPY TO OTHER CELLS . 29INTRODUCTION . 66FORMULAS VIEW . 30FILTERING DATA . 66ADDING ROWS . 31To Filter Data . 66MOVING ROWS AND COLUMNS . 31To Add Another Filter . 68TRACE ERRORS . 32MC-NPL Computer Lab 1001 Powell St Norristown, PA 19401(610) 278-5100 x141 mcnplcomputerlab@gmail.com www.mc-npl.orgPage 2 of 83
MICROSOFT EXCEL 2016: STEP-BY-STEP GUIDERevised: 2/20/2020To Clear a Filter . 68 DATA VALIDATION (SUPPLEMENTAL CONTENT). 75ADVANCED FILTERING . 69IF FUNCTION (SUPPLEMENTAL CONTENT) . 78Filtering Using Search. 69IF STATEMENT WORKSHEET . 79Advanced Text Filters . 70TAX FORM WORKSHEET . 82Advanced Date Filters . 71CONDITIONAL FORMATTING . 83To Use Advanced Number Filters: . 71MANIPULATE THE TAX FILE . 84TEXT TO COLUMNS (SUPPLEMENTAL CONTENT) . 73Created & Maintained by:Andrea PhiloMike AngstadtMONTGOMERY COUNTY-NORRISTOWN PUBLIC LIBRARYNORRISTOWN, PENNSYLVANIAWWW.MC-NPL.ORGNote to Home Students:This lesson plan will frequently refer to flash drives that we have our students useduring class. Instead of saving files to a flash drive, you may save them to yourcomputer’s hard drive.We preload these flash drives with an assortment of files that are used during class.These files can be downloaded from on our Class Resources page. Our class handoutsand exercises can also be downloaded there. The website address is:www.mc-npl.org/class-resourcesMC-NPL Computer Lab 1001 Powell St Norristown, PA 19401(610) 278-5100 x141 mcnplcomputerlab@gmail.com www.mc-npl.orgPage 3 of 83
MICROSOFT EXCEL 2016: STEP-BY-STEP GUIDEIntroductionRevised: 2/20/2020Show Slide 1Notice the picture of a slide rule on the first slide. This is what people used before Excel!Microsoft Excel is an electronic spreadsheet program that runs on a personal computer. As with apaper spreadsheet, you can use Excel to organize your data into rows and columns and to performmathematical calculations.What is Microsoft Office? The term “Microsoft Office” refers Microsoft’s entire suite of officeproductivity applications. Microsoft Excel is one of the many applications that are grouped under ofthe “Microsoft Office” umbrella.What is Office 365? Office 365 is a service where you pay a monthly subscription fee (around 10 amonth) to use Microsoft Office programs (as opposed to paying 100 or more up front, as wastraditionally done). One benefit to using Office 365 is that software updates are free (for example, if anew version of Microsoft Excel comes out, you can upgrade to that new version for free).In this class, we will be using Excel 2016.An Excel spreadsheet contains one or more worksheets. Each worksheetShow Slides 2-5contains a grid of cells. Related worksheets are held together in aworkbook. When you save a spreadsheet made in Excel it saves a workbookregardless of how many worksheets it contains. An Excel workbook can hold a maximum of 1,048,576rows and 16,384 columns. A row goes left-to-right, a column goes up-and-down (like the column of abuilding).MC-NPL Computer Lab 1001 Powell St Norristown, PA 19401(610) 278-5100 x141 mcnplcomputerlab@gmail.com www.mc-npl.orgPage 4 of 83
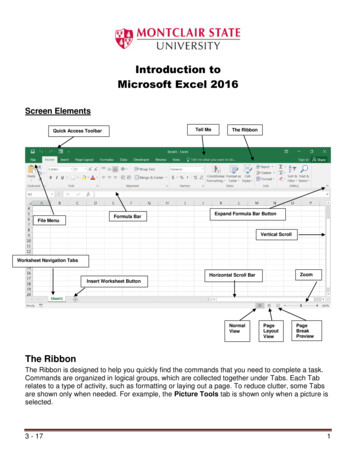
MICROSOFT EXCEL 2016: STEP-BY-STEP GUIDERevised: 2/20/2020Exploring the Excel 2016 EnvironmentSwitch to ExcelOpen Excel by using the Start menu or by double-clicking the Desktop icon for Excel 2016.Title Bar1. Note the Title Bar section which has window controls at the right end, as in other Microsoft Officeprograms.2. Note that a blank workbook opens with a default file name of Book1.Quick Access ToolbarThe Quick Access Toolbar is located all the way to the lefton the Title Bar. It contains frequently used commandsand can be customized using the drop-down menu.SaveUndoCustomize1. Point to each small icon to view its ScreenTip.2. Be aware that the Undo and Repeat buttonscommands are not located anywhere else in theapplication except for on the Quick Access Toolbar.Redo/Repeat3. Click the Customize Quick Access Toolbar button,check New on the menu. Notice how a new button has appeared.4. Click the Customize Quick Access Toolbar button again and select Show Below the Ribbon. Thisrepositions the toolbar to be below the ribbon.5. Note that when the toolbar is below the ribbon, its customize button is very difficult to see, due toits white color.6. Move the Quick Access Toolbar back above the ribbon by clicking the customize button andselecting Show Above the Ribbon.MC-NPL Computer Lab 1001 Powell St Norristown, PA 19401(610) 278-5100 x141 mcnplcomputerlab@gmail.com www.mc-npl.orgPage 5 of 83
MICROSOFT EXCEL 2016: STEP-BY-STEP GUIDERevised: 2/20/2020RibbonThe ribbon contains all of the tools that you use to interact with yourMicrosoft Excel file. It is located at the top of the window. All of theprograms in the Microsoft Office suite have one.Mention Handout 1The ribbon has a number of tabs, each of which contains buttons, which are organized into groups.Try clicking on other tabs to view their buttons (do not click the File tab yet), and then return to Hometab.Active TabBy default, Excel will open with the Home tab active on the Ribbon. Note how the Active tab has awhite background, and the Inactive tabs have the opposite.Contextual TabsContextual tabs are displayed when certain objects, such as an images and charts, are selected. Theycontain additional options for modifying the object. Contextual tabs stand out because they are darkerin color and are located to the right of all the other tabs. As soon as we start being productive in theprogram, we will see contextual tabs appear.Show Slide 6Groups and ButtonsSwitch to ExcelOn each tab, the buttons (a.k.a. commands or tools) are organized into Groups. The groups havenames, but the names are not clickable.Hover over some active buttons on the Home tab to observe ScreenTips. The ScreenTips display thename of the button, along with a short description of what the button does.MC-NPL Computer Lab 1001 Powell St Norristown, PA 19401(610) 278-5100 x141 mcnplcomp
Exploring the Excel 2016 Environment Open Excel by using the Start menu or by double-clicking the Desktop icon for Excel 2016. Title Bar 1. Note the Title Bar section which has window controls at the right end, as in other Microsoft Office programs. 2. Note that a blank workbook opens with a default file name of Book1. Quick Access Toolbar