Transcription
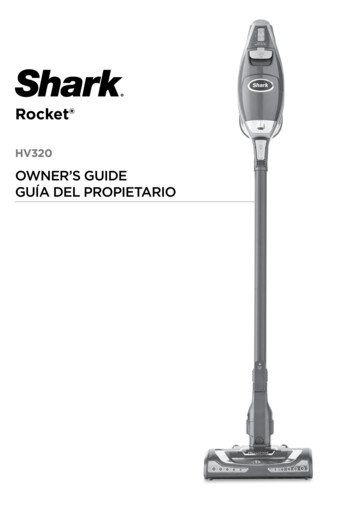
Rocket HV320OWNER’S GUIDEGUÍA DEL PROPIETARIO
REGISTER YOUR PURCHASEENGLISHTHANK YOUfor purchasing the Shark Rocket Ultra-Light UprightCONTENTSImportant Safety Instructions 3registeryourshark.comGetting To Know Your Shark Rocket Ultra-Light Upright 51-800-798-7398Assembling Your Vacuum 7Scan QR code using mobile deviceChoosing the Appropriate Setting 8Using the Motorized Floor Nozzle 9TIP: The date code islocated on one of theprongs of the powercord plug.RECORD THIS INFORMATIONTIP: You can find themodel and serial numberson the QR code labelon the bottom of thedust cup.Date of Purchase (Keep receipt): Using Your Vacuum in Above-Floor Mode 10Model Number: Accessories 11Serial Number: Using the Dust-Away Hard Floor Attachment 13Store of Purchase: Storage 14TECHNICAL SPECIFICATIONSMaintaining Your Vacuum 15Emptying the Dust Cup 15Cleaning the Filters 16Checking for Blockages 17Bottom of Floor Nozzle 18Voltage:120V., 60HzTroubleshooting Guide 19Watts:500WAmps:4.2AWarranty 20PLEASE READ CAREFULLY AND KEEPFOR FUTURE REFERENCE.This Owner’s Guide is designed to helpyou get a complete understanding ofyour new Shark Rocket Deluxe Pro.If you have any questions, please visit usat sharkclean.com/support.1s h a r kc l e a n . c o ms h a r kc l e a n . c o m2
SAVE THESE INSTRUCTIONSTo reduce the risk of electric shock, this vacuum cleaner has a polarizedplug (one blade is wider than the other). As a safety feature, this plug willfit into a polarized outlet only one way. If the plug does not fit fully into theoutlet, reverse the plug. If it still does not fit, contact a qualified electrician.DO NOT force into outlet or try to modify to fit.17. Use extra care when cleaningon stairs.18. DO NOT leave the vacuum cleanerunattended while plugged in.19. When powered on, keep thevacuum cleaner moving over thecarpet surface at all times to avoiddamaging the carpet fibers.20. DO NOT place vacuum cleaneron unstable surfaces such as chairsor tables.21. Your Shark vacuum may notbe designed to stand up on its own.When taking a break from cleaning,you may need to lean it againstfurniture or a wall, or lay it flaton the floor. Using the vacuumfor an application where the unitlacks stability may result inpersonal injury.22. DO NOT use to pick up: a) Liquids b) Large objects c) Hard or sharp objects(glass, nails, screws, or coins) d) Large quantities of dust (drywalldust, fireplace ash, or embers).DO NOT use as an attachment topower tools for dust collection. e) Smoking or burning objects(hot coals, cigarette butts,or matches) f) Flammable or combustiblematerials (lighter fluid, gasoline,or kerosene) g) Toxic materials (chlorine bleach,ammonia, or drain cleaner)HOUSEHOLD USE ONLY WARNINGTO REDUCE THE RISK OF FIRE, ELECTRIC SHOCK OR INJURY:GENERAL WARNINGS1. Your vacuum cleaner may consistof a motorized nozzle, wand, hose,and/or vacuum pod. This devicecontains electrical connections,electrical wiring, and movingparts that potentially present riskto the user.2. Use only identical replacementparts.3. Carefully observe and follow theinstructions provided below toavoid improper use of the appliance.DO NOT use the vacuum for anypurpose other than those describedin this manual.4. Before use, carefully inspect allparts for any damage. DO NOTuse if any parts are damaged.5. The use of an extension cord isNOT recommended.6. This vacuum cleaner containsno serviceable parts.USE WARNINGS7. DO NOT allow the appliance to beused by children. Close supervisionis necessary when used nearchildren. This is not a toy.8. Always turn off the vacuum cleanerbefore connecting or disconnectingany motorized nozzles or otheraccessories.9. DO NOT handle plug or vacuumcleaner with wet hands.10. DO NOT use without filters in place.3s h a r kc l e a n . c o m11. O nly use Shark branded filtersand accessories. Failure to do sowill also void the warranty.12. DO NOT damage the power cord:a) DO NOT pull or carry vacuumcleaner by the cord or use thecord as a handle.b) DO NOT unplug by pullingon cord. Grasp the plug, notthe cord.c) DO NOT run the vacuum cleanerover the power cord, close adoor on the cord, pull the cordaround sharp corners, or leavethe cord near heated surfaces.13. DO NOT put any objects into nozzleor accessory openings. DO NOT usewith any opening blocked; keep freeof dust, lint, hair, and anything thatmay reduce airflow.14. DO NOT use if nozzle or accessoryairflow is restricted. If the airpaths or the motorized floornozzle become blocked, turn thevacuum cleaner off and unplugfrom electrical outlet. Remove allobstructions before you plug inand turn on the unit again.15. Keep nozzle and all vacuumopenings away from hair, face,fingers, uncovered feet, orloose clothing.16. DO NOT use if vacuum cleaner isnot working as it should, or has beendropped, damaged, left outdoors, ordropped into water.ENGLISHIMPORTANT SAFETY INSTRUCTIONSREAD ALL INSTRUCTIONS BEFORE USE23. DO NOT use in the following areas:a) Poorly lit areasb) Wet or damp surfacesc) Outdoor areasd) Spaces that are enclosedand may contain explosive ortoxic fumes or vapors (lighterfluid, gasoline, kerosene, paint,paint thinners, mothproofingsubstances, or flammable dust)24. Turn off all controls before pluggingin or unplugging the vacuum.25. Unplug from electrical outletwhen not in use and beforeany maintenance or cleaning.26. Hand wash with water only.Washing with cleaning chemicalscould damage the unit.27. During cleaning or routinemaintenance, DO NOT cut anythingother than hair, fibers, or stringwrapped around the brushroll.28. Allow all filters to air-dry completelybefore replacing in the vacuum toprevent liquid from being drawninto electric parts.29. Make sure the dust cup and allfilters are in place after routinemaintenance.30. If provided, secure the powercord around the two cord hooksduring storage.s h a r kc l e a n . c o m4
ENGLISHGETTING TO KNOW YOURSHARK ROCKET ULTRA-LIGHT UPRIGHTWELCOME!ACongratulations on yourpurchase. Use this Owner’sGuide to learn about your newvacuum’s great features. Fromassembly to use to maintenance,you will find it all in here.BCDust CupReleaseDEFWANDGMAIN UNITA Power SwitchB Handheld VacuumC Dust Cup ReleaseD Handheld Vacuum CatchE Cord Hooks (not shown)FWand ReleaseHG WandIH Handheld Vacuum Storage HookILower Wand Release PedalJBrushroll Indicator LightK Motorized Floor NozzleJK5s h a r kc l e a n . c o ms h a r kc l e a n . c o m6
CHOOSING THE APPROPRIATE SETTINGSTEP 1STEP 2I nsert the wand into themotorized floor nozzleconnector until it clicksinto place.I nsert the handheldvacuum into the top ofthe wand until it clicksinto place.ENGLISHASSEMBLING YOUR VACUUMCLICKCLICKSlide the power switch on the handheld vacuum to the appropriate speed setting.Setting I, Bare Floor, Small Area Rugs: – The brushroll spins slowly to clean barefloors and delicate area rugs.Setting II, Carpets – The brushroll spins faster to pick up debris below the surfaceof your carpets.NOTE: For deep cleaning per ASTM F 608 (embedded dirt in carpets) use setting II, Carpets.7s h a r kc l e a n . c o ms h a r kc l e a n . c o m8
USING YOUR VACUUMIN ABOVE-FLOOR MODENOTE: Before vacuuming yourdelicate area rugs or carpet, refer tothe manufacturer’s recommendedcleaning instructions.WANDHANDHELDSTEP 1STEP 1Stand the vacuum upright. Step onthe foot pedal and pull the wand upto disconnect it from the motorizedfloor nozzle.Press the Wand Release button onthe top of the wand to detach thehandheld vacuum.TIP: You can attach the handheldvacuum directly to the motorized floornozzle for convenient stair cleaning.ENGLISHUSING THE MOTORIZEDFLOOR NOZZLEWHAT DOES THE BRUSHROLLINDICATOR LIGHT MEAN?WANDSolid GreenThe brushroll is on and working asit should. Solid RedThere is a jam in the brushroll area.Turn your vacuum off and removethe blockage. lug the unit in and recline the wand,Pthen choose your floor setting tostart cleaning.9s h a r kc l e a n . c o mSTEP 2STEP 2Attach desired cleaning accessory.Attach desired cleaning accessory.s h a r kc l e a n . c o m10
There are a variety of accessories thatare compatible with this vacuum series.Your Quick Start Guide shows theaccessories that are included withyour model.To purchase additional accessories,go to sharkclean.com11s h a r kc l e a n . c o mA 12" Crevice ToolClean in tight spaces or reachbaseboards and ceilings with this slimcrevice tool.B Pet/Upholstery ToolPerfect for grabbing pet hair and lintfrom furniture and other upholsteredsurfaces.C Duster Crevice ToolTwo cleaning tools in one. The crevicetool gives you extended cleaning reachfor small spaces, while the dusting brushcleans a multitude of surfaces.D Mini Motorized BrushPicks up pet hair and loose debrisand powerfully cleans dander out ofupholstery and surfaces. Cannot be usedwith the Flexible Hose.E Dust-Away Hard Floor Attachmentwith Microfiber PadDirect suction for big crumbs and debris.The washable, reusable microfiber paddusts hardwood and tile floors.F Dusting BrushDust shelves, baseboards, window/doorframes, and much more. Turn the brushhead to adjust the angle to the surfaceyou’re cleaning.G Under-Appliance WandClean under and behind hard-to-moveappliances and furniture with thisadjustable 36” tool. Flip the extensionpiece over to clean the undersideof appliances.H Flexible HoseStretch and flex this extension hose toclean around objects and get into hardto-reach spaces. Attach the crevice tool oranother accessory depending on what youare cleaning.I Wall MountInstall the mount to hang your vacuumon the wall for convenient storage.Includes screws, anchors, and instructionsheet with mounting template for easyinstallation.J Onboard Storage ClipRemovable clip attaches to the vacuumwand. Can hold up to two accessories ata time while cleaning or for storage.ENGLISHACCESSORIESABCDEFGHIJs h a r kc l e a n . c o m12
IMPORTANT: DO NOT use theDust-Away Hard Floor Attachmentwithout the microfiber pad.STEP 1 lip two tabs between the nozzle andSthe duster base and attach them to thefront fasteners.MICROFIBER PAD CAREENGLISHUSING THE DUST-AWAY HARD FLOOR ATTACHMENTSTORAGEPress the Wand Release button on the top of the wand to release the handheldvacuum. Align the catch on the bottom of the handheld vacuum with the storagehook on the wand. Slide the handheld vacuum down so that the catch hangs fromthe storage hook. Wrap the cord counterclockwise around the cord hooks, startingwith the top hook.Note: Ensure there is slack where the cord connects to the handheld vacuum.Machine-wash or hand-wash the padseparately in warm water withliquid detergent.DO NOT use bleach or fabric softenersas they may damage the pad orleave a coating that will reduce itscleaning performance.HandheldVacuum CatchTumble dry low or line-dry to extendthe life of the microfiber fabric.For the best results, replace themicrofiber pad every 3 to 4 months.STEP 2Pull the other two tabs tightly aroundto the back fasteners. Ensure the padis flat against the bottom surface andtightly secured.Slide the power switch to setting I, BareFloor, Small Area Rugs to clean hardfloors. Do not use to clean damp floorsor wet/sticky messes. Use only padsprovided by Shark .Handheld VacuumStorage Hook13s h a r kc l e a n . c o ms h a r kc l e a n . c o m14
IMPORTANT: Clean the dust screeninside the dust cup as required.NOTE: Empty dust cup when debrisreaches the MAX fill line.EMPTYING THE DUST CUP1Press the Wand Release button onthe top of the wand to disconnectit from the handheld vacuum.OR emove the dust cup from theRhandheld vacuum by squeezing thetwo Dust Cup Release buttons onboth sides of the base at the sametime and pulling it out.2 Hold dust cup over a trash bin andpress the Empty button on the frontof the dust cup. The bottom lid willopen, allowing the debris to fall out.3 Once dust cup is empty, close thebottom lid and insert dust cup backinto handheld vacuum until you itclicks into place.RECOMMENDED FILTER CLEANINGSCHEDULE:Pre-Motor Filter Kit(Foam & Felt)XPMFK320Clean once a month.Post-Motor FilterClean once a year.1084FTV320CLEANING THE FILTERS1 Pre-Motor (foam and felt):Lift the latch on the top of thehandheld vacuum to open the filtercover. Take out filters and tap loosedirt off them. If more cleaning isneeded, rinse filters with water onlyand let them air-dry completely.To reinstall them, insert the feltfilter first, place the foam filter ontop of it, and close the filter cover.2 Post-Motor: Lift off the post-motor filter coverbelow the handle of the handheldvacuum. Remove the filter, rinse itwith water only, and let it air-drycompletely. Replace the filter, thenclose the cover, pressing it until itclicks into place.FoamEmptyFeltDustpReleaCuse15s h a r kc l e a n . c o ms h a r kc l e a n . c o m16ENGLISHMAINTAINING YOUR VACUUM
TIP: Ensure the bottom of the floornozzle is completely sealed and lockedbefore using.TIP: You do not need any tools to openthe floor nozzle, just a coin.CHECKING FOR BLOCKAGES:BOTTOM OF FLOOR NOZZLE HANDHELD AND WAND1 Use the edge of a coin to open thethree locks on the bottom of thefloor nozzle.2 To access the brushroll, removethe cover from the bottom of thefloor nozzle. Shine a flashlight intothe nozzle to check for possibleblockages in the airway.3 Run scissors along the groove inthe brushroll to cut or clear awayany string, carpet fibers, hair, orother debris.4 To reinstall the cover, line it up,then rotate down until it clicks intoplace. Use the edge of a coin toclose the three locks on the bottomof the nozzle.1 Remove the wand from thehandheld vacuum and checkall dust cup intake openings.2 Remove the floor nozzle fromthe wand and check the wandfor blockages.17s h a r kc l e a n . c o mENGLISHMAINTAINING YOUR VACUUM - Continueds h a r kc l e a n . c o m18
FIVE (5) YEARLIMITED WARRANTYENGLISHTROUBLESHOOTINGGUIDEVacuum is not picking up debris. No suction or light suction.The Five (5) Year Limited Warranty applies to purchases made from authorized retailers of SharkNinjaOperating LLC. Warranty coverage applies to the original owner and to the original product only and isnot transferable. C heck filters to see if they need cleaning. Follow instructions for rinsing andcompletely air-drying the filters before reinserting in the vacuum. Dust cup may be full; empty dust cup. Check floor nozzle for blockages; clear blockages if required. Remove any string, carpet fibers, or hair that may be wrapped around the brushroll.SharkNinja warrants that the unit shall be free from defects in material and workmanship for a periodof five (5) years from the date of purchase when it is used under normal household conditions andmaintained according to the requirements outlined in the Owner’s Guide, subject to the followingconditions and exclusions:Vacuum lifts area rugs.2. In the event a replacement unit is issued, the warranty coverage ends six (6) months following thereceipt date of the replacement unit or the remainder of the existing warranty, whichever is later.SharkNinja reserves the right to replace the unit with one of equal or greater value.(Refer to Maintenance section for more information.) S uction is powerful. Take care when vacuuming area rugs or rugs with delicatelysewn edges. Turn off the unit to disengage the brushroll. To restart, slide the power switch tosetting I, Bare Floor, Small Area Rugs.Brushroll does not spin. I f Brushroll Indicator Light on the floor nozzle turns red, the brushroll hasstopped spinning. Immediately turn off and unplug vacuum and removeblockage. Plug unit into an electrical outlet and turn vacuum on. If Brushroll Indicator Light on the floor nozzle is green, the blockage has beensuccessfully cleared. If the light is still red, please contact Customer Service at1-800-798-7398.Vacuum turns off on its own or indicator light flashes red. his vacuum is equipped with a motor-protective thermostat so it will shut off if itToverheats. Should this occur, perform the following steps to restart the motor-protectivethermostat:1. Turn vacuum off and unplug it.2. Empty dust cup and clean filters (see Maintenance section).3. Check for blockages in hose, accessories, and inlet openings.4. Allow unit to cool for a minimum of 45 minutes.5. Plug in vacuum and turn it on.What is covered by this warranty?1. The original unit and/or non-wearable components deemed defective, in SharkNinja’s solediscretion, will be repaired or replaced up to five (5) years from the original purchase date.What is not covered by this warranty?1. Normal wear and tear of wearable parts (such as foam filters, HEPA filters, pads, etc.), which requireregular maintenance and/or replacement to ensure the proper functioning of your unit, are notcovered by this warranty. Replacement parts are available for purchase at sharkaccessories.com.2.Any unit that has been tampered with or used for commercial purposes.3. Damage caused by misuse (e.g., vacuuming up water or other liquids), abuse, negligent handling,failure to perform required maintenance (e.g., not cleaning the filters), or damage due tomishandlingin transit.4.Consequential and incidental damages.5. Defects caused by repair persons not authorized by SharkNinja. These defects include damagescaused in the process of shipping, altering, or repairing the SharkNinja product (or any of its parts)when the repair is performed by a repair person not authorized by SharkNinja.6.Products purchased, used, or operated outside North America.How to get serviceIf your appliance fails to operate properly while in use under normal household conditions within thewarranty period, visit sharkclean.com/support for product care and maintenance self-help. Our CustomerService Specialists are also available at 1-800-798-7398 to assist with product support and warrantyservice options, including the possibility of upgrading to our VIP warranty service options for selectproduct categories.SharkNinja will cover the cost for the customer to send in the unit to us for repair or replacement. A fee of 24.95 (subject to change) will be charged when SharkNinja ships the repaired or replacement unit.How to initiate a warranty claimYou must call 1-800-798-7398 to initiate a warranty claim. You will need the receipt as proof ofpurchase.A Customer Service Specialist will provide you with return and packing instruction information.How state law appliesThis warranty gives you specific legal rights, and you also may have other rights that vary from state tostate. Some states do not permit the exclusion or limitation of incidental or consequential damages, sothe above may not apply to you.191-800-798-7398s h a r kc l e a n . c o m20
ENREGISTREZ VOTRE ACHATFRANÇAISENGLISHMERCId’avoir fait l’achat de l’aspirateur vertical ultraléger Shark Rocket TABLE DES MATIÈRESImportantes consignes de sécurité . . . . . . . . . . . . . . . . . . . . . 23Apprendre à connaître l’aspirateur verticalultraléger Shark Rocket . . . . . . . . . . . . . . . . . . . . . . . . . . . . . . 25registeryourshark.com1-800-798-7398Assemblage de l’aspirateur. . . . . . . . . . . . . . . . . . . . . . . . . . . . 27Choisir la configuration appropriée. . . . . . . . . . . . . . . . . . . . . 28Utilisation de la buse de plancher motorisée. . . . . . . . . . . . . 29CONSIGNEZ LES RENSEIGNEMENTSCI-DESSOUSNuméro du modèle : Code de date : Date d’achat : (conservez la facture)Magasin où l’appareila été acheté : CARACTÉRISTIQUES TECHNIQUESTension électrique : 120 V, 60 HzWatts :500 WPuissance :4,2 AVEUILLEZ LIRE ATTENTIVEMENTLE PRÉSENT MODE D’EMPLOI ET LECONSERVER À TITRE INFORMATIF.CONSEIL : Le numéro de modèle estindiqué sur la plaque signalétique qui estsituée sous la poignée.CONSEIL : Le code de la date estindiqué sur l’une des broches ducordon d’alimentation.Utilisation de l’aspirateur en modenettoyage au-dessus du sol. . . . . . . . . . . . . . . . . . . . . . . . . . . . 30Utilisation de l’accessoire pour plancherà surface dure Dust-Away . . . . . . . . . . . . . . . . . . . . . . . . . . . . 31Rangement. . . . . . . . . . . . . . . . . . . . . . . . . . . . . . . . . . . . . . . . . . 32Accessoires. . . . . . . . . . . . . . . . . . . . . . . . . . . . . . . . . . . . . . . . . . 33Entretien de l’aspirateur. . . . . . . . . . . . . . . . . . . . . . . . . . . . . . . 35Vidange du récipient à poussière. . . . . . . . . . . . . . . . . . . . . . . . . 35Nettoyage des filtres. . . . . . . . . . . . . . . . . . . . . . . . . . . . . . . . . . . . 36Vérification de la présence d’obstructions. . . . . . . . . . . . . . . . . 37Partie inférieure de la buse de plancher . . . . . . . . . . . . . . . . . . . 38Guide de dépannage. . . . . . . . . . . . . . . . . . . . . . . . . . . . . . . . . . 39Garantie. . . . . . . . . . . . . . . . . . . . . . . . . . . . . . . . . . . . . . . . . . . . . 40Ce manuel du propriétaire a étéconçu pour vous aider à acquérir unecompréhension approfondie de votrenouvel aspirateur Shark Rocket.Pour toute question, veuillezcommuniquer avec le service à laclientèle au 1 800 798-7398.21s h a r kc l e a n . c o ms h a r kc l e a n . c o m22
USAGE DOMESTIQUE SEULEMENTPour réduire le risque de décharges électriques, cet aspirateur est muni d’une fichepolarisée (une lame est plus large que l’autre). Comme précaution, cette fiches’insère dans une prise polarisée dans un seul sens. Si la fiche d’alimentation nes’insère pas à fond dans la prise de courant, inversez alors le sens de la fiche. Si ellene s’insère toujours pas, communiquez avec un électricien qualifié. NE FORCEZ PASpour insérer la fiche dans la prise et ne tentez pas de la modifier pour qu’elle puisseentrer dans celle-ci. AVERTISSEMENTAFIN DE RÉDUIRE LES RISQUES D’INCENDIE, D’ÉLECTROCUTION OU DE BLESSURE :AVERTISSEMENTS GÉNÉRAUX1. Votre aspirateur pourrait être composéd’une buse motorisée, d’un tube,d’un tuyau et/ou d’un réceptacle. Cetappareil comporte des raccordementsélectriques, du filage électrique et despièces amovibles pouvant exposerl’utilisateur à certains risques.2. Utilisez uniquement des pièces derechange identiques.3. Respectez et suivez attentivement lesinstructions ci-dessous afin d’évitertout usage inadéquat de l’appareil.N’UTILISEZ PAS l’aspirateur pour unusage autre que ceux décrits dans leprésent manuel.4. Avant d’utiliser, inspectezsoigneusement toutes les piècesafin de déceler tout dommage. NEL’UTILISEZ PAS s’il est endommagé.5. L’utilisation d’une rallonge électriqueN’EST PAS recommandée.6. Cet aspirateur ne renferme aucunepièce qui peut être réparée.AVERTISSEMENTS CONCERNANTL’UTILISATION7. NE LAISSEZ PAS les enfants se servirde l’appareil. Une surveillance étroiteest nécessaire lorsque l’appareil estutilisé en présence d’enfants. Cetappareil n’est pas un jouet.8. Mettez toujours l’aspirateur horstension avant d’attacher ou dedétacher la buse motorisée ou unautre accessoire.9. NE MANIPULEZ PAS la fiche oul’aspirateur avec les mains mouillées.23s h a r kc l e a n . c o m10. N ’UTILISEZ PAS l’appareil si les filtresne sont pas en place.11. Utilisez uniquement des filtres et desaccessoires de marque Shark . Sinon,la garantie sera annulée.12. PRENEZ SOIN DE NE PASENDOMMAGER le cordond’alimentation :a) N’UTILISEZ PAS le cordond’alimentation comme poignéepour porter ou pour tirerl’aspirateur.b) NE DÉBRANCHEZ PASl’appareil en tirant sur le cordond’alimentation. Agrippez la fiche etnon le cordon.c) NE PASSEZ PAS l’aspirateur pardessus le cordon d’alimentation, nefermez pas une porte sur le cordon,ne tirez pas le cordon sur des coinspointus et ne laissez pas le cordonprès de surfaces chaudes.13. ÉVITEZ d’insérer des objets dans lesouvertures de la buse ou de tout autreaccessoire. N’UTILISEZ PAS l’appareilsi une ouverture est obstruée. Veillezà ce que les ouvertures ne soientpas bloquées par de la poussière,de la peluche, des cheveux ou toutautre élément qui pourrait gêner lacirculation de l’air.14. N’UTILISEZ PAS l’appareil si le fluxd’air de la buse ou de l’accessoireest obstrué. Si la buse de planchermotorisée ou les conduits d’airdeviennent obstrués, éteignezl’aspirateur et débranchez-le dela prise de courant. Retirez touteobstruction avant de remettrel’appareil en marche.CONSERVEZ CES INSTRUCTIONSFRANÇAISENGLISHIMPORTANTES CONSIGNES DE SÉCURITÉLISEZ TOUTES LES INSTRUCTIONS AVANT L’UTILISATION15. Tenez la buse et tous les orifices del’aspirateur éloignés des cheveux,du visage, des doigts, des piedsdéchaussés ou des vêtementsamples.16. N’UTILISEZ PAS l’aspirateur s’il nefonctionne pas comme prévu, ou s’il aété échappé sur le sol, endommagé,laissé à l’extérieur ou immergé.17. Soyez extrêmement prudent lorsquevous nettoyez les escaliers.18. NE LAISSEZ PAS l’aspirateur sanssurveillance lorsqu’il est branché.19. Lorsqu’il est en marche, gardezl’aspirateur en mouvement sur letapis en tout temps, afin d’éviterd’endommager les fibres du tapis.20. NE PLACEZ PAS l’aspirateur sur dessurfaces instables comme des chaisesou des tables.21. Votre aspirateur Shark pourrait nepas avoir été conçu pour se maintenirde lui-même en position verticale.Lorsque vous prenez une pause, vousdevrez peut-être l’appuyer contreun meuble ou un mur, ou le placersur le plancher. Toute utilisation oùl’aspirateur serait dans une positioninstable pourrait entraîner desblessures corporelles.22. N’UTILISEZ PAS l’appareil pouraspirer : a) Des liquides b) Des objets de grande taille c) Des objets durs ou tranchants(verre, clous, vis ou pièces demonnaie) d) De grandes quantités depoussière (poussière de cloisonsèche, cendres ou braisesde foyer). N’UTILISEZ PASl’aspirateur comme accessoirepour un outil électrique pourl’aspiration de la poussière. e) Des objets fumants ou brûlants(charbons ardents, mégots decigarettes ou allumettes) f) Des matériaux inflammables oucombustibles (essence à briquet,essence ou kérosène) g) Matières toxiques (eau deJavel, ammoniaque ou produitdébouchant)23. N’UTILISEZ PAS l’appareil dans lesendroits suivants :a) Endroits faiblement éclairésb) Surfaces humides ou mouilléesc) À l’extérieurd) Dans des endroits fermés pouvantcontenir des matières explosives,ou des fumées ou vapeurstoxiques (essence à briquet,essence, kérosène, peinture,diluants à peinture, produits detraitement antimite ou poussièresinflammables).24. Fermez toutes les commandesavant de brancher ou de débrancherl’aspirateur.25. Débranchez l’appareil de la prisemurale lorsqu’il n’est pas en usage,et avant d’en faire l’entretien ou de lenettoyer.26. Lavez à la main avec de l’eauseulement. L’utilisation de produitschimiques de nettoyage pourraitendommager l’appareil.27. Pendant le nettoyage ou l’entretien,NE COUPEZ aucune matière autreque des cheveux, des fibres ou de laficelle enroulés autour de la brossecylindrique rotative.28. Laissez tous les filtres séchercomplètement avant de les remettredans l’aspirateur pour éviter quedu liquide ne soit aspiré dans lescomposants électriques.29. Après avoir effectué l’entretien deroutine, assurez-vous que le récipientà poussière et tous les filtres sont enplace.30. Le cas échéant, fixez le cordond’alimentation autour des deuxcrochets avant de ranger l’appareil.s h a r kc l e a n . c o m24
FRANÇAISENGLISHAPPRENDRE À CONNAÎTRE L’ASPIRATEURVERTICAL ULTRALÉGER SHARK ROCKET BIENVENUE!AFélicitations pour votreachat. Utilisez ce manueld’instructions afin deconnaître les caractéristiquesremarquables de votre nouvelaspirateur. De l’assemblageà l’utilisation, en passant parl’entretien, vous trouverez tousles renseignements que vouscherchez ici.BCDust CupReleaseDEUNITÉ PRINCIPALEFA Interrupteur d’alimentationB Aspirateur portatifWANDGC Bouton de dégagement du récipientà poussièreD Collecteur de l’aspirateur portatifE Crochets d’enroulement du cordon(non visible)FBouton de dégagement du tubeG TubeH Crochet de rangement de l’aspirateurportatifIPédale de dégagement du tubeinférieurJTémoin lumineux de la brosse rotativeK Buse de plancher motoriséeHIJK25s h a r kc l e a n . c o ms h a r kc l e a n . c o m26
CHOISIR LA CONFIGURATION APPROPRIÉEÉTAPE 1ÉTAPE 2I nsérez le tube dansla buse de planchermotorisée jusqu’à ce qu’unclic se fasse entendre. Insérez l’aspirateurportatif dans la partiesupérieure du tubejusqu’à ce qu’un clic sefasse entendre.FRANÇAISENGLISHASSEMBLAGE DE L’ASPIRATEURCLICCLICÉTAPE 3Fixez l’attache derangement surle tube. Fixez unaccessoire sur lesupport supérieuret l’autre sur lesupport inférieur.Réglez le bouton curseur de l’aspirateur portatif à la vitesse souhaitée.Planchers, carpettes (I) – La brosse rotative tourne lentement pour nettoyer lesplanchers et les carpettes délicates.Carpettes à poils longs (II) – La brosse rotative tourne rapidement pour aspirer lesdébris incrustés dans les tapis.REMARQUE : Pour un nettoyage en profondeur selon la norme ASTM F 608 (élimination des saletésincrustées dans
ENGLISH 5 sharkclean com sharkclean com 6 GETTING TO KNOW YOUR SHARK ROCKET ULTRA-LIGHT UPRIGHT WELCOME! Congratulations on your purchase Use this Owner's Guide to learn about your new
