Transcription
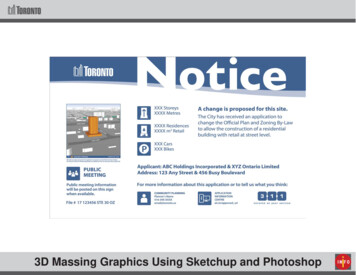
Importing CAD files in SketchUp Pro TutorialThis is a basic tutorial that outlines how you can import CAD files into Google SketchUp Pro, to createworking models of your data. It is important to note that the following tutorial can only be carried out inthe Pro version of Google SketchUp. There are numerous work stations within the Geospatial Centrewhich has the Pro license for the program.Google SketchUp Pro supports AutoCAD files, .dwg and .dxf, therefore you can either import an existingCAD file into SketchUp Pro or export GIS data to CAD format via ArcMap, then import to SketchUp Pro.For the purposes of this tutorial, we will use GIS data and exporting to CAD.Let’s say you were doing an initial site analysis of an area – you begin by selecting data layers whichwould be of importance to you. In this case, we will be selecting, buildings, roads, surface water, andparks. These layers are found within your tutorial package.1. Adding Layers into ArcMapBegin by adding your layers into ArcMap, using the add data function.You will produce something that looks similar to the image below, which includes the roads,water, parks and building footprints.
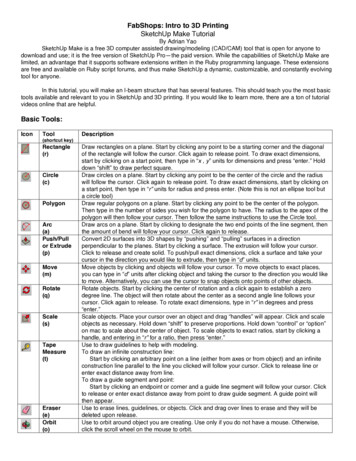
2. Clipping the Layers to the SiteFrom there, clip the individual layers to the specific site you are analysing. To do so, first zoominto the specific area in which you are analysing. Then right click on the layer you wish to export Data Export Data.
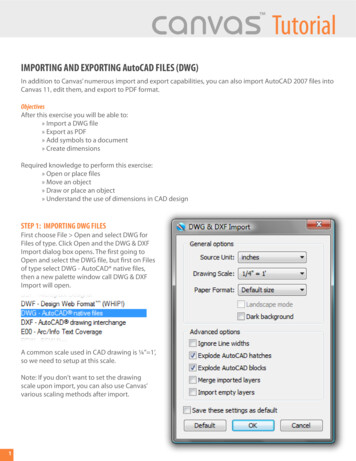
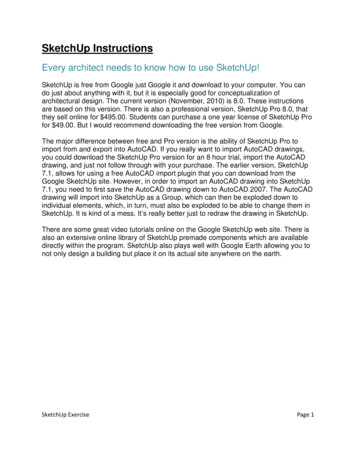
When the Export Data window opens, change the Export from ‘All Features’ to ‘All Feature inView Extent’ (as shown in the picture below), save it as a shapefile and click ok. When it promptsyou to add the exported data to the map as a layer, click yes and the new clipped layer willappear in the data frame.3. Exporting to CADNext, you will need to export each layer as a CAD file. Right click on the layer name data export to CAD.
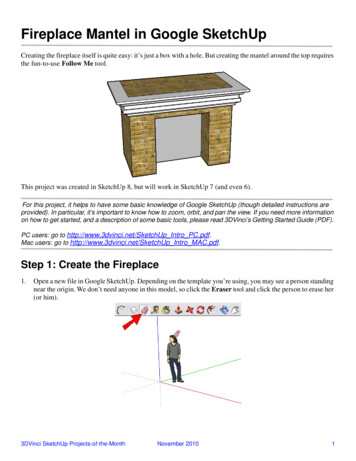
It will open a window like the image below. Keep the default settings, but change the output fileto save it to your working folder and click OK. Do this for each layer in your data set.Once that is complete, you can open Google SketchUp Pro.4. Opening CAD files in SketchUp ProTo open CAD files in SketchUp Pro, go to File Import and it will open a new window.
Locate the tutorial package in which you’ve saved the CAD files and open each one.5. Accuracy in Displaying DataThere may come a time where you need to make minor adjustments to the placement of your CADlayers. For example, this surface water layer (highlighted in blue)should not be aligned with the rest of the layers at the bottom left corner, but rather the bottomright corner. To move a specific layer, simply select the layer using the select tool,
then enable to the move tool,to click an area of the layer and drag it to its correct location (as seem below).6. Making Your Model 3DYou can also make your model 3D. For instance, you can trace over the CAD lines for the buildinglayer by first enabling the line tool,and tracing over the outline. From there, you can use the push/pull tool
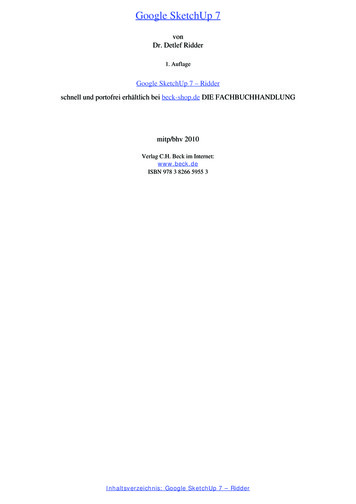
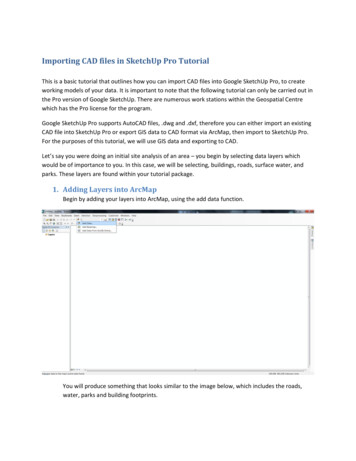
to drag the building up a desired height, and the result will be similar to the image below.7. Possible Usages for Displaying InformationBelow is an example of the level of detail you can include in your 3D model, depending of theproject requirements. In this case, an initial site analysis was conducted and the buildings wereraised to their specific heights and colour coded based on their usage (yellow for residential, purplefor institutional etc.). The possible usages of CAD files in Google SketchUp Pro is endless.
Katherine FrankovichJuly 31, 2012
Google SketchUp Pro supports AutoCAD files, .dwg and .dxf, therefore you can either import an existing . 7. Possible Usages for Displaying Information Below is an example of the level of detail you can include in your 3D model, depending of the project requirements. In this case, an initial site analysis was conducted and the buildings were