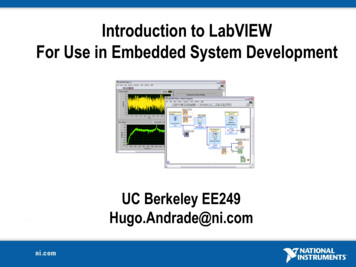
Transcription
ENE 806Laboratory Feasibility Studies for Environmental RemediationIntroduction to LabVIEWByAhsan MunirInstructor: Dr. Syed Hashsham
Introduction to Labview Product of National Instruments (NI)Software for Virtual InstrumentationData Acquisition (DAQ)Graphical ProgrammingData Storage and Analysis for wide Range ofApplications
Features of LabVIEW Design– Signal and Image Processing– Embedded System Programming (PC, DSP, FPGA, Microcontroller)– Simulation and Prototyping– And more Control– Automatic Controls and Dynamic Systems– Mechatronics and Robotics– And more Measurements– Circuits and Electronics– Measurements and Instrumentation– And more
Things to do .PHYSICALSYSTEMACQUIREANALYSEDISPLAY
Data Acquisition (DAQ)“Data acquisition is the process of gathering or generating information inan automated fashion from analog and digital measurement sources suchas sensors and devices under test.”Video TutorialBuild a PC-Based Data Acquisition System in 10 Minuteshttp://zone.ni.com/wv/app/doc/p/id/wv-207( from National Instruments Corporation)
Introduction to Labview Creating your first Virtual Instrument A simple Input/Output VI
Start LabviewCreate a Blank VI
You should see the Front Panel.Close any open palettes or menus to simplify the look.Use the View menu to display the Tools Palette. Notice it isset to automatically choosethe correct tool.You can switch between theFront Panel and theBlock Diagram by usingthe Ctrl-E command.You can also use theWindow menu.
Right-click anywhere in theFront Panel to bring up theControls Palette.Hover over the NumericControls to see what isavailable.Choose a simple NumericControl with a left-click andplace it on the Front Panel withanother left-click.
The control icon (an input) shouldshow up on the Front PanelIt’s corresponding icon will show upon the Block Diagram.This is what a Userwill see to operatethe program.
Change the name of theNumeric Control to “Input 1”Use left-clicks to select andchange the name.Notice that the correct tool ischosen for you as you changethe name. The name willchange on both the FrontPanel and the Block Diagram.
Choose the wrong Control You will now make your first mistake in a Labviewprogram. This is so that you can learn how to fix amistake. Go back to the Front Panel and create another NumericControl You are smart enough to know that you may want a NumericIndicator (an output) to pair up with the Control (the input). This iscorrect. But we will make the mistake and then learn a way toquickly fix the mistake which is easy to make.
Right-click on the Front Panelto bring up the ControlsPalette.Hover over the NumericControls to see what isavailable.Choose a simple NumericControl with a left-click andplace it on the Front Panel withanother left-click.The second Numeric Controlshould show up both places.
Go to the BlockDiagramTry to wire the Input 1to the new NumericControl.You do not have tochoose the wire tool.It should be doneautomatically.You will see a brokenwire because it cannot be done.
Right-click on the bad Control you just created and Change to IndicatorThe wiring should work now.Notice the Control is thick and the Indicator is thin. Also notice the wire comes out ofthe right and into the left.
Change the name of the Indicator to Output1Add some more Indicators to the Front Panel and wire them up inthe Block Diagram. Now do it without mistakes. Choose anIndicator.You should only have 1 Control. Input 1 should be putting its valueinto all the other Outputs.No broken wires means you are ready to run.
Type a number into the Input. Or use the arrows on the input toselect a value.Hit the Run button on the Control Panel
For a more meaningful Labview experience. Hit the RunContinuously button. You should be able to figure out how to stop it.Change the value of the input and watch the output.Go to the Block Diagram and hit the Highlight Execution button.This helps in debugging programs to show the data flow through thediagram. Turn this off to speed up program execution.
Fixing a small problem on the Indicators can be donewhile the program is running.Double left-click toselect and changevalues of indicators.
If you don’t like the horizontal slide.Stop the Program.Right-click on the slide.Replace with the item youchose.
Replace the Input Control with a Knob.Right-click gives many options. Take some time to explorethe format and precision options to make it look nice.Showing the digital display is a nice option. It gives twoways to input the value for the Control.
Adding Two InputsOn the Front Panel, create two new numeric controls (inputs) andone new numeric indicator (an output)You will be adding the two inputs together and putting the resultinto the output. You will be creating a 2500 adding machine.Createthese threesimpleitems andrenamethem.
Find the new items on the Block Diagram.They should be named correctly.
Right-click within the Block Diagram to bring upthe Functions Palette.Hover above the Numeric structure to bring upthe addition Function Block.Left-click to choosethe addition function.
Place the Addition Function in thecorrect place.Wire the Block Diagram.Be careful to get the right parts ofthe block when you wire. Labelspop up to help, but you have totake the time to actually read them
Reminder: Use Ctrl-E to swap between the Front Panel andBlock Diagram.Run your VI and make sure it is working.
Working with constantsInstead of using a control for the input. It is often useful to use anumeric constant in a math operation. Doing the operationy 2x 5 requires 1 variable for the “x” and two constants. The “2”and the “5”.Create oneinput andone outputand labelthem.
Add in the multiply block and addition block fromthe Functions Palette. Sometimes a carefulplacement of the blocks will allow them to be“prewired” as soon as they are dropped in place.Make sure they are wired correctly.The constantsare created bya right-click inthe positionwhere the wirenode is.Sorry, I can’tget a screenshot of doingthis. You’llfigure it out.
The constants do not show upon the Front Panel becausethey are not going to bechanged by the user. If youwant variables, you wouldcreate a control.Running this vi should dosome simple calculations.Don’t forget to wire theoutput into the y 2x 5indicator.
Thanks
For a more meaningful Labview experience. Hit the Run Continuously button. You should be able to figure out how to stop it. Change the value of the input and watch the output. Go to the Block Diagram and hit the Highlight Execution button. This helps in debugging programs to show the data flow through the diagram.File Size: 894KBPage Count: 30Explore furtherLabview tutorial: Getting started with labview first projectmicrocontrollerslab.comWhat Exactly Is LabVIEW, and What Can It Do for Me .www.informit.comHow to Download and Install LabVIEW 2017 on Windows .www.studica.comNI LabVIEW 7.1 Download - W Programming Examples - Kansas State Universityfaculty.salina.k-state.eduRecommended to you b