Transcription
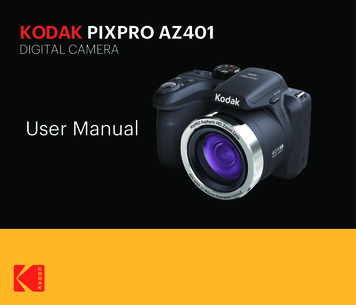
KODAK PIXPRO AZ252DIGITAL CAMERAUser Manual
BEFORE YOU STARTDeclaration of ConformityResponsible Party: JK Imaging Ltd.Address: JK Imaging Ltd., 17239 So. Main Street, Gardena, CA 90248 USACompany Website: kodakpixpro.comFor Customers in the U.S.A.Tested to Comply with FCC Standards FOR HOME OR OFFICE USEThis device complies with part 15 of the FCC Rules. Operation is subject to the following two conditions: (1)This device may not cause harmful interference and (2) this device must accept any interference received,including interference that may cause undesired camera operation.For Customers in Europe"CE" mark indicates that this product complies with the European requirements for safety, health,environment and customer protection. "CE" marked cameras are intended for sales in Europe.This symbol [crossed-out wheel bin WEEE Annex IV] indicates separate collection of electricalwaste and electronic equipment in the European countries. Please do not throw the equipment intodomestic refuse. Please use the return and collection systems available in your country for proper,safe disposal of this product.Batteries: Please dispose of used batteries at designated collection centers.Packaging: Please follow local regulations for the recycling of packaging.1
About this ManualThank you for purchasing this KODAK PIXPRO Digital Camera. Please read this manual carefully and keep itin a safe place for future reference.JK Imaging reserves all rights of this document. No part of this published manual may be reproduced,transmitted, transcribed, stored in a retrieval system or translated into any language or computerlanguage, in any form, by any means, without the prior written permission of JK Imaging.All trademarks mentioned in this manual are used for identification purposes only and are properties oftheir respective owners owners and holders.This manual provides you with instructions on how to use your new KODAK PIXPRO Digital Camera.Every effort has been made to ensure that the contents of this manual are accurate; however JK Imagingreserves the right to make changes without notice.Throughout this manual, the following symbols are used to help you locate information quickly andeasily.Indicates useful information.The following symbols may be used throughout this manual to facilitate your understanding of how tooperate the camera:[Item properties]: The optional properties in the camera interface are indicated by the [ ] symbol.2
SAFETY NOTESSafety Notes for this CameraDo not drop the camera or allow it to hit solidobjects.Do not attempt to disassemble or repair thecamera.Do not use or store the camera in dusty placesor on a beach to help prevent dust or sand fromentering the camera, causing possible damage.Do not use or store the camera in a hotenvironment or in direct sunlight.Do not use or store the camera near powerfulmagnetic fields, such as a magnet ortransformer.Avoid touching the lens of the camera.Do not expose the camera to direct sunlight fora long period of time.To prevent the camera from being damaged bymoisture, do not use or store the camera in veryhumid environments, such as in rain or nearbodies of water.If water accidentally comes in contact withthe camera, turn the camera off immediately,remove the battery and the memory card anddry it completely within 24 hours.When you take the camera from a coldenvironment to a warmer environment,condensation may occur. Please wait for areasonable period of time before you turn thecamera on.Before you remove the battery and memorycard, the camera should be turned off.When you clean the body of the camera, donot use abrasive, alcohol-based or organiccleansers or solvents.Use a professional lens cleaning cloth andappropriate cleaner to wipe and clean the lens.Download your photos and remove the memorycard when you are going to store the camerafor long periods of time.If this camera is not in use for a long period oftime, please keep it in a dry and clean storagelocation.Our company will not pay compensation forany failure of playback including: pictures orvideos damaged or unrecoverable by improperoperation.3
4Safety Notes for BatteriesIf battery fluid leaks inside the camera, contactour customer service department immediately.If battery fluid leaks onto your skin, rinse yourskin department with clean water and seekimmediate medical attention.Disposal of used batteries should be carriedout in accordance with your local (national orregional) regulations.To prevent batteries from being damaged, donot drop them or allow them to hit solid objectsor to be scratched by foreign objects.Do not let batteries come in contact withmetal objects (including coins) to avoid shortcircuiting, discharging, excessive heat orpossible leakage.Do not attempt to disassemble batteries.Do not expose batteries to water. Always keepthe battery contacts dry.Do not heat batteries or throw them into a fireto avoid a possible explosion.Do not store batteries in a hot environment or indirect sunlight.When the camera is stored for a long period oftime, remove batteries and keep them in a safe,dry place that is not accessible to infants andchildren.In colder environments, the performance ofbatteries could be noticeably reduced.When you install the batteries, align thebattery markings according to the positive andnegative markings inside the camera batterycompartment. Never force batteries into thebattery compartment.Safety Notes for Memory CardsWe highly suggest buying only well-known, namebrand memory cards to ensure peak performanceand reliability.Format the memory card using the camera beforeyou use it or insert a new one.Do not drop the memory card or allow it to hitsolid objects to avoid damaging it.Do not attempt to disassemble or repair thememory card.Do not expose the memory card to water. Alwayskeep it dry.Do not remove the memory card when thecamera is turned on. Otherwise, the memorycard and photo/video files could be permanentlydamaged.
Do not directly edit the data on the memorycard. Copy the data to your computer beforeyou edit the files.When the camera is stored for long periodsof time, be sure to download your photos andremove the memory card. Store the memorycard in a dry environment.Do notmodify the name of the files or folders of thememory card using your computer. Modifyingthe file names may cause the files to notbe recognized on the camera or a possiblepermanent error may occur.A photo taken with the camera will be stored inthe folder that is automatically generated on thememory card. Do not store photos that are nottaken using this camera in these folders as thepictures cannot be recognized during playback.When you insert the memory card, make surethe notch of the card matches the markings onthe top of the camera card slot.Other Safety NotesDo not disconnect the power or turn thecamera off during the update process. Doing somay cause incorrect data to be written and thecamera may not power on later.Do not hang the neck strap of the cameraaround the neck of a child.When using your camera on an airplane,observe the relevant rules specified by theairline and FAA regulations.Due to the limitations of manufacturingtechnology, the LCD may have a few dead orbright pixels. These pixels do no effect thequality or performance of the camera, photosor video.Do not expose the camera’s LCD to water. In ahumid environment, only wipe it with a soft, dry,cleaning cloth.If the LCD screen is damaged, pay particularattention to the liquid crystal in the screen.If any of the following situations arise,immediately take the steps listed below:1. If liquid crystal comes in contact with yourskin, please wipe with a dry cloth, washthoroughly with soap, and rinse with plentyof clean water.2. If liquid crystal gets into your eye, flush theeye immediately with plenty of clean waterfor at least 15 minutes and then seek medicalassistance.3. If liquid crystal is swallowed, immediatelyrinse your mouth thoroughly with cleanwater and induce vomiting. Seek medicalassistance.5
WARNINGAltering, tampering or modifying the any parts of AZ252 camera are unauthorized and will void themanufacturer’s warranty and “could” void Federal and/or State Compliance.This equipment has been tested and found to comply with the limits for a Class B digital device, pursuantto part 15 of the FCC Rules. These limits are designed to provide reasonable protection against harmfulinterference in a residential installation.This equipment generates, uses, and can radiate radio frequency energy and, if not installed and used inaccordance with the instructions, may cause harmful interference to radio communications. However,there is no guarantee that interference will not occur in a particular installation.If this equipment does cause harmful interference to radio or television reception, which can bedetermined by turning the equipment off and on, the user is encouraged to try to correct the interferenceby one or more of the following measures:- Reorient or relocate the receiving antenna- Increase the separation between the equipment and receiver- Connect the equipment into an outlet on a circuit different from that to which the receiver is connected- Consult the dealer or an experienced radio/TV technician for help6
CONTENTSBEFORE YOU START. 1MODE OVERVIEW. 21SAFETY NOTES. 3Display Setting. 21LCD Screen Display. 22CONTENTS. 7GETTING READY. 11Accessories Included. 11Installing Lens Cap and Neck Strap. 12Part Names. 13Installing AA Batteries and Memory Card. 16Turning Camera On and Off. 18How to Take Pictures. 18Set your Language, Date/Time. 19Set your Language, Date/Time after theFirst Power-On. 19Resetting your Language. 19Resetting Date/Time. 20Overview of the Screen Icons in PhotoShooting Mode. 22Overview of the Screen Icons in MovieMode. 24Overview of the Screen Icons in PlaybackMode. 25Using the Mode Dial. 26Face Beautifier. 28Panorama Mode. 29Scene Mode. 30Movie Mode. 34Custom Settings (Landscape). 34. 35BASIC OPERATION. 367
Using the Zoom Function. 36Thumbnail View. 47Focus Setting. 37Using Zoom Playback (for still pictures only). 48Macro Mode. 37Slideshow. 49Self-Timer Setting. 38Deleting Photos and Videos. 50Flash Mode. 39USING THE MENUS. 51White Balance Setting. 40Continuous Shot. 41EV Setting. 42Exposure Compensation. 42ISO. 43Shutter Adjustment. 43Aperture Adjustment. 44Using Quick Recording. 44"i" Button Function Menu. 45PLAYBACK. 46Viewing Photos and Videos. 468Photo Setup Menu. 51Expo Metering (Exposure Metering). 51Image Size. 52OIS (Optical Image Stabilization). 52Continuous AF (Auto-Focus). 53HDR (High Dynamic Range). 53Beautifier. 54Select Scene. 54Photo Shooting Setting Menu. 56Quality. 56AF Assist Beam (Auto-Focus AssistBeam). 57
Digital Zoom. 57Playback Setting Menu. 66Date Imprint. 57Protect. 66Quick Review. 58Delete. 67Custom Settings. 58DPOF (Digital Print Order Format). 68Movie Menu. 59Trim. 69Expo Metering (Exposure Metering). 59Setup Menu. 70Video Quality. 60Sound Settings. 71OIS (Optical Image Stabilization). 60Power Saver. 71Movie Setting Menu. 61Language. 71Digital Zoom. 62World Time. 72Custom Settings. 62Date & Time. 72Playback Menu. 63File / Software. 72HDR (High Dynamic Range). 63Format . 72Touch-Up. 64Copy to Card. 73Rotate. 64File Numbering. 73Resize. 65Reset. 74Color . 65Firmware (FW) Version. 749
CONNECTIONS. 75Exit. 84Connecting to a Computer. 75APPENDICES. 85Setting the USB Mode. 75Specifications. 85Transferring Files to Your Computer. 75Prompts and Warning Messages. 89Video System. 76Troubleshooting. 93Set Eye-Fi SD Card Connection Mode. 77Memory Card Compatibility. 95Supported HDMI Connections. 78Connecting HDMI-Ready TV. 78Connecting to a PICTBRIDGE CompatiblePrinter. 79Setting the USB Mode. 79Connecting to your Printer. 80Using the PICTBRIDGE Menu. 81Print (with Date). 81Print (without Date). 82Print Index. 8310Print DPOF Images. 84
GETTING READYAccessories IncludedYour camera box should contain the camera model you purchased along with the following accessories. Ifanything is missing or appears to be damaged, please contact your retailer or our customer service team.AA Alkaline Battery 4Quick StMicro USB Cableart GuiLens Cap with CordSTOPdeQuick Start GuideNeck StrapWarranty CardService Card11
Installing Lens Cap and Neck Strap 12
Part Names2134567891012151314111. AF Assist Beam/Self-Timer Lamp2. Flash Lamp3. Microphone4.5.6.7.8.9.10.11.12.13.14.LensLCDFast Video Recording ButtonIndicator Lamp"i" ButtonMenu ButtonDisplay ButtonPlayback ButtonAF Button/Arrow Button (Up)Flash Button/Arrow Button (Right)Delete Button/Self-Timer Button/Arrow Button (Down)15. Macro Button/Arrow Button (Left)16. SET Button13
1717. Strap Eyelet1818. Micro HDMI Port1919. Micro USB/AV Port2520. Zoom Lever2421. Shutter Button2322. Continuous Shot Button2223. Exposure Compensation Button24. Power Switch25. Mode Dial211420
2626. Speaker2927. Tripod Socket2828. Battery Cover Lock29. Battery Door Cover2715
Installing AA Batteries and Memory Card1. Open the battery door cover.2. Insert 4 AA batteries into the battery slot inthe correct direction as shown in the followingdiagram:23Please use brand name batteries (such as Energizer or Duracell ) for optimal performance. Do not mixnew and old batteries or use different brands of batteries. When replacing batteries, please replace all4 batteries at the same time.The performance and life expectancy of alkaline batteries will vary depending on the brand.Do not mix alkaline, standard (carbon-zinc), or rechargeable (ni-cad, ni-mh, etc.) batteries.16
3. Insert the memory card into the memory cardslot as shown in the diagram below:4. Close the battery door cover.4Write Protection ToggleSwitch5A standard SD memory card is not included in the camera packaging and needs to be purchasedseparately. This camera takes a standard (SD/SDHC) memory card. We recommend using a name brandmemory card that is Class 4 or higher and has a capacity of 4GB to 32GB. The camera is not compatiblewith Micro SD, Ultra, Ultra Plus, Extreme, XC, or adapters for any of these other memory cards.To remove your memory card, open the battery door cover, gently press the memory card to eject it.Remove it carefully.17
Turning Camera On and OffSlide the Power switch to turn the camera on/off.Power SwitchHow to Take Pictures1. Hold the camera with both hands, being carefulto not block the flash and lens with fingers.2. Point the lens toward the object you want totake a picture of, then frame it with the LCD.3. Use the Zoom button to select Tele or Widepositions to zoom in or out on your subject.4. Press the shutter button halfway to focus onthe subject. When the focus frame turns green,press the shutter button down completely totake the picture.When the power is off, press and holdthe playbutton to power on and enterPlayback Mode.18
Set your Language, Date/TimeSet your Language, Date/Time after theFirst Power-On1. When you turn the camera on for the first time,the language selection screen appears.2. Press the arrow buttons to select your desiredlanguage.3. After you press thebutton to confirm yourlanguage selection, the Date/Time settingsscreen will appear.4. Press the left/right arrow buttons to select theDate/Time to be adjusted: Time is displayed inYYYY.MM.DD/HH:MM.5. Press the up/down arrow buttons to adjust thevalue for the desired Date/Time.6. Press thebutton to confirm the time settingsand the snapshot screen will appear.2. Press the up/down arrow buttons to selectand press thebutton or right arrow button toenter the menu.3. Press the up/down arrow buttons to select[Language] and press thebutton or rightarrow button to enter the menu.4. Press the arrow buttons to select your desiredlanguage and press thebutton to confirm.5. Press thebutton and the snapshot screenwill appear.Resetting your LanguageAfter you set your desired language for the firsttime, follow the instructions below to reset yourlanguage.1. Press thebutton, press the up/down arrowbuttons to select. Press thebutton toenter the menu.19
5. Press the up/down arrow buttons to press thevalue for your selected entry. After you finishyour settings, press thebutton to confirm.6. Press thebutton and the following snapshotscreen will appear.Resetting Date/TimeAfter you set your Date/Time for the first time,follow the instructions below to reset date andtime.1. Press thebutton, press the up/down arrowbuttons to selectand press thebutton toenter the menu.2. Press the up/down arrow buttons to selectand press thebutton or right arrow button toenter the menu.3. Press the up/down arrow buttons to select [Date& Time] and press thebutton or right arrowbutton to enter the menu.204. Press the left/right arrow buttons to select theDate/Time to be adjusted: Time is displayed inYYYY.MM.DD/HH:MM.
MODE OVERVIEWDisplay SettingPress theFull, Off.button to display the settings: Classic,Off: Does not display any additional icons onscreenClassic: Displays the camera parameters on screenx3.4SD1234F1/50-0.3 EV400 ISOFull: Camera parameters with Grid and HistogramSDx3.41234F1/50-0.3 EV400 ISO21
LCD Screen DisplayOverview of the Screen Icons in PhotoShooting Mode32142 Macro Mode53 Zoom Display (By turning the Zoom lever)4 Memory Card/Built-In MemorySD6x3. 478F1/5016 15 14197 Color Effect (Adjustable in00:56:00108 Number of Remaining Shots-0.3 EV1322400 ISO12Mode)Mode)9 Image Size10 Video Quality111 1 ISO Value (Adjustable inShooting Mode IconsAuto ModePanorama ModeProgram AEScene ModeShutter PriorityCustomSettingsManual ModeLandscapeFace Beautifier6 White Balance (Adjustable in123418175 Battery StatusMode)12 Remaining Recording Time13 Exposure Compensation (EV Value)(Adjustable inMode)14 Shutter Speed (Adjustable inMode)15 Histogram16 Aperture Value (Adjustable in17 Image Stabilization18 Focus FrameMode)
192021SDx3.4Self-Timer Off25242312342200:56:00F1/5021 Self-Timer-0.3 EV400 ISOSelf-Timer 2 secSelf-Timer 10 secSelf-Timer Smile19 AF Mode22 HDR (Adjustable inSingle-AF23 Eye-Fi ON (with signal)Multi-AF24 Expo MeteringObject Tracking20 Flash ModeFlash AutoFill FlashSlow Sync.Slow Sync. Red-EyeRed-Eye ReductionMode)AiAESpotCenter25 Continuous ShotSingleContinuous Shot3 ShotsTime-Lapse (30sec/1min/5min/10min)23
Overview of the Screen Icons in MovieMode123547 Color Effect8 Video QualitySDx3.41569 Remaining Recording Time7141 1 Image Stabilization13121100:56:008-0.3 EV101Movie Mode Icons3 Self-TimerSelf-Timer OffSelf-Timer 10 sec4 Zoom Display (by using the Zoom lever)5 Memory Card/Built-In Memory6 Battery Status12 Focus Frame13 Eye-Fi On (with signal)14 Expo Metering92 Macro Mode2410 Exposure Compensation (EV Value)AiAESpotCenter15 AF ModeFor optimal video shooting, it isrecommended that an SD/SDHC memorycard be used.Optical Zoom and Digital Zoom can beadjusted (100X in total). Digital Zoom can beadjusted to 4X.
Overview of the Screen Icons in PlaybackMode1121/45 SD13DPOF File2 File Protection31243 Memory Space (indicating the current numberof photos and total number of photos)54 Memory Card/Built-In Memory5 Battery Status116 Zoom Magnification Area10x2-20100 :0067 Image Zoom Ratios78 Image Zone89 Shooting Date10 Eye-Fi On (with signal)911Touch-Up12 HDR13 Date Folder25
Using the Mode DialThis camera provides a convenient Mode dial that allows you to manually switch between different modeswith ease. The available modes are listed below:Mode NameAuto ModeProgram AEShutterPriority26IconDescriptionIn this mode, the optimal conditions for taking pictures will be set based on thesubject and environment. It is the most commonly used mode for taking pictures.Under different scenes, the user can switch the ISO and EV value according topersonal preference, the camera can automatically set the shutter speed andaperture value.Setting allows you to adjust the shutter speed / EV value and ISO value. The cameraautomatically sets the aperture value based on the shutter speed and ISO value toget the most appropriate exposure value.Manual ModeThis mode is for manually setting the aperture, shutter speed and ISO value.FaceBeautifierThis mode automatically enhances facial features with skin softening touches andeye brightening capabilities.PanoramaModeIn this mode, up to 4 frames can be stitched together to create a single panoramicphoto.Scene ModeChoose from 22 different pre-set scene types and effects for your photos.Movie ModeRecord videos.CustomSettingsThe user can store frequently used shooting modes and parameters. Switching tothis mode enables quick adjustment.LandscapeFor landscape and outdoor shots. Vivid reproduction of green and blue.
Please refer to the table below if any non-adjustable options inOptionsApertureModeXShutterX(Display) (Display)X(Display)OOO1. Turn the Mode Dial to select the2. Press theEVISOOOOOX(Display)mode: (O: Available X: Unavailable)Omode you want.button to configure settings.3. Press the left/right arrow buttons to select setting to adjust.4. Press the up/down arrow buttons to adjust the parameters.5. Press thebutton to confirm the settings and enter the shooting screen.27
Face BeautifierIn Beautifier Mode, the camera is set toautomatically adjust camera exposure for realisticportrayal of skin tones. Effect 1: Skin Soften1. Turn the Mode dial to select Face BeautifierMode (). Effect 2: Skin Soften Eye Brightening2. Press thebutton and press the up/downarrow buttons to select. Effect 3: Skin Soften Eye Brightening Eye Enlargement3. Press the left/right arrow buttons to select FaceBeautifier and press thebutton to confirmand return to photo shooting mode.SDx123400:56:00-0.3 EV28Beautifier Mode has 3 effects:400 ISO
Panorama ModeWith Panorama Mode, you can take a series ofpictures which will be automatically stitched intoan ultra-wide panoramic (up to 180 ) picture by thecamera.Follow the steps below:1. Turn the Mode dial to Panorama Mode ().2. Press the arrow buttons to select a desiredshooting direction. Should you not select adirection, the default shooting direction is“right”. 2 seconds later, the camera will be readyto take pictures. You can also press thebutton or press the shutter button halfway downto get ready to take pictures.3. Compose the first view of the panoramicpicture on the LCD and press the Shutter buttonto capture the image.4. When you finish shooting the first photo, twotarget icons will display on the LCD in the leftand right sides. Move the camera to the rightuntil the round target icon is directly positionedover the square box. The box will turn greenwhen they overlap and the camera willautomatically take the next picture. Repeat thesame steps for additional shots. Up to 4 framescan be stitched together.5. If continuous pictures are less than 4 shots,press thebutton and the camera willautomatically stitch the pictures together. Pressthe playback button to enter playback mode tosee the effect.6. If you take 4 pictures, the camera will stitchthe pictures together automatically. Press theplayback button to enter Playback Mode to seethe finished effect.In Panorama Mode, the Flash, Self-Timer,Macro Modes and Exposure Compensationare not available. Focus Adjustment is also notavailable at this time.In the process of automatic panoramicshooting "Improper alignment. Please tryagain", means that during the process of thecamera moving, the angle is not on the greenline, and shooting and stitching cannot becompleted.29
Scene ModeIn Panorama Mode, up to 4 photos can becaptured when the image size is set at 2MP.During Panorama Mode shooting, press thebutton to interrupt shooting and save thecurrent picture. Press the down button() to cancel shooting and deletepreviously taken pictures.You can select your desired scene from the22 preset modes according to the type ofenvironment you are shooting in. The camera thenautomatically configures the most appropriatesettings for the best possible photos.Turn the Mode dial to Scene Mode to enter theScene Mode menu. The LCD display is shown inthe screen shot below:Auto ScenePress the arrow buttons to select a scene andpress thebutton to confirm.30
SceneDescriptionAuto SceneIdentifies the scene automatically; Person, Backlighting, Landscape, Macro, NightScene, Night Scene Person and Auto.SportFor fast-moving subjects. Captures sharp, action shots with minimal blur. Thismode is not recommended for shooting indoors.BeachFor taking pictures in areas with strong sunlight.SunsetFor sunsets. Captures subjects in strong sunlight.FireworksFor fireworks at night. The use of a tripod is recommended with this setting.NightLandscapeFor night scenes. The use of a tripod is recommended with this setting.SketchFor taking photos with a pencil sketch effect.SnowFor snowy conditions. Reproduces natural, clear, white scenes.ChildrenTurns flash off automatically. Avoids disturbing the subjects and is suitable fortaking photos of children and pets.IDFor shooting ID size photos. (It is recommended to print using 6-inch 4R (4" X 6")photographic paper).GlassFor objects behind transparent glass.Photo FrameFor adding interesting frame effects to the photo.31
Scene32DescriptionPanning ShotClearly captures fast moving objects, leaving a blurred background.PortraitMost suitable for capturing people, focusing on their faces.Fish EyeFor an interesting fish eye effect.PartySuitable for taking indoor party pictures, even under complicated lightingconditions.IndoorFor indoor settings. Reduces blur and improves color accuracy.LeafFor plants. Captures brilliant shots of greenery and blossoms.MuseumFor museums or flash-free areas. Retains color and reduces blur.Night PortraitFor taking portraits against night scenery.Pet Mode-DogQuickly identifies a dog, capturing quick or unexpected movements.Pet Mode-CatQuickly identifies a cat, capturing quick or unexpected m
This manual provides you with instructions on how to use your new KODAK PIXPRO Digital Camera. Every effort has been made to ensure that the contents of this manual are accurate; however JK Imaging reserves the right to make changes without notice. Throughout this manual, the following sy