Transcription
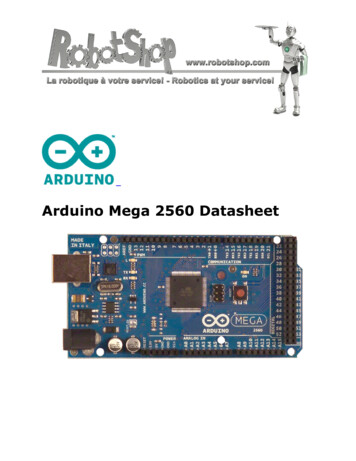
2/12/2018PiJuice/Software at master · PiSupply/PiJuice · GitHub.BatteryIconsadd more PNGsInstallBump version to 1.2SourceAdd version fileTestCreated a main changelogREADME.mdAdded API reference9 months ago7 days ago10 hours ago18 days ago4 days agoREADME.mdPiJuice SoftwareSoftware installationAutomated processAt the command line simply type:sudo apt-get install pijuice-guiPiJuice depends on other libraries to be present, the package is designed to raise them and let apt-get resolve them.If you wish to install just the light version of PiJuice with no GUI:sudo apt-get install pijuice-baseThis is particularly indicated for Raspbian Lite or an headless installation.Manual processCopy either of the deb packages to the pi home and install it.For example for the full version with GUI:sudo dpkg -i ./pijuice-gui 1.1-1 all.debFor the light version:sudo dpkg -i ./pijuice-base 1.1-1 all.debShould the installation complain about missing dependencies you need to sort them first and try with the installation onceagain.You will need to reboot at this point so that the system tray app is refreshed.To remove PiJuice you'll need to run:sudo dpkg -r pijuiceBuild DEB-package manually./pckg-pijuice.shor for the light version without r/Software1/18
2/12/2018PiJuice/Software at master · PiSupply/PiJuice · GitHub./pckg-pijuice.sh --lightNote: You will need python-stdeb, dh-systemd and debhelper in order to be able to build.GUI MenusWe have also taken a LOT of screenshots of all the different menu options etc to show you the full software. So lets get stuckin:We have compiled the source code into a .deb Debian package file so it is super easy to install. Once installation is completethe software appears in the system menu under Menu - Preferences - PiJuice Settings as you can see in the above image.System TrayOnce you load the software, you will see the PiJuice icon appear in the system tray, as above. This icon shows you the statusof the PiJuice - charging from Pi, charging from PiJuice, running on battery as you have in a normal laptop computer.Additionally you can hover over it to tell you the charge level of the battery.Note that it is not possible to detect battery not present when powered through on board USB micro, so it might show 0% er/Software2/18
2/12/2018PiJuice/Software at master · PiSupply/PiJuice · GitHubYou can also right click on this icon to load the configuration menu, instead of having to go to the menu as in the previousimage.PiJuice SettingsMain software menu, with no battery attachedThis picture is how the PiJuice Settings software looks when it loads up. This also shows some basic information about thebattery charge, battery voltage, and where it is charging from.here is it showing 0% and a low voltage on the battery because there is no battery installed! You can also see that it is charging from the Pi GPIO (meaning it is plugged in to thePis microUSB) and it also shows the rail voltages and current draw over the GPIO pins. Below that is the PiJuice microUSBand as you can see in this screenshot that is not currently plugged in. There is a fault checker, a system switch state and alsoa link to a HAT config menu (more on that later! - see PiJuice HAT Configuration Menu screenshot).Main software menu, with battery aster/Software3/18
2/12/2018PiJuice/Software at master · PiSupply/PiJuice · GitHubThis screenshot shows the same menu as in the previous screenshot, the only difference being there is now a batteryinstalled in the PiJuice.Wakeup Alarm MenuIn this screenshot we have moved over to the Wakeup alarm tab of the config menu and as you can see this is an area whereyou can set schedules for the Pi to automatically wake up. This is useful for remote monitoring applications.This feature will only work if you are either plugged in to the PiJuice microUSB / running on battery. If the battery is low andyou are plugged in via the Raspberry Pis GPIO the only way to enable this feature is by soldering the optional "spring pin"that comes with the PiJuice HAT.System Task r/Software4/18
2/12/2018PiJuice/Software at master · PiSupply/PiJuice · GitHubHere we have the system task menu tab. This enables you to set the external watchdog timer - useful for remoteapplications where you can't come and do a hard-reset yourself if the Pi crashes or hangs. The PiJuice essentially monitorsfor a "heart beat" from the software - if it does not sense it after a defined period of time it automatically resets theRaspberry Pi. You can also set here wakeup on charge levels, minimum battery levels and voltages.The watchdog timer has a configurable time-out. It defines the time after which it will power cycle if it doesn't receive aheartbeat signal. The time step is in minutes so the minimum time-out period is one minute and the maximum is 65535minutes. The number can be any whole number between one and 65535. If you set the time to zero the watchdog timer willbe disabled.System Events MenuThis is the system events menu tab. It allows you to trigger events for certain scenarios such as low charge, low voltage andmore. Each paramater has a couple of preset options to choose from, and also you can select options from the "user scripts"tab which allows you to trigger your own custom scripts when certain system events occur for maximum flexibility.User Scripts r/Software5/18
2/12/2018PiJuice/Software at master · PiSupply/PiJuice · GitHubThis is the user scripts menu tab as we mentioned in the above screenshot description where you can add paths to customscripts that you can trigger on events.User scripts can be assigned to user functions called by system task when configured event arise. This should be nonblocking callback function that implements customized system functions or event logging.User functions are 4 digit binary coded and have 15 combinations, code 0 is USER EVENT meant that it will not be processedby system task, but left to user and python API to manage it. We thought that it should be a rare case that all 15combinations would be needed on the GUI so we only provided 8. However if someone needs more scripts they can bemanually added by editing config json file: /var/lib/pijuice/pijuice config.JSON as explained in the JSON file SectionPiJuice ConfigurationPiJuice HAT General Config r/Software6/18
2/12/2018PiJuice/Software at master · PiSupply/PiJuice · GitHubIn the first config menu screenshot, we mentioned a button in the image that said "Configure HAT" - if you were to click onthat button it would bring you to this PiJuice HAT general configuration menu. It allows you to configure a lot of hardwaresettings on the PiJuice HAT itself (as opposed to the previous menus which were actually configuring the software hopefully that is not too confusing!)This is the general tab, which allows you to select whether you have installed the spring pin / run pin and also the I2Caddresses of the HAT and the RTC as well as changing the write protect on the eeprom and changing the actual physical I2Caddress of the eeprom. These eeprom features can be very useful if you want to stack another HAT on top of the PiJuice butstill have that other HAT auto-configure itself.Inputs precedence: Selects what power input will have precedence for charging and supplying VSYS output when bothare present, HAT USB Micro Input, GPIO 5V Input. 5V GPIO selected by default.GPIO Input Enabled: Enables/disables powering HAT from 5V GPIO Input. Enabled by default.USB Micro current limit: Selects maximum current that HAT can take from USB Micro connected power source. 2.5Aselected by default.USB Micro IN DPM: Selects minimum voltage at USB Micro power input for Dynamic Power Management Loop. 4.2Vset by default.No battery turn on: If enabled pijuice will automatically power on 5V rail and trigger wake-up as soon as power appearsat USB Micro Input and there is no battery. Disabled by default.Power regulator mode: Selects power regulator mode. POWER SOURCE DETECTION by default.Note: Using the "Reset to default configuration" will restore the board to its default settings and for a short while the GUI willreport "COMMUNICATION ERROR"PiJuice HAT Config Buttons r/Software7/18
2/12/2018PiJuice/Software at master · PiSupply/PiJuice · GitHubNext we have the buttons menu - this configures the actions of the buttons on the PiJuice HAT (there are three surfacemount buttons, one of which also has a 2 pin 2.54mm header so you can break out a button on a cable to the edge of a caseor wherever you fancy).There are a number of preset behaviours for the buttons - startup/shutdown etc and this menu also ties in to the "UserScripts" menu shown above meaning you can actually trigger your own custom scripts and events based on the press of oneof these buttons very easily.You can even trigger different events for a press, release, single press, double press and two lengths of long press - you caneven configure the length of time these long presses would take before triggering the event. As you can see the first buttonis already configured for system power functionality and we would highly recommend that at least one of the buttons isconfigured to these settings or you may have issues turning your PiJuice on and off :-)Button events:PRESS. Triggered immediately after button is pressedRELEASE: Triggered immediately after button is releasedSINGLE PRESS: Triggered if button is released in time less than configurable timeout after button press.DOUBLE PRESS: Triggered if button is double pressed in time less than configurable timeout.LONG PRESS 1: Triggered if button is hold pressed hold for configurable time period 1.LONG PRESS 2: Triggered if button is hold pressed hold for configurable time period 2.Button events can be configured to trigger predefined or user functions.Hardware functionsPOWER ON: This function will wake-up system. 5V regulator (5V GPIO rail) will be turned on if was off.POWER OFF: 5V regulator (5V GPIO rail) turns off.RESET: If run pin is installed then reset is triggered by run signal activation. If run pin is not installed rest is done bypower circle at 5V GPIO rail if power source is not aster/Software8/18
2/12/2018PiJuice/Software at master · PiSupply/PiJuice · GitHubPiJuice HAT Config LEDs MenuPerhaps our favourite options menu is the LEDs menu - as with the buttons we have made these super versatile. They canhave standard functions as displayed above, they can have preset functions or you can define custom ways for them tobehave.Each LED can be assigned to predefined predefined function or configured for user software control as User LED.CHARGE STATUS. LED is configured to signal current charge level of battery. For level 15% red with configurablebrightness. For level 15% and level 50% mix of red and green with configurable brightness. For level 50% greenwith configurable brightness. When battery is charging blinking blue with configurable brightness is added to currentcharge level color. For full buttery state blue component is steady on.USER LED. When LED is configured as User LED it can be directly controlled with User software via command interface.Initial PiJuice power on User LED state is defined with R, G, and B brightness level parameters.PiJuice HAT Config Battery r/Software9/18
2/12/2018PiJuice/Software at master · PiSupply/PiJuice · GitHubThe battery menu is a very important one. It basically allows you to set charge profiles for the PiJuice charge chip in order tocorrectly and efficiently charge the battery, correctly monitor the charge percentages and more. We have got a number ofbuilt in presets such as the ones that will come with the PiJuice by default (the BP7X) and all of the other ones we will supply.But as promised, there is also the ability to add your own custom charge profiles and even your own battery temperaturesensor in order to increase the safety and efficiency of charging your batteries.As previously mentioned, some of these are even hard coded into the firmware on the PiJuice which enables you to actuallyselect profiles using the PiJuices on board DIP switch.More information on the default profiles and how to created additional ones can be found in the Hardware SectionPiJuice HAT Config IO r/Software10/18
2/12/2018PiJuice/Software at master · PiSupply/PiJuice · GitHubThis Tab provides configuration of two pins IO port provided from HAC microcontroller at P3 Header. Modes selection boxprovides to program IO pin to one of predefined modes:NOT USED: Set IO pin in neutral configuration (passive input).ANALOG IN: Set IO pin in analog to digital converter mode. In this mode Value can be read with status functionGetIoAnalogInput(). Pull has no effect in this mode.DIGITAL IN: Set IO pin in digital input mode. Pull in this mode cen be set to NO PULL, PULLDOWN or PULLUP. Usestatus function SetIoDigitalOutput() to read input value dynamically.DIGITAL OUT PUSHPULL: Set IO pin in digital output mode with push-pull driver topology. Pull in this mode should beset to NO PULL. Initial value can be set to 0 or 1. Use status function SetIoDigitalOutput() to control output valuedynamically.DIGITAL IO OPEN DRAIN: Set IO pin in digital output mode with open-drain driver topology. Pull in this mode can beset to NO PULL, PULLDOWN or PULLUP. Initial value can be set to 0 or 1. Use status function SetIoDigitalOutput() tocontrol output value dynamically.PWM OUT PUSHPULL: Set IO pin to PWM output mode with push-pull driver topology. Pull in this mode should be setto NO PULL. Period [us] box sets period in microseconds in range [2, 131072] with 2us resolution. Set initial duty circlein range [0, 100]. Use status function SetIoPWM() to control duty circle dynamically.PWM OUT OPEN DRAIN: Set IO pin to PWM output mode with open-drain driver topology. Pull in this mode can beset to NO PULL, PULLDOWN or PULLUP. Period [us] box sets period in microseconds in range [2, 131072] with 2usresolution. Set initial duty circle in range [0, 100]. Use status function SetIoPWM() to control duty circle dynamically.Click Apply button to save new settings.PiJuice HAT Config Firmware r/Software11/18
2/12/2018PiJuice/Software at master · PiSupply/PiJuice · GitHubLast but very much not least is the firmware menu. This allows you to update the firmware on the PiJuice MCU chip as andwhen necessary meaning we can actively improve the firmware and any updates or improvements we make in the future canbe retrospectively applied to all PiJuice HATs!Note that the PiJuice package you installed comes with a default firmware located at the path below:/usr/share/pijuice/data/firmware/the filename would look like PiJuice-V1.1-2018 01 15.elf.binaryIf you want to use the GUI to update the firmware to a more recent version you will have to override this file with the newone that you can download from our Firmware section.Remember though that the firmware we provide in the software package you've obtained from either APT or Github isgenerally the only one you should ever use for that specific version of Software release, therefore only update the firmware ifthe GUI reports that the firmware is not up to date or if we instruct you to do so.During the update the window may become unresponsive. Wait until the update is finished before you continue withanything else.JSON configuration fileChanges made on tabs "System Task", "System Events" and "User Scripts" on the main windows will be saved on a JSON file./var/lib/pijuice/pijuice config.JSONhere is an example of a configuration.{"system events": {"low battery voltage": {"function": "SYS FUNC HALT","enabled": r/Software12/18
2/12/2018PiJuice/Software at master · PiSupply/PiJuice · GitHub},"low charge": {"function": "NO FUNC","enabled": true},"button power off": {"function": "USER FUNC1","enabled": true},"forced power off": {"function": "USER FUNC2","enabled": true},"no power": {"function": "SYS FUNC HALT POW OFF","enabled": true},"forced sys power off": {"function": "USER FUNC3","enabled": true},"watchdog reset": {"function": "USER EVENT","enabled": true}},"user functions": {"USER FUNC8": "","USER FUNC1": "/home/pi/user-script.sh","USER FUNC2": "","USER FUNC3": "","USER FUNC4": "","USER FUNC5": "","USER FUNC6": "","USER FUNC7": ""},"system task": {"watchdog": {"enabled": true,"period": "60"},"min bat voltage": {"threshold": "1","enabled": true},"min charge": {"threshold": "1","enabled": true},"enabled": true,"wakeup on charge": {"enabled": true,"trigger level": "1"}}}For the light version of PiJuice changes can be done directly on the JSON file. Here is a list of accepted values for the variousfields above.system events:low battery voltage low charge no power:enabled: true, falsefunction:NO r/Software13/18
2/12/2018PiJuice/Software at master · PiSupply/PiJuice · GitHubSYS FUNC HALTSYS FUNC HALT POW OFFSYS FUNC HALT POW OFFSYS FUNC REBOOTUSER EVENTUSER FUNC1 . USER FUNC15button power off, forced power off, forced sys power off, watchdog resetenabled: true, falsefunction:NO FUNCUSER EVENTUSER FUNC1 . USER FUNC15system task:enabled: true, falsewatchdogenabled: true, falseperiod (minutes): 1.65535min bat voltageenabled: true, falsethreshold (%): 0.100min chargeenabled: true, falsethreshold (%): 0.100wakeup on chargeenabled: true, falsetrigger level (Volts): 0.10user functions:absolute path to user defined scriptAdding USER FUNC from 9 to 15The user functions section of the JSON file looks like the following. To add USER FUNC from 9 to 15 simply append them tothe existing ones."user functions": {"USER FUNC1": "","USER FUNC2": "","USER FUNC3": "","USER FUNC4": "","USER FUNC5": "","USER FUNC6": "","USER FUNC7": "","USER FUNC8": "","USER FUNC9": "",."USER FUNC15": ""},I2C Command APIPiJuice HAT provides control, status and configuration of supported features through I2C Command API. Read/writecommands are based on I2C block read/write transfers where messages carrying data are exchanged with Master. ster/Software14/18
2/12/2018PiJuice/Software at master · PiSupply/PiJuice · GitHubstarts with one byte command code, followed by data payload and with checksum byte at the end of message. Checksum is8-bit XOR calculated over all data payload bytes.Command Abstraction LayerIn order to facilitate communication with PiJuice HAT using I2C Command API there is abstraction layer hat encapsulatescommands into more intuitive interface to configure, control and retrieve status of PiJuice features. This layer isimplemented as python script module pijuice.py. Different types of interface function are encapsulated in next set of classes:PiJuiceInterface. Functions for low level message exchange end error checking through I2C bus.PiJuiceStatus Functions for dynamically controlling and reading status of PiJuice features.PiJuiceRtcAlarm Functions for setting-up real time clock and wake-up alarm.PiJuicePower Power management functions.PiJuiceConfig Functions for static configuration that mostly involves non-volatile data that saves in EEPROM. All thefunction classes are encapsulated in top level object PiJuice(bus, address), where bus presents I2C bus identifier andaddress presents PiJuice HAT I2C slave address. Usage example:from pijuice import PiJuice # Import pijuice modulepijuice PiJuice(1, 0x14) # Instantiate PiJuice interface objectprint pijuice.status.GetStatus() # Read PiJuice staus.Commands are encapsulated with two type of functions, Setters that writes configuration and control data to PiJuice andGetters that reads status or current configuration/control data. Every function returns object of dictionary type containingcommunication error status:{'error':error status}Where error staus value can be NO ERROR in case data are exchanged with no communication errors or value thatdescribers error in cases where communication fails. In case of Getter functions additions additional data object is returnedin case of successful data read with value that presents returned data:{'error':error status,'data':data}PiJuiceStatus functionsGetStatus()Gets basic PiJuice status information about power inputs, battery and events. Returns: 'data':{ 'isFault':is fault,'isButton':is button, 'battery':battery status, 'powerInput':power input status, 'powerInput5vIo':5v power input status }Where:is fault is True if there faults or fault events waiting to be read or False if there is no faults and no fault events.is button is True if there are button events, False if not.battery status is string constant that describes current battery status, one of four: 'NORMAL', 'CHARGING FROM IN','CHARGING FROM 5V IO', 'NOT PRESENT'.power input status is string constant that describes current status of USB Micro power input, one of four:'NOT PRESENT', 'BAD', 'WEAK', 'PRESENT'.5v power input status: is string constant that describes current status of 5V GPIO power input, one of four:'NOT PRESENT', 'BAD', 'WEAK', 'PRESENT'. aster/Software15/18
2/12/2018PiJuice/Software at master · PiSupply/PiJuice · GitHubprint pijuice.status.GetStatus()Returns: {'data': {'battery': 'CHARGING FROM 5V IO', 'powerInput5vIo': 'PRESENT', 'isFault': False, 'isButton':False, 'powerInput': 'NOT PRESENT'}, 'error': 'NO ERROR'}GetChargeLevel()Gets current charge level percentage. Returns: 'data':charge level Where charge level is percentage of charge, [0 - 100]%.Example:print pijuice.status.GetChargeLevel()Returns: {'data': 57, 'error': 'NO ERROR'}GetButtonEvents() Gets events generated by PiJuice buttons presses. Returns: 'data': { 'SW1':event, 'SW2':event, 'SW3':event }where event is detected event name for corresponding button and can be one of: 'PRESS', 'RELEASE', 'SINGLE PRESS','DOUBLE PRESS', 'LONG PRESS1', 'LONG PRESS2' if event is generated or 'NO EVENT' if event is absent. Example:print pijuice.status.GetButtonEvents()Returns: {'data': {'SW1': 'NO EVENT', 'SW3': ' SINGLE PRESS', 'SW2': 'NO EVENT'}, 'error': 'NO ERROR'}AcceptButtonEvent(button) Clears generated button event. Arguments: button: button designator, one of: 'SW1', 'SW2','SW3'. Example:print pijuice.status. AcceptButtonEvent ('SW2')SetLedState(led, rgb) Sets red, green and blue brightness levels for LED configured as “User LED”. Arguments: led: LEDdesignator, one of: 'D1', 'D2'. rgb:[r, g, b] - array of brightness levels of LED components, where r, g and b, are in range [0 –255]. Example:print pijuice.status.SetLedState(‘D2’, [127, 0, 200])GetLedState(led) Gets current brightness levels for LED configured as “User LED”. Arguments: led: LED designator, one of:'D1', 'D2'. Returns: 'data':[r, g, b] where [r, g, b] is array of brightness levels of LED components, where r, g and b, are in range[0 – 255]. Example:print pijuice.status.GetLedState('D1')Returns: {'data': [127, 0, 200], 'error': 'NO ERROR'}SetLedBlink(led, count, rgb1, period1, rgb2, period2) Plays blink pattern on LED configured as “User LED”. Arguments: led:LED designator, one of: 'D1', 'D2'. count: number of blinks for count in range [1 - 254], blink indefinite number of times forcount 255. rgb1: [r, g, b] is array of brightness levels of LED components in first period of blink, where r, g and b, are inrange [0 – 255]. period1: duration of first blink period in range [10 – 2550] miliseconds. rgb2: [r, g, b] is array of brightnesslevels of LED components in second period of blink, where r, g and b, are in range [0 – 255]. Period2: duration of secondblink period in range [10 – 2550] miliseconds. Example:pijuice.status.SetLedBlink('D2', 10, [0,200,100], 1000, [100, 0, 0], 500)GetLedBlink(led) Gets current settings of blink pattern for LED configured as “User LED”. Arguments: led: LED designator,one of: 'D1', 'D2'. Returns: 'data': { 'count':count, 'rgb1':rgb1, 'period1':period1, 'rgb2':rgb2, 'period2':period2 } aster/Software16/18
2/12/2018PiJuice/Software at master · PiSupply/PiJuice · GitHubprint pijuice.status.GetLedBlink('D2')Returns: {'data': {'count': 10, 'period2': 500, 'rgb2': [100, 0, 0], 'rgb1': [0, 200, 100], 'period1': 1000},'error': 'NO ERROR'}GetIoDigitalInput(pin) Gets state at IO pin configured as digital input. Arguments: pin: IO pin designator, 1 for IO1, 2 forIO2. Returns: 'data':input state Where input state is 0 for low input state, 1 for high. Example:print pijuice.status.GetIoDigitalInput(1)Returns: {'data': 0, 'error': 'NO ERROR'}SetIoDigitalOutput(pin, value) Sets state at IO pin configured as digital output. Arguments: pin: IO pin designator, 1 for IO1,2 for IO2. value: output state to set, 0 for low output state, 1 for high. Example:print pijuice.status.SetIoDigitalOutput(1, 1)GetIoDigitalOutput(pin) Gets current output state at IO pin configured as digital output. Arguments: pin: IO pin designator,1 for IO1, 2 for IO2. Returns: 'data':output state Where output state is 0 for low output state, 1 for high. Example:print pijuice.status.GetIoDigitalOutput(1)Returns: {'data': 1, 'error': 'NO ERROR'}GetIoAnalogInput(pin) Gets voltage in millivolts at IO pin configured as analog input. Arguments: pin: IO pin designator, 1for IO1, 2 for IO2. Returns: 'data':analog value where analog value is voltage in millivolts measured at analog input. Example:print pijuice.status.GetIoAnalogInput(1)Returns: {'data': 2222, 'error': 'NO ERROR'}SetIoPWM(pin, dutyCircle) Sets PWM duty circle at IO pin configured as PWM output. Arguments: pin: IO pin designator, 1for IO1, 2 for IO2. dutyCircle: pulse width as percentage of period, [0 - 100]% Example:print pijuice.status.SetIoPWM(2, 35.6)GetIoPWM(pin) Gets current PWM duty circle at IO pin configured as PWM output. Arguments: pin: IO pin designator, 1 forIO1, 2 for IO2. Returns: 'data':duty circle where duty circle is pulse width as percentage of period. Example:print pijuice.status.GetIoPWM(2)Returns: {'data': 35.59984130375072, 'error': 'NO ERROR'}PiJuicePower FunctionsSetSystemPowerSwitch(state) Sets state of System switch. Arguments: ' state':state where state is desired current limit inmilliampere (two options available, 500 and 2100), or switch off if 0. Example:print werSwitch() Gets current state of System switch. Returns: 'data': state where state is current limit in milliampereor 0 if switch is off. aster/Software17/18
2/12/2018PiJuice/Software at master · PiSupply/PiJuice · GitHubprint pijuice.power.GetSystemPowerSwitch()Returns: {'data': 500, 'error': 'NO ster/Software18/18
2/12/2018 PiJuice/Software at master · PiSupply/PiJuice · GitHub https://github.com/