Transcription
Practice WorkbookThis workbook is designed for use in Live instructor-led training and for OnDemand self study.OnDemand videos for this course are available through CONNECT Advisor and on the LEARN Server.Introduction to OpenRoads Designer forGEOPAK, InRoads, and MXROAD UsersCONNECT Edition (10.02.00.XX)About this Practice Workbook. This PDF file includes bookmarks providing an overview of the document. Click on the bookmark to quicklyjump to any section in the file. You may have to turn on the bookmark function in your PDF viewer.The dataset used throughout this Getting Started guide uses metric units.This training uses the Training and Examples workspace and the Integrated Highway Lifecycle worksetinstalled with the OpenRoads Designer software.It is very important that you select the Integrated HighwayLifecycle workset when working the exercises in this course.The terms Left-click, Click, Select and Data are used interchangeably to represent pressing the left mousebutton. The terms Right-click and Reset are also used interchangeably. If your mouse buttons are assigneddifferently, such as for left-handed use, you will need to adjust accordingly.Have a Question? Need Help? If you have questions while taking this course, submit them to the Civil Design Forum on BentleyCommunities where peers and Bentley subject matter experts are available to help.TRNC02566-1/0014DO NOT DISTRIBUTE - Printing for student use is permitted
Module 1: Overview and TerrainDescriptionIn this module you will review the OpenRoads Designer interface and import the existing ground terrain.Objectives User Interface Backstage Functionality Search Capability Integration with ConceptStationCopyright 2017 Bentley Systems, IncorporatedDO NOT DISTRIBUTE - Printing for student use is permitted2
Start OpenRoads Designer and Select WorkSpace1. Start the OpenRoads Designer software.NOTE: The Startup Screen appears where example videos, learning courses, news, and announcements appear. This screen is not yetfully populated in the Early Access Preview software but will be in the commercial release.2. Click the Start a Work Session arrow on the right side of the screen.
3. Set the WorkSpace and WorkSet.This workshop requires the Training and Examples WorkSpace and Integrated Highway Lifecycle WorkSet installed with the OpenRoadsDesigner software.a. Select Training and Examples from the WorkSpace menu.b. Select Integrated Highway Lifecycle from the WorkSet menu.4. Create a new 3D file for the terrain.a. Select New File.b. Browse to c:\Bentley Training\Introduction to OpenRoads Designer\Module 1 (Overview and Terrain) or other folder where youunzipped the dataset files.c. Set the Seed to Seed3D-IHL.dgn.d. Create a new file named Terrain3D.dgn.Copyright 2017 Bentley Systems, IncorporatedDO NOT DISTRIBUTE - Printing for student use is permitted4
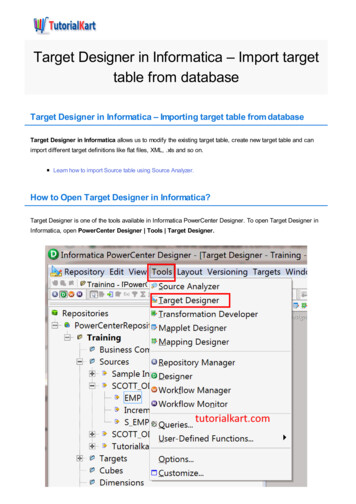
Review the Interface1. Activate the OpenRoads Modeling workflow from thepick list in the upper left corner if it is not already active.The ribbon menu changes to OpenRoads Modeling tools organized into familiar categories called ribbon tabs. Home - Common tools such as attributes, Explorer, references, models, element selection, fences, and reports. Terrain - Element selection and terrain modeling tools. Geometry - Element selection Civil AccuDraw, and geometry tools including Lines, Arcs, and Points. Corridors - Element selection, superelevation, and corridor modeling tools. Model Detailing - Element selection, Civil Cells, and 3D (linear template, surface templates, etc.) tools. Drawing Production - Element selection, saved views, notes, text, annotations, and plans production (cross section, plan, and profile)tools.Drawing - Commonly used MicroStation drawing tools. To access the complete set of MicroStation tools change the active workflow toDrawing, Modeling (3D only), or Visualization (3D only).View - Commonly used view control tools.Copyright 2017 Bentley Systems, IncorporatedDO NOT DISTRIBUTE - Printing for student use is permitted5
2. Searching the ribbon.When you are not sure where to find a tool on the ribbon interface the Search Ribbon field in the upper right corner is your best friend.a. Type Template in the search field.The matches found in the ribbon menus appear. The search is across all ribbonmenus, not just the currently active ribbon.b. Hover over Create Template.The search results expand showing where this tool is located on the ribbon.c. Select Create Template to start that tool.Notice that the Create Template tool started but the ribbon menu did not change.d. Close the Create Template dialog.e. Type Template in the search field again.f. Hover over Create Template to expand the search options.g. Select OpenRoads Modeling Corridors Create Template.The ribbon changes to the selected menu which contains the Create Template tool.3. Auto hide ribbon.a. Double click on any Ribbon Tab (such as Corridors) to set the ribbon menu in auto hide mode.b. Double click a Ribbon Tab again disable auto hide mode.4. Introduction to the Backstage.a. Activate the Back Stage View by clicking File in the ribbon menu.b. Select Settings.Design File settings, preferences, customizations, etc. are found in the Backstage, keeping the ribbon menus focused on the tools.c. Click the Arrow in the upper left corner to return to the design canvas.5. Close AccuDraw if it is currently open.Copyright 2017 Bentley Systems, IncorporatedDO NOT DISTRIBUTE - Printing for student use is permitted6
Import Existing Ground Terrain from ConceptStation1. Select From File from the Terrain tab on the OpenRoads Designer workflow (ribbon).2. Select OG.tin from the Module 1 (Overview and Terrain) folder.3. Set the Feature Definition to Terrain Existing Existing Boundary.This terrain could have originated in ConceptStation, InRoads, GEOPAK or another application.4. Click Import.5. Close the Import Terrain Model dialog.6. Select Fit View to see the terrain model.7. Select Save Settings.HINT: The icon is found in the Quick Access toolbar at the top of the screen.Copyright 2017 Bentley Systems, IncorporatedDO NOT DISTRIBUTE - Printing for student use is permitted7
Module 2: GeometryDescriptionIn this module you will import and annotate geometry from ConceptStation.Objectives Integration with ConceptStation Annotation Feature DefinitionsCopyright 2017 Bentley Systems, IncorporatedDO NOT DISTRIBUTE - Printing for student use is permitted8
Attach Original Ground Terrain1. Open the file Geometry.dgn from the Module 2 (Geometry) folder.2. Attach Terrain3D.dgn as reference using a Coincident-World orientation.a. Select Home Primary Attach Tools Referencesb. Select Attach Reference in the References dialog.c. Browse to and select the Terrain3D.dgn file.d. Use a Coincident - World Orientation.3. Fit the view.The original ground terrain loaded in the previous exercise is displayed.4. Set the terrain model as the Active Terrain Model.5. Select Save Settings.Copyright 2017 Bentley Systems, IncorporatedDO NOT DISTRIBUTE - Printing for student use is permitted9
Import Geometry1. Import the geometry.a. Select Import Geometry from the Geometry ribbon tab.b. Browse to and select the Geometry.alg file. You may have to set the file filter to *.algc. Select the check box next to Geometry to select all alignments.d. Enable the Create Civil Rules option.e. Click Import.2. Assign a Feature Definition to geometrya. Select All to add the geometry elements to a selection set.b. Select Geometry General Tools Standards Set Feature Definition.c. Set the parameters. Feature Type Alignment Feature Definition Alignment Geom Baseline.d. Data point to update the feature definitions.The geometry elements turn red.e. Select None to clear the selection set.Copyright 2017 Bentley Systems, IncorporatedDO NOT DISTRIBUTE - Printing for student use is permitted10
Annotate Geometry1. Zoom to where about half of the long east-west alignment (Rt97 Extension) is visible.2. Annotate a single alignmenta. Select Drawing Production Annotations Element Annotation Annotate Element.b. Select the Route97 Extension centerline (the long east-west alignment).c. Reset to annotate the alignment.3. Change the annotation scale.a. Select the Drawing ribbon tab.b. Set the Annotation Scale in the Drawing Scale group to 1:500 to make the annotations larger.4. Remove annotation from a single alignment.a. Select Drawing Production Annotations Element Annotation Remove Element Annotations.b. Select the Route97 Extension centerlinec. Reset to clear the annotation.Copyright 2017 Bentley Systems, IncorporatedDO NOT DISTRIBUTE - Printing for student use is permitted11
5. Annotate multiple alignmentsa. Fit the view so all alignments are visible.b. Select All to add the geometry elements to a selection set.c. Select Drawing Production Annotations Element Annotation Annotate Element.d. Data point to annotate the selected geometry.6. Set the Annotation Scale on the Drawing ribbon tab to 1:200 to update all annotations to a 200 scale.7. Fit View and Save Settings.Copyright 2017 Bentley Systems, IncorporatedDO NOT DISTRIBUTE - Printing for student use is permitted12
Module 3: ModelingDescriptionIn this module you will model a flyover ramp including the approach and exit roadways and a temporary model of the bridge. You will alsomodel a 9.8 kilometer or 6.1 mile long section of roadway.Objectives Drawing Scale across references General Modeling File Federation PerformanceCopyright 2017 Bentley Systems, IncorporatedDO NOT DISTRIBUTE - Printing for student use is permitted13
Model Ramp C1. Open the file Corridor RampC.dgn from the Module 3 (Modeling) folder.2. Click in View 1 to make it the active view and model.3. Use Corridors Create New Corridor to create a corridor along Ramp C from the beginning of alignment to the bridge at station 1 000. Feature Definition Conceptual (set in the Tool Settings dialog) At the Locate Corridor Baseline prompt, select the Ramp C geometry. Profile Active Profile Feature Name RampC-1 Template Templates IHL Ramp RT Tie Start Station Beginning of Alignment End Station 1 000 Drop Interval 5 Minimum Transition Before Drop 0 Minimum Transition After Drop 04. Change corridor feature definition.a. Select the corridor.b. Open the corridor Properties.c. Set the Feature Definition Corridor FinalNotice the template drop interval tightens.d. Close the Properties Window.Copyright 2017 Bentley Systems, IncorporatedDO NOT DISTRIBUTE - Printing for student use is permitted14
5. Create another corridor from the end of the bridge at station 1 550 to end of alignment. Feature Definition Corridor FinalAt the Locate Corridor Baseline prompt, selectthe Ramp C geometry. Profile Active Profile Feature Name RampC-2 Template Templates IHL Ramp RT Tie Start Station 1 550 End Station End of Alignment Drop Interval 5 Minimum Transition Before Drop 0 Minimum Transition After Drop 0Copyright 2017 Bentley Systems, IncorporatedDO NOT DISTRIBUTE - Printing for student use is permitted15
Model the Approximate Bridge along Ramp C1. Open the file named Bridge RampC.dgn.2. Click in View 1 to make it the active view and model.3. Create a corridor approximating the bridge. This corridor will be replaced later by the actual bridge modeled using OpenBridge Modeler. Feature Definition Corridor Final Profile Active Profile Feature Name Bridge-RampC Template Templates IHL Ramp BridgeRT Tie Start Station 1 000 End Station 1 550 Drop Interval 5 Minimum Transition Before Drop 0 Minimum Transition After Drop 04. Select Corridors Edit Edits Create Parametric Constraint andlocate the Bridge-RampC corridor to change the bridge deck depth toapproximate the depth of the superstructure.a. Start Station 1 000b. Stop Station 1 550c. Constraint Label BR Deck Depthd. Start Value -2.4e. Stop Value -2.45. Review the 3D Model. Notice the depth of the temporary bridge template to approximate the depth of the superstructure.Copyright 2017 Bentley Systems, IncorporatedDO NOT DISTRIBUTE - Printing for student use is permitted16
Model the Route 97 Extension1. Open the file named Corridor Rt97 Extension.dgn.2. Click in View 1 to make it the active view and model.3. Create a corridor for the Route97 Extension (9.8 kilometer or 6.1 mile long east-west alignment). Feature Definition Corridor Final Profile Active Profile Feature Name Route97 Extension Template Templates Rural Asphalt Pavt w/ Asphalt Shoulders Divided 4 Lanes Inside Edge PGL Start Station Beginning of Alignment End Station End of Alignment Drop Interval 5 Minimum Transition Before Drop 0 Minimum Transition After Drop 04. Review the 3D model.Copyright 2017 Bentley Systems, IncorporatedDO NOT DISTRIBUTE - Printing for student use is permitted17
Module 4: SuperelevationDescriptionIn this module you will define and edit superelevation and assign the superelevation to multiple corridors.Objective General Superelevation Superelevation ModelCopyright 2017 Bentley Systems, IncorporatedDO NOT DISTRIBUTE - Printing for student use is permitted18
Define Superelevation for Ramp C1. Open the file Superelevation.dgn from the Module 4 (Superelevation) folder.2. Create superelevation definitions for RampC.a. Select Corridors Superelevation Create Create Superelevation Sections. Feature Definition Superelevation Superelevation (set in the Tool Settings dialog) Name RampC Feature Name RampC Start Station Beginning of Alignment Stop Station End of Alignment Minimum Tangent Length 10000b. The Create Superelevation Lane tool should start automatically. If not, select the tool at Corridors Superelevation Create CreateSuperelevation Lane. Name RampC Type Primary Side of Centerline Left Inside Edge Offset 0 Width 3.65 Normal Cross Slope -2%c. Reset to stop defining superelevation lanes.Copyright 2017 Bentley Systems, IncorporatedDO NOT DISTRIBUTE - Printing for student use is permitted19
d. The Calculate Superelevation tool should start automatically. If not, select the tool at Corridors Superelevation Calculate Calculate Superelevation. Standards File Name AASHTO 2011 metric.xml e selection AASHTO Method 5 L Selection AASHTO Design Speed 50 Pivot Method Crown Open Editor NoCopyright 2017 Bentley Systems, IncorporatedDO NOT DISTRIBUTE - Printing for student use is permitted20
Review and Edit the Superelevation for Ramp C1. Select Corridors Superelevation Open Superelevation View.2. Display the model in View 2.3. Select the superelevation transition line.4. Zoom into the area of near full super near the bottom of the diagram.TIP: Hold down the Shift key and use the scroll wheel to change the vertical exaggeration5. Change the stations of the near full superelevation section. Start Station 0 940 End Station 1 620Copyright 2017 Bentley Systems, IncorporatedDO NOT DISTRIBUTE - Printing for student use is permitted21
Assign Superelevation to Ramp C Corridors1. Open the file Corridor RampC.dgn.2. Click in View 1 to set the 2D model active.3. Attach the Default model from Superelevation.dgn as a reference to the 2D model.4. Assign the superelevation to the RampC-1 corridor.a. Select Corridors Superelevation Calculate Assign to Corridor.b. Select the Ramp C superelevation section.c. Reset to stop selection of superelevation sections.d. Select the RampC-1 corridor.e. Confirm the Superelevation and Pivot points set automatically by the template.f. Click OK to associate the superelevation with the corridor.5. Assign the superelevation to the RampC-2 corridor.Copyright 2017 Bentley Systems, IncorporatedDO NOT DISTRIBUTE - Printing for student use is permitted22
Assign Superelevation to Ramp C Bridge Corridors1. Open the Bridge RampC.dgn file.2. Click in View 1 to set the 2D model active.3. Attach the Default model from Superelevation.dgn as a reference to the 2D model.4. Assign the superelevation to the Bridge-RampC corridor.5. Review Dynamic Cross Sections for the Bridge-RampC corridor.HINT: Try the new View Control macro to open the dynamic cross section, plan, and 3D views! Right click and hold for a few seconds inany view and select View Control 3 Views - Plan/XS/3D from the popup menu. You will be prompted to select the corridor to show in thecross section view followed by which view where the cross sections will be displayed.Copyright 2017 Bentley Systems, IncorporatedDO NOT DISTRIBUTE - Printing for student use is permitted23
Module 5: Integrate Bridge ModelDescriptionIn this module you will integrate a bridge model from OpenBridge Modeler into the roadway model.Objective Integration with OpenBridge ModelerCopyright 2017 Bentley Systems, IncorporatedDO NOT DISTRIBUTE - Printing for student use is permitted24
Integrate Bridge Model from OpenBridge Modeler1. Open the file Corridor RampC.dgn from the Module 5 (Integration) folder.2. Turn off display of temporary bridge modeled with OpenRoads Designer.a. Select the Home Primary Attach Tools References.b. Click in the 3D view to ensure the references for that file are being manipulated. There should be 7 references.c. Select the Bridge RampC.dgn - Default-3D model.Be careful to select the Default-3D model attachment, not the 2D attachment of the Bridge RampC.dgn file.d. Disable the Display parameter.3. Attach OBM Bridge RampC.dgn to the 3D view as reference using a Coincident-World orientation.Copyright 2017 Bentley Systems, IncorporatedDO NOT DISTRIBUTE - Printing for student use is permitted25
4. Review the detailed bridge now included in the model.Copyright 2017 Bentley Systems, IncorporatedDO NOT DISTRIBUTE - Printing for student use is permitted26
Module 6: Subsurface UtilitiesDescriptionIn this module, you will analyze a storm drainage system to see how well it copes with a storm event, view one of the networks in profile, andreview the 3D model.Objective Inspect the Subsurface Utilities workflow Run a hydraulic analysis Create and view a profile Review the 3D modelCopyright 2017 Bentley Systems, IncorporatedDO NOT DISTRIBUTE - Printing for student use is permitted27
Review the Interface1. Open the file Storm Drainage.dgn from the Module 6(Subsurface Utilities) folder.2. If prompted to compact the database, select Yes.NOTE: The prompt may appear behind the File Open Progress dialog. If it does, move the Subsurface Utilities Engineering dialog until itis visible.Copyright 2017 Bentley Systems, IncorporatedDO NOT DISTRIBUTE - Printing for student use is permitted28
3. Review the Subsurface Utilities Interfacea. Select the Subsurface Utilities workflow from the pick list in the upper left corner.The ribbon menu changes to Subsurface Utilities tools. Some of the ribbon tabs are shared with the OpenRoads Designer workflow,where the functionality is common to both workflows. Others are specific to Subsurface Utilities. Layout - Tools for creating and importing utilities Analysis - Tools to calculate the hydrology and hydraulics of hydraulic elements (i.e. storm and sanitary networks) Components - Libraries of commonly used components. The content of this tab changes when a different license is activated. Utilities View - Tools to inspect utilities Tools - Various tools including ModelBuilder and Clash Detection Report - Hydraulic reports View - Commonly used view control tools.Copyright 2017 Bentley Systems, IncorporatedDO NOT DISTRIBUTE - Printing for student use is permitted29
Review Data Imported using ModelBuilderThis storm network model has already been imported into this file using the ModelBuilder tool.The road corridor is also visible in this file but has been set to be mostly transparent so that the storm network model is easily visible.Note that the catchment areas are drawn in two colors - red and green. Feature definitions were applied to them when they were imported,and a WHERE clause was used to apply either a pavement or a grass feature definition, depending on the runoff coefficient of eachcatchment. The same technique was used to apply different feature definitions to the catch basins, depending on whether a note in the Exceldata stated that a small or a large chamber was required.1. Zoom to the area highlighted below at the outfall on the north side of the road.Copyright 2017 Bentley Systems, IncorporatedDO NOT DISTRIBUTE - Printing for student use is permitted30
Hydraulic Analysis - Running the Analysis ScenarioNow that the storm drainage data has been imported, hydraulic analysis can be run. When the utility model was created, settings were copiedinto the active design file from a DGN Library, including an analysis scenario and a rainfall event. You will now see how the system copes withthis rainfall event.1. Select Analysis Calculation Scenarios ScenarioManager.Subsurface utilities can analyze drainage networks withknow pipe sizes or can design and size the pipes asneeded. Multiple scenarios can be setup for both analysisand design to evaluate different storm event models.In this course you will analyze an already designed pipenetwork using a 10 year storm event. This file has a singlescenario that defines the calculation settings andalternative data for the system - the storm event, pipesizes, etc.2. Select Compute Scenario.After a few moments, the GVF-Rational CalculationSummary dialog is displayed. This tells you the name ofthe Scenario that you computed, and the rainfall event thatit uses. It also tells you that there are three networks in thedata, and that convergence was achieved for all of them. Itis worth noting that a Gradually Varied Flow calculationhas been done, as opposed to a simple Peak Flowcalculation. The calculations for normal and critical depthare iterative, so it is important that convergence has beenachieved.Copyright 2017 Bentley Systems, IncorporatedDO NOT DISTRIBUTE - Printing for student use is permitted31
3. Click the Details button.4. Select the Link Summary tab on the Calculation Detailed Summary dialog.This tab shows columns for Depth (In) and Depth (Out), confirming that a Gradually Varied Flow analysis has been done.5. Click the Close button on the Calculated Detailed Summary dialog.6. Click the Close button on the GVF-Rational Calculation Summary dialog.7. Close the Scenarios dialog.Copyright 2017 Bentley Systems, IncorporatedDO NOT DISTRIBUTE - Printing for student use is permitted32
Review Properties and Analysis Results from Graphic Elements1. Select pipe SS-22 in the graphics. Pipe SS-22 extends at an angle from the main network to a headwall.2. Hover over the pipe and select Utility Properties from thecontext sensitive menu.3. Select the Hydraulic Analysis tab.4. Scroll to the various Results sections.The results including flow, depths, velocities, etc. are shown.5. Close the Properties dialog.Copyright 2017 Bentley Systems, IncorporatedDO NOT DISTRIBUTE - Printing for student use is permitted33
Creating a Profile RunNow that you have computed the hydraulics for the system, you can see these results in a profile view. This is a good way to visualize thedepth of water in the conduits.1. Click the Select None button to clear any selections that might exist.2. Open the Explorer by clicking the Home Primary Explorer.3. Select the Subsurface Utilities Model category.4. Expand Subsurface Utilities Model.5. Expand Storm Drainage.dgn.6. Right click on Profile Runs, and select Auto Create New Profile Run.Copyright 2017 Bentley Systems, IncorporatedDO NOT DISTRIBUTE - Printing for student use is permitted34
7. Click the Browse button next to the Network to Profile field.8. Select the headwall from the graphics, as shown below.The name of the headwall element (HW-2) appears in the dialog.9. Click OK.NOTE: It will take a few seconds for the profile to be generated.10. Expand Subsurface Utilities Model Storm Drainage.dgn Profile Runs.The DI- to HW-2 profile run should appear in the list. If it doesnot, close and re-open the Explorer dialog. Restarting theExplorer is required for the Explorer to refresh properly.11. Right click on DI- to HW-2, and select Open Analysis Profile.The Analysis Profile dialog shows the pipes in the Profile Run,the Hydraulic Grade Line, and the Energy Grade Line.12. Close the Profile dialog.Copyright 2017 Bentley Systems, IncorporatedDO NOT DISTRIBUTE - Printing for student use is permitted35
Review the 3D ModelYou have looked at the subsurface utilities model in 2D, and in profile. Now you will review the 3D model.1. Open View 2.This view is setup to show the 3D drainage network in the Default-3D model. In addition, the road corridor is shown with transparency sothe interaction between the design terrain and the drainage network can be reviewed.TIP: Press F9 key to invoke a macro delivered with the Bentley workspaces that opens a second view and displays the 3D model in thatview.2. Turn off display of the corridor model so that they drainage model is easier to view.a. Select the Home Primary Attach Tools References.b. Click in the 3D view to ensure the references for that file are being manipulated. There should only be 1 reference.c. Select the Corridor Rt97 Extension.dgn file.d. Disable the Display parameter.Copyright 2017 Bentley Systems, IncorporatedDO NOT DISTRIBUTE - Printing for student use is permitted36
3. Use the Fit, Zoom and Rotate View tools to inspect the3D model. Observe how inlets and pipes are accuratelymodeled.4. Change the Display Style to Smooth for a morerendered view.The Display Style is set in the View Attributes located inthe upper left corner of the view.Copyright 2017 Bentley Systems, IncorporatedDO NOT DISTRIBUTE - Printing for student use is permitted37
Module 7: Cross SectionsDescriptionIn this module you will create cross sections along the Rt 97 Extension.Objective Create cross section sheets along an alignmentCopyright 2017 Bentley Systems, IncorporatedDO NOT DISTRIBUTE - Printing for student use is permitted38
Creating Cross Section Sheets for Rt 97 Extension1. Open the file Corridor Rt97 Extension.dgn from the Module 7 (Cross Sections) folder.2. Select the OpenRoads Modeling workflow from the pick list in the upper left corner.3. Create cross section named boundaries along Rt97 Extension alignment.The named boundaries define the location, width and height of the cross sections.a. Click in View 1 (2D view) to set it as the active model.b. Select Drawing Production Named Boundaries Named Boundary Place Named Boundary.c. Select Civil Cross Section mode.d. Set the Drawing Seed to A1 XS.The drawing seed sets the seed files and default values for the values on the dialog except the start and stop locations.e. Graphically select the centerline geometry for Route97 Extension in the 2D view.f. Change the following parameters from their defaults. Interval 100 Bottom Clearance 2.0 (The extra bottom clearance is to allow the drainage pipes to appear on the cross sections) Keep the default values set by the Drawing Seed for the other parameters.g. Disable the Include Control Points option.When enabled, cross sections are added at horizontal control points such as PC and PT.h. Enable the Create Drawing option.When enabled, the process to create the cross section sheets is automatically started after the named boundaries are created. Whendisabled, the named boundaries are created but the sheets are not created.Copyright 2017 Bentley Systems, IncorporatedDO NOT DISTRIBUTE - Printing for student use is permitted39
i. Enable the Show Dialog option.When enabled, a dialog with additional parameters set by the Drawing Seed is shown.j. Define the start and stop locations. Start Location Click Stop Location 21 500to lock to the beginning of the alignmentk. Data point in the 2d view to accept the starting stationof the named boundaries.NOTE: If the Start Location was not defined and lockedin the dialog it is selected graphically at this step.l. Data point a second time in the 2d view to accept andcreate the named boundaries.NOTE: If the Stop Location was not defined and lockedin the dialog it is selected graphically at this step.Creating the named boundaries will take a short time.Once complete the Create Drawing dialog appears andthe named boundaries are visible in the 3D view.4. Click OK on the Create Drawing dialog to create the crosssection sheets.The Create Drawing dialog provides an opportunity toadjustments the parameters being used. However, in atypical workflow these parameters do not need to bechanged because the default values are all set by theDrawing Seed selected when creating the namedboundaries in the previous stepsCopyright 2017 Bentley Systems, IncorporatedDO NOT DISTRIBUTE - Printing for student use is permitted40
Creating the cross sections sheets will take a minute or so for this 9.8 kilometer or 6.1 mile long stretch of roadway. A progress bar isprovided at the bottom of the screen. Once complete, a cross section sheet appears.Copyright 2017 Bentley Systems, IncorporatedDO NOT DISTRIBUTE - Printing for student use is permitted41
Each cross section is a live reference to a drawing model which in turn is a live reference to the 3D design model. The drawing model is whereannotations are added to the cross sections. All graphics that appear in the 3D model are automatically shown on the cross section. Inaddition, since these are live references, any changes to the 3D model are automatically updated on the cross sections.Copyright 2017 Bentley Systems, IncorporatedDO NOT DISTRIBUTE - Printing for student use is permitted42
5. Review Cross Section sheets.a. Select Home Primary Models. Drawing Model Sheet Modelb. Double cli
Drawing Production - Element selection, saved views, notes, text, annotations, and plans production (cross section, plan, and profile) tools. Drawing - Commonly used MicroStation drawing tools. To access the complete set of MicroStation tools change the active workflow to Drawing