Transcription
PRO SECRETS IN ABLETON LIVEBY VESPERSVesperswww.Vespers.ca
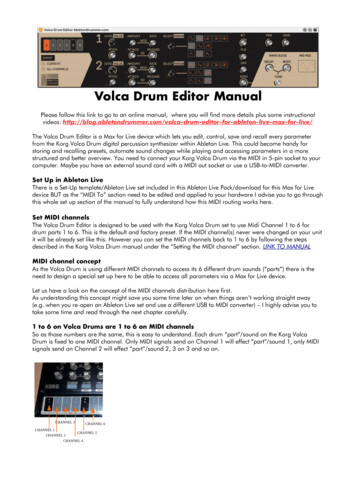
noticeIs This You?This book is not intended for total newbies to Live. It is not an intro to Live. If you are a brand new user, thisbook will quite likely confuse you. This book is for users who have read the manual and understand the basics ofthe program, but are looking to take their knowledge and skill to the next level. It’s not a comprehensive list ofevery pro technique, but a collection of some of my favorites. In the following pages you’ll learn some mid andadvanced level Live techniques.What Version of Live Do You Have?This book is written for users of Ableton Live 8 and Suite 8. Due to limitations in Live Lite and Intro, some ofthe techniques may not work in these and earlier versions of Live.Shout Outs!I’ve had an abundance of support and guidance in the creation of this e-book. Some of my first mentors andinfluences were Ill Gates, Myagi, and Rennie Dubnut Foster. They taught me a lot about electronic music. HustonSingletary, Ableton’s Lead Clinician, and the other trainers in my certification group: Tommy Faulds, Jake Perrine,Joaquin Jiminez, Will Dogget, Christopher Schlyer, and Brett Davis. Some of these techniques were inspired bythem. And, finally, my Youtube subscribers, Twitter followers, and Facebook fans. Your questions and commentsfueled me to create this. Thank you!
pro tipsWhat makes the pros different from the amateurs? During my time as a computer music producer, I’ve had theopportunity to network with and learn from some top notch producers. I’ve always been fascinated by what the differenceis in their mindset and patters that makes them exceptional, so I studied them carefully. Here’s what I’ve learned.The core secret of the pros is that they spend the time to master their tools and reduce or automate repetitive tasks.This allows them to stay in the creative flow when inspiration occurs. Think of your workflow as a road and your inspirationis a Ferrari. If you’re going to cruise at 200 mph and achieve all you’re capable of, do you want to be going overspeedbumps or riding on a nice flat highway? Pros invest the time to eliminate the speedbumps.When I first started producing music, I recall having many moments of inspiration where I’d be excited to start writing,but then I’d get on the computer and I just didn’t have the skills and workflow to get the ideas out of my head fast enough.The program felt cumbersome.like it was getting in my way and holding me back. This wasn’t the program’s fault, ofcourse; it was the fact that I hadn’t yet taken the time to master it. Now that I’ve invested (and continue to invest) the timeto master it, the program feels like an extension of my mind and empowers me to create with ease. I am able to flow ideaseffectively from conception in my mind to reality in the computer.Rather than have you invest the years of time I spent exploring the program, reading manuals, and studying pros, I’dlike nothing more than to give you the straight goods right here! This e-book is all about removing the speedbumps andteaching you all the knowledge I’ve gained in the last 7 years as a music producer.
PRO SECRET #1: GET ORGANIZEDBy default, Live’s user interface uses shades of grey. Everything tends to blur together and it can be difficult tovisually identify various elements quickly. I’m a big fan of organizing as you go. This way you don’t waste needless timesearching for things. Here are some ways Live provides for you to get organized.Name Your tracksThe first step to getting organized is renaming your tracks. Do this by pressing Command R (Mac), Control R (PC). I name everything, as I create it. One of my fellow producers told me this was a waste of time, so weopened one of his projects and I asked him to show me where his hi hi hats were, watching as he spent about 2minutes soloing various un-named elements until he finally found them. They turned out to be a grey track namedAudio 26. 2 minutes may not seem like that long, but imagine now that you’re in the peak of a creative flow andyou have an idea you want to get down. 2 minutes would seem like a lifetime. Also, add up those 2 minutes overyears of producing and you have a very bad habit, wasting a lot of precious time and inspiration.Color Your tracksLive allows you to color your tracks, allowing quick, visual identification, rather than scrolling through a sea ofhomogenous grey. Use the color scheme below to add color by Right / Control clicking and selecting a shadefrom the color panel.ELEMENTCOLORAtmospherics & EffectsVocalsSynthsPercussion (additional percussion elements)Main Beats (kick, snare, hats)BassSub BassColor Different Versions of Your ClipsOn the same track, I often create several versions of clips. Say, for example, I have a change in my MIDIpercussion pattern. I color these clips differently for easy visual identification during sequencing.Vespers.cawww.
PRO SECRET #2: BROWSER POWERThe Browser is the area we go to most frequently when adding new devices or content to our sets. Given the amountof time we spend in there, it makes sense to master this area.Quickly Clean Things UpWhen browsing through various folders, looking for sounds, it can get pretty messy. For example, I often findmyself deep in the depths of the Instrument Racks folder, but then I may want to add another type of device like aGate. Rather than scroll up and down or close all the folders individually, simply double click on the Live DeviceBrowser icon and it’ll instantly close all folders. You can achieve the same thing by Right / Control clicking in thebrowser window and selecting Close All Folders. Then you can click on the word Name in the browser to reorderthe contents alphabetically from top to bottom.Bookmark File Browser LocationsWhen in one of the three File Browsers, youcan click on the Bookmarks bar and add aBookmark by selecting Bookmark Current Folder.Now you can easily go back to your mostfrequently used locations by using the Bookmarksbar.Vespers.cawww.
PRO SECRET #3:TOP KEYBOARD SHORTCUTSWhen producing music, you do some common functions over andover again. One of the main habits of power users is they havemastered the keyboard shortcuts so they are blindingly fast with theprogram and move much more quickly than the average user. Wheninspiration hits and you’re in a creative zone, you want to be able to getideas out of your head fast and just flow. Before I learned the shortcuts,I felt like the program was getting in the way of my inspiration andholding me up. Now that I’ve mastered them, I feel like the program isan extension of my mind and body.Live has tons of built-in keyboard shortcuts. In this section I’ll explain not just what they are, but also how to usethem. Getting to know them is the best way to get faster with the program. Shortcuts allow you to spend more timemaking music and less time navigating menus.Essential Shortcuts1. Duplicate1. Shortcut: Command D (Mac), Control D (PC)2. What it Does: This command will Duplicate virtually anything fast. Audio clips, MIDI clips, tracks,devices etc. I use it most frequently in Arrangement View when copying loops out across the sequencerwindow, or when editing audio / MIDI clips with snap to grid on to create beat repeat style glitch effects.I also use it to Duplicate whole tracks if I’m layering up synths or if I have created a chain on a track that Iwant to use on another one.2. Click Drag Duplicate1. Shortcut: Option click and drag (Mac), Control click and drag (PC)2. What it Does: Holding the Option / Control key, then clicking on an item, you can easily drag toDuplicate and place MIDI and audio clips or MIDI notes wherever you release the mouse. This is bestused when you want to place a clip or a note in a specific place, rather than just create a Duplicate rightnext to the original. I use it frequently when editing MIDI notes.3. Toggle track / Clip View1. Shortcut: Shift Tab (Mac), Shift Tab (PC)2. What it Does: This quickly toggles between clip and track view without having to click on the clipoverview and track view selector in the bottom right of the screen. I often want to edit device settings ona track, then shift over and work on editing the clip contents. This is a super fast way to switch betweenthem.4. Toggle Pointer & Pencil Tool1. Shortcut: Command B (Mac), Control B (PC)2. What it Does: Toggles draw mode on and off (the pencil tool). The draw tool is used in SessionView to modify envelopes and MIDI, or in the Arrangement View for modifying automation.Vespers.cawww.
5. Group1. Shortcut: Command G (Mac), Control G (PC)2. What it Does: This command groups items together in different ways, depending on what you’regrouping. If you have MIDI or audio tracks selected, it’ll put them into a group track (busses themtogether into a track you can expand or collapse). If you have devices selected, it’ll group them into aRack (an instrument or audio/MIDI effects Rack, depending if your selection contains an instrument ornot). If you are in a drum Rack and you select multiple chains in the chain list, this command will groupthem to a new Drum Rack within your Drum Rack.6. Insert MIDI Clip1. Shortcut: Command Shift M (Mac), Control Shift M (PC)2. What it Does: This will quickly insert a MIDI clip onto a MIDI track. In Session View it inserts a 1bar MIDI clip. In Arrangement View, you must select a section of time with your mouse and it’ll insert aMIDI clip the same length as your selection.7. Grid Control1. Command 1 (Mac), Control 1 (PC) narrows the grid setting2. Command 2 (Mac), Control 2 (PC) widens the grid setting3. Command 3 (Mac), Control 3 (PC) toggles triplet grid on and off4. Command 4 (Mac), Control 4 (PC) toggles snap to grid on and off8. Loop Selection1. Shortcut: Command L (Mac), Control L (PC)2. What it Does: This is a big time saver when writing and looping a section for editing in theArrangement View. Simply select a clip or section of time, then hit the shortcut and your Loop Brace willautomatically snap to your selection and looping will be activated.9. Split Clip1. Shortcut: Command E (Mac), Control E (PC)2. What it Does: When editing in the Arrangement View, you can select a section of an audio or MIDIclip, hit this badboy, and it’ll detach your selection and break it out into a new clip. Very handy for quickediting.10. Follow1. Shortcut: Command F (Mac), Control F (PC)2. What it Does: This toggles on and off the follow function in the Arrangement View, allowing yourview of the screen to scroll horizontally and “follow” the section playing, or stay fixed. I usually usefollow when zoomed in pretty close and I want to see the clips or notes as they play.11. Insert Silence1. Shortcut: Command I (Mac), Control I (PC)2. What it Does: When editing in the Arrangement View, you can select a piece of time on a track orusing the Loop Brace and this function will insert blank time (silence) immediately before your selection,shifting the other events to the right.12. Edit Key Map1. Shortcut: Command K (Mac), Control K (PC)2. What it Does: Live has the ability to quickly and visually map keyboard keys to certain functions.When you activate this feature, all the functions that are available for mapping will light up orange.Simply click on a function, for example a track solo button, and press a key on your keyboard. Thenpress the shortcut again and you’ll exit key mapping mode and the key will now toggle on and off soloon that track. This is particularly handy on laptops when you’re on the road and don’t have a MIDIcontroller.Vespers.cawww.
13. Edit MIDI Map1. Shortcut: Command M (Mac), Control M (PC)2. What it Does: This is the whole reason I started using Live in the first place; the ability to easilymap MIDI controller buttons, faders and knobs to whatever you want in Live. When you activate thisfeature, all the functions that are available for mapping will light up purple. Simply click on a function,like track volume for example, and then move a fader on your MIDI controller. Then press the shortcutagain and you’ll exit MIDI mapping mode and the fader will now control volume on that track.14. Rename1. Shortcut: Command R (Mac), Control R (PC)2. What it Does: Renames virtually anything (tracks, clips, devices etc.). I use it to keep organizedand name custom devices that I save.15. Create Fades1. Shortcut: Command Option F (Mac), Control Alt F (PC)2. What it Does: Opens the fades editor for an audio clip. I use this often to eliminate clicks whenI’m slicing up audio and to create crescendo / diminuendo effects with longer clips rather than volumeautomation.16. Create New track1. Create New Audio track: Command T (Mac), Control T (PC)2. Create New MIDI track: Command Shift T (Mac), Control Shift T (PC)3. Create New Return track: Command Option T (Mac), Control Alt T (PC)17. Special Delete1. Delete Selected Automation Breakpoints: Command Delete (Mac), Control Delete (PC)2. Delete Selected Time: Command Shift Delete (Mac), Control Shift Delete (PC)18. Render Loop1. Shortcut: Command Shift R (Mac), Control Shift R (PC)2. What it Does: Renders out your master buss for the area selected with the Loop Brace. I use thisfor exporting loops that are selected and soloed, or for exporting my entire mixdown when the track iscomplete.19. Unfold / Fold All Tracks1. Shortcut: Option Click (Mac), Alt Click (PC) the Unfold / Fold track button2. What it Does: When in Arrange View only, this will unfold or fold all tracks in the set, rather thanjust one.There you have it! This is not a complete list of every shortcut in Live. These are the ones I use most frequently andsome of the more useful ones you may not know about.DISCLAIMERI’m exclusively a Mac user. I’ve done my best guess to learn what the PC shortcuts are in my examples, but I can’tguarantee that every single one is accurate. If you notice one doesn’t work, please let me know, but don’t gripe about it tome. After all, this book is free. And shame on you for not having Macs anyways ;) (oh, come on, take a joke!). Specialthanks to Tom Laskey for helping me out with the editing and PC shortcuts! You rock bro!Vespers.cawww.
PRO SECRET #4: MAXIMIZE SCREEN REAL ESTATEA lot of us are producing on laptops with small screens. When editing, you want to clearly see your clips rather thansquint at tiny objects. Even if you’re using a larger monitor, it helps to be able to see a clear overview of your track. Unlikemany programs that use detached windows you can tab through, Live locks all of it’s browsers and mixer in place. Thiscan really clutter up the screen unless you can quickly de-clutter it. When I’m sequencing or doing detailed edits, I like tohide as much of this clutter as possible so I can focus my attention on the work at hand. I used to do this by clicking allthe little show/hide buttons for each section, which is time consuming and interrupts workflow. Now, I’ve discovered aseries of shortcuts that quickly allow you to maximize screen real estate.1. Show / Hide Browser: Command Option B (Mac), Control Alt B (PC)2. Show / Hide Detail View: Command Option L (Mac), Control Alt L (PC)3. Show / Hide Overview Mode: Command Option O (Mac), Control Alt O (PC)4. Show / Hide Mixer: Command Option M (Mac), Control Alt M (PC)5. Show / Hide Returns: Command Option R (Mac), Control Alt R (PC)6. Show / Hide I/O: Command Option I (Mac), Control Alt I (PC)You’ll notice that all the shortcuts use the Command Option (Mac) or Control Alt (PC) keys. When I want to quicklymaximize my screen real estate, I just hold down Command Option, type in BLOMRI and voila!.the screen is maxed out.Vespers.cawww.
BEFOREAFTER
PRO SECRET #5: CONSOLIDATE CLIPSWhen editing and slicing up audio and MIDI clips on the timeline in Arrangement View, things can get messy reallyfast. There’s a simple feature in Live, Consolidate Clips, that can help you kill the clutter and stay organized. When writingdance music, things move in 8 bar phrases in 4/4 time, so it’s best to cut your clips to 8 bars for easy sequencing.During your experimenting and creative brainstorming it’s okay to move fast and create some chaos, but when youmove to your sequencing and mixdown stage, you’ll benefit greatly from having things all cleaned up. I don’t know aboutyou, but during sequencing I like to have things set up in nice clean sections that can easily be moved around on the fly,visually.Enter the Consolidate Clips function! To use it, simply highlight all the clips you wish to “glue” together into a singlenew one, and press command J (Mac), control J (PC). It will take a second to process and then create a new, singleclip the length of your selection. Note: When selecting audio clips, ifyou are playing the project it will need to stop the audio toConsolidate Clips (Live will prompt you first). MIDI clips can beconsolidated on the fly while playing the project.Trust me, this will save you a load of time when it comes tosequencing out your projects. Enjoy!Vespers.cawww.
PRO SECRET #6: TEMPLATE SETEarlier we talked about keyboard shortcuts and how much time they can save you. Now you’ve been rescued fromthe world of browsing menus and right clicking, can you imagine ever going back? Many people never take the time tofully explore all the features of Live; they just keep grinding away in the studio without mastering their main tool of musiccreation. Yes, it takes time to learn this stuff, and it may not seem as fun as writing music, but it accelerates your ability tofinish music and stay in the creative flow.The next evolution in your productivity is using a template track as your starting point for every project. Think back toevery time you started a new project and all the setup required. Most of us use a chosen set of common tools in everytrack. How much time do you spend on every single project doing things like this?1.Adding EQs and compressors to every track2.Adjusting the volume sliders of your tracks so you don’t redline the mixer3.Setting up return tracks with effects like reverbs and delays4.Setting up a quarter note kick drum track to sidechain from5.Naming, coloring and grouping tracks for organizationLive has the ability to use a template track with these things set up for you already.To Create a Template Set1.Open a new Live set2.Set everything up exactly as you’d like it to appear for your template3.Open Live’s Preferences4.Click on the “File Folder” tab5.Next to “Save Current Set as Default” click the “Save” button6.Now, whenever you load Live, this set will load automatically as your starting pointVespers.cawww.
MAKING YOUR TEMPLATE SETI’ve made quite a few template sets in Live and in this section I’ll explain some of the features and functions I’drecommend you include in yours. If you’d like to save yourself the trouble of setting this all up, you can buy my VespersMaster Template set by clicking here.Channel StripsThere are some common tools that I use on every single track. These are a compressor, EQ Eight, andspectrum. The EQ Eight is set to high quality mode and has the first EQ set to low cut at 30 hz because a lowfrequency rolloff is something that I found I was repetitively doing on every element. The compressor is set upwith attack, release and ratio settings the way I would most commonly start off, then I’ve turned makeup gain offand set the output gain to -15.0 dB. This is an important time saver, called gain staging. I found that with allLive’s volume faders set to 0 dB, things would quickly start to redline. I prefer to start with much more headroomin my mixer, so I gain stage down all my compressor outputs by 15 dB to ensure my mix stays nice and clean.Next, I’ve grouped these effects together into an audio effects Rack and named it Vespers Channel Strip. Asa final step, I’ve used the Rack’s macros to control Low Cut on the EQ Eight and Output on the compressor. Thisgives me easy access to the most common controls on my channel strip. Then I saved the Rack so I can easilydrag it in to future sets, and copied it onto every track in my Live template set. Now I have channel strips onevery track.Add Audio and MIDI tracksA typical one of my songs includes about 30-50 tracks when complete. Rather than adding one of thesemanually, every time I need one, I add them to my template. I start with about 15 audio tracks and 5 MIDI tracks,each with Vespers Channel Strips on them. If I need more, I simply select an existing one and Duplicate it.Side ChainSide chaining is a common element I use in every set. Rather than wasting time setting it up later, I integrateit directly into my template. Add an Audio track and lay a heavy kick drum sample on each 1/4 note for one bar.Duplicate them so they run for a full eight bars, then use the Consolidate Clips function to create a full phrase,eight bar clip. I copy this for the entire duration of a typical song (say 5-6 minutes), using the Duplicate function,then deactivate the track so the kick is not audible. This will be the “Audio From” source that will drive all myCompressor Sidechain inputs. Rename this track Sidechain.Vespers.cawww.
MAKING YOUR TEMPLATE SETReturn tracksReturn tracks are something I use in every set. Through the use of common effects like reverb and delay asreturns, you can really speed up your production while reducing your processor load by avoiding using multipleinstances of them as inserts. I use the same set of returns on every set because it’s easy to memorize them thisway. For example, I always know that return A is my short delay. Here’s my return setup:A.Short Delay (return track A)A.I always EQ my return channels so they fit in the mix better, so this chain has an EQ Eight with EQone set to low cut at 500 hz. This removes any low end that could muddy up your bass frequencies.Then I have a Simple Delay with link activated and sync to 1/4 notes with the 4 button depressed. Iensure Dry/Wet is set to 100% as it’s not an insert and the amount of processed signal is controlled bythe send level from the track. Feedback is set to 50% and can be adjusted from there to your liking.B.I’m big on panning my returns as well, so they sit nicely in the mix and don’t conflict with centerpanned elements. Use either an Auto Pan effect or Utility effect with the width at 150% to add somestereo spread.C.Next I group these into an Audio Effects Rack, rename it Vespers Short Delay Return, and macro thelowcut frequency of the EQ Eight, feedback of the Simple Delay, and Width of the Utility, then save theRack for future use.D.B.Then I rename the return track S DLY for easy reference.Long Delay (return track B)A.Sometimes called dub delays, this delay is meant to feedback for much longer for spacial effects.First, I start with the Vespers Short Delay Return I just saved, then make the following modifications.B.Change the Feedback to 80%.C.Add a slight high frequency rolloff. Approximately -5 dB at 9 kHz.D.Add a Compressor after the Utility and mess with the Threshold to extend the delay longer or makeit more audible.E.Experiment with adding Saturation and a synced Auto Pan and macro mapping their parameters.F.Then I rename my Rack Vespers Long Delay Return and save it for future use.G. Finally, I rename the return track L DLY.C.Short Reverb (return track C)A.Sometimes called room sound, short reverbs are essential to create space around your elements.Start by adding a Reverb and grouping it to an Audio Effects Rack. I macro decay time, room size, predelay, and the lo cut EQ frequency.B.I take Hi Cut off, Lo Cut on and set it to 400 hz with the Bandwidth all the way down to 0.5. I setglobal quality to High, Size to 50, and decay time to 350 ms (these are my personal preferences and willvary depending on your style). Ensure Dry/Wet is set to 100%.C.I rename it Vespers Short Reverb Return, then save it for future use.D.Finally, I rename the return track S RVB.Vespers.cawww.
MAKING YOUR TEMPLATE SETD. Long Reverb (return track D)A.Start by adding the same short reverb we just created. Set the Size to 400, Stereo to 120, anddecay time to 5 seconds (again, these are my personal preferences).B.Add a Compressor, macro the threshold, and set it low enough to compress the output of theReverb. I do this because I want the Reverb to be a very audible effect in this case, rather than roomsound.E.C.I rename it Vespers Long Reverb Return, then save it for future use.D.Rename the return track L RVB.Exciter (return track E)A.Exciters add buzz and sizzle to the top end of your mix. I use them extensively on a lot of myelements, so I find it best to set this up as a Return track. Exciters in Live can be created by using acombination of an Auto Filter, Saturation, Redux and Compressor. Add each of these effects and groupthem into an Audio Effects Rack.B.Macro the Autofilter frequency, Redux downsample, Saturator drive, and Compressor threshold.C. Set your Auto Filter to Highpass mode, add a bit of resonance (say Q 1.25) and crank up theFrequency to around 4 kHz.D. Set the Redux to Soft mode and Downsample to around 5.0.E.Set the Saturation drive to 4.00 dB.F.Crank down the Compressor threshold (adjust later).G. Then I rename the Rack Vespers Exciter Return and save it.H. Rename the Return track Exciter.To start using the Vespers Master Template with all these custom Racks now, click here to buy.Vespers.cawww.
PRO SECRET #7: CREATE YOUR OWN UNIQUESOUNDEach of the pros I’ve had the opportunity to observe has a well developed and unique sound. Most of them haveachieved this by creating their own custom samples, patches and techniques. Often times I'd find when I was making atrack, I’d invest a lot of time in creating a specific sounding patch or drum kit, then move on to a different track and forgetI’d ever created it. If, in the future, I did remember it and wanted to use it in a track, I had to re-create it from scratch.This, obviously, is not the best approach.Now, every time I create one of my sounds I save it. If it’s percussion, I export the samples to audio and make a drumkit or save a Drum Rack. If it’s a synth or effect, I save it as a patch. If it’s a collection of instruments and effects, I groupthem together and save them as a Rack. Here’s how you do it:1.After you get your sound perfect, select all the instruments and effects you want to include in the Rack by holdingdown Command (Mac) / Control (PC) and clicking on each one.2.Press Command G (Mac) / Control G (PC). This creates a Rack.3.Give the Rack a name selecting it and pressing Command R (Mac) / Control R (PC) and typing in a new name.4.Click the Save Preset button to save the Rack in your Library. It will now appear in the Live Device Browser underInstrument Rack (if it contains an instrument) or Audio (or MIDI) Effects Rack (depending on if it contains audio or MIDIeffects). This will appear in any future project you open. Just open the Live Device Browser, navigate to where theywere saved and drag them into your project.Setting aside regular time for experimentation and sound design, and saving your results will enable you to build yourown unique set of tools, sounds and Racks.Vespers.cawww.
PRO SECRET #8: MACROSThe main feature that attracted me to Live was its easy MIDI mapping. The ability to quickly map a hardwarecontroller to a parameter in the program is appealing. There’s a lot more to Live’s MIDI mapping features than having onecontroller move one parameter though. Macros expand the possibilities significantly.Macros appear in Racks as a series of eight knobs. By default they don’t do anything, but you can map them to anynumber of parameters on the devices contained in the Rack. The beauty of macros is the ability to control multipleparameters on multiple devices. For example, you can have one single macro knob that simultaneously controls ReverbDecay Time, Reverb Dry/Wet, Compressor Threshold and Auto Filter Cutoff. When you spend some time to get into it, thepossibilities with this modular device Racking and flexible MIDI mapping are exciting.Racks have their own internal mapping system, that’s different than using the regular MIDI map mode. To map withina Rack, press the Map Mode button. Every parameter that can be automated will light up green. To map, simply click on agreen parameter from one of the devices in the Rack and drag it onto the macro knob. Try dragging multiple parameters toone knob. I rename my macro knobs once I’m done mapping by clicking them and pressing Command R (Mac), Control R (PC). You can even add color to them by right / control clicking on them. When you’re done, you can then use regularMIDI map to map the macro knob to a hardware controller.Vespers.cawww.
PRO SECRET #9: ADVANCED MIDI MAPPINGThere’s more to Live’s MIDI mapping than may initially be apparent. At the basic level, you can map a MIDI control(rotary knob, fader, button etc.) to control almost any parameter within Live. This is very useful, but you’ll quickly find thatmore advanced control is needed in certain situations. Here’s how to take things to the next level.Min / Max Value EditingWhen you enter MIDI map mode, the Mapping Browser opens. You can enter values in the Min and Maxfields. This will limit the range of the parameter you’re controlling. It’s useful when you want to have a knob,fader, or other hardware control only move a specific range of the parameter in Live. I use this feature in severalcommon ways:Device On / OffLet’s say you have a hardware control mapped to an Autofilter, controlling the frequency cutoff. Ionly want the Autofilter to be on when I’m tweaking the cutoff, not all the time. So, in MIDI Mappingmode, I select the Device Activator, move my controller to map the parameter, then click in the Min boxan
This book is written for users of Ableton Live 8 and Suite 8. Due to limitations in Live Lite and Intro, some of the techniques may not work in these and earlier versions of Live. Shout Outs! I’ve had
