Transcription
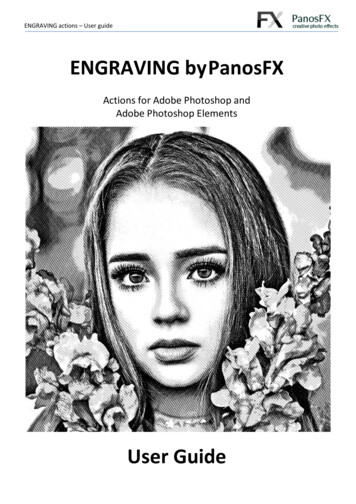
ENGRAVING actions – User guideENGRAVING by PanosFXActions for Adobe Photoshop andAdobe Photoshop ElementsUser Guide
ENGRAVING actions – User guideCONTENTS1.2.3.THE BASICS.11.1.About the effects .11.2.How the product files are organized.11.3.Loading the actions in Photoshop .11.4.Uninstalling an older product version .2USEFUL TIPS .22.1.Choosing the right photos .22.2.Troubleshooting .2THE ACTIONS.33.1.The “Pattern Maker” action .33.2.The “Engraver” action .33.3.The Layers panel .6
ENGRAVING actions – User guide1. THE BASICS1.1. About the effectsThe Engraving actions will turn your photos into beautiful engraved images.1.2. How the product files are organizedThe Engraving actions are included in the “Sketch & Engrave” bundle, which is available on ons/sketchDownload the product zip file and decompress it. You’ll find two folders, containing the actions for Photoshopand Photoshop Elements, respectively:Double click to open the folder that corresponds to your Photoshop version.It contains 2 action sets:The “ENGRAVING by PanosFX.atn” file contains the engraving actions.1.3. Loading the actions in PhotoshopIf you don’t know how to load and use Photoshop actions, please refer to this article on oubleshooting/installing-photoshop-actions1 Panos Efstathiadis all rights reserved
ENGRAVING actions – User guide1.4. Uninstalling an older product versionHow to unload the old actions:If you have an older product version installed, or if you installed the trial version before purchasing the full one, Irecommend you remove it prior to installing the new files. This article shows you how to do ting/uninstallingHow to unload the patterns of an product older version: If you have Photoshop CC, select Window Patterns. Then select and delete all patterns whose namebegins with “PFx-Etching”If you have Photoshop CSx or Photoshop Elements, select Edit Preset Manager. Select “Patterns” fromthe dropdown list and delete all patterns whose name begins with “PFx-Etching”2. USEFUL TIPSBelow you can find a number of tips, aiming to help you make the most out of the filmstrip actions.2.1. Choosing the right photosPhotos with crisp details produce much better cartoons. Avoid using blurry photos.You should also avoid using poorly scanned photos, or scanned copies of old, textured photo papers.2.2. TroubleshootingIf Photoshop behaves abnormally or if you get errors such as. “Couldn’t not complete your request because of aprogram error”, please reset the preferences and reload the actions. Refer to these instructions for on-troubleshooting/reset-preferences2 Panos Efstathiadis all rights reserved
ENGRAVING actions – User guide3. THE ACTIONSThe “ENGRAVING by PanosFX.atn” file contains two actions:3.1. The “Pattern Maker” actionSelect the action and hit the Play button at the bottom of the actions panel.This action creates the patterns used in the effect. You don’t have to run this action each time you wish to createan engraved version of a photo. The action should be executed only once. The patterns it creates are stored inPhotoshop until you remove them manually, using the Preset manager of the Patterns panel (CC-2020 or newer).3.2. The “Engraver” actionThis is the core action of the set. Load a photo in Photoshop, select the action and hit the Play button. A messagewill show up, informing you that in the next step you can change the image size:The action works best on photos whose longest side (width or height) is in the range between 3000 to 4000pixels. Of course you can enter whatever value you wish.Larger image sizes produce engraved photos with denser lines.3 Panos Efstathiadis all rights reserved
ENGRAVING actions – User guideIn the following examples the biggest side of the original image was set to 2500, 3300, and 4500 pixels.See how the size affects the density of the engraving lines:So, depending on the effect you wish to create, enter your preferred value in the Width or Height field (whicheveris bigger) and hit OK:The action will soon create the engraved version of the photo.4 Panos Efstathiadis all rights reserved
ENGRAVING actions – User guideYour only intervention is near theend, when you will be asked to usethe Levels sliders to manipulate thelooks of the image:Click Continue.Move the left slider to the right / left to increase / decrease the shaded areas of the photo:5 Panos Efstathiadis all rights reserved
ENGRAVING actions – User guide3.3. The Layers panelWhen the action execution is over, the layers panel lookslike the screenshot on the right.The engraving lines are contained within two layergroups: Straight linesWaved linesYou can turn on and off any of these groups / layers andsee how this affects the final image.The “Darken up” layer is used to add some depth to theengraved photo by enhancing the shaded areas.Double click the “Levels” adjustment layer to re-adjust thesettings you entered in step 3.2At the top of the layers panel there are 5 layers that areswitched off, by default. Single color (double click to change)Foggy colorsYellowishLighterColorizeTry to switch them on and see how they affect the look of the engraved photo:6 Panos Efstathiadis all rights reserved
ENGRAVING actions – User guideHere’s an engraved image with the “Colorize” layer activated:Image with the “Foggy colors” layer activated:7 Panos Efstathiadis all rights reserved
ENGRAVING actions – User guideImage with the “Yellowish” layer activated:Image with the “Lighter” layer activated:8 Panos Efstathiadis all rights reserved
ENGRAVING actions – User guideImage with the “Single color (double click to change)” layer activated:When you activate the “Single color (double click to change)” adjustment layer, you can double click its thumbnailand change the color to your preference.You can also try to change the opacity and blending mode of these layers.If you have any questions, please email me using the contact form at the footer of any page of my site.Panos Efstathiadiswww.PanosFX.com9 Panos Efstathiadis all rights reserved
ENGRAVING actions – User guide ENGRAVING by PanosFX Actions for Adobe Photoshop and Adobe Photoshop Elements User Guide . ENGRAVING actions – User guide CONTENTS . Photoshop until you remove them manually, using the Preset manager of the Patt