Transcription
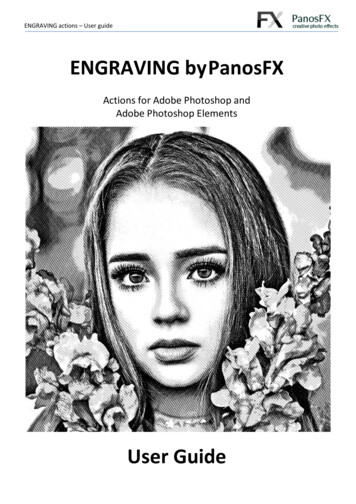
CRYSTAL BALLS ‘n BUBBLES – User guideCRYSTAL BALLS ‘n BUBBLESFor Adobe Photoshop CC, CS6, CS5, CS4Adobe Photoshop Elements 2015 or newerUser Guide
CRYSTAL BALLS ‘n BUBBLES – User guideCONTENTS1. THE BASICS . 11.1. About the effects . 11.2. Before loading a photo . 11.3. Quick tips on tweaking the final photo . 11.4. How the actions are organized . 21.5. Removing an older version (or a trial one) . 31.6. Installing the actions in Photoshop . 31.7. Installing the actions in Photoshop Elements . 31.8. Installing and using the brushes in Photoshop . 31.9. Installing and using the brushes in Photoshop Elements . 42. THE ACTIONS . 52.1. The core actions . 52.1.1.Turning the entire photo into an orb52.1.2.Turning a custom selection into an orb102.1.3.Creating transparent bubbles162.2. The actions in the “EXTRA TOUCHES” group .172.2.1.Flip the orb photo172.2.2.Distortion plus172.2.3.Iridescence182.2.4.Tweak edge glows182.2.5.Framed photo inside212.2.6.Softer orb edges232.2.7.Alternative blurred background242.2.8.Facebook profile photo253. THE “LENS FLARES” BRUSHES .26
CRYSTAL BALLS ‘n BUBBLES – User guide1. THE BASICS1.1. About the effectsThe “Crystal Balls ‘n Bubbles” actions for Adobe Photoshop and Adobe Photoshop Elements turn yourphotos into gorgeous crystal orbs or bubbles. You can choose to apply the effect to the entire photo, orto a custom area of the photo.The “Lens Flares” is an additional set of brushes, which you can use to add beautiful flares to your glasssphere images.The actions create 3 different crystal ball styles: The first two styles resemble a lensball (a compact glass ball)The third style looks like an orb made of thin glass, or a bubble.There are also several complementary actions that produce a variety of effects.1.2. Before loading a photoTake into account these two tips before selecting a photo to process with the actions: Avoid using photos with blown-out highlights or blacked-out shadows.Try the effect on photos that include the sky, the clouds, etc.1.3. Quick tips on tweaking the final photoWhen the execution of the core action is completed, you can go to the Layers panel and try the followingadjustments, to tweak the look of the glass sphere: Adjust the opacity of the “Darker edges” layer.Adjust the opacity of the “Outline 3” layer.Adjust the opacity of the “Reflection top 1” and “Reflection top 2” layers, contained in the“Reflections” layers group.Turn off the “Surface glare (move it)” layer.Turn on the “Color (double click to edit)” to create a colored-glass orb. You can edit the color andeven duplicate this layer.Add your own flare effects (refer to the respective instructions, at the end of this guide).1 Panos Efstathiadis all rights reserved
CRYSTAL BALLS ‘n BUBBLES – User guide1.4. How the actions are organizedThe image on the right shows the actions contained in the product.The actions set name is “CRYSTAL BALLS n BUBBLES by PanosFX”. You should not change this namebecause the actions will fail to run. The set contains 3 core actions, groupedunder the “RUN ONE OF THESE ACTIONS”group. They convert the entire photo or aselected area, into a crystal ball or abubble. You must select and execute oneof these actions:o “Apply to a custom area”,o “Apply to the entire photo” ando “Add an empty bubble”Note: the product version for PhotoshopElements and for Photoshop CS6, CS5, andCS4 contains 4 core actions:oooo“Apply to a custom area”“Apply to the entire photo(Landscape images)”“Apply to the entire photo(Portrait images)”“Add an empty bubble” The actions in the “EXTRA TOUCHES”group can be used optionally to change orspice up the look of the orb created withthe core actions. The “do NOT run” actions should not be executed.2 Panos Efstathiadis all rights reserved
CRYSTAL BALLS ‘n BUBBLES – User guide1.5. Removing an older version (or a trial one)If you have an older product version installed, I recommend you remove it prior to installing the newfiles. This article shows you how to do installing1.6. Installing the actions in PhotoshopIf you don’t know how to install and use actions in Photoshop, please refer to this article shooting/installing-photoshop-actions1.7. Installing the actions in Photoshop ElementsIf you don’t know how to install and use actions in Photoshop Elements, please refer to this article -troubleshooting/installing-pse-actions1.8. Installing and using the brushes in PhotoshopTo load the “Lens Flares” set of brushes in Photoshop, use the Brushes panel (press F5 or select “Window Brushes” from the menu). Click the menu button on the upper-right corner of the panel and select"Import Brushes" (in older Photoshop versions select "Load Brushes").To add a flare: press B, set the foreground color to white, create a new layer, adjust the brush tip sizeusing the bracket keys [ ] and click to add.For more information, refer to section 3 at the end of this guide.3 Panos Efstathiadis all rights reserved
CRYSTAL BALLS ‘n BUBBLES – User guide1.9. Installing and using the brushes in Photoshop ElementsTo load the “Lens Flares” set of brushes in Photoshop Elements, press B to select the brush tool.Click on “Tool Options” at the bottom of your work area (1), click the brush picker arrow (2), click themenu button (3) and finally select “Load Brushes” (4):To add a flare: press B, set the foreground color to white, create a new layer, adjust the brush tip sizeusing the bracket keys [ ] and click to add.For more information, refer to section 3 at the end of this guide.4 Panos Efstathiadis all rights reserved
CRYSTAL BALLS ‘n BUBBLES – User guide2. THE ACTIONS2.1. The core actions2.1.1.Turning the entire photo into an orbThe “Apply to the entire photo” action will turn the entire photo into a crystal ball. Please load a photo inPhotoshop and then: If you have Photoshop CC, select the “Apply to the entire photo” action. If you have Photoshop CSx or Photoshop Elements, select the “Apply to the entire photo(Landscape images)” action if the photo has a landscape orientation. If it has a portraitorientation, select the “Apply to the entire photo (Portrait images)” action.Press the Play button, located at the bottom of the Actions panel.In a few seconds the action will create the orb. You will be prompted to resize it to your preference:Hit Continue and resize the orb proportionally.5 Panos Efstathiadis all rights reserved
CRYSTAL BALLS ‘n BUBBLES – User guideThe next instruction stop prompts you to blur the background photo:Hit Continue and move the Gaussian blur filter slider to preference.Hit OK.The value you entered will be stored in the Gaussian Blur smart filter of the “Background photo” layer:You can re-edit the settings at any time, by double clicking the smart filter (not available in PhotoshopElements).6 Panos Efstathiadis all rights reserved
CRYSTAL BALLS ‘n BUBBLES – User guideThe next instruction stop prompts you to adjust the brightness and contrast of the background photo:Hit Continue and adjust the values or hit OK to proceed with the default settings.Your values will be stored in the “Brightness/Contrast (adjust)” adjustment layer:You can re-edit the settings at any time, by double clicking the adjustment layer thumbnail.7 Panos Efstathiadis all rights reserved
CRYSTAL BALLS ‘n BUBBLES – User guideThe execution of the core action has been completed. You have 3 different documents open in your workarea. Choose the orb that looks best for the particular photo.Style 1:Style 2:Style 3:8 Panos Efstathiadis all rights reserved
CRYSTAL BALLS ‘n BUBBLES – User guideThe current state of the orb layers has been saved in the History panel, as “Snapshot”. Use it to undo anychanges you make (not available in Photoshop Elements).The actions make extensive use of smart layers, adjustment layers, and smart filters, allowing you tomake non-destructive edits and bring the effect closer to your taste.9 Panos Efstathiadis all rights reserved
CRYSTAL BALLS ‘n BUBBLES – User guide2.1.2.Turning a custom selection into an orbThe “Apply to a custom area” action lets you make a custom circular selection on the photo which willthen be turned into a crystal ball.Try to ‘study’ a photo and think of how you can use this action creatively. The following photo is such anexample. I will use the second core action to enclose the man inside a bubble and make the photo tell adifferent story:Begin with loading the photo in Photoshop. Then press the Play button, located at the bottom of theActions panel.10 Panos Efstathiadis all rights reserved
CRYSTAL BALLS ‘n BUBBLES – User guideA vector circle will appear at the upper-left corner of the photo:The circle defines the area of the photo that will become the crystal ball. Hit Continue and Drag a corner handle to resize the circle proportionally. Drag the circle to reposition it.11 Panos Efstathiadis all rights reserved
CRYSTAL BALLS ‘n BUBBLES – User guideWhen you finish, double click the shape to continue.The next step lets you distort (“Spherize”) the photo inside the circular area. You will see the followinginstruction:Hit Continue.By default the action uses the maximum filter value (100%). You can adjust this to your preference (setthe amount to 0 for no change):Hit OK to move on.12 Panos Efstathiadis all rights reserved
CRYSTAL BALLS ‘n BUBBLES – User guideThe next step lets you resize the sphere:Hit Continue and resize it proportionally. Double click to confirm and move on.The next instruction stop prompts you to blur the background photo:Hit Continue and move the Gaussian blur filter slider to preference.In this example I didn’t want to blur the background, so I set the filter to the lowest value (0.1):TIP: you can go to the Layers panel and turn off theGaussian blur smart filter, after the action execution iscompleted (not available in Photoshop Elements).13 Panos Efstathiadis all rights reserved
CRYSTAL BALLS ‘n BUBBLES – User guideThe last instruction stop prompts you to adjust the brightness and contrast of the background photo:Hit Continue and adjust the values or hit OK to proceed with the default settings.Your values will be stored in the “Brightness/Contrast (adjust)” adjustment layer:You can re-edit the settings at any time, by double clicking the adjustment layer thumbnail.The execution of the core action has been completed. You have 3 different documents open in your workarea. Choose the orb that looks best for the particular photo (in this example I’ll choose the third style).Style 1:14 Panos Efstathiadis all rights reserved
CRYSTAL BALLS ‘n BUBBLES – User guideStyle 2:Style 3:15 Panos Efstathiadis all rights reserved
CRYSTAL BALLS ‘n BUBBLES – User guide2.1.3.Creating transparent bubblesThe “Add an empty bubble” action works quite similarly with the “Apply to a custom area” action.The major different is that the orb is transparent. Therefore, this action lets you create different kind ofeffects, by adding one or multiple bubbles to your photos:At the beginning the action will ask you to define the circular area that will be turned into a bubble. Thereare no other steps requiring your input. The action will create the bubble. You can move it or resize itwith your mouse.You can duplicate the bubble by selecting the layers group, holding down the Alt key (Mac: option) anddragging with your mouse.You can also duplicate a bubble by right-clicking on the layers group and selecting “Duplicate group”. Youcan then drag and resize the copy.16 Panos Efstathiadis all rights reserved
CRYSTAL BALLS ‘n BUBBLES – User guide2.2. The actions in the “EXTRA TOUCHES” group2.2.1.Flip the orb photoIn real life, a lensball showsthe background photoflippedverticallyandhorizontally. This actiondoes exactly this.Run the action again torestore the previous look.2.2.2.Distortion plusThis action creates a more“spherized” version of theorb photo.Adjust the strength of theeffect by setting the valueof the Spherize filter (0 to100).17 Panos Efstathiadis all rights reserved
CRYSTAL BALLS ‘n BUBBLES – User guide2.2.3.IridescenceThis action switches on the layers of the “Iridescence (turn on/off)” group. These layers give iridescentqualities to your orb:You can turn off the visibility of the layers group by clicking on its eyeball in the layers panel. You can alsotry to change the opacity and blending mode of the various layers.2.2.4.Tweak edge glowsThere are 3 beautiful glow effects on the edges of the orb. This action lets you change their position:18 Panos Efstathiadis all rights reserved
CRYSTAL BALLS ‘n BUBBLES – User guideRead the instructions and hit Continue:In the next step you’ll see a black circle, with a glow on its edge.Read the instructions and hit Continue:The Lens Flare window opens up:19 Panos Efstathiadis all rights reserved
CRYSTAL BALLS ‘n BUBBLES – User guideUse the mouse to reposition the center of the flare (marked by a small cross sign). Keep the center of theflare slightly outside the perimeter of the circle:You may also change the flare Brightness. Hit OK to apply your changes.You will be asked to perform the same steps 2 more times, to reposition the flares.You can run the action again.20 Panos Efstathiadis all rights reserved
CRYSTAL BALLS ‘n BUBBLES – User guide2.2.5.Framed photo insideThis action creates an alternative scene, with your photo enclosed inside a sphere.Select the action and press the Play button.You will be prompted to move the “Stroke” Size slider, to define the size of the photo border.Hit Continue and move the Stroke Size slider to your preference:Observe the change in the border size and hit OK when you are happy with the result.The next step prompts you to adjust the levels of the bordered photo:Hit Continue and move the slider to preference. Hit OK when you are happy with the result:21 Panos Efstathiadis all rights reserved
CRYSTAL BALLS ‘n BUBBLES – User guideAt the end the orb is cropped, presented against a transparent background. You can use this photo inyour Facebook profile or in other projects:22 Panos Efstathiadis all rights reserved
CRYSTAL BALLS ‘n BUBBLES – User guide2.2.6.Softer orb edgesRun this action to make the edges of the orb look softer, more transparent:23 Panos Efstathiadis all rights reserved
CRYSTAL BALLS ‘n BUBBLES – User guide2.2.7.Alternative blurred backgroundRun this action to apply a different blur effect to the background photo (switch from “Gaussian Blur” to“Radial Blur” with zoom):When the action finishes, you can go to the Layers panel and double click the “Radial Blur” smart filter, tochange its settings. You can also turn off this filter and re-activate the “Gaussian Blur”:24 Panos Efstathiadis all rights reserved
CRYSTAL BALLS ‘n BUBBLES – User guide2.2.8.Facebook profile photoUse this action to create an orb for your Facebook profile. When the action completes, save the image asPNG-24 in order to preserve the transparency. To export as PNG-24, you can use one of these commands.In Photoshop CC: File Export Quick Export as PNG File Export As File Export Save for Web (Legacy) File Save AsIn Photoshop CSx: File Save for Web File Save AsFinally, go to your profile page and update your profile photo with the new image:25 Panos Efstathiadis all rights reserved
CRYSTAL BALLS ‘n BUBBLES – User guide3. THE “LENS FLARES” BRUSHESAlong with the Photoshop actions, the product contains a set of brushes which you can use to addbeautiful lens flare effects to your glass sphere images.To load the brushes, refer to the instructions in sections 1.8 and 1.9 of this manual.Having created the orb, go to the layers panel andcreate a new layer at the top. Name it “LensFlares”:Go to the Brushes panel and select one of the 6 flares:26 Panos Efstathiadis all rights reserved
CRYSTAL BALLS ‘n BUBBLES – User guideFinally, set the foreground color to White and click on the image, to add the lens flare:If you have any questions, please use the contact form on my site, or use the site forum.Panos Efstathiadiswww.PanosFX.comCheck the PanosFX Facebook page:CREDITS:The photos used in this guide are available on unsplash.com. Click on the thumbnails to go to therespective pages:27 Panos Efstathiadis all rights reserved
CRYSTAL BALLS ‘n BUBBLES – User guide CRYSTAL BALLS ‘n BUBBLES For Adobe Photoshop CC, CS6, CS5, CS