Transcription
JIGSAW PUZZLES – 3D User guideJIGSAW PUZZLES – 3DActions for Adobe Photoshop CCUser GuideNote: The trial version contains a small subset of the effects available in the full d.details.100604.html
JIGSAW PUZZLES – 3D User guideCONTENTS1. THE BASICS . 11.1.About the actions . 11.2.How the actions are organized . 11.3.The “Classic” effects (examples) . 31.4.The “Special” effects (examples) . 52. INSTALLATION & TROUBLESHOOTING . 82.1.Unzip the product file . 82.2.Load the 2D Puzzles actions in Photoshop . 82.3.Requirements . 82.4.Troubleshooting . 93. USING THE “CLASSIC” 3D PUZZLES ACTIONS . 103.1.Introduction . 103.2.Using the “Classic” actions in GROUP 1. 113.2.1.Load the photo . 113.2.2.Modify the style of the pieces. 113.2.3.Manually select up to 30 layers (pieces) . 133.2.4.From 2D to 3D . 143.2.5.Editing the 3D Scene . 153.3.Using the “Classic” actions in GROUP 2. 204. USING THE “SPECIAL” 3D PUZZLES ACTIONS . 214.1.Introduction . 214.2.Using the “Special” actions in GROUP 1 . 224.2.1.Load and crop the photo . 224.2.2.Create and edit the 3D scene . 224.3.Using the “Special” actions in GROUP 2 . 23
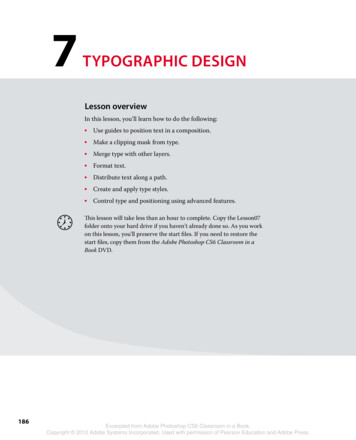
JIGSAW PUZZLES – 3D User guide1. THE BASICS1.1. About the actionsThe PanosFX “Jigsaw Puzzles” actions for Adobe Photoshop turn your photos into digital jigsaw puzzles. Τhe 3Dactions make use of Photoshop’s advanced features to create impressive 3D scenes.The actions create a remarkable range of different jigsaw puzzle effects. This guide describes the way the 2DPuzzle actions work.1.2. How the actions areorganizedThe 3D Puzzle Effects include two setsof Photoshop actions: The “Classic” effects.The “Special” effects.1 Panos Efstathiadis all rights reserved
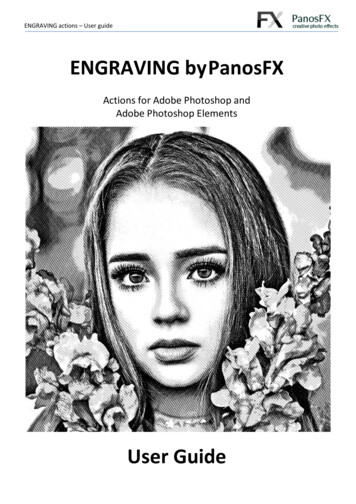
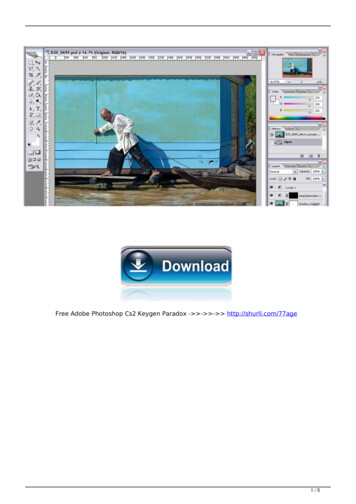
JIGSAW PUZZLES – 3D User guideThe “Classic” Puzzle effects, as theirname indicates, make your photoslook like classic paperboard jigsawpuzzles.You can create puzzles with up to 210pieces. They let you select up to 20pieces (or groups of pieces) of yourpreference and are turned intoindividual 3D objects.The “Special” Puzzle effects includean impressive assortment of creativepuzzle effects, such as spiral puzzles,hearts, or diamonds, to name a few.The example on the right shows aheart with 14 pieces that are slightlydisplaced from their positions. Theextruded sides are made from glassymaterial.In these actions each piece is anindividual 3D object.2 Panos Efstathiadis all rights reserved
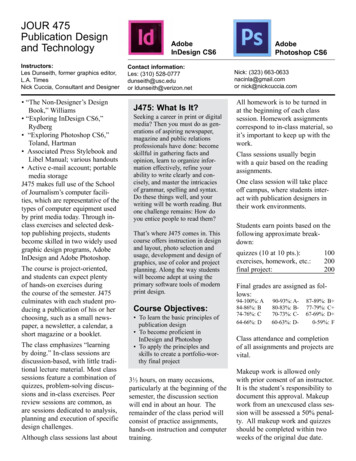
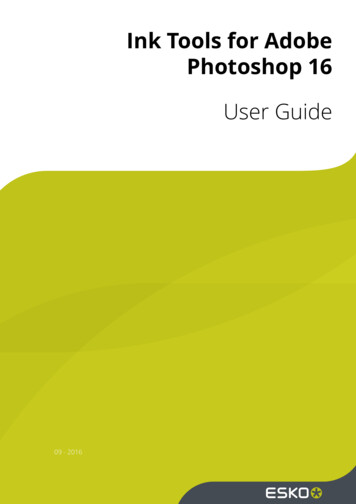
JIGSAW PUZZLES – 3D User guide1.3. The “Classic” effects (examples)The examples below show 14 puzzles created using the 3D ‘Classic’ actions:3 Panos Efstathiadis all rights reserved
JIGSAW PUZZLES – 3D User guide4 Panos Efstathiadis all rights reserved
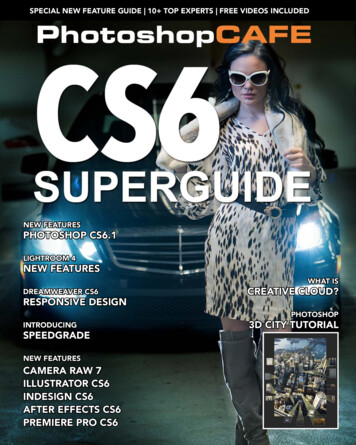
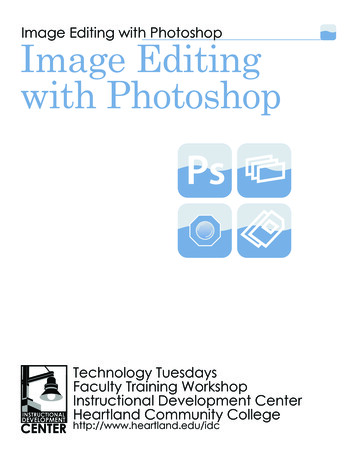
JIGSAW PUZZLES – 3D User guide1.4. The “Special” effects (examples)The examples below demonstrate the 23 effects produced by the ‘Special’ 3D actions:5 Panos Efstathiadis all rights reserved
JIGSAW PUZZLES – 3D User guide6 Panos Efstathiadis all rights reserved
JIGSAW PUZZLES – 3D User guide7 Panos Efstathiadis all rights reserved
JIGSAW PUZZLES – 3D User guide2. INSTALLATION & TROUBLESHOOTING2.1. Unzip the product fileWhen you acquire the product or the trial version, the zip file “PanosFX‐Jigsaw‐Puzzles.zip” will be automaticallydownloaded into your "Downloads" folder. If you can’t find it, please send immediately an email toinfo@panosfx.comUnzip the file ”PanosFX‐Jigsaw‐Puzzles.zip”. This will create a folder called "PFx Jigsaw Puzzles", which contains 4files:PFx PUZZLES 2D ‐ Classic.atnPFx PUZZLES 2D – Special.atnPFx PUZZLES 3D ‐ Classic.atnPFx PUZZLES 3D – Special.atn2.2. Load the 2D Puzzles actions in PhotoshopMethod 1: Double‐click the “PFx PUZZLES 2D – Classic.atn” or the “PFx PUZZLES 2D – Special.atn” files; the actions will beloaded automatically into the Actions Panel.Method 2: Go to Photoshop’s Actions Panel. If the actions panel is not visible, select Window Actions, or press Alt‐F9(PC) or option‐F9 (Mac). Click the panel’s menu button (at the top‐right panel corner) and select "Load Actions" from the pop‐up menu. Navigate inside the " PanosFX Jigsaw Puzzles " folder and load the “PFx PUZZLES 2D – Classic.atn” or the “PFxPUZZLES 2D – Special.atn” files; the actions will be loaded automatically into the Actions Panel.Load a photo in Photoshop; select an action with your mouse; hit the Play button, which is located at the bottomof the Actions Panel. The action will begin. Read carefully the on‐screen instructions.2.3. RequirementsThe 3D Puzzles actions are compatible with Photoshop CC and Photoshop CS6 Extended. Your system shouldmeet the minimum 3D requirements, as provided by equirements.htmlThe 3D Photoshop menu becomes unavailable (grayed out) in systems with old graphics cards that are notsupported anymore by Adobe.8 Panos Efstathiadis all rights reserved
JIGSAW PUZZLES – 3D User guideIt is highly recommended that you use the 64 bit Windows version or macOS. If you have less than 8GB of RAM,you may experience crashes while working in 3D or using 3D actions. It is also recommended you have 2GB ofVideo RAM (or more).2.4. TroubleshootingMake sure you read the following pages, in order to understand how the actions work. If you notice thatPhotoshop behaves abnormally proceed with resetting the preferences the way described in this ubleshooting/reset‐preferences9 Panos Efstathiadis all rights reserved
JIGSAW PUZZLES – 3D User guide3. USING THE “CLASSIC” 3D PUZZLES ACTIONS3.1. IntroductionThe “Classic” 3D Puzzles actions are divided in two groups: GROUP 1GROUP 2Why are there 2 different groups? This division has to do with themaximum number of pieces that will be turned into individual 3Dobjects. Some actions create puzzles with a large number of pieces(e.g. 210 pieces). Turning every piece into a unique 3D object wouldtake a lot of time and additional system resources. In the end, howmany would need a 3D puzzle scene with e.g. 56 different 3D objects? The actions in the first group cut the photos in many pieces.These actions let you choose up to 20 pieces that will be turnedinto individual 3D objects. This number will cover most designneeds. The actions in the second group cut the photos into fewerpieces (6, 9, 12, 15, 20, 24, or 30). In these actions each piecewill be automatically turned into an individual 3D object.10 Panos Efstathiadis all rights reserved
JIGSAW PUZZLES – 3D User guide3.2. Using the “Classic” actions in GROUP 13.2.1.Load the photoBegin with loading a photo of landscape orientation.NOTE: If your photo has a portrait shape, rotate it by 90 degrees prior to running the actions, using the menu command:Image Image Rotation 90 Clockwise. When the action finishes, restore the original orientation using the 3D Panel: clickon “Scene objects” (PS CS6: click on “Scene”) and rotate the scene 90 degrees CCW.Select one of the actions in “GROUP 1” and hit the Play button.The action will encourage you to downsize your photo,if it is very big. If you plan to publish the puzzle imageson the web, you certainly don’t need to use a very bigphoto. Smaller photos create 3D puzzles that can beedited more efficiently.Click on Continue. Then change the image size to yourpreference, or hit OK to use the original image size.The action will then cut the puzzle pieces, creating a different 2D layer for every puzzle piece. This may take awhile, depending on the number of pieces and your system.3.2.2.Modify the style of the piecesWhen all pieces are cut, the action prompts you to modify the default style setting for the top‐left piece.Click on Continue.11 Panos Efstathiadis all rights reserved
JIGSAW PUZZLES – 3D User guideTo make the pieces look more realistic, the action applies two layer styles on every piece, the “Bevel & Emboss”and “Drop Shadow”:Click on “Bevel & Emboss” and modify the default settings. While modifying the settings, observe the effect onthe top left piece. For maximum accuracy, I recommend you zoom to 100% by pressing Ctrl (Mac: cmd) and theplus key ( ).TIP: If you can’t see the top left piece after zooming to 100%, hold down the Space key and drag with your mouse.When you finish, press OK to move on. The style settingswill be copied to all other pieces:12 Panos Efstathiadis all rights reserved
JIGSAW PUZZLES – 3D User guide3.2.3.Manually select up to 30 layers (pieces)In Photoshop CC, the action will prompt you to hit Stop andmanually select up to 30 layers that will become the individual3D objects.In Photoshop CS6 Extended you must select exactly 30 layers,no more, no less!Click on Stop and select the individual layers (pieces). If youselect more than 30 layers, the action will stop in a latter stepand ask you to start from the start.HOW TO USE YOUR MOUSE TO SELECT MULTIPLE PIECES:How to select the first layer:Press V and then right‐click on the first piece whoselayer you wish to select. A window pops‐up; click on thelayer name to select it:How to select the second (third, etc.) layer:Hold down Shift and right‐click on the next piece thatyou wish to select; click on the layer name in the pop‐up window.Repeat to select additional pieces.NOTE: In the “Classic puzzles” actions the pieces are arranged in rows and columns. The layer name format is: “Row X – X”,indicating the position of the respective piece. For example layer “Row 3 – 4” represents the 4th piece in the 3rd row.Alternatively you can use the Layers panel to select up to 30 pieces (layers). Hold down Ctrl (Mac: cmd) and clickon each layer that you want to turn into an individual 3D object.Make a last check on the Layers panel to confirm that you have selected no more than 30 layers.Then click the Play button at the bottom of the Actions Panel, to resume the action:13 Panos Efstathiadis all rights reserved
JIGSAW PUZZLES – 3D User guide3.2.4.From 2D to 3DEach one of the layers you selected will be transformed into an individual 3D object, that has its own propertiesand that can be moved or scaled in 3D.The creation of the 3D meshes may take some time, depending on the size of the image and the number of 3Dobjects. When it finishes, the action will prompt you to click on Continue if you have the English Photoshopversion, or Stop if you have a different language version: If you have a non‐English Photoshop version hit Stop; the few remaining action steps are languagedependent and won’t run in your version. Please refer to the extra PDF guide that is included in theproduct ZIP file, to find out the steps you need to perform manually. If you have the English Photoshop version, click on Continue. The action will add a reflection, and modifyan array of 3D materials settings as well as the 3D lights.The action has finished its complex job. You should see the following message:Click on Stop. Then go to the Actions Panel and click the little down‐arrow to the left of theaction name you used, to collapse the action steps:14 Panos Efstathiadis all rights reserved
JIGSAW PUZZLES – 3D User guide3.2.5.Editing the 3D SceneAt this point your 3D puzzle should look like this:At the first glance it doesn’t look very 3D”ish”. Well, the reality is different. Time to dive in the 3D world!The action has already switched to the 3D workspace, because the 3D Panelbecomes indispensable and should be omnipresent. The pieces that you turned into individual 3D objects are named“Piece 1”, “Piece 2”, . , “Piece X” (where X 20).All the other pieces have been merged into a single 3D object called“All other pieces”.In Photoshop CC, these 3D objects are grouped under “Scene Objects”:15 Panos Efstathiadis all rights reserved
JIGSAW PUZZLES – 3D User guideBy default the 3D puzzle is displayed in a standing position (it stands vertically to the ground plane). To switch to alaying position, do the following: Click on “Scene Objects” on the 3D Panel (in CS6 click on “Scene”).Go to the Properties panel and enter 90 in the X angle:Select 3D Move Object to Ground Plane in Photoshop’s menu.TIP: at this point I recommend you create a new snapshot in the History Panel, tobe able to revert any changes you make.Let’s change the position of the camera. Go to the 3D Panel and click on“Current View”:Press V ; click any the five tools at the top of your work area and use your mouse tochange the camera position:Here’s how my puzzle lookslike, at this step:16 Panos Efstathiadis all rights reserved
JIGSAW PUZZLES – 3D User guideNow let’s detach, move and rotate the individual pieces.Go to the 3D Panel and click the second tab (called Filter By: Meshes). This tabshows the various individual 3D objects that make up the 3D scene:When you select any of these 3D objects, the 3D axes appearabove the respective piece, on the puzzle image:Use your mouse on the 3D axes to move / rotate the piece:Do the same for the otherpieces (select the piece in the3D Panel and use your mouseto move it in 3D):You may even select multiple3D objects in the 3D Panel andmove / rotate them together.17 Panos Efstathiadis all rights reserved
JIGSAW PUZZLES – 3D User guideHOW TO CHANGE THE DEFAULT 3D LIGHT SETTINGS:Go to the 3D Panel and click the fourth tab (“Filter By: Lights”):Then drag with your mouse to change the direction of the light source to your liking:Go to the Properties Panel, and change the Intensity and the Softness of the3D light to your preference:18 Panos Efstathiadis all rights reserved
JIGSAW PUZZLES – 3D User guideHOW TO CHANGE THE THICKNESS OF THE PIECES:Go to the 3D Panel and click the second tab (“Filter By: Meshes”). Hold downShift and select all objects:Go to the Properties Panel, click the first tab and modify the Extrusion Depthto taste:HOW TO CHANGE THE EXTRUSION MATERIAL OF THE PIECES:The actions use “Cork” as the extrusion material for the pieces:To change the extrusion material, go to the 3D Panel and click thethird tab (“Filter By: Materials”). Hold down the Ctrl key (Mac: cmd)and click to select all “Extrusion Materials”:19 Panos Efstathiadis all rights reserved
JIGSAW PUZZLES – 3D User guideGo to the Properties Panel. Click the Materials dropdown list and select amaterial of your taste.RENDERING THE 3D SCENE:What you see on your screen so far is just a draft representation of the final image. To render it select 3D Render from the menu. Alternatively you can press Shift‐Ctrl‐Alt‐R (Mac: Shift‐cmd‐option‐R), or click the renderbutton on the 3D Panel or the Properties Panel.Rendering takes time to complete. You don’t have to wait until it’s done 100% : you can press the Esc key andstop it when you feel that the quality of rendered image is adequate for your needs.3.3. Using the “Classic” actions in GROUP 2The actions in GROUP 2 work similarly to those in GROUP 1.You must open a photo of landscape ratio prior to running the actions. Then you must select one of the actions in“GROUP 2” and hit the Play button.The action will prompt you to change the image size (optional) and then modify the layer styles of the pieces, aswas described in 3.2.1. and 3.2.2.Unlike the actions in GROUP 1, the actions in GROUP 2 won’t ask you to stop and manually select up to 20 layers.They will automatically turn each 2D piece into a unique 3D object. This will take some time, depending on thesize of your photo and the number of pieces.The next steps are exactly the same as those described in 3.2.4. and 3.2.5.20 Panos Efstathiadis all rights reserved
JIGSAW PUZZLES – 3D User guide4. USING THE “SPECIAL” 3D PUZZLES ACTIONS4.1. IntroductionThe “Special” 3D Puzzles actions are categorized in two groups: GROUP 1GROUP 2The reason for this categorization is described in 3.1.21 Panos Efstathiadis all rights reserved
JIGSAW PUZZLES – 3D User guide4.2. Using the “Special” actions in GROUP 14.2.1.Load and crop the photoBegin with loading a photo of any aspect ratio. Select one of the actions in “GROUP 1” and hit the Play button.The action creates a vector shape that servestwo purposes: It lets you define which pixels willbe included in the puzzle.It lets you preview the exact edges ofeach piece.Drag any of the 4 corner handles to resize theshape. Do not drag any of the middle handles.You can also rotate or move the vector shapeusing your mouse.When you finish, double click inside the shapeto move on. The action will crop the photo andcut the puzzle pieces.The action will encourage you to downsize your photo, if itis too big. Use this (optional) step to create 3D puzzles thatcan be edited more efficiently and effectively.Click on Continue. Then change the image size to yourpreference, or hit OK to use the original image size.4.2.2.Create and edit the 3D sceneThe remaining steps let you: Modify the layer style of the puzzle pieces (refer to 3.2.2.).Manually select up to 20 pieces that will become individual 3D objects (refer to 3.2.3.).Create the 3D puzzle (refer to 3.2.4.).Edit the 3D scene (refer to 3.2.5.).22 Panos Efstathiadis all rights reserved
JIGSAW PUZZLES – 3D User guide4.3. Using the “Special” actions in GROUP 2The actions in GROUP 2 work similarly to those in GROUP 1. The only difference is that you don’t have to stop theaction, select up to 20 layers and resume the execution: the actions in GROUP 2 will automatically turn each 2Dpiece into an individual 3D object.To recap: Start with opening one photo and running one of the actions in GROUP 2. The action will create a vector shape that defines the pixels that will be included in the puzzle. Resize,rotate, move the shape. When you are ready, double click to move on. Lower the size of the cropped photo (optional) if it is very big.The action will then create the 3D puzzle. Refer to 3.2.4. and 3.2.5. to find out how to edit the 3D scene.If you have any questions, please use the contact form on PanosFX.com, or use the site forum.Panos Efstathiadiswww.PanosFX.com23 Panos Efstathiadis all rights reserved
JIGSAW PUZZLES – 3D User guideThe photos used in this guide were kindly provided by Shutterstock.The Shutterstock image IDs are as 45635387.jpg24 Panos Efstathiadis all rights reserved
The PanosFX “Jigsaw Puzzles” actions for Adobe Photoshop turn your photos into digital jigsaw puzzles. Τhe 3D actions make use of Photoshop’s advanced features to create impressive 3D scenes. The actions crea