Transcription
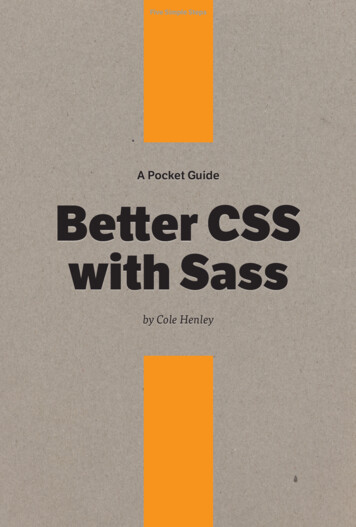
Five Simple StepsA Pocket GuideBetter CSSwith Sassby Cole Henley
2
3Better CSS with Sassby Cole HenleyPublished in 2015 by Five Simple Steps119 St Mary StreetCardiffCF10 1DYUnited KingdomOn the web: www.fivesimplesteps.comand: cole007.netPlease send errors to errata@fivesimplesteps.comPublisher: Five Simple StepsCopy Editor: Ary LacerdaTechnical Editor: Stu RobsonProduction Manager: Amie LockwoodArt Director: Craig LockwoodDesigner: Valentino CellupicaCopyright 2015 Cole HenleyAll rights reserved. No part of this publication may be reproduced or transmitted inany form or by any means, electronic or mechanical, including photocopy, recordingor any information storage and retrieval system, without prior permission in writingfrom the publisher.ISBN: 978-3-863730-81-9A catalogue record of this book is available from the British Library.Proudly made in Wales.
Introduction
6In a relatively short period of time, Sass has become an essentialpart of the front-end developer toolbox. It takes a lot of the legworkout of writing good CSS and can help foster good practices onwriting flexible, maintainable, robust and efficient code.Personally, Sass is the first resource I go for when creating anew website. It has gone from a tool to speed up the way I writemy style sheets to a means of writing increasingly complex andclever CSS. There are new blog posts and code snippets posted dailydemonstrating the things that can be accomplished with Sass thatwere barely conceivable two or three years ago. However, with thisspeed in evolution, the barrier to entry has risen fast. Where dowe start if we are new to Sass? How do we distinguish our mixinsfrom our functions? How do we use variables? What is a partial?Although it is a relatively simple language to learn, Sass brings withit a wide range of terms that can be intimidating to somebody onlyfamiliar with HTML and CSS.This pocket guide is intended to introduce you to Sass and willexplain some of the confusing terms that may have held you backfrom learning this brilliant tool. It will provide an overview of howSass can dramatically improve your workflow and help make yourCSS work easier for you. Although this guide is primarily aimed atthose new to Sass, hopefully there will be something for everybodywithin these pages.
7
1
Gettingstartedwith Sass
10What is SassSass is a pre-processor. What this means is that it takes code in oneformat and outputs it in another format; in this case, CSS. At itssimplest, this can mean taking your normal CSS and minifying it toreduce the file size. However, as we will cover in this pocket guide,there are numerous benefits to using a pre-processor like Sass.The first benefit is that it separates our working code from ourproduction code. This is particularly good practice when it comesto working in teams and using version control. Secondly, we can usethe functions and methods built into Sass to make how we write ourCSS more efficient. Thirdly, we can use principles like nesting andpartials to better organise our code. Finally, we can extend Sass witha range of third-party mixins, functions, libraries, and frameworks.Sass vs ScssSass isn’t the only CSS pre-processor. You may also have heard ofLess. Originally, Less was by far more popular than Sass because Lesswas far easier to pick up, using a markup similar to CSS. However,over time Sass has become the pre-processor of choice amongst thediscerning front-end developers, particularly with the introductionof its sibling syntax, Scss.Sass itself uses a different form of notation from CSS. In aneffort to speed up development, it employs its own shorthand,stripping out brackets and instead using tabs. For example, I might
11define some colour rules for an alert box with the following, usingtabs to denote the difference between the selector I’m defining(.alert-box) and the properties (colour and border) I’m affecting:.alert-boxcolor: #dd0000;border: 1px solid #dd0000;If we’re coming from CSS, this approach is quite difficult to pickup. Scss was introduced to ease the migration to a pre-processor byletting us extend the simple CSS we use every day. The above codeexample in Scss would simply be:.alert-box {color: #dd0000;border: 1px solid #dd0000; }Look familiar? Even without using a pre-processor, we canunderstand the above. Scss makes the transition to using a preprocessor much easier by working in a way we already know.Furthermore, it reduces the barrier to begin working with Sassbecause we can just drop our existing CSS into our Sass files andthese will be processed just fine.We distinguish between Sass and Scss by the file extension weuse. Sass files are saved as .sass whilst Scss files are saved as .scss.Although Sass and Scss are ultimately two distinct syntaxes fordelivering the same thing — using the same language, functions,
12and principles — for ease of learning, I will focus on Scss. Forthe rest of this guide, I will use Sass to refer to the language andtechniques involved in working with this pre-processor and .scss torefer to the files we are working with.Installing SassYou can run Sass in one of two ways: by installing an applicationon your computer or by using the command line. I will touch onsome applications that can install Sass for you later but for thispocket guide, we will be installing and working with Sass throughthe command line. I’ve learned from bitter experience it is almostalways better to work on the command line rather than relying onan application where often our understanding of what is happeningis sacrificed for ease of use.When we use a pre-processor like Sass, the processing canhappen in one of two ways: by converting files as needed or bypointing Sass to a particular file or folder in order to watch forchanges within your files. When a change is made, the processingkicks in and CSS is outputted in the desired format.So what are we waiting for? Let’s roll our sleeves up and get ourhands dirty.
13Mac: Ruby and SassInstalling Sass on a Mac is relatively straightforward. It operates asa gem – that is, a package that runs using the Ruby programminglanguage. Fortunately for Mac users, Ruby comes already installed,so all we need to do is install the Sass gem. We can do this by typinginto the command line:gem install sassDepending on your permissions level, you may need to use the sudocommand. This basically tells the command line that you are theroot administrator or super user and that you really, really want toinstall Sass. You will likely be prompted to enter your administratorpassword. We should always exercise caution when using sudo butin this instance we should be fine:sudo gem install sassWe can check to see if Sass is installed correctly by typingthe following:sass -vThe -v tells the command line that we are requesting the version ofSass that is available. As this is being written, the latest version ofSass is 3.4.15, so the above returns:
14Sass 3.4.15 (Selective Steve)Selective Steve is the release name of the latest (3.4) Sass version. Ifat any time we want to update our version of Sass, we type:sudo gem update sassThis will replace our version of Sass with the latest available.WindowsWindows users will first need to install Ruby, which can easily beachieved by using installer software. Check out the installer atrubyinstaller.org to get Ruby up and running. Once you have Rubyinstalled, follow the instructions for Mac Users above to then getSass up and running.Other toolsAs well as the command line, there are a number of tools that willhelp compile Sass for you. Mixture is a great tool that can performa range of actions to speed up your workflow, from compiling Sassto image compression and Javascript minification. For somethingsimpler, Scout is a good app available for both Mac and Windows forhandling Sass processing.
15The above tools can be great if you are scared of the commandline. However, learning from the command line gives you a greaterchance to learn how things work under the bonnet and have aclearer understanding of what happens when things go wrong.Running Sass on the command lineAt its most basic, the way Sass works is by converting a file fromone format to another. This is what we mean by a pre-processor.An example would be useful to illustrate this. Create a folder youwant to work in and save a file called style.scss with some simpleCSS, for example:body {font-family: sans-serif; }This is a relatively straightforward bit of CSS to change the defaultfont of our website. Our browser won’t understand .scss files so wemust first convert this into CSS. To do this we use the command lineto navigate to the folder our file is situated in:cd /Applications/MAMP/htdocs/stylesAll cd is doing is pointing the command line to a specific locationin the file system we want to work in. We can then use the sasscommand to convert a .scss file in that folder into a .css file for usein our production code:
16sass style.scss style.cssEt voila. If you look at your folder, it will now contain an extra file:style.css containing your outputted (production) CSS. Dependingon the version of Sass you are using and your configuration, youmay also have another file: sass.css.map but I will cover this in moredetail later in this guide.The above is quite straightforward but we don’t want to bewriting this out every time we want to convert our files to CSS, so wecan use Sass to watch a file for any code changes. When a .scss fileis updated, it will process the necessary changes automatically andproduce the CSS we want to output.This can be achieved by using the watch command:sass --watch style.scss:style.cssThere are two things to note here. Firstly, we are extending Sass withthe watch command (note the two hyphen characters) and secondly,when using watch, we use a colon (:) instead of a space betweenthe input and output files. This will now monitor the source file forany changes and process them as and when it needs to. This willcontinue until we terminate the command, which we can do withCtrl c.If the .scss and .css files we are working with are in the samefolder, we can even dispense with specifying the output file:sass --watch style.scss
17In the fourth chapter, I will talk about ways we can break ourworking Sass code into different files. In this context, we wouldwant to watch out for changes to more than one file, so we want toapply the watch command to a folder instead. We can do this withthe following:sass --watch /stylesThis says watch out for changes to files that are in the /styles/scssfolder and output the results to the corresponding CSS files in the/styles folder. The above example are all using relative paths basedon where we are in the file system. We can also use absolute paths todo the same thing:sass --watch /styles/scss:/styles/So we’ve got Sass installed, we know how to convert Sass (or .scss)files into CSS, and we can use our existing CSS, which will processjust fine into Sass. But where’s the fun in that? In the next chapter,I will start to look at some of the things we can do in Sass that wecan’t do in CSS.sass ications/MAMP/htdocs/styles
18So we’ve got Sass installed, we know how to convert Sass (or .scss)files into CSS, and we can use our existing CSS, which will processjust fine into Sass. But where’s the fun in that? In the next chapter,I will start to look at some of the things we can do in Sass that wecan’t do in CSS.
19
2
The buildingblocks ofSass
22When we first look at Sass, we come across a number of terms thatmight be new to us, such as variables, scope, nesting, extends,mixins, and functions. These are all new to CSS but they ultimatelyserve the same purpose: to extend the functionality of CSS byborrowing from some of the principles of programming languagesyou may already be familiar with, such as PHP and JavaScript. Thischapter will look at these and see how, once we have Sass compilingour Sass files into CSS, we can then make the most of what Sass hasto offer.VariablesHow many times when writing CSS have you had to make repetitivechanges across your files? For example, when a font-size changesor a client wants to modify a brand colour. In the past, we wouldhave to do a ‘find and replace’ to change all these things within ourstyle sheets. Variables mean we can make this information availableglobally by defining it once and then referring to this originaldefinition elsewhere in our Sass files. So, for example, if we knowwe are going to be using red across our site, we might want to definethis as: red: #dd0000;Here we are defining a variable – red – using the dollar symbol ( )as a prefix to say we want to treat this as a variable. We then use a
23colon (:), as we would with CSS, to define the value for our variable.Finally, we terminate our rule with a semi-colon (;). To referencethat variable, taking our example from the previous chapter, wewould use:.alert-box {color: red;border: 1px solid red; }This means that if, at some later stage, we want to update the tone ofred, we can just update the variable’s value and this change will bereflected in every instance that red is used in our Sass. red: #bd250a;// produces.alert-box {color: #bd250a;border: 1px solid #bd250a; }With this simple example, you can immediately see the value ofvariables. Any information that is repeated across your CSS file isbest served by variables. The important thing to remember is that,like CSS, Sass is read in sequence, so you will need to define yourvariables before you start using them.Colours, fonts used, and breakpoints defined in media queriesall serve as great examples of when you might want to use a variable.
24NestingThe next important thing to know about Sass is that when we defineour CSS, we can nest our arguments. In normal CSS, when we wantto define the CSS of a child element, we would do the following:ul.nav {list-style: none; }ul.nav li {padding: 0; }In Sass, we can simplify this by nesting our queries to demonstratetheir context. By nesting, we use curly brackets to wrap aroundselector rules. To define a rule for child elements, we just place theserules within the parent brackets:ul.nav {list-style: none;li {padding: 0; }}Here the li selector is nested within the brackets of the ul.navselector. In normal CSS, all our arguments are tied to the contextof the specific selector chain we are using. In Sass, however, ourarguments inherit context, so the above will output exactly the sameas in our original declaration:
25ul.nav {list-style: none; }ul.nav li {padding: 0; }So with Sass, we can not only save the amount of selectors we haveto type, but also make the CSS we write much more modular, or inother words, tied to the particular context we are styling. You cannest as deep as you want, but beware of the dangers of specificity asthis will cause havoc once you end up with selectors three or morelevels deep.Sass accepts all the selectors we would normally use in CSS.However, with nesting, Sass introduces a new selector: the parentselector denoted by the ampersand character (&). The parentselector serves as a way of accessing a selector that has already beendefined in our nesting. So, for example if we want a global list stylewhich has padding but then want to define a class that has smallerpadding, we can do the following:ul {padding: 20px;&.slim {padding: 10px; }}
26This will produce the following CSS:ul {padding: 20px; }ul.slim {padding: 10px; }So & is repeating the immediate parent within our nesting sequence.And we can chain this infinitum, so the following:ul {padding: 20px;&.slim {padding: 10px;&.slimmer {padding: 5px; }}}Would ultimately produce:ul.slim.slimmer {padding: 5px; }You should exercise caution with this approach as by abusingnesting, we can end up with a nasty case of classitis and a tangledmess of selectors!A really good example of where you might want to use theparent selector is with pseudo-classes. For example, with links, we
27might want to define hover and focus states:a {text-decoration: none;&:hover, &:focus {text-decoration: underline; }}This will output as:a {text-decoration: none; }a:hover, a:focus {text-decoration: underline; }Another use of parent selectors is if we want to increase thespecificity of a particular nested selector to override a defaultsetting. For example:p {font-size: 1em;.article & {font-size: 1.2em; }}This would apply a different font-size to paragraph elementscontained within an .article, as this would create a more specific rule.Additionally, we can use the parent selector to set rules for a specificcontext. For example, if we wanted to style a certain element based
28on its location within a site and we used different classes on thebody element for each section:.article h1 {background-color: #FFAFA5;.home & {background-color: #BBFCA2; }.about {background-color: #A0ADF1; }}// produces.article h1 {background-color: #FFAFA5; }.home .article h1 {background-color: #BBFCA2; }.article h1 .about {background-color: #A0ADF1; }Since Sass version 3.3, we can also use parent selectors to createcompound selectors. That is, we can define new classes byappending our selector to a parent class name. Previously, if we havetwo kinds of footers on a site that feature different font sizes, wemight want to declare this in Sass as follows:.footer {font-size: 16px;&.footer-small {font-size: 12px; }}
29However, we can simplify this immensely by using the & to create acompound selector as follows:.footer {font-size: 16px;&-small {font-size: 12px; }}The output is similar but the code we are using to generate thatoutput is much simpler, more concise, and ultimately less specific:footer {font-size: 16px; }.footer-small {font-size: 12px; }This approach really comes to the fore when you start to look atObject Oriented CSS and approaches like SMACSS and BEM. I tend touse BEM in my projects, which is based on the principle of extendingour class names to reflect the place of an element within a particularcontext. BEM stands for Block Element Modifier and involvesdefining our CSS classes by a block (the parent object), an element (adescendent object) and a modifier (variations to that object). Let ussay that we have an article and want to provide styles for an imagein that article but also an alternative styling if we want that image tobe smaller. Using double underscore as a separator for elementsand double hyphen -- as a separator for modifiers, we might write
30the following:.article {margin: 20px 0;& image {width: 40%; }&--small {width: 20%; }}The output for this is:.article {margin: 20px 0; }.article image {width: 40%; }.article image--small {width: 20%; }Thus, we can immediately see how we can use Sass to simplify theway we achieve increasing modularity within our CSS rules andclass names. And in all honesty, such modular approaches wouldnot have been possible without the simplicity that tools like Sassafford us.
31Nesting CSS propertiesAs well as nesting our CSS selectors, we can also use namespacesto nest our CSS properties. Namespaces are a common term inprogramming to signify a group of variables or properties that sharea particular functionality. Namespaces in CSS tend to be reserved forthose properties that can be specified as shorthand – e.g. font – orbroken down into specific sub-properties – e.g. font-family, fontsize, etc. Other examples of namespaced properties in CSS includebackground, list, margin, padding and border. To nest our properties,we declare our root property and then nest any child propertieswithin curly brackets, as we would for nested selectors:.body {background: {color: #A1FF7F;image: url(tile.png);repeat: no-repeat;position: center; }}This compiles to:.body {background-color: #A1FF7F;background-image: url(tile.png);background-repeat: no-repeat;background-position: center; }
32ExtendsAs we have seen, we can use the parent selector (&) to avoidrepetition. However, this is very much tied to the scope of theparticular parent. What happens if we want to reuse some Sass codelater in our project? We have variables, but these are only really forreusing small values such as a pixel size or colour value; they cannotbe used for reproducing large chunks of code. This is where extendscome to the fore.We can use extend – through the @extend command – to reusealready declared code snippets. For example, we might want toapply the same stylistic approach to both form elements and quoteelements:.form {border: 1px solid #219fe3;background: #7cc6ef; }.quote {border: 1px solid #219fe3;background: #7cc6ef;color: #000; }There is a lot of repetition here. We could instead use a commonclass between these elements to avoid repetition, but we can alsouse extends to repeat the same rules across classes. Taking the aboveexample, we can instead write:
33.quote {@extend .form;color: #000; }Which will output the following:.form, .quote {border: 1px solid #219fe3;background: #7cc6ef; }.quote {color: #000; }This makes our Sass much more reusable, but there can bedangers of our Sass code spilling out into other elements with thisapproach. To resolve this problem, we can use something calledplaceholder selectors.Placeholder selectorsExtends can be incredibly useful for creating resuable blocks of CSS.However, in the above example, if we end up writing lots of stylesspecific to our .form element these will then be applied to our .quoteelements which is not very helpful. This is what the placeholderselector is designed to resolve.The point of a placeholder selector is that we are creating a setof rules that we never intend to be outputted into CSS except for
34later reference as an extend within other elements. We define ourplaceholder selectors through the use of a percent symbol (%) todenote that this selector will only ever be used as a reusable pieceof code:%list-style {list-style: none;padding: 0; }.list-group {@extend %list-style;margin: 2.5em 0 0.75em; }CSS will not understand % so this part of the code is never outputtedby Sass into our CSS:.list-group {list-style: none;padding: 0; }.list-group {margin: 2.5em 0 0.75em; }This is much more effective and avoids the risks of over-extendingour Sass.So in this chapter, we’ve seen the ways in which Sass can beused to avoid repetition in our CSS. We can use variables to takecontrol of values we want to reuse throughout our styles. We cannest our Sass to define context and through the parent selector, we
35can keep our Sass files lean and efficient. Through extends, we canstart to create reusable, modular styles and with the placeholderselector, we can begin to think about avoiding code bloat. In the nextchapter, we will look at how some of the principles of programmingcan be applied to Sass to make our code more logical.
3
Logical Sass
38We spent the last chapter talking about the ways Sass can make ourcode more reusable. A lot of these techniques, Sass borrows fromthe tried and tested principles of programming. In this chapter,we will look at how Sass takes this further by letting us apply logicand helping us make even more reusable CSS though mixins andfunctions.Simple MathsOne of the nice features of Sass is that we can start to performsimple maths functions. Addition ( ), multiplication (*), division (/)and subtraction (-) are all ways we can control and modify numberswithin our Sass. We just need to make sure that we contain anymathematic operations within brackets, e.g.:.heading {font-size: (24 / 2) px; }Will output as:.heading {font-size: 12px; }Note the use of the plus character after our calculation. Here, we arenot using the character to carry out an addition, but saying thatwe want to append the px unit to our calculation. This simple maths
39may not seem to be very useful but the power of mathematics can bedemonstrated when we start to look at mixins.MixinsWe touched on extends and placeholder selectors as a way ofcreating reusable chunks of code. But what if we want to then modifythat code? The code produced by extends and variables are fixed;we cannot change them once they have been defined, only overridecertain rules by redefining them. Mixins provide a way of creatingreusable chunks of code but offer the ability to modify parts of thatcode as and when we need them. We define the mixin, any variableswe want it to access (called arguments), and then our logic – the stuffwe want our mixin to output – is contained within curly brackets: mixin mixin-name( variable) {output stuff here; }A good, practical example where we might want to use a mixin iswhen defining em or rem font-sizes for a website. Say your designerhas given you the pixel values for your fonts but working these outin relation to each other can quickly become very confusing. So amixin can help work this out for us:
40 base-font-size: 16;@mixin font-size( size) {font-size: size px;font-size: ( size / base-font-size) rem; }Here, we are defining size as an argument and then outputting twolines of CSS: one calculating a rem font based on a global font-size(defined by our base-font-size variable) and a px fallback for olderbrowsers. Again, we are using the plus character ( ) to concatenate– join together – the calculated values and the units we need. Toaccess our mixin, we then use the @include method. This tells Sasswe are treating what follows as a mixin:.box {@include font-size(24); }The resulting CSS for this is:.box {font-size: 24px;font-size: 1.5rem; }We can extend our mixin further to factor in line-height. Saywe want to output a line-height as a proportion of our font-size(rather than using a specific unit). We can do the following, dividingour line-height by our size variable:
41@mixin font-size( size, line-height) {font-size: size px;font-size: ( size / base-font-size) rem;line-height: ( line-height / size); }So calling this mixin, we now give it two arguments:.box {@include font-size(24, 32); }Which outputs as:.box {font-size: 24px;font-size: 1.5rem;line-height: 1.33333; }If we want, we can set default arguments for our mixin. So, forexample, if the line-height is relatively constant in our designs,we don’t need somebody to enter it repeatedly. So if we know ourfont-size is 16px and our line-height is normally 32px, we couldset a default line-height using the colon separator when definingour arguments:@mixin font-size( size, line-height: 32) { .box {@include font-size (24); }
42Say we want our text to sit along a baseline rhythm. We can startto use some simple maths in our arguments to define a consistentline-height. So if our base font-size is 16px and our base lineheight is 24px, we can specify a default line height of 24 divided bywhatever value is entered for size:@mixin font-size( size, line-height: (24/ size)) {So with very little effort, we can create really useful, reusable chunksof CSS. We don’t necessarily even need to have custom variables inour mixins. One good example of this might be a mixin for whenyou are using floats intensively in your CSS layouts. We simply writea clearfix mixin to use every time we want to clear an element:@mixin clearfix {&:before,&:after {display: table;content: '';line-height: 0; }&:after {clear: both; }}Here, we are using the parent selector we covered in the last chapterand the :before and :after pseudo-classes in conjunction with thecontent property to insert content into the DOM and clear whateverprecedes it. Note that without any arguments for our mixin, we candeclare it and call it without needing to employ rounded brackets:
43form {@include clearfix; }This produces the following CSS:form:before, form:after {display: table;content: "";line-height: 0; }form:after {clear: both; }FunctionsA function is like a mixin but instead of returning code blocks, it canonly be used to return values. As a nonsensical function, we couldperform some simple maths to produce a value squared:@function squared( number) {@return ( number * number); }The @return command is specifying the value or string we want toreturn from our function. To access this function, we would just dothe following:
44.text {padding: squared(10) px; }Which will return:.text {width: 100px; }One of the great things with Sass is that we can apply mathematicsto variables featuring unit values. For example, consider thefollowing double function:@function double( number) {@return ( number number); }.text {width: double(10px); }Will output:.text {width: 20px; }As with mixins, we can declare as few or as many arguments as wewant for our functions and also set default values:
45@function line-height( font-size, line-height: 1.5) {@return ( font-size * line-height); }.text {line-height: line-height (18px); }Which returns:.text {line-height: 27px; }However, the real power of mixins and functions comes when westart to use conditionals within them to determine their output.ConditionalsConditionals are simple means for determining an outputdepending on an input: e.g. if X is Y then do Z. Conditionals are thebuilding blocks of any programming language and are particularlyuseful when we write functions and mixins. Conditionals give usthe chance to limit what we return to our CSS, avoid repeatingourselves, and ultimately make our Sass more extensible.
46@if and @else conditionsA simple example of conditional logic might be a mixin to definewhat fonts we want to use in our site. Say we are using web fonts.We might want to specify particular fonts rather than rely on thebrowser to apply weight and style. In this instance, we use @if and @else to say that we’d like to test a set of conditions:@mixin font-type( font: 'base') {@if ( font bold) {font-family:'Avenir-Demi'; }@else if ( font italic) {font-family:'Avenir-LightItal'; }@else {font-family:'Avenir-Light'; }}In this example, we are wrapping our statement in brackets. In Sass,we don
Mac: Ruby and Sass Installing Sass on a Mac is relatively straightforward. It operates as a gem – that is, a package that runs using the Ruby programming language. Fortunately for Mac users, Ruby comes already installed, so all we need to do is install the Sass gem. We can
