Transcription
288
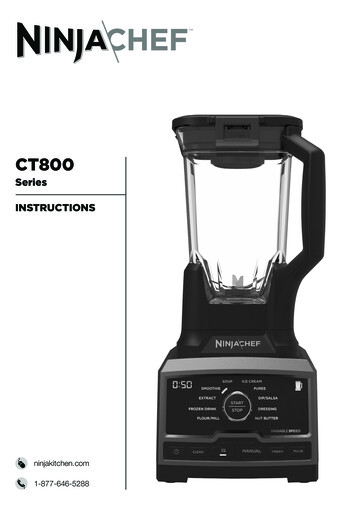
THANK YOUfor purchasing the Ninja Chef BlenderREGISTER YOUR PURCHASEregisteryourninja.com1-877-646-5288Scan QR code using mobile deviceTIP: You can find themodel and serial numberson the QR code label onthe back of the motor base.RECORD THIS INFORMATIONModel Number: Serial Number: Date of Purchase (Keep receipt): Store of Purchase: TECHNICAL SPECIFICATIONSVoltage:120V, 60HzWatts:1500WPLEASE READ CAREFULLY AND KEEPFOR FUTURE REFERENCE.These instructions are designed to help you get acomplete understanding of your new Ninja ChefBlender.If you have any questions, please call ourCustomer Service line at 1-877-646-5288.11-877-646-5288
ENGLISHCONTENTSImportant Safety Instructions 3Getting to Know Your Ninja Chef Blender 7Features 9Before First Use 10Using Your 72 oz. Pitcher 11Using Your Single-Serve Cups 15Care & Maintenance 19Cleaning 19Storing 19Resetting the Motor Thermostat 19Ordering Replacement Parts 19Troubleshooting Guide 20Warranty 22n i n j a k i tc h e n . c o m2
IMPORTANT SAFETY INSTRUCTIONSPLEASE READ CAREFULLY BEFORE USE FOR HOUSEHOLD USE ONLYWARNINGTo reduce the risk of injury, fire, electrical shock, or property damage, basicsafety precautions must ALWAYS be followed, including the followingnumbered warnings and subsequent instructions.1Read all instructions prior to using theappliance and its accessories.2Carefully observe and practice all warningsand instructions. This unit containselectrical connections and moving partsthat potentially present risk to the user.3ALWAYS handle the 72 oz. Pitcher withcare when cleaning. Contact with the bladeassembly will result in a risk of laceration.4 Take your time and exercise care duringunpacking and appliance setup. Thisappliance contains sharp blades that cancause injury if mishandled.7Unplug the appliance from the outletwhen not in use, before assembling ordisassembling parts, and before cleaning.To unplug, grasp the plug by the body andpull from the outlet. NEVER unplug bygrasping and pulling the flexible cord.8To protect against electric shock, DONOT unplug from electrical outlet whileunit is running. Turn the unit off first beforeunplugging.9Before first use, wash all parts that maycontact food. Follow washing instructionscovered in this instruction manual.10 To protect against the risk of electricshock, DO NOT submerge the applianceor allow the power cord to contact anyform of liquid.5Take inventory of all contents to ensureyou have all parts needed to properly andsafely operate your appliance.6ALWAYS exercise care when handling11 DO NOT use this appliance outdoors. It isthe Pro Extractor Blades Assembly. Thedesigned for indoor household use only.blades are sharp. ONLY grasp the ProExtractor Blades Assembly by the outer12 This appliance has a polarized plug (oneperimeter of the blade assembly base.prong is wider than the other). To reduceFailure to use care when handling the bladethe risk of electric shock, this plug will fitassembly will result in a risk of laceration.in a polarized outlet only one way. If theplug does not fit fully in the outlet, reversethe plug. If it still does not fit, contact aqualified electrician. DO NOT modify theplug in any way.31-877-646-5288
ENGLISH13 DO NOT operate any appliance witha damaged cord or plug, or after theappliance malfunctions, or has beendropped or damaged in any manner. Thisappliance has important information onthe plug prong. The entire cord set is NOTsuitable for replacement. If damaged,please contact SharkNinja LLC for service.14 DO NOT use extension cords with thisappliance.15 DO NOT allow young children to operatethis appliance or use as a toy. Closesupervision is necessary when anyappliance is used near children.16 This appliance is not intended to be usedby people (including children) with reducedphysical, sensory, or mental capabilities,or lack of experience and knowledge,unless they have been given supervision orinstruction concerning use of the applianceby a person responsible for their safety.17 Before each use, inspect blade assembliesfor damage. If a blade is bent or damage issuspected, contact SharkNinja to arrangefor replacement.18 DO NOT attempt to sharpen blades.19 DO NOT allow the cord to hang over theedge of tables or counters or to contacthot surfaces, including stoves and otherheating appliances.20 ALWAYS use the appliance on a dry andlevel surface.21 Keep hands, hair, and clothing out of thepitcher and Single-Serve Cup when loadingand operating.22 ONLY use attachments and accessoriesthat are provided with the product or arerecommended by SharkNinja. Use ofattachments not recommended or sold bySharkNinja may cause fire, electric shock,or injury.CONTINUED ON PAGE 5SAVE THESE INSTRUCTIONSn i n j a k i tc h e n . c o m4
IMPORTANT SAFETY INSTRUCTIONSPLEASE READ CAREFULLY BEFORE USE FOR HOUSEHOLD USE ONLYWARNINGTo reduce the risk of injury, fire, electrical shock, or property damage, basicsafety precautions must ALWAYS be followed, including the followingnumbered warnings and subsequent instructions.23 During operation and handling of theappliance, avoid contact with movingparts.24 DO NOT operate the appliance with anempty pitcher or cup.25 While blending liquids or ingredients thatare frozen, cold, or room temperature, DONOT fill pitcher past the MAX LIQUID line.26 DO NOT microwave any pitcher oraccessories provided with the appliance.27 Before operation, ensure all utensils areremoved from pitcher and cup. Failureto remove utensils can cause vessel toshatter and potentially result in personalinjury and property damage.28 ALWAYS operate blender with lid and lidcap firmly in place. The lid cap should beremoved only when adding ingredients andwhen using the tamper. NEVER removethe lid cap while blending hot liquids.29 Keep hands and utensils out of pitcherand cup while blending to reduce the riskof severe injury or damage to the blender.While the blender is running, the ONLYutensil that may be used is the includedtamper. When the blender is NOT running,then a scraper may be used.51-877-646-528830 DO NOT blend hot ingredients or liquidsin the blender cup. Doing so may causeexcessive pressure buildup, resulting inthe risk of the user being burned. Onlythe pitcher can be used to blend hotingredients.31 To avoid risk of scalding from spray orescaping steam, DO NOT blend hotor warm liquids or ingredients beyondthe MAX HOT LIQUID fill line. Liquids oringredients above the MAX HOT LIQUIDfill line need to be at room temperature orcolder for processing.32 DO NOT blend hot ingredients or liquidson the pulse setting to avoid risk ofscalding from spay or escaping steam.33 To avoid the risk of scalding, NEVERoperate the appliance without pitcherlid and lid cap in place while blendinghot liquids. DO NOT use the tamperwhile blending hot liquids. Keep handsand exposed skin away from lid capwhile blending hot ingredients to preventpossible burns from escaping steam.Failure to keep the lid cap in place whileblending hot liquids may result in risk ofscalding.34 Handle the pitcher with care when blendinghot ingredients, as the lid, lid cap, andsides of pitcher may become hot to touch.When moving the pitcher, use the handleto carry. If needed, hold bottom of pitcherto stabilize.
ENGLISH35 If at any time the blender cup becomeswarm to the touch, or steams or ventswhile blending, immediately stop blendingingredients and turn off the unit.36 DO NOT perform grinding operationswith the blender cups and Pro ExtractorBlades Assembly.37 Remove the Pro Extractor BladesAssembly from the blender cup uponcompletion of blending. DO NOT storeingredients before or after blending them inthe cup with the blade assembly attached.Some foods may contain active ingredientsor release gases that will expand if left ina sealed container, resulting in excessivepressure buildup that can pose a risk ofinjury. For ingredient storage in the cup,use only Spout Lid to cover.38 NEVER place a blade assembly on themotor base without it first being attachedto its corresponding container and lid.39 Flashing light indicates ready to operate.Avoid any contact with blades or moveableparts.40 DO NOT attempt to defeat the interlockmechanism. Ensure the pitcher and lid areproperly installed before operation.41 DO NOT expose the pitcher, cup,blade assemblies, and accessories toextreme temperature changes. They mayexperience damage.42 NEVER leave the appliance unattendedwhile in use.43 If you find unmixed ingredients sticking tothe sides of the pitcher, use the includedtamper, with the lid locked on the pitcher,to dislodge ingredients when unit isoperating. If not using the tamper, stopthe appliance, remove the lid, and use aspatula to dislodge ingredients. NEVERinsert your hands into the pitcher, asyou may contact one of the blades andexperience a laceration.44 DO NOT attempt to remove the pitcher,pitcher lid, or cup from the motor basewhile the blade assembly is still spinning.Allow the appliance to come to a completestop before removing pitcher, pitcher lid,or cup.45 If the appliance overheats, a thermalswitch will activate, temporarily disablingthe motor, and the control panel will notfunction when modes are pressed anddisplay "Err". To reset, unplug the applianceand allow it to cool for approximately 15minutes before using again.46 The maximum wattage rating for thisappliance is based on the configurationof the Bottom Blades and pitcher. Otherconfigurations may draw less power orcurrent.47 DO NOT spray the motor base or screenwith water or other liquids.48 Turn off the appliance and unplug themotor base before cleaning.SAVE THESE INSTRUCTIONSn i n j a k i tc h e n . c o m6
GETTING TO KNOW YOUR NINJACHEF BLENDERWELCOME!Congratulations onyour purchase. Use thisinstruction manual tolearn about the greatfeatures of your NinjaChef blender. Fromassembly to use tomaintenance, you willfind it all in here.There are a variety ofaccessories that are compatiblewith this blender series.NOTE: The top flap ofyour box shows the selectaccessories that areincluded with your model.Visit ninjaaccessories.com topurchase our Single-ServeCup Kit or the Double-WalledTo-Go Tumbler with Spout Lid,so you can blend drinks andtake them on the go.If you have any questions,concerns, or feedback, wewould love to hear from you.Give us a call at 1-877-6465288 or visit ninjakitchen.comMAIN UNITA Lid CapB Pitcher LidC 72 oz. Pitcher*D Bottom BladesE Motor BaseFG TamperAVAILABLE ACCESSORIESH 24 oz. Double-Walled To-Go TumblerI*64 oz. max liquid capacityActivation Dial24 oz. Single-Serve CupJ Spout LidK Pro Extractor Blades Assembly71-877-646-5288
ENGLISHAGBCHDEIJKFn i n j a k i tc h e n . c o m8
FEATURESIMPORTANT: Review allwarnings on pages 3–6before proceeding.DID YOU KNOW? All containers and lids areBPA free. All blades, containers, andlids are dishwasher safe.MODES:CLEANTo run the self-cleaning program, first add warm water to theCLEAN line and a couple drops of dishwashing soap to the pitcher.Select CLEAN mode, then press START/STOP to begin. Theunit will shut down when the cleaning cycle is complete. Oncecomplete, thoroughly rinse and air-dry the pitcher.iQThese 10 pre-set programs combine a unique set of pulsing,pausing, and blending patterns to take the guesswork out ofmaking meals and drinks. The speed changes and pauses aredesigned to provide consistent, delicious results every time at thetouch of a button.MANUALThe activation dial gives you total control over blending speed. Byturning the dial while in MANUAL mode, you can vary blendingspeed from 1 (slowest) to 10 (highest).TIMER Use TIMER mode to set a countdown timer. Select TIMER andadd blend time in 10-second intervals by repeatedly pressing theTIMER button. Set the speed by turning the dial to the desiredsetting. Press START/STOP to activate the unit. Blending will stopautomatically when countdown is complete.PULSESelect PULSE and turn the dial to the desired speed. Press theSTART/STOP button in short bursts to pulse. The unit will blendonly while the button is pressed.* Blend soup in the pitcher from hotingredients.91-877-646-5288AUTO-iQ PROGRAMS:FLOUR/MILL, FROZEN DRINK, EXTRACT, SMOOTHIE, SOUP*,ICE CREAM, PUREE, DIP/SALSA, DRESSING, NUT BUTTER.
1ENGLISHBEFORE FIRST USERemove all packaging materials from the unit. Exercise caution when handling the pitcher, asbottom blade assembly is sharp.2 If included with your model, handle the Pro Extractor Blades Assembly by grasping aroundthe perimeter of the blade assembly base.3 Wash containers, lids, blade assemblies, and tamper in warm, soapy water using adishwashing utensil with a handle to avoid direct contact with the blades. The pitcher andthe Single-Serve Cup can be cleaned automatically by running the self-cleaning cycle (seeinstructions on page 19). Exercise care when cleaning the blade assemblies, as the bladesare sharp.4 Thoroughly rinse and air-dry all parts.5 All attachments are dishwasher safe. It is recommended that the lids and tamper be placedon the top rack of the dishwasher.6 Wipe the motor base with a clean, damp cloth.n i n j a k i tc h e n . c o m10
USING YOUR 72 OZ. PITCHERIMPORTANT: Review allwarnings on pages 3–6before proceeding.IMPORTANT: Hotingredients are meant onlyfor blending in the pitcher,NOT in the cup.TIP: To learn more aboutthe unit’s programs, referto page 9.TIP: Use the lid cap toeasily add oil to emulsifydressings. Add desiredmeasurement of oil to thecap, then pour into thepitcher through the hole inthe lid. Replace cap whenfinished.1Plug in motor base and place on a clean, dry, level surfacesuch as a countertop or table. Press downward on themotor base to adhere the suction cups to the work surface.Ensure the motor base is connected to power.2 Lower the pitcher onto the motor base. The pitcher canbe installed in two different orientations. The handle canbe aligned on either the right side or the front of the motorbase. The pitcher should be oriented so the LOCK symbolsare visible on the motor base. Then rotate the pitcherclockwise until it clicks into place.111-877-646-5288
ENGLISH3 Add ingredients to the pitcher, makingsure not to exceed the MAX LIQUIDline on the side of the pitcher. Whenblending any room temperature, cold, orfreezing ingredients, such as beveragesor smoothies, DO NOT exceed the MAXLIQUID line on the side of the pitcher. Whenblending hot ingredients, such as soupsand sauces, NEVER exceed the MAX HOTLIQUID line or use the pulse setting.4 Place lid onto pitcher, then press downfirmly, making sure that both side clips onlid fully snap onto lip of pitcher. Insert thelid cap into the lid and turn clockwise tolock. When the unit is connected to powerand the pitcher is correctly locked ontothe motor base, the unit is ready to bepowered on.n i n j a k i tc h e n . c o m12
USING YOUR 72 OZ. PITCHER - CONT.IMPORTANT: Review allwarnings on pages 3–6before proceeding.IMPORTANT: As asafety feature, if thepitcher is not properlyinstalled, a flashing “JAR”message will appear onthe control panel. If thishappens, repeat step2 on page 11. Whenthe pitcher is properlyinstalled, the power lightwill flash and the modelight will illuminate steadily,indicating the unit is readyfor use.TIP: If unmixed ingredientsare sticking to the pitcher,remove lid cap and insert5 AUTO-iQ MODEtamper through the holeTo begin, press the button. The unit will automaticallyin the lid. Use tamper todefault to Auto-iQ mode and the power button will flash,push ingredients closerindicating the unit is ready to operate. To use an Autoto the blades. When usediQ program, turn the dial to your desired program andcorrectly, the tamper willpress START/STOP to begin. The Auto-iQ program willnot contact the blades.automatically stop when complete.Remove tamper when6 MANUAL MODEfinished and replace theTo switch to Manual mode, select MANUAL. To choose alid cap.blending speed, turn the dial to the desired speed. As youturn the dial, the control panel will display the speed level inNOTE: Press the powerthe upper left corner. Press START/STOP to begin. Duringbutton to turn the unit on.blending, turn the dial clockwise to increase speed andThe button will flash whencounterclockwise to decrease speed.vessel is assembled andready to use. Press the powerIf desired, or if ingredients are not blending properly, use thebutton to turn the unit offtamper to help push ingredients towards the blades. Whenwhen finished.ingredients have reached the desired consistency, press theSTART/STOP button on the dial. Be sure to wait for the unitto come to a complete stop before removing the pitcherfrom the base or the lid from the pitcher.131-877-646-5288
ENGLISH7 To remove the pitcher fromthe motor base, turn thepitcher counterclockwiseand then lift it off the motorbase.8 To remove the lid, pull upone of the side tabs, thenlift off the lid. The pitchercan then be emptied.If hot ingredients wereblended, place the pitcheron a flat surface, carefullyhold the pitcher handle,and remove the lid.Exercise caution whenpouring ingredients toprevent possible burns.9 When finished, unplugthe unit and release themotor base from thework surface. To releasethe motor base, placeyour hands underneath itand gently pull it towardyou. Refer to page 19 forstoring instructions.For units that include theDouble-Walled To-GoTumbler, pour your finishedblended drink into the cupand twist the Spout Lidonto the cup to take yourdrink on the go.n i n j a k i tc h e n . c o m14
USING YOUR SINGLE-SERVE CUPSIMPORTANT: Review allwarnings on pages 3–6before proceeding.WARNING: DO NOTblend hot ingredients inthe cup. Doing so maycause excessive pressurebuildup, resulting in therisk of the user beingburned. Hot blending ismeant for the pitcher only.NOTE: The Single-ServeCup may not be included withyour blender model. Pleaseview the top flap of the boxto see which accessories areincluded with your unit.To purchase additionalaccessories, visitninjaaccessories.com.1151-877-646-5288Place the unplugged motorbase on a clean, dry, andlevel surface such as acountertop or table. Pressdownward on the motorbase to adhere the suctioncups to the work surface.Ensure the motor base isconnected to power.2 Add ingredients to theSingle-Serve Cup. DO NOTadd ingredients past theMAX LIQUID line on thecup.
ENGLISH3 Place Pro Extractor Blades Assembly ontop of cup and rotate clockwise until sealedtightly.4 Turn the Single-Serve Cup upside downand install onto the motor base. Align thetabs on the cup with the slots on the base,then rotate cup clockwise until it clicks intoplace.n i n j a k i tc h e n . c o m16
USING YOUR SINGLE-SERVE CUPS - CONT.IMPORTANT: Review allwarnings on pages 3–6before proceeding.IMPORTANT: As asafety feature, the timerwill flash “JAR” and themotor will be disabled ifthe cup is not properlyinstalled. If this happens,repeat step 4 on page 16.When the cup is properlyinstalled, the power lightwill flash and the modelight will illuminate steadily,indicating the unit is readyfor use.NOTE: Press the powerbutton to turn the uniton. The button will flashwhen vessel is assembledand ready to use. Press thepower button to turn theunit off when finished.5 AUTO-iQ MODETo begin, press the button. The unit will automaticallydefault to Auto-iQ mode and the power button will flash,indicating the unit is ready to operate. To use an AutoiQ program, turn the dial to your desired program andpress START/STOP to begin. The Auto-iQ program willautomatically stop when complete.6 MANUAL MODETo switch to Manual mode, select MANUAL. To choose ablending speed, turn the dial to the desired speed. As youturn the dial, the control panel will display the speed level inthe upper left corner. Press START/STOP to begin. Duringblending, turn the dial clockwise to increase speed andcounterclockwise to decrease speed.When ingredients have reached the desired consistency,press the START/STOP button on the dial. Be sure to waitfor the unit to come to a complete stop before removing thecup from the base.171-877-646-5288
ENGLISH7 To remove the cup from the 8 Remove the Pro Extractormotor base, turn the cupBlades Assembly bycounterclockwise and thentwisting it counterlift it off the motor base.clockwise. Exercise carewhen handling the bladeassembly, as the bladesare sharp. DO NOT storeblended contents withthe Pro Extractor BladesAssembly attached.9 To enjoy your drink on thego, place the Spout Lidonto the Single-Serve Cupand twist clockwise untilfirmly sealed. For storagein the cup, use only SpoutLid to cover.10 Unplug the appliancewhen finished and releasethe motor base from thework surface. To releasethe motor base, placeyour hands underneath itand gently pull it towardyou. Refer to page 19 forstoring instructions.n i n j a k i tc h e n . c o m18
CARE &MAINTENANCECLEANING1 Separate all parts.2 Hand-WashingWash containers, blade assemblies, lids,and tamper in warm, soapy water, using adishwashing utensil with a handle to avoiddirect contact with the blades. Exercisecare when washing Pro-Extractor Blades Assembly and pitcher, as the bladeassemblies are sharp. Thoroughly rinse andair-dry all parts.DishwasherThe tamper and all containers, lids, andblade assemblies are dishwasher safe. It isrecommended that the tamper and lids beplaced on the top rack of the dishwasher.Exercise care when handling pitcher andPro Extractor Blades assembly, as the bladeassemblies are sharp.Using Clean ModeTo run the self-cleaning program withthe pitcher, first add warm water to theMAX CLEAN line and a couple drops ofdishwashing soap to the pitcher. Securethe pitcher lid and lid cap in place. SelectCLEAN mode, then press START/STOP tobegin. The unit will shut down when the selfcleaning cycle is complete. Make sure tothoroughly rinse and air-dry the pitcher.When using CLEAN mode for the blendercup, fill the cup halfway with warm waterand add one drop of dishwashing soap.Motor BaseTurn off the unit and unplug the motor basebefore cleaning. Wipe motor base with aclean, damp cloth.Clean the control panel with a soft cloth,such as microfiber, to prevent scratching. Toremove residue from the control panel, youmay use an all-purpose cleaner.191-877-646-5288NEVER directly spray the base or controlpanel with water or other liquids.DO NOT use abrasive cloths/pads/brushesto clean the base or control panel, as thiscan dull or scratch the surface.STORINGStore the unit upright with the lid on the pitcher.DO NOT store blended or unblendedingredients in the Single-Serve Cup with the ProExtractor Blades assembly attached.DO NOT stack items on top of the containers.Store any remaining attachments alongsidethe unit or in a cabinet where they will not bedamaged or create a hazard.RESETTING THE MOTOR THERMOSTATThis unit features a unique safety systemthat prevents damage to the motor and drivesystem should you inadvertently overload theunit. If the unit is overloaded, the motor willbe temporarily disabled, and the control panelwill not function when modes are pressed anddisplay "Err". Should this occur, follow the resetprocedure below.1 Unplug the unit from the electrical outlet.2 Remove the pitcher lid. Empty the pitcherand ensure no ingredients are jamming theblade assembly.3 Allow the unit to cool for approximately 15minutes.4 Return the pitcher to the motor base.IMPORTANT: Ensure that maximumcapacities are not exceeded. This is themost typical cause of appliance overload.If your unit needs servicing, please callCustomer Service at 1-877-646-5288.ORDERING REPLACEMENT PARTSTo order additional parts and attachments,please visit ninjaaccessories.com or contactCustomer Service at 1-877-646-5288.
ENGLISHTROUBLESHOOTINGGUIDEWARNING: To reduce the risk of shock and unintended operation, turn offpower and unplug unit before troubleshooting.Motor does not start or blade assembly does not rotate. Make sure the pitcher or blender cup is securely placed on motor base. If “JAR” messageappears on control panel, the pitcher or cup is not installed correctly. The unit is turned off. Press the power button ( ) to turn on. Check that the plug is securely inserted into the electrical outlet. Check the fuse or circuit breaker. The unit may have overloaded or overheated. The unit will stop and the control panel will notfunction when modes are pressed and will display "Err". Unplug, remove jar, remove contentsand wait approximately 15 minutes before using again.Food is chopped too fine or is too watery. The food has been over-processed. Use PULSE mode for controlled processing.Food collects on lid or on the sides of the pitcher. The mixture is too thick. Add more liquid or use the tamper to help push the ingredientstoward the blades.You cannot create snow from solid ice. DO NOT use ice that has been sitting out or has started to melt. Use ice straight from thefreezer. Start with a few pulses and then go to a continuous blending cycle. For best results, use the tamper to push the ice down toward the blades.Motor base won’t stick to counter or tabletop. Make sure surface and suction feet are wiped clean. Suction feet will only stick to smoothsurfaces. Suction feet WILL NOT stick on some surfaces such as wood, tile, andnon-polished finishes. DO NOT attempt to use appliance when the motor base is stuck to a surface that is notsecure (cutting board, platter, plates, etc.)You get a blinking “JAR” message. The container is not installed properly. For your safety, the unit will only be able to be turnedon when it is properly assembled. Please refer to the assembly pages of this instructionmanual for assistance.Why can’t I run the CLEAN program twice? CLEAN mode is intended to be used as a single cycle. The unit will lock the user out fromrunning back-to-back CLEAN mode cycles. If container is not completely clean after theCLEAN cycle is complete, please follow hand-washing or dishwasher instructions above.You get a blinking "Err" message. Your motor has overheated or your unit has been running for more than 2 minutes within abrief period of time. If this occurs, simply unplug the unit, remove the container, and allow unitto cool before restarting.n i n j a k i tc h e n . c o m20
NOTES211-877-646-5288
ENGLISHONE (1) YEARLIMITED WARRANTYThe 1-Year Limited Warranty applies to purchases made from authorized retailers of SharkNinja Operating LLC.Warranty coverage applies to the original owner and to the original product only and is not transferable.SharkNinja warrants that the unit shall be free from defects in material and workmanship for a period of 1 yearfrom the date of purchase when it is used under normal household conditions and maintained according to therequirements outlined in this instruction manual, subject to the following conditions and exclusions.What is covered by my warranty?1. The original unit and/or non-wearable components deemed defective, in SharkNinja’s sole discretion,will be repaired or replaced for up to 1 year from the original purchase date.2. In the rare event that a replacement unit is issued, the warranty coverage ends six months after thereceipt date of the replacement unit or the remainder of the existing warranty, whichever is greater. Ifthe unit is replaced, SharkNinja reserves the right to replace the unit with one of equal or greater value.What is not covered by my warranty?Our Customer Service and Product Specialists are available to provide all the warranty service options availableto you, including the possibility of upgrading to our VIP Warranty Service Options for select product categories.1.2.3.4.5.6.7.Normal wear and tear of wearable parts (including all blending vessels, lids, blades and blender base)which require regular maintenance and/or replacement to ensure the proper functioning of your unit arenot covered by this warranty.Any unit that has been tampered with or used for commercial purposes.SharkNinja will cover the cost for the customer to send the unit to us for repair or replacement. A feeof 19.95 for return shipping costs will be charged at the time of return shipment of the repaired orreplacement unit.Damage caused by misuse, abuse, or negligent handling, or damage due to mishandling in transit.Consequential and incidental damages.Defects caused by or resulting from damages from shipping or from repairs, service, or alteration to theproduct or any of its parts which have been performed by a repair person not authorized by SharkNinja.Products purchased, used, or operated outside of North America.Problems with your unit/How to get service:If your appliance fails to operate properly while in use under normal household conditions within the warrantyperiod, visit ninjakitchen.com for product care/maintenance self-help. Our Customer Service and ProductSpecialists are also available at 1-877-646-5288 to assist with product support and warranty service options
for purchasing the Ninja Chef Blender PLEASE READ CAREFULLY AND KEEP FOR FUTURE REFERENCE. These instructions are designed to help you get a complete understanding of your new Ninja Chef Blender. If you have any questions, please call our Customer Service line at