Transcription
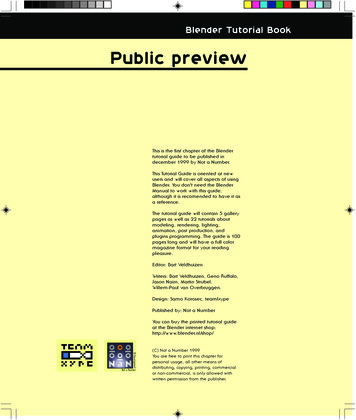
Blender Tutorial BookPublic previewThis is the first chapter of the Blendertutorial guide to be published indecember 1999 by Not a Number.This Tutorial Guide is oriented at newusers and will cover all aspects of usingBlender. You don't need the BlenderManual to work with this guide,although it is recomended to have it asa reference.The tutorial guide will contain 5 gallerypages as well as 22 tutorials aboutmodeling, rendering, lighting,animation, post production, andplugins programming. The guide is 100pages long and will have a full colormagazine format for your readingpleasure.Editor: Bart VeldhuizenWriters: Bart Veldhuizen, Geno Ruffalo,Jason Nairn, Martin Strubel,Willem-Paul van Overbruggen.Design: Samo Korosec, team xypePublished by: Not a NumberYou can buy the printed tutorial guideat the Blender internet shop:http://www.blender.nl/shop/(C) Not a Number 1999You are free to print this chapter forpersonal usage, all other means ofdistributing, copying, printing, commercialor non-commercial, is only allowed withwritten permission from the publisher.
Blender Tutorial Book
Blender - Interface :: beginnerThe interfacewindow in detail (that is where theBlender manual comes in), butinstead let you see the basic ideabehind it.After finishing this chapter you areready to work with the rest of thebook. Like me, you will find outthat Blender's user interface reallygrows on you; it is one of the mostefficient and well-thought outinterfaces I have worked with.Here is what I found to be theGolden Rule of Blender:Author: Bart VeldhuizenSubjects: user interfaceLevel: beginnerBlender version: freewareIntroductionIf you are reading this chapter, youare probably feeling like I didexactly one year ago. I had foundthis extremely interesting looking 3Dapplication (which other users wereraving about), but the user interfacecompletely baffled me. I couldn'tfind the quit function (I had to kill theapplication instead of exiting it), Isaw buttons that seemed to reactdifferently each time I clicked onthem and every time somethinginteresting happened, I could notreproduce it.In the weeks after that, I slowly foundout the basic principles behind theBlender user interface. And though itis non-standard, it became clear thatit was a very consistent system - itwould let me use the same functionsin a number of completely differentsituations."Keep one hand on your keyboardand one on your mouse."Even while Blender's user interfacemay be a bit daunting at first, Ihope that working with this bookwill teach you that it is actually avery intuitive one. It was writtenentirely for working efficiently andquickly and this means that a lot offunctions are accessible both byusing the keyboard and by usingthe mouse. Working with hotkeysinstead of menus is harder tolearn, but the rewards are great.After a while working with Blenderbecomes a second nature. Often,my girlfriend watches inamazement at the speed withwhich I can handle objects,change views, navigate my wayaround my scene in Blender.Blender has really turned mykeyboard and mouse into a glovewhich reaches into 3D space.But it all starts with the GoldenRule - remember it while you areworking your way through thisbook!This chapter will save you weeks offrustration by explaining the basics ofBlender's user interface. It will notexplain every button or even every01
InterfaceBlenders startup screenposition of the header by8RightClicking on it and confirmingthe requester that pops up ('Switchheader').Pay special attention to the buttonon the far left - each window has thisicon. This is also the one thatcompletely eluded me in thebeginning.In Blender terms, it is called an IconSlider button. If you 8LeftClick on itand drag left or right it will change,revealing a number of differenticons. Each icon corresponds to adifferent window type. I will explainthe different types later.What am I looking at?When you first start Blender, yourscreen will look like this. The screen isdivided into three parts; at the topyou see the Info Window. Amongother things, you will see Blender'sversion number and some statisticsabout your current scene.Next is the 3D Window. This windowtype is used for all the editing in your3D world. The pink square in themiddle is the standard plane. It ispink because it is currently selected.The black triangle on the bottom isthe camera. The gray lines are thegrid lines of the 3D world - you canuse them to align your objects. Thecross hairs with the white and redcolored circle is the 3D cursor. Youcan place it anywhere in 3D space. Itis used to determine where newobjects are placed, but it can alsoact as a center for rotation or scaling.The window on the bottom is calledthe Buttons Window. In this window,you can edit a variety of informationabout your scene: materials, lights,animation settings, rendering settings- it is all in here.the window headerEach window has a Header. For the3D window the header is located atthe bottom. You can switch the02You can also click on the left andright half of the Icon Slider to changethe window type.The contents of the Buttons Windowcan be changed by clicking on oneof these buttons. In fact, it is a lot likethe Icon Slider button that I discussed,but now all the options are visible.The meaning of the different buttonsis explained later in the paragraph'the Buttons Window'Configuring the screenyour waychanging the sizeof the windowBlender's screen can be reconfiguredin any way that you like. To startwith, you can change the size of thedifferent windows by placing themouse pointer over one of the linesseparating the different windows.The cursor changes shape to indicateyou can now change the windowsize. 8LeftClick and drag to changethe window size.
Blender - Interface :: beginnersplitting thewindow upAdding a new window is similar:move the mouse pointer over awindow border and 8MiddleClick. Asmall requester will pop up now. Youcan confirm splitting the screen by8LeftClicking on the text 'Split', orby pressing f. The window whichhas the focus and has a yellowheader (in this case, the topwindow) is the one that will be split approaching the window borderfrom below will split the bottomwindow.A line indicating the position of thesplit is now shown. You can move itto the desired position and8LeftClick to confirm the location.Cancel the action by moving yourmouse pointer away from therequester, or by pressing .Of course, splitting windows works onvertical window borders, too. In thisexample, I have created threeadditional 3D Windows by splittingthe default 3D Window three times.Each window is now independentfrom the others. This way, you cancreate the traditional 4-view window(top, front, right and camera) inBlender. More about this in theparagraph 'the 3D Window'.the blender screen after 3 splitsIf you own a mouse with 2 buttonsinstead of 3, hold down the a keyand 8LeftClick to mimic the8MiddleButton.Removing windows is very much likesplitting them; with the mousepointerover a window border, 8RightClick .Confirm the requester. Like splitting,the direction from which youapproached the border (or rather,which window has the focus beforejoining) determines which window'survives' the joining.The toolbox - adding aspherejoining twoscreens intoonethe toolboxAlmost every Blender function canbe accessed by using the keyboardor the mouse. The Toolbox containsmost of Blender's functions. You cancall up the toolbox either by clickingits icon in the top-right of theBlender screen, or by pressing k.This is how the toolbox works: Thedark gray buttons on the left arefunction categories; moving yourmouse pointer over them willchange the button list on the right.Move your mouse pointer to the rightand click on a function button toactivate that function. Each buttonalso shows the correspondingkeyboard shortcut. In the shortcutnotation, c button means holdingdown b and pressing the listedbutton. Similarly, a button uses thea key as a modifier.Clicking some buttons will reveal athird layer of functions. For example,if you wish to add a sphere to yourscene, first select 'Add' from thecategories list in the Toolbox. Next,8LeftClick on the button labeled'Mesh'.adding amesh.selectingits typeThe button list on the right nowchanges to offer you a choicebetween the different primitives thatBlender knows. 8LeftClick on'UVsphere' to add a sphere to yourscene.03
Interfaceresolution queryWhen adding objects like a sphere,Blender wants to know whichresolution you require. A sphere witha high resolution looks smootherthan a low-resolution sphere, but italso requires more memory and isslower to manipulate and render.These buttons work like the Iconslider you saw earlier: 8LeftClick onthe 'Segments' button and drag leftor right to increase or decrease thevalue. Also, you can click on eitherside of the button to change thevalue step by step.editing the valuesthe sphere addedYet another way to change the valueis to hold down j and 8LeftClickthe 'Segments' button. This willchange the button into a text input.You can now type a value into thefield directly. Press f when you haveentered the correct value.Finally, click on the OK button to setthe value of the 'Segments' variable.In the case of the sphere, you willneed to set a second parameter,'Rings'. After doing this, a sphere willshow up at the location of your 3DCursor. Instead of showing up in pinkor black, the sphere is drawn withsmall yellow dots. This mode isdescribed in the paragraph 'EditMode'.About Editmodethis object is not in editmodeWhen you are working in 3D space,you can basically perform two typesof operations: operations that affectan object as a whole and operationsthat affect the geometry of anobject, but do not affect the object'sglobal properties. An example ofthe former is moving an object toanother location. An example of thelatter is shaping a nose on a face.In Blender, you have to indicatewhich of the two you want to use.This is where editmode comes in.04This is an example of an object thatis not in editmode. Operations liketranslating (G), rotating (R) orscaling (S) affect the object as awhole. For example, translatingmoves the entire object somewhereelse.In contrast, when you selectyouenter editmode. The object isredrawn and the separate points ofwhich is consists are drawn. (Thesepoints are known as vertices, by theway). If you select a vertex by8RightClicking on it, you can thentranslate only this point, whileleaving the others unaffected. In thisway, you change an object's shape.If you select more than one vertex,you can also rotate or scale them. Inthis case, the vertices are rotated orscaled around their median point.Loading and saving yourworkBy now you have probably created aBlender scene which you might wantto save to disk, or you would like to
Blender - Interface :: beginnertake a look at the .blend files thatwe have included on the CD-Romthat comes with this book. Blenderhas a lot of file loading and savingoptions - even to the point that youcan use Blender as afilemanager.In this part I will brieflydescribe the basic fileloading and savingmechanisms. Asalways, these functionscan be accessed eitherfrom the Toolbox or byusing a hotkey.Loading a blender fileCall up the File Window by pressingl. In this window, files are shown inblack and directories in white text.The .blend files are also indicatedwith a small yellow square in front ofthem.The first method to load a file is by8LeftClicking on a filename. Thiswill copy the name to the filenamebox at the top of the window (thesecond textbox from the top).Pressing f will then actually loadthe file. Alternatively, you can also8MiddleClick on a file which willcause it to be loaded immediately.Navigating to the parent directory isdone by clicking on the '.' directoryin the list or by clicking on the 'P'button at the top of the window.Sometimes you may want to refreshthe filelist; for example whenanother program has been writing orchanging files in the current directory.In that case, click on the '.' directory.Saving a blender filethe save file - windowOpen the File Window by pressingm. This window works in the sameway as above. Additionally, you cannow enter a new filename in thefilename box. To do this, 8LeftClickin the filename box and enter a newname.Use the keys NumPad andNumPad - to automaticall increaseor decrease the versionnumber of afile before loading or savingIf you try to save over an existingfile, Blender will show you thiswarning. To confirm this request,either press f or 8LeftClick on thefilename. To cancel it, you can press or move the mouse away fromthe requester.saving current file warningchangingReturning to a directory where youhave already been (and saved orloaded a file), or changing thecurrent drive that you are working onis easy; just click/hold on the '-'button at the top of the File window.Select an entry to directly jump tothis directory.directoriesSaving an imageTo save an image that you haverendered, just press n. From now onsaving the file is the same as savinga regular .blend file. The onlydifference is that you can select thefile format in the Display Buttonswindow. This window is discussed indetail below.the display buttons05
InterfaceSaving an animationSaving an entire animation is donedifferently; you first need to enter afilename for your animation in theDisplay Buttons window and thenpress the 'Anim' button. From thenon, all the animation frames aresaved using the filename that youjust entered as a base. Read moreabout this in the Display Buttonssection below.The 3D Windowrotating the viewtranslating the viewzooming the viewperspective view06orthogonal viewThe 3D window is where you willspend most of your time in Blender.In this window, you can rearrangethe objects in your scene, edit theirindividual vertices (vertices are thepoints that make up an object),define animation, add lights andcameras, .if you own a mouse with twobuttons instead of three , skip aheadand read about the Info Window in'The Blender Windows: a summary'The first thing to know about the 3Dview is how you can navigatethrough it. I am not talking aboutmoving objects, but about movingyour viewpoint - how can youexamine objects? How does anobject look from another side? Dothe different parts have the correctcolor? Did I add a little detailcorrectly?Blender uses a very simple yetintuitive method for changing theview in 3D. To get started,8MiddleClick , hold and drag yourmouse around. Do you see whathappens? Without any modifiers,8MiddleClick, hold anddrag rotatesyour 3D view.Now try the same but hold down thej key before you click the mousebutton. The view is now translatedinstead of rotated.Finally, the b key allows you tozoom in and out.To toggle between perspective andorthogonal view, press NumPad 5.In the 3D window, you can displayyour scene in a number of modes.Especially if you don't have 3Dhardware this can make a hugeperformance difference. To togglebetween wireframe and solid view,press Z. Solid view can display ascene with some shading eventhough you have not yet defined alamp.Switch to (real) shaded view withjZ. If you have not defined alamp yet, the scene will becompletely black.wireframe viewsolid viewshaded view
Blender - Interface :: beginnerAside from navigating around 3Dspace to look at your objects, youcan also use a few hotkeys to quicklyswitch to standard views. UseNumPad 7, 1, 3 and 0 to switchto top view, front view, side view orcamera view.top viewA similar function like the previousone, you can also zoom in to theselected object and hide all otherobjects at the same time by pressingNumPad/. To unhide your objects,press NumPad/ again.restoring the view of the whole scene;gfront viewcentering the selected object and hiding others;NumPad/side viewcentering the selected object;camera viewThe display buttonsNumPad.Once you are ready to render yourimage or save it to disk, you needthe Display Buttons window. In thiswindow you can control all theparameters that have to do withitems as rendering quality, renderingsize, animation length andanimation filenames.the Home iconthe display buttonsSometimes you may get lost inside3D space a bit. To restore the view,either click on the Home icon at thebottom of the 3D window, or pressg. Blender will resize the view toinclude every object in your scene.On some systems you may need topress the numlock key to get thenumpad to work.If you want to get a specific objectinto view and not the entire scene,first select the object by 8RightClickon it (the object will turn pink toindicate it is selected). Next, pressNumPad.To define the image size you caneither select a preset value from therow of buttons on the far right or setan image size yourself by changingthe SizeX and SizeY values. Forpreview rendering, you can alsorender the image at 25%, 50% or75% of the final output size.selecting the output image size07
InterfaceTurn anti-aliasing on or off with theOSA button. Control the imagequality with the oversamplingbuttons 5, 8, 11 or 16. A highervalue will result in a better imagequality at the penalty of a longerrendering time.To set the animation start and endframe, change the 'Sta' and 'End'values. Pressing jz and jxwill automatically jump tothe start and end frame.The Blender windows:a summaryrendering animations and stillsStart rendering by selecting the'Render' button or by pressing thekey. A separate window will pop up. aborts rendering.will togglethe rendering result window.Press 'Anim' to render an entireanimation. When rendering ananimation, enter the basename ofthe animation frames in the 'Pics'field. Each file will be automaticallynamed basename framenumber.For example: frame0001,frame0002 etc. After rendering,press the 'Play' button to play backyour animation.This section gives a summary of themost important windows in Blender.It does not try to be complete nor toexplain each window in detail. Mostof the windows contain pointers toother chapters where it is discussed inmore detail.The file windowl for loading,m for saving.selecting the output formatSelect a file format with the buttonslabeled 'Targa', 'TgaRaw', 'Iris', . Foranimations, you can also choose 'AVIraw' and 'AVI jpg' and define thenumber of frames per second forthese files.the Windows Mediaplayer hasproblems playing back Blender's AVIraw and jpg files, but the Quicktime4player plays them back correctly.setting the start/end frameof the animtion088LeftClick to select a file and pressf to load it, or 8MiddleClick toboth select and load it.To save a file, enter a name in thefilename field (the second one fromthe top) and press f to confirm thefilename. Press f again to save thefile. If you have already entered afilename earlier, pressing m, f willsave, too.Entering a new directory name in thedirectory box (the one on the top)will create the new directory for youafter asking confirmation.
Blender - Interface :: beginnerThe image select windowYou can navigate through 3D spaceby dragging with the8MiddleButton; this will rotate yourview. Dragging with 8MiddleButtonbutton and holding the j key willtranslate the view, and holding downb will allow you to zoom.The IPO window (jq)This window type works exactly likethe file load window, but allrecognized image files are shown asthumbnails. An example of wherethis window is used is in the TextureButtons window, for loading imagetexture maps.The 3D window (jp)In this window you can edit thetimelines that are associated todifferent object properties, like theirposition and rotation, but also theircolor or layer. The different objectproperties or 'channels' that areavailable are shown on the right.You can select channels by8LeftClicking on them - j willextend the selection.IPO windowEnter editmode by pressing v. Youcan now edit the individual verticesof the curves or change theircurvature.You can read more about the IPOwindow in the chapter 14Text edit window (jThis window allows you tomanipulate the objects in your scenedirectly by dragging (G), rotating(R) or scaling them (S).top view:front viewright view:perspective off/oncamera view:solid mode off/onshaded mode:NumPadNumPadNumPadNumPadNumPadZbZ71350)The Text Edit Window is mainly usedfor writing Python scripts, but also ifyou do not have a C key this windowcan be extremely valuable. It isoften a good idea to keep notes ofyour animation projects. Informationthat I always forget (especially aftera couple of weeks!) are the mapsthat I have used, the scenes that Ihave defined, important framenumbers, well, you get the picture.text edit windowA big advantage of using the TextEdit Window is that the notes arestored inside the .blend files - thisway you can never loose your notesagain!When creating a new Text EditWindow, you have the choice ofcreating a new text object, or toimport an existing text file. In thatcase, a File Window will be opened09
Interfaceand you can select a file as usual. Ofcourse, you can have more than onetext object in your Blender file.The info windowrevealing the info windowThe Info Window does not have ahotkey. Instead, it is 'hidden' at thetop of your screen. To reveal it, dragdown the top window border onyour screen as indicated in thepicture.the info windowThe Info Window shows you thesettings of Blender. Among otherthings, you can tell Blender where tostore autosave files, when to savethem (use the 'Time' value) and howmany versions to keep on disk.Here, you can also activate Blender'stooltips function. Tooltips will appearin the right corner of the header ofthe Info Window, right next to theBlender URL and version number.You can make your settings permanent by pressing bU andconfirming the requester that popsup. (Please note, that this entirebook assumes that you have notchanged the default Blender settingsfile!)If you have purchased a C-key, youruser name will show up here.Important note for owners of a twobutton mouse: activating the 2mouse option will cause Blender tosimulate a 8MiddleClick when youhold down a and 8LeftClick.lamp buttons10Lamp buttons (o)The Lamp Buttons will only showwhen a lamp has been selected.With these buttons, you can changeall the parameters of lamps, liketheir color, energy, type (regularlamp, spotlight or sun). You can alsocontrol the quality of shadows bymanipulating the clipping values andshadow buffer sizes.You can read more about lamps inthe chapter 6.Material buttons (p)Material Buttons are only shownwhen an object has been selected.This window allows control overproperties as object color, shininess,transparency, textures, texture types,texture projection methods.You can read more about assigningmaterials in chapter 2. Moreinformation about texturemaps isavailable in chapter 3.Animation buttons (s)In the left part of the AnimationButtons window you can setproperties for things like curvefollowing, automatic objectduplication and object tracking.The middle part of the windowcontains the interface to objecteffects like particle systems and thewave effect. Pressing the 'New Effect'button and selecting an effect fromthe effects list on the right will attacha new effect to the currently selectedobject and display the list of optionsfor this effect.The standard effects are: particlesystem (read more about that inchapter 10), wave and build.
Blender - Interface :: beginnerWorld buttons (s)With the World Buttons window youcan set up horizon colors, ambientlighting, fog effects and starfields. Itis used in the chapter 10.material buttonsEdit buttons (t)The buttons that are shown in the EditButtons window depend on the kindof object that you have currentlyselected.texture buttonsDisplay buttons (u)Using the Display Buttons, you cancontrol the way Blender will renderyour images. Set the image size withthe SizeX and SizeY buttons andcontrol the image quality by settingan OSA (Over SAmpling) value.Higher values result in better imagequality, but a longer rendering time.Select the 'Render' button to rendera still image, or the 'Anim' button torender a range of images. (Foranimations, the 'Sta' and 'End' valuesdetermine the length of theanimation).animation buttonsworld buttonsedit buttonsdisplay buttons11
Blender Tutorial Book. Blender Tutorial Book. 01 window in detail (that is where the Blender manual comes in), but instead let you see the basic idea behind it. After finishing this chapter you are ready to wo