Transcription
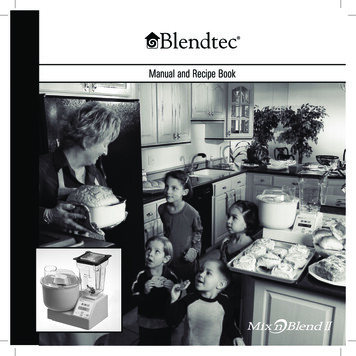
Manual and Recipe Book1
Table of ContentsImportant Safeguards.1Component Overview.1Component Overview - Diagram.3Operating Instructions.4Cleaning Instructions.5Mixer Recipes.5Blender Recipes.9Troubleshooting.10Warranty.10NOTES.11
Important SafeguardsComponent OverviewPLEASE READ ALL INSTRUCTIONS CAREFULLYBEFORE USING YOUR Mix-n-Blend II 1. POWER UNITThis is the main part of the mixer that includesthe electrical controls, the motor assembly,drive gears, and the control panel. Each unit hasbeen factory tested to ensure that all internalcomponents are in proper working order. Thecover must not be removed. There are noadjustments that can be made and no serviceableparts within the power unit. All service must beperformed by the Blendtec factory. Removing thecover may result in damage to the machine ANDWILL VOID THE WARRANTY.1. DO NOT operate the Mix-n-Blend II power unitin water or any other liquid. DO NOT use the unitoutdoors.2. Close supervision is necessary when the machineis being used by or near children.3. AVOID CONTACT WITH MOVING PARTS. Keepfingers, hands, hair and clothing away from all movingparts. Keep all utensils away from the drive socket andblender jar blades during operation. Metal utensils maydamage blades. NEVER put hands into the blenderjar or add substances by hand when the blender jar ison the motor base. NEVER touch the blade with yourfingers whether it is on or off the motor base. NEVERplace jar into drive socket if blender motor is operating.DO NOT rock the blender during operation.These precautions will prevent personal injury and/ordamage to the blender.4. DO NOT let the cord hang over the edge of worksurface.2. POWER SWITCHThe power switch is located on the lower rightcorner of the machine (below the control panel).Power can be immediately turned off using thisswitch.3. LOW SPEED DRIVEBecause of the great variety of options on theMix-n-Blend II , two drives are required. The lowspeed drive is located on the lower left section ofthe mixer. The low speed drive operates the bowl.4. HIGH SPEED DRIVEThe high speed drive is located on the upper rightside of the mixer and is used to drive the blender.5. CONTROL PANELThe control panel is used to control all functionsof the Mix-n-Blend II . The chart below gives abrief overview of the button functions:5. DO NOT operate with a damaged cord or plug.If the appliance malfunctions, or if it is droppedor damaged in any manner, return the mixer toBlendtec for examination, repair, or adjustment.6. UNPLUG the machine when not in use or whilecleaning. Remove beaters from mixer beforewashing.7. All removable parts are dishwasher safe on TOPRACK ONLY. Dishwasher temperature should notexceed 220 Fahrenheit.8. Always operate blender with lid cover in place.9. Blender blades are sharp. Handle carefully.BUTTONFUNCTIONJarAccesses the Blender MenuBowlAccesses the Mixer MenuAuto-KneadStarts Auto-Knead cycleSpeedManually adjust speed settingTimeManually adjust length of cycleUp/Down ArrowsScrolls through cycle menus,adjusts speed and time settingsPulsePulses at maximum speed whilebutton is pressedStart/StopStarts and stops cycles and/ormanual operationsMore on the functionality of the control panel canbe found in the Operating Instructions.6. DRIVE SHAFTThe drive shaft is used in all mixing operations.1
The shaft fits into the speed 3 drive. To protectthe motor and gear assemblies, the drive shafthas been designed to be the weakest link aspower is transferred from the motor to thedough hook or whisk assembly. This built-in,fail-safe design will prevent serious gear ormotor damage from occurring in the event thatrotation of the dough hook or whisks becomesexcessively difficult. Always adjust all non-Mixn-Blend II bread recipes by using at least 15%less flour. Most recipes call for “excess” flour toaccommodate kneading by hand.12.FRENCH WHISK ASSEMBLYFrench Whisks are used for meringues, whippingcream, mashing potatoes, light frosting, andpourable batters. DO NOT USE WITH STIFFBATTERS OR COOKIE DOUGH.13.ACCESSORY RELEASE BUTTONAttachments can be released from the mixer bydepressing the release button found under thefront left corner.14.BLENDER JARThe blender jar has a capacity of 64oz. andhas markings for cups on one side, and ounceson another side. The stainless steel blade iswarranted for life from dulling or breaking.The drive shaft is designed to break so as toprotect the motor and gear assembly if too muchflour is added. Foreign objects, such as spoons,measuring cups, etc., placed or dropped into thebowl can also break the drive shaft. The driveshaft is not included in the warranty.15.BLENDER JAR LIDCover for the blender jar. This must be in placeany time the blender is in operation. The blenderlid can be easily removed by grasping one of thecorners and lifting up to release the seal withthe jar. The steam cap should be removed whenblending hot ingredients.7. BOWLThe bowl is used in all mixing operations. Rinsingyour bowl with a vinegar or baking soda solutionwill remove oils from the surface. Avoid usingsharp metal utensils or scouring pads as theycould scratch or damage your bowl. To attach thebowl to the power unit, turn it counter clockwise.To release the bowl, turn it clockwise.Mixer AssemblyFor smooth operation and successful foodpreparation, please read and become familiar withthese instructions8. BOWL LIDThe bowl lid should be placed on the mixerwhen kneading large batches of dough. The lidhelps keep the dough mass down so that properkneading will occur. The lid opening can beused for adding ingredients or final amounts offlour to a dough mixture. Using the lid wheneveroperating the mixer will avoid spills or overflowof ingredients. To attach the lid to the bowl, turnit counter clockwise. To release the lid, turn itclockwise.1. Insert the drive shaft into the mixer base.2. Place the bowl over the drive shaft and turn thebowl counter-clockwise.3. Add the appropriate accessory to the top of thedrive shaft following these precautions:9. KNEADING ARMThe kneading arm provides a stationary barrierwhich pulls and folds the dough as the doughhook turns past the kneading arm. The kneadingarm is only used in conjunction with the doughhook.ters,Frenchgear10. DOUGH HOOKThe dough hook is made of surgical stainlesssteel for long life without tarnishing. DO NOTPLACE THE DOUGH HOOK ON THE DRIVESHAFT UNLESS THE BOWL IS IN PLACE.French whisks are used for meringue,light frosting, whipped cream, pourable batand mashed potatoes (potatoes must bethoroughly cooked). NOTE: Using thewhisks for cookies will cause the whiskto fail and will void the warranty on thatattachment.Medium whisks are used for denser dough,such as cookies. Medium Whisks aredesigned with a single loop that lets doughthrough more easily.11.MEDIUM WHISK ASSEMBLYMedium Whisks are single wire whisks usedfor thicker batters, heavier frosting, and cookiedough. If the dough cannot be stirred with aspoon, or if it contains ingredients such as nutsor chocolate chips, then the dough hook andkneading arm should be used.2The dough hook is used for heavy doughsand isalways used in conjunction with thekneadingarm. To assemble, place kneading arm over
Component Overview - Diagram815111461015391323
center of mixing bowl with the arm inthe 9 o’clock position. Place dough hook ontop and turn in a clockwise direction until itengages with drive shaft. Make surekneading arm is NOT directly under the lidopening.CYCLE NAMECYCLE TIMERegularCookie50 secondsDouble Cookie 1 minute 20 secondsTo access the Mixer cycles, press the Bowl button.Again use the Up/Down buttons to scroll through thecycles in the Mixer Menu. Press Start/Stop to startthe cycle.4. Plug unit into outlet and turn on power switch.Operating InstructionsAuto Knead FunctionAs you begin to use your Mix-n-Blend II , you willquickly learn that its power and double whisk actionwill make quick work out of any mixing job. Do notover mix your batter. Begin on the Speed 3 to blendingredients in the order specified by your favoriterecipe. Increase speed as needed.This feature is unique to Blendtec. First, pressthe BOWL button. The first mixer cycle to appearis the BREAD cycle. After placing the first set ofingredients into the mixing bowl, begin the BREADcycle by pressing the START/STOP button. The Mix n’Blend II begins the initial mixing of flour, yeast, water,etc.One of the unique features of the Mix n’ Blend II isits computer controlled “cycles” allowing food anddrink to be preparared automatically. The followingblender and mixer cycles are preprogrammed intothe Mix n’ Blend II:Add the remaining flour until the dough clings to thedough hooks and pulls away from the sides of thebowl. This initial mixing period should take between 3and 4 minutes.IMPORTANT! Stop machine when dough pullsaway from sides of bowl. Do not knead pastthis point. Due to the varying moisture contentof the flour, the exact amount of flour needed willvary with every batch of bread made. For excellent,consistent bread, keep the initial mixing period from3 to 4 minutes. Answering the phone or becomingotherwise distracted during this time can undulylengthen the total mixing time and potentially overknead your bread.Manual OperationsWhen you first turn on the machine, the default modeis manual operation. CAUTION: Keep hands clearof mixer and blender base. Pressing the UP keyat this time will start the machine at speed 1 and willrun for 5 minutes. Manual mode can be accessed atany time by pressing the SPEED or TIME buttonsBy pressing either the SPEED and/or TIME buttonswhile the machine is in operation, the speed andtime can be adjusted by pressing the Up or Down arrows. If the mixer is inactive, the speed and time canalso be adjusted in the same manner. Pressing theSTART/STOP button to start with these settings.Next push the Auto Knead button to initiate theAuto Knead function. Be sure to follow your recipe,remembering that the Mix-n-Blend II uses at least15% less flour than recommended in standard breadrecipes. DO NOT ADD TOO MUCH FLOUR!NOTE: The speed can only be adjusted while thearrows are flashing around “Speed X”. The time canonly be adjusted while the arrows are flashing aroundthe time.The Mix-n-Blend II now takes over developing thegluten. It will knead until the gluten is fully developedand will stop automatically. This process takesapproximately two to three minutes.Blender Operation - AutomaticMixer Operation - AutomaticCYCLE NAMECYCLE TIMECYCLE NAMECYCLE TIMESmoothie25 SecondsBreadSee “Auto Knead” function belowMulti-Use50 SecondsWhip1 minute 30 secondsJuice50 SecondsCake2 minutes 30 secondsSauces23 Seconds4
CYCLE NAMECYCLE TIMEBatters23 SecondsIce Crush34 SecondsMilkshakes35 SecondsIce Cream45 SecondsMixer RecipesTo help you get started with your Mix-n-Blend II ,we’ve included some basic recipes on the followingpages. These recipes have been kitchen tested inthe Mix-n-Blend II mixer. Our suggestion would beto test and try your favorite recipes. Remember, theMix-n-Blend II uses about 15% less flour so adjustother recipes accordingly.To access the blender cycles, press the Jar button.Then use the Up/Down buttons to scroll through thecycles in the Blender Menu. Once the desired cyclehas been selected, press Start/Stop to start thecycle.Be aware that both drive sockets turnwhen the motor is running. Whenrunning the blender, remove the bowland vice versa!NOTE ABOUT YEAST:The recipes in this instruction booklet use rapid orinstant yeast. We recommend Fermipan InstantYeast available either from K-TEC or from a bakerysupply store in your area. If you are not able to usethe rapid or instant yeast you will need to let thedough rise once before you form the loaves.Tips For Making Bread1. Use instant yeast.2. Put dough into pan seam side down.Cleaning Instructions3. Use medium sized pans or smaller. Bread tendsto fall with large sized pans.The Mix-n-Blend II is as easy to clean as it is to use.4. Form bread dough into loaves as quickly aspossible, as yeast starts acting quickly.Before cleaning make sure the main power switch isturned off and the mixer is unplugged.5. When making, or fancy breads, line the bakingsheet with parchment paper. This makes cleanupeasier and eliminates the need to grease thebaking sheet.Power Unit:Always keep the power unit far away from water.Wipe the power unit off with a soft cloth.Mixer Accessories:Do not use harsh abrasives on any parts. Wash partsby hand with warm, soapy water or place on thetop rack of a dishwasher. Dishwasher temperaturesshould not exceed 220 degrees Fahrenheit.6. Allow dou
14.BLENDER JAR The blender jar has a capacity of 64oz. and has markings for cups on one side, and ounces on another side. The stainless steel blade is warranted for life from dulling or breaking. 15.BLENDER JAR LID Cover for the blender jar. This must be in place any time the blender is in operation. The blender
