Transcription
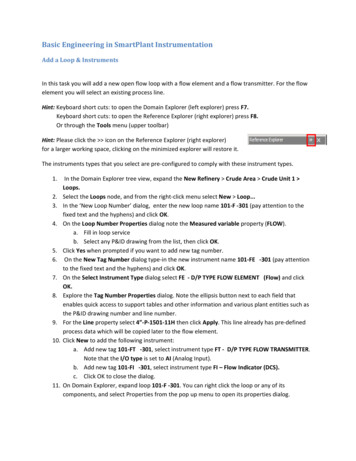
Basic Engineering in SmartPlant InstrumentationAdd a Loop & InstrumentsIn this task you will add a new open flow loop with a flow element and a flow transmitter. For the flowelement you will select an existing process line.Hint: Keyboard short cuts: to open the Domain Explorer (left explorer) press F7.Keyboard short cuts: to open the Reference Explorer (right explorer) press F8.Or through the Tools menu (upper toolbar)Hint: Please click the icon on the Reference Explorer (right explorer)for a larger working space, clicking on the minimized explorer will restore it.The instruments types that you select are pre-configured to comply with these instrument types.1.2.3.4.5.6.7.8.9.10.11.In the Domain Explorer tree view, expand the New Refinery Crude Area Crude Unit 1 Loops.Select the Loops node, and from the right-click menu select New Loop.In the ‘New Loop Number’ dialog, enter the new loop name 101-F -301 (pay attention to thefixed text and the hyphens) and click OK.On the Loop Number Properties dialog note the Measured variable property (FLOW).a. Fill in loop serviceb. Select any P&ID drawing from the list, then click OK.Click Yes when prompted if you want to add new tag number.On the New Tag Number dialog type-in the new instrument name 101-FE -301 (pay attentionto the fixed text and the hyphens) and click OK.On the Select Instrument Type dialog select FE - D/P TYPE FLOW ELEMENT (Flow) and clickOK.Explore the Tag Number Properties dialog. Note the ellipsis button next to each field thatenables quick access to support tables and other information and various plant entities such asthe P&ID drawing number and line number.For the Line property select 4”-P-1501-11H then click Apply. This line already has pre-definedprocess data which will be copied later to the flow element.Click New to add the following instrument:a. Add new tag 101-FT -301, select instrument type FT - D/P TYPE FLOW TRANSMITTER.Note that the I/O type is set to AI (Analog Input).b. Add new tag 101-FI -301, select instrument type FI – Flow Indicator (DCS).c. Click OK to close the dialog.On Domain Explorer, expand loop 101-F -301. You can right click the loop or any of itscomponents, and select Properties from the pop up menu to open its properties dialog.
Tip: Selection of instrument type is required only if there are multiple choices of the sameabbreviation of that instrument type in the name.The Instrument ListIn this task you will explore the Instrument Index browser.1. From the menu, select Modules Instrument Index or select the Index icon2. Click the Browse iconfeatures;Note:.from the bottom toolbar. Explore some of the instrument indexYellow properties are “write protected”; white properties are editable.Columns such as manufacturer name, model name, Location and others arecustomizable as supporting tables and are seen and function in the index as pick-lists. Values for the selection lists can be selected from support tables. These tables areaccessible by selecting the Open Supporting Table. commands from the popup menuwhen you highlight a cell with pick lists and right click the mouse button.You can count records by clicking the ‘Count’ icon.Click the Print icon to invoke the Instrument list report. In the print preview you canrevise the document and compare with previous of the document.Select any tag number and click the Documents icon (on the module, bottom toolbar) toview its documents.In the browser window, double click the Tag Number header to sort by the instrumentname. Repeat to sort by descending order.Add Process DataEngineering process data can be entered directly in SPI, it can also be entered remotely using theexternal process data editor and later imported into SPI. following the process data workflow,enables process engineers to control when process data can be used by instrumentation engineers.Note that SPI supports multiple process data cases for an instrument.1. Double click the Loop Name header to sort.2. Scroll down to loop 101-F -301.a. Hint: You can use the Find icon to locate the loop (use the “String” radio button).3. Select tag number 101-FE -301 and then click the Process Data icon(upper toolbar).4. Press the Instrument button. In the Enter Tag Number dialog type-in 101-FE-301 andclick OK.5. When prompt to process data click OK.
6. Experience process data units of measure conversion: change the Upstream pressure unit ofmeasure to psi; observe the value being re-calculated.7. In the Additional Properties section, in Required range, enter a range of 0-40 m³/h @flow.You can proceed to the flow element calculation or try the revision and archive.Revisions and archivingIn this task, you will generate the process data report, revise the document, and experience thecomparison feature.1. Click the Generate Reports icon. When prompted to save the process data, answer Yes.2. Reports can be revised and archived inside the application. Click the Revision icon.3. Select any revision method and click New. Enter revision data and click OK. Click OK when asave confirmation message opens.4. Close the report tab (hint: right-click on the tab name and select Close).5. Change the Normal flow rate from 30 to 28.6. When prompted, save the data.7. Re-open the process data report.8. Click the Compare icon. Select the Compare the current report with an archived res. port andclick OK.9. Select the revision and click OK.10. In the Changes report, review the process data changes.11. Switch back to the process data report. Review the marked change.Now try to calculate a flow element.Calculate a Flow ElementSPI features various flow element calculations as well as other types of calculation. In this task, you willcalculate an orifice plate.1. From the main toolbar, click the Calculation icon.2. Click the Flowmeter iconon the lower toolbar. In the dialog, type the tag number 101FE -301 according to the mask and then click OK.3. The calculation opens with the process data sheet (similar to the process data module). Click theCalculate icon(bottom toolbar).4. In the Flowmeter calculation dialog enter the following data:a. Flowmeter type Square Edge Orificeb. Sub type Flange tapping [ISO 5167 (1998) R.W. Miller]c. Orifice Material 310 S.S.d. Select the Calculate discharge coefficient checkbox.
e. In the Select calculate field frame, select the Orifice Diameter option.f. In the Full scale flow option select m³/h and @Flow condition then set the value of 36as the value.g. In the Differential range, select inH2O as unit of measure and then type 100 as thevalue (make sure to leave the option button unchecked.)h. Click Calculate. The orifice diameter and beta ratio are displayed.i.Click Close (on the dialog window) and then click the Save icontoolbar).j.Click the Report icon(in the bottomto see the output calculation sheet.After entering the process data and calculating the orifice, the next step is to fill in the data sheet so aninstrument package can be produced and delivered to various vendors for bids.Create Data SheetSmartPlant Instrumentation enables you to present your data sheets in the format that best meets yourneeds and according to your organization standards. Data sheets (or as they are called in SPI,Specification sheets) can be customized once to suit your needs.Note that an instrument can be associated with multiple different forms. This can help during the designphase of a project when engineers send datasheets for bids to several vendors, and still didn’t decidethe specific nature of the instrument that is required. The module also supports separate data sheets ifan instrument has multiple process cases.To add a specification sheet, follow these steps:1. From the main menu, select Modules Specifications (or press theicon in the toptoolbar).2. From the toolbar select Open Spec.3. In the Open Specification dialog enter item number 101-FE-301.a. Hint: you can use the Find button to look for certain tags.4. In the Form number field enter 11 or use the Find button to look up the form Orifice Plate.5. In the New Specification dialog accept the document name 101-FE -301-SP.6. Click OK7. The specification sheet open with some process data and calculation results already populated.8. At this point you can continue to fill in additional technical data as you like.9. When done, click Save10. Click Print to review the report. The report and the form are identical (WYSIWYG).
At this point, basic engineering data (index, process data, calculation, & specification sheet) is ready tobe used by the designers and engineers.The next step is to add the data sheet to a Specification Binder.Add Data sheet to a Specification BinderThe binder module is used to gather documents in packages called binders so these binders can beprinted, revised, and sent for reviews or construction easily. There are two types of binders:A. Specification binder – Each specification binder includes several types of documents such as: Instrument Specification list (Index sheet) General notes sheet (per entire package) Form notes (per each form) Specification sheets Changes report (from previous revision)The binder package enables the user to easily group specifications for bidding, purchase, or constructionpurposes, track the changes, and control the revision.B. Document Binder – This binder can include any document.In this task you will add a specification sheet to an existing binder, review the binder features and revisethe package.1. From the main menu, select Modules Document Binder (or press the Document Binder icon)The Document binder screen opens. The left pane displays the available binders. The right pane displaysadditional details, in this case the documents in the binder. You can open any of these documents bydouble clicking it.2. In the hierarchy tree (left pane), expand the binder. Select the Specification Sheets folder. The documents assigned are displayed in the treeand in the right window: Each row displays the tag number, the document name, theform number, the process case (if used), the revision and a flag if the data has changed. The change flag is set automatically by the software when data changes but the user canalso change it manually. The change flag controls the revision of the relevant spec sheet when revising thepackage.3. Select the Specification Sheets Assign Specification.4. In the Find Items window click Find.5. Scroll down and select 101-FE -301.6. Click OK.
7. A prompt window asks whether to change all the specifications’ notice to Yes? Click Yes.8. Note that the Changed column has been changed to yes for all the specifications.The document is added to the list of specifications.9. To review/set specification change notification flag (in a separate window) select SpecificationSheets Specification change notification. Documents marked as Yes (or new ’#’) will get anew revision number when the packaged is revised.10. Click OK.11. You can view a “Working issue” of the package; select the TestDrive Demo, TechnicalSpecification Printcommand (bottom toolbar).12. Select Working issue then click OK.13. After a short processing you should see a preview of the documents. Use the Next Report andother navigation icons to review the un-formal package.14. Close the print preview tabs.15. To revise the package, select the binder package TestDrive Demo, Technical Specification 16.17.18.19.20.21.Revisions. (or click the Revisions icon, bottom toolbar).Type a document number (or accept the existing name).Select Revision method from the list.Click New and enter the revision information.Click OK.Click OK when prompted that data was saved successfully.At this point you can print preview the formal binder. Repeat step 9, this time selecting Formalissue and the revision, then click OK.
Detail Engineering in SmartPlant InstrumentationYour next tasks are related to the wiring module detail engineering.SmartPlant Instrumentation enables you to design the wiring of your plant making it easy to extractdetailed wiring reports and loop drawings.In the following exercises you will terminate the instrument’s cable to a junction-box, assign theinstrument to an Input/output (I/O) card, and run the automatic cross wiring. Next, you will generatesome wiring reports and a loop diagram.Conventional InstrumentConnect an Instrument to a Junction-Box.When you created the flow transmitter 101-FT -301, SPI also created a device panel (a terminationpanel) and cable connected to it in the background based on the instrument type profile.You will now connect that cable to a junction box. The junction box is already connected with a multipaired cable to a marshaling panel.1. In the Domain Explorer tree view, expand the New Refinery Panels by Category JunctionBoxes 101-JB-DCS-001. Note the two terminal strips TS-1 & TS-2.2. Select the TS-1 node and expand it to see its terminals.3. Select TS-1. From the right click menu select Actions Connection The connection screen opens displaying the terminal strip and the connected cables and wiretag numbers.4. In the Domain Explorer, navigate to New Refinery Cables 101-FT -301; Expand the cable tosee its pair and wires.5. In Domain Explorer, select the cable. From the right click menu select Actions Connection theconnection screen of the device panel opens. Close the connection screen.6. While the connection screen of the junction box is open in front of you, select PR#1 of thedevice cable (from domain explorer) and drag and drop it onto the left side of terminal 6 7. The Cable Connection Definition opens. This screen enables you to define how to connect thecable by selecting the cable-end, the termina, l and how to connect each pair. Set the following:a. Cable end to connect End 2b. Start at Terminal 6 c. On the grid in the right side select Connection type 3 in a row (make sure the row ishighlighted)
8. Click Connect. The screen closes and the cable is connected.9. On the right
Keyboard short cuts: to open the Reference Explorer (right explorer) press F8. . Create Data Sheet SmartPlant Instrumentation enables you to present your data sheets in the format that best meets your needs and according to your organization standards. Data sheets (or as they are called in SPI, Specification sheets) can be customized once to suit your needs. Note that an instrument can be .
