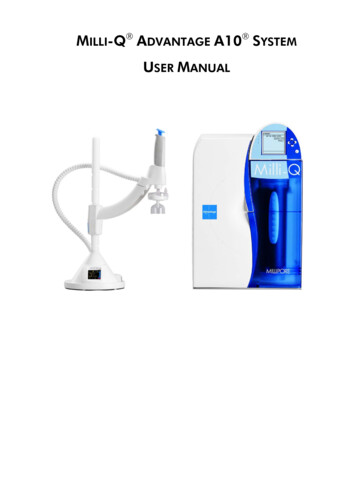
Transcription
Installation and Operation ManualATEM MiniJuly 2020English, 日本語, Français, Deutsch, Español, 中文,한국어, Русский, Italiano, Português and Türkçe.
LanguagesTo go directly to your preferred language, simply click on the hyperlinks listed in thecontents aliano1282Português1442Türkçe1602
EnglishWelcomeThank you for purchasing ATEM Mini for your live production streaming!If you’re new to live production switchers, then you’re about to become involved in the mostexciting part of the broadcast industry and that’s live production! There is nothing like liveproduction and it’s so easy to become addicted to the adrenaline rush of editing in real time whilethe live event unfolds before your eyes.ATEM Mini is a small live production switcher that automatically converts 720p and 1080p HD videoand connects it directly to your computer via USB. The computer sees your ATEM Mini as a webcamso it can be streamed online using your favorite online streaming application like YouTube orOBS Studio.ATEM Mini switchers use the same internal video processing used in the largest ATEM switchers,so even though the unit is small and portable, you get the same amazing level of control andprofessional features so it is very powerful. You can use the high quality buttons on the built incontrol panel, or launch ATEM Software Control and perform more complex switching. For example,you can manage all your graphics, set up keyers, record and run macros, and even mix andenhance your audio using a full audio mixer with faders and advanced EQ and dynamics controls.ATEM Mini lets you start small, then expand your ATEM workflow as your projects grow. There reallyis no limit to what you can do! We hope you get years of use from ATEM Mini and have lots of funwith your live production!This instruction manual should contain all the information you’ll need for installing yourATEM Mini and getting started.Please check the support page on our web site at www.blackmagicdesign.com for the latestversion of the ATEM software. When downloading software, please register with your informationso we can keep you updated when new software is released. We are constantly working on newfeatures and improvements, so we would love to hear from you!Grant PettyCEO Blackmagic Design
ContentsGetting Started 6Processing Palettes 32Plugging in Power 6Media Player Tab 34Plugging in Video Sources 7Output Tab 34Plugging in a Monitor and Testing Inputs 7Recording ISO Files onATEM Mini Pro ISO 37Connect a Microphone 8Connect your Computer 9Setting the Webcam Source 9Using Open Broadcaster 10Switching your Production 10Preparing Media for Recording 43Preparing Media on a Computer 43Timecode Generator 45Using the Audio Mixer 45Using Cuts and Transitions 10Shaping your Audio Mix usingAdvanced Fairlight Controls 48Switching Sources using a Cut 10Using the 6 Band Parametric Equalizer 49Switching Sources using an AutoFairlight Controls Workflow Guide Transition 10Using the Media Page Transition Styles and DVEs 11Navigating the Browse Window Controlling Audio 12ATEM Media Pool Using Picture in Picture 13Image File Types Using the Upstream Keyer 13Creating a TGA File withan Alpha Channel Fade to Black 14555556575858Using a Still Graphic 14Using Camera Control 61Additional Features on ATEM Mini Pro 15DaVinci Resolve PrimaryColor Corrector 65Stream Buttons 15Recording using the Record Buttons 16Setting the HDMI Output usingthe Video Out Buttons 17Direct Streaming and SwitcherControl via Ethernet 17Using the Multiview on ATEM Mini Pro 22ATEM Software Control 25Switching Modes 26Using ATEM Software Control 27Media Manager 28Audio Mixer 28Using Macros 68What is a Macro? 68The Macros Window inATEM Software Control 68Changing Switcher Settings 74Setting Audio Input andOutput Behaviour 75Multiview Settings 76Labels Settings 77HyperDeck Settings 77Setting the HDMI Output Source 78Camera Control 29Saving and RestoringSwitcher Settings 78Using the Software Control Panel 29Preference Settings 80ATEM Mini4
ATEM Mini Setup Settings 82HyperDeck Control 112Updating your ATEM Mini 83Introducing HyperDeck Control 112Configure Page 83Controlling HyperDecks withATEM Software Control 114Setting up Open Broadcaster 84Using Adobe Photoshop with ATEM 86Using Multiple Control Panels 87Connecting to a Network 89Using DHCP and Fixed IP Addresses 89Manually Setting a Fixed IP Address 90Changing ATEM Mini Network Settings 91Changing the Hardware PanelNetwork Settings 92Setting the Switcher’s IPLocation on the Panel 93ATEM Software Controlvia the Network 94Connecting ATEM Mini Proto an Internet Router 95Getting a Stream Key 96Keying using ATEM Mini 97Understanding Keying 97Luma Key 97Linear Key 98Pre multiplied Key 98Performing an UpstreamLuma/Linear Key 99Chroma Key 101Performing a Chroma Key 102Pattern Key 104DVE Key 107Performing UpstreamKeyer Transitions 109Controlling HyperDecks withExternal Hardware Panels 116HyperDeck Setup withATEM 1 M/E Advanced Panel 116Controlling HyperDecks withATEM 1 M/E Advanced Panel 118Connecting ATEM 1 M/EAdvanced Panel 120Using ATEM 1 M/E Advanced Panel 121Performing Transitions usingATEM 1 M/E Advanced Panel 127Recording Macros usingATEM 1 M/E Advanced Panel 138Using ATEM Camera Control Panel 140Changing Network Settings 142Camera Control Panel Layout 144Controlling Cameras 148Using Audio 155Connecting other Audio Sources 155Using EmbeddedHDMI Audio Sources 155Using a Third Party Audio MixerControl Surface 156Help 158Regulatory Notices 159Safety Information 160Warranty 161ATEM Mini5
Getting StartedAt first glance ATEM Mini might seem intimidating with all the connectors and buttons, howeverthe unit is actually very easy to set up and use. Each feature serves a specific function and itwon’t take long to get familiar with ATEM Mini and know exactly what each feature does.This section of the manual will show you how to get started with your ATEM Mini, including howto connect power, connect an HDMI video source, connect a microphone and plug into yourcomputer so you can start broadcasting online.ATEM Mini’s control panel lets you switch video sources, adjust audiolevels, perform transitions and apply graphics and effectsPlugging in PowerThe first step to getting started is to plug in the mains power supply using the supplied poweradapter. If you’re power supply has a locking ring, secure the connection to ATEM Mini bytightening the connector to the unit. This locks the power cable to ATEM Mini preventing it frombeing accidentally removed.12Connect power to ATEM Mini’s powerinput using the supplied cableSecure the connector to ATEM Mini bytightening the connector screwTIP It’s important to note that the power supplies for ATEM Mini and ATEM Mini Pro aredifferent as the ATEM Mini Pro model uses a little more power so its power supply canprovide more current. However they are both 12 volts. So this means it’s important touse the power adapter supplied with each unit. If you have both models of ATEM Minithen it might be a good idea to label each power adapter so you know which adapteris for each unit.Getting Started6
Plugging in Video SourcesPlug your HDMI cameras and other HDMI sources into ATEM Mini’s HDMI inputs. This gives youfour different images to switch to when creating your program. Simply plug one end of theHDMI cable to your camera and the other end to any of ATEM Mini’s HDMI inputs. The first inputyou plug in will set the video format, so if the first video source you plug in is 1080p50, all otherinputs will automatically be converted to 1080p50.If you want to set the video format yourself after plugging in all video sources, you can do that inthe switcher settings in ATEM Software Control. You can find more information about changingthe video format settings in the ‘using ATEM Software Control’ section.Plug HDMI sources into ATEM Mini’s four HDMI inputsPlugging in a Monitor and Testing InputsWith your video sources connected, you can now plug an HDMI television into ATEM Mini’sHDMI output and check all the inputs are working. This is also a good opportunity to checksources and see if your shots are smoothly switching between each other.To check your sources, simply press the numbered input buttons on ATEM Mini’s control paneland watch the HDMI television. If your sources are working correctly, you should see themswitch between each other when you press the input buttons.Plug an HDMI television or monitor into ATEM Mini’s HDMI output so you canmonitor your program output and check all your sources are working properlyGetting Started7
TIP ATEM Mini Pro has a powerful multiview feature that lets you see all your inputs,plus program and preview outputs simultaneously on one screen. The multiview is thedefault source for the HDMI output. This means once your ATEM Mini Pro is connectedto an HDMI television you can see all your inputs at once and know they are allworking straight away.Connect a MicrophoneWhen broadcasting a PowerPoint presentation or a kickstarter video, you might want to use amicrophone so your voice can be heard loud and clear. Plug a microphone, for example a smallwireless collar microphone, into one of the 3.5mm audio inputs.If you are broadcasting an interview, plug the second microphone into the second 3.5mmaudio input. You can even plug a music player into one of the audio inputs and mix it intoyour production.Connect microphones to ATEM Mini’s mic inputsGetting Started8
TIP While ATEM Mini will keep perfect audio and video synchronization, somecameras you connect might have some video processing delay. This can cause theaudio on the ATEM Mini analog inputs to be slightly out of sync, because theseinputs are not delayed like the camera’s video is. So you can select some audio delayon the analog audio inputs to keep all your audio and video sources in perfect sync.For more information, refer to the ‘delay control’ section in this manual.Connect your ComputerPlug ATEM Mini’s webcam output into your computer’s USB input. Now your computer willrecognize ATEM Mini as a webcam so you can select it as the webcam source in your streamingprogram, such as Skype or OBS Studio.Plug your computer into ATEM Mini’s webcam out USB-C connectorTIP When recording to disk using ATEM Mini Pro, the USB connector will be busyrecording to a disk so it won’t be free to use as a webcam output. However theATEM Mini Pro model also has live streaming direct via its Ethernet connection. If youwant to use the USB connection to record to a disk you can use the Ethernetconnection for streaming. You can even use the Ethernet for external control usingATEM Software Control. Please refer to the ‘additional features on ATEM Mini Pro’section for more information.Setting the Webcam SourceIn most cases, your streaming software will automatically set ATEM Mini as the webcam,so when you launch your streaming software you will see the picture from your ATEM Ministraight away. If your software doesn’t select ATEM Mini, simply set the software to useATEM Mini as the webcam and microphone.Below is an example of how to set the webcam settings on Skype.1In Skype’s menu bar, open the ‘audio and video settings’.2Click on the ‘Camera’ drop down menu and select Blackmagic Design from the list.You will see the video from ATEM Mini appear in the preview window.3Now go to the ‘microphone’ drop down menu and select Blackmagic Design as youraudio source.Getting Started9
With your Skype settings set correctly, perhaps try out a Skype call with a friend as a quick testto check your broadcast setup is working.That’s all you need to do and ATEM Mini is now ready to broadcast your video to the world live!Using Open BroadcasterOpen Broadcaster is another streaming platform that takes your program video and streamsit live via your favourite video sharing application, like YouTube or Vimeo.For information on how to set up Open Broadcaster with your ATEM Mini, refer to the‘Setting up Open Broadcaster’ section in this manual.Switching your ProductionNow that you have your cameras and microphone connected and your streaming software seesATEM Mini as a webcam, ATEM Mini is ready to start switching your production. This happenswhen you switch from one video source in your broadcast to another. A source can be anyHDMI video signal connected to the HDMI inputs. It can also be a still graphic, a keyer, or anyinternal source like a color generator, color bars, or black.With ATEM Mini, you can switch cleanly using professional cuts or transitions. For example,a cut will instantly change from one source to another and a transition will change sources overa defined duration often using an effect. For more information, refer to the ‘using cuts andtransitions’ section later in this manual.Using Cuts and TransitionsWhen switching video sources, you can use a straight cut which will immediately change onesource to another, or a transition which gradually changes one source to another over a definedduration. Transitions appear as an effect, for example a cross dissolve or mix, a dip to colour, oreven a stylized wipe and you have many styles to choose from.Switching Sources using a CutIn the demonstration below ATEM Mini will cut from input 1 to input 2.To perform a cut:1 Input 1 is illuminated red to indicate input 1 is currently live on air.2Select a ‘cut’ by pressing the ‘cut’ button. Pressing ‘cut’ tells ATEM Miniyou want to use a straight cut instead of an auto transition.3Now press the input 2 button.Input 1 will now immediately switch to input 2 and you will see input 2 illuminated red,which means input 2 is now live on air. This is known as a cut as you are ‘cutting’ directlyfrom one source to another.Switching Sources using an Auto TransitionTransitions let you smoothly switch from one source to another over a defined duration.For example, a mix transition gradually fades the current source into the next until the originalsource is no longer visible. A wipe transition will move a line across the original sourcerevealing another effectively wiping across the image.Switching your Production10
You can add a colored border, or make it soft so the edge is smooth and pleasing. You caneven use digital video effects or DVEs, such as a squeeze or push, to move the images as theytransition from one to the other.In the demonstration below ATEM Mini will switch from input 1 to input 2 using a mix transition:To perform a mix auto transition:1 Press the ‘mix’ button to select a mix transition.2Now press a duration you want for the mix.3Press the ‘auto’ button to tell ATEM Mini you want to use an automated transition.4Press the input 2 button to perform the mix transition.You will now see inputs 1 and 2 buttons illuminated red while the transition happens and yourbroadcast changes to input 2. When the transition is complete, input 2 will be illuminated redto indicate it is now live on air.Transition Styles and DVEsThe buttons above the ‘auto’ button contain different transition styles, including a mix crossdissolve and a dip to color.You can also select horizontal and vertical wipe transitions by pressing their respectivetransition style buttons. These also include DVE push and squeeze transitions.Press the transition type button for the transition you want to use, for example ahorizontal or vertical wipe, push or squeeze DVE transition, and mix or dip transitionSwitching your Production11
Controlling AudioWhen setting up your production or during your broadast, you will likely want to control audiolevels if the sound is too quiet or too loud.When an audio level is too loud it will clip. Clipping means the audio has increased beyond themaximum accepted level and when this happens it can distort and sound unpleasant.Pressing the up and down arrow buttons for each input will increase or decrease the audiolevel for the respective source. For example, if the presenter’s voice is too loud and risksclipping, you can decrease the audio level by pressing the down button incrementally untilthe level is safe.ON OFFPressing the on or off buttons will let you permanently enable the audiofrom the respective input source, or turn its audio off completely.ON – When the input’s audio is set to ‘on’, the input audio will be heard permanently,even if the source is not currently on air.OFF – When the input’s audio is set to ‘off’, the source audio will never be heard even ifthe source video is on air.AFVAFV stands for ‘audio follows video’ and will let the audio for a respective input be heardwhenever the source is switched on air.To enable or disable AFV for each input, simply press its AFV button.ResetPressing the ‘reset’ button will restore the input audio level to its default position. This ishelpful if you want to cancel any adjustments or reference the original level before youmade changes.Switching your Production12
Using Picture in PicturePicture in picture superimposes a second source over your broadcast video source in a smallbox you can position and customize. Input 1 is the default picture in picture source, so if you’rebroadcasting gameplay and want to superimpose your reactions, plug your camera into input 1and it will appear in picture in picture.To enable picture in picture:1 Make sure your video to be inside the box is plugged into HDMI input 1.2Plug your main video into HDMI input 2, 3, or 4.3In the picture in picture buttons on control panel, press ‘on’.You will now see the picture in picture box appear on the screen. To select a different position,press any of the position buttons.Using the Upstream KeyerATEM Mini’s upstream keyer is used to superimpose graphics or blend one video layer overanother using transparency. This means you can tell ATEM Mini to make an input source’sbackground color invisible using the chroma keyer, or only use a specific section of a graphicusing a luma or linear key. Linear keys are great for visual effects, titles and lower third graphics.Press the ‘key’ on or off buttons to switch theupstream keyer on and off airTIP ATEM Mini’s advanced chroma keyer is perfect for keying graphics from aPowerPoint presentation. For example, you could have a series of graphics designedto be keyed over a background and these can played out directly from a PowerPointsequence. All you need to do is make any invisible areas green, or any solid color thatisn’t used in your graphic, then set the chroma keyer to make that color transparent.The images from your computer will be high quality over HDMI so will key very cleanlyand look fantastic.Switching your Production13
Fade to BlackThe fade to black button is an easy way to start and end live broadcasts. Fade to blackperforms a mix to black which happens across all video layers at the same time. This means allvideo inputs, stills and any upstream or downstream keyers that are visible in your broadcast.When performing a fade to black, the master program audio will also fade out to silence.Simply press the FTB button to perform the fade to black. The button will flash while enabled.To fade up from black, simply press the FTB button again. This is a clean way of starting andfinishing a broadcast.Using a Still GraphicThe ‘still’ button is another input source you can switch to in your production. Simply press the‘still’ button to switch a still loaded in the media player to air.To take the graphic off air, simply switch to a different input source.The ‘still’ button will switch a graphic loaded in ATEM Software Control’s media pool.ATEM Software Control is an extremely powerful software control panel that opens aworld of options and lets you do a lot more with ATEM Mini.Switching your Production14
Additional Features on ATEM Mini ProATEM Mini Pro has additional features that give you more options for your broadcast and evenmore ability to control your production directly from the unit without the need for a computer.Dedicated buttons on the control panel let you switch sources to the HDMI output, start/stopstreaming and start/stop recording.With ATEM Mini Pro, you also have the choice of streaming via the webcam output or directstreaming via Ethernet. At any time, you can record your broadcast to an external disk viaUSB-C and use the dedicated record buttons on ATEM Mini Pro to start and stop recording.One of the most exciting new features on ATEM Mini Pro is the multiview. This powerful featuredisplays a multiview on the HDMI video output that shows a comprehensive overview of yourproduction. All 4 HDMI input sources, the program and preview outputs, plus importantrecording, streaming and audio status information is presented on one screen so you alwaysknow exactly what is happening during your broadcast!This section describes all the additional features on ATEM Mini Pro and how to use them.Stream ButtonsStreaming is built into the ATEM Mini Pro model, so you don’t need to use any complicatedsoftware to get started. Just use the included ATEM Software Control to select what streamingservice you intend to use and then enter in the streaming key. Once you have completed thissetup, you can simply press On Air to go live! There is more information in the live streamingsection of this manual.The stream buttons labelled ‘on air’ and ‘off’ let you startand stop streaming directly from your ATEM Mini ProWhen your broadcast has finished, all you need to do is press the ‘off’ stream button and yourstream is stopped. This means once you are set up and streaming, your ATEM Mini Pro iscompletely independent and you don’t need to go back to your computer to stop and closeyour stream.Additional Features on ATEM Mini Pro15
TIP After your streaming details are entered into the ‘output’ palette in ATEM SoftwareControl, your streaming setup is now stored in your ATEM Mini Pro so you can startstreaming again immediately, even after a power cycle. This makes it easy to stream anew broadcast without having to reset your streaming software every time.On ATEM Mini Pro, it is actually easier and faster to stream via Ethernet. This lets youstream immediately via any internet connection on a computer or internet router,while simultaneously giving you the additional benefits of ATEM Software Control overthe same connection.For information on setting up streaming and control via Ethernet, refer to‘direct streaming and switcher control via Ethernet’ later in this section.Recording using the Record ButtonsATEM Mini Pro lets you record your stream via its USB-C output using an external disk or flashdrive. For example, you can connect a Blackmagic MultiDock 10G and record directly to an SSD.When the disk indicator above ATEM Mini Pro’s record button illuminates green, press therecord button and you are now recording your broadcast to disk. To stop recording, press the‘stop’ button.ATEM Software Control records your stream using H.264 compression with an optimizedcompression ratio to provide high quality video without large file sizes.Press the record button, marked ‘rec’, to record yourbroadcast to an external drive or flash disk via USB-CDisk Status IndicatorThe disk status LED indicator lets you know the status of the recording media. For example,the indicator illuminates green if the current drive is formatted and ready to record and redwhile recording.Indicators include:GreenFormatted disk is detected and ready to record.RedDisk is recording.Slowly flashing redLow disk space.Rapidly flashing redBad disk performance causing disk to skip frames.NOTE To record to an external drive, you first need to format the disk.Refer to the ‘preparing media for recording’ section for more information.Additional Features on ATEM Mini Pro16
Setting the HDMI Output using the Video Out ButtonsThe video out buttons on the right side of your ATEM Mini Pro are used to switch sources to theHDMI output. The default output source is the multiview and you can read more about thispowerful feature later in this section.Press the video out buttons to switch a source to the HDMI outputTo change the HDMI output source, press any of the video out buttons. For example you canselect the HDMI inputs for isolated camera recordings, or select the program output ormultiview. Compared to ATEM Mini, having the buttons built into ATEM Mini Pro means you canchange the HDMI output directly from the unit itself!NOTE If you want to switch camera 1 direct or preview to the HDMI output, thesesources are available from the ‘output’ drop down menu in ATEM Software Control.Direct Streaming and Switcher Control via EthernetATEM Mini Pro’s Ethernet connector lets you stream directly while simultaneously providing theadded benefits of ATEM Software Control. You can learn more about this powerful controlsoftware in the ‘using ATEM Software Control’ section.Plug into your internet router via Ethernet to stream directlyTo set up your ATEM Mini Pro for software control and direct streaming:1 Plug ATEM Mini Pro into your computer’s spare Ethernet port. It may take a moment forDHCP to find ATEM Mini Pro and assign an IP address.2Launch ATEM Software Control.3You will see ATEM Mini Pro listed as a connected ATEM switcher on your network.Simply select ATEM Mini Pro from the list.4Click ‘connect’.ATEM Software Control will now appear with buttons and indicators illuminated. You can nowoperate your ATEM Mini Pro the same way you would via USB-C.If your computer is connected to the internet, this also sets up your ATEM Mini Pro for directstreaming via your computer. Keep reading for details on how to set up a direct stream.Additional Features on ATEM Mini Pro17
Direct Streaming by Sharing Your Computer InternetWith ATEM Software Control now connected to your ATEM Mini Pro, you can set up a directstream via your computer’s internet connection.You can select which platform you want to use in ATEM Software Control and set all the relevantsettings for your stream. If you are setting up a broadcast on your channel that you will regularlyuse, these settings will be stored in your ATEM Mini Pro and you can then plug into any internetconnection at any time and broadcast directly from the unit.This section includes how to configure settings for YouTube Studio and Twitch.TIP As you’re setting up your broadcast, it’s worth loading a standby graphic intoATEM Software Control’s media player and switching it to the program output so youcan perform a quick test broadcast before actually going live.To configure your settings for YouTube Studio:1Log into your Youtube account. Click ‘create’.3Click ‘new stream’, or if you have alreadystreamed before, click ‘copy and create’.5Set the child protection to theappropriate setting.2Click ‘go live’.4Enter your broadcast name and details. Set thebroadcast to ‘public’ so anyone can watch.6Click ‘create stream’.Additional Features on ATEM Mini Pro18
7An auto generated stream key will appear in thestream settings, click ‘copy’ to copy the stream key.Now you have copied the stream key for your broadcast, you will need to paste it into thestream details in ATEM Software Control.1In ATEM Software Control’s processingpalettes, click on the ‘output’ tab.Open the ‘live stream’ palette.3In the ‘key’ setting, paste the stream keyyou copied from YouTube.2Set the platform to YouTube by clicking in themenu and selecting YouTube from the dropdown list. Set the server to ‘primary’.4Set the streaming quality to low, medium,or high. This will also set the quality for therecording output via USB-C.5With all the streaming details now set, it’s worthperforming a quick test broadcast to make sureeverything is working. Press the ‘on air’ buttonon ATEM Mini Pro, or click on the on air button inthe live stream palette.Additional Features on ATEM Mini Pro19
YouTube Studio is now ready to start broadcasting. It may take a few moments for the memorybuffer to initiate. When the buffering is complete, the ‘go live’ button will appear in the YouTubeStudio manager and all you need to do is click ‘go live’.You are now broadcasting!To test that everything is working properly, click the ‘share’ icon, copy the link and paste it into anew window or tab in your internet browser. You can now monitor your live stream just like amember of your audience.When your production has finished, press the ‘off’ streaming button on ATEM Mini Pro to stopyour broadcast.To configure your settings for Twitch:1Log into your Twitch account. Click on youraccount avatar in the top right corner.3In the stream manager preferences,select ‘channel’.2Click on ‘creator dashboard’.4A primary stream key will beautomatically generated.5Click ‘copy’.Now you have copied the stream key for your broadcast, you will need to paste it into thestream details in ATEM Software Control.Additional Features on ATEM Mini Pro20
12In ATEM Software Control’s processingpalettes, click on the ‘output’ tab. Open the‘live stream’ palette.3Set the platform to Twitch by clicking in the menuand selecting Twitch from the drop down list.4Click on the ‘server’ setting drop down list andselect the server nearest to your location.5In the ‘key’ setting, paste the stream key youcopied from Twitch.6Set the streaming quality to low, medium,or high. This will also set the quality for therecording output via USB-C.With all the streaming details now set, it’s worthperforming a quick test broadcast to make sureeverything is working. Press the ‘on air’ buttonon ATEM Mini Pro, or click on the on air button inthe live stream palette.You are now on air! To check your broadcast, click on your account avatar and select ‘back toTwitch’. Once in the main Twitch window, click your avatar icon again and select ‘channel’.You will now see your broadcast on your channel and the live indicator will appear at the top ofthe
When broadcasting a PowerPoint presentation or a kickstarter video, you might want to use a microphone so your voice can be heard loud and clear. Plug a microphone, for example a small wireless collar microphone, into one of the 3.5mm audio inputs. If you are broadcasting an interview, plug the second microphone into the