Transcription
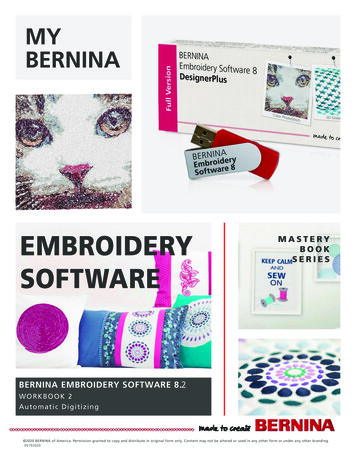
A EMBROIDERY SOFTWARE 8.2WO RK BO OK 2Au tomatic Digitizing 2020 BERNINA of America. Permission granted to copy and distribute in original form only. Content may not be altered or used in any other form or under any other branding.05192020
Table of ContentsIntroduction . 3ExercisesAuto-Digitize . 6Instant Auto-Digitize . . . 8Magic Wand . 9Magic Wand with Block Digitizing . . 11Magic Wand Fill Without Holes . 12Magic Wand Centerline . 13Color PhotoStitch . 14PhotoSnap . 16Convert Artwork to Embroidery . 18 2020 BERNINA of America. Permission granted to copy and distribute in original form only. Content may not be altered or used inany other form or under any other branding2
Introduction There are several methods in Software 8 to automatically convert pictures to stitches. All methods begin with a bitmap or vector image that is converted into stitches. Auto-Digitize, Magic Wand, PhotoSnap, and Color PhotoStitch all work with bitmap images,those images that have pixels (small squares) of colors. Convert Artwork to Embroidery is found in Artwork Canvas and usually begins with a vector image, an image that is mathematically drawn; but the process can also be used on bitmaps. The success of automatic digitizing is dependent on the clarity of the bitmap that is used inthe process. Some bitmaps may need to be opened in Corel PHOTO-PAINT to clean up theartwork before processing. This is done by selecting the bitmap and clicking on Edit Artworkin Artwork Canvas.Methods of Automatic Conversion:Auto-Digitize will convert the entire picture to stitches, which can then be edited. The stitching sequence is determined by the software. Outlines and borderscan be added to the picture in the process of automatic digitizing. Black and whitepictures or colored images with or without outlines can be processed in AutoDigitize. The image must be processed before it is converted to stitches.Instant Auto-Digitize turns an image into stitches even if it hasn’t been preprocessed. This method is best done on simple images.The Magic Wand converts one part of the picture at a time to stitches. Images areprocessed first as with Auto-Digitize; but stitch types and properties can be preselected or they can be edited later. Color is determined by the color of the bitmap.You determine the order of stitching by the order you select the objects for converting to stitches.Magic Wand with Block Digitizing is used to convert narrow column artworkshapes to a satin stitch with multiple angles. Images must be processed first beforeapplying this technique.Magic Wand Fill Without Holes is used to convert artwork to step fill, but anyobjects within the shapes are ignored so that only the outside borders of the objects are used to fill with stitches. Images must be processed first before applyingthis technique. 2020 BERNINA of America. Permission granted to copy and distribute in original form only. Content may not be altered or used inany other form or under any other branding3
Introduction ContinuedMagic Wand Centerline creates run stitches in the middle of the selected objects and applies a double run to these objects. These images must also be processed before stitches are added.PhotoSnap converts color or black and white photos and pictures to one color designs and creates a tapestry-effect. You can then edit the design resolutionand the angle of the stitch. The stitches are called Photo Satin and have thick andthin lines based on the contrast of the image.Color PhotoStitch automatically turns photographs and bitmap artwork intomulti-colored embroidery. Sepia or grayscale effects can also be created.Convert Artwork to Embroidery converts vector images and text to stitches.This icon is found in Artwork Canvas. The images are generally converted to 45ºangle step fills just like Auto-Digitize. This icon can also be used to convert bitmapsto stitches. The software determines the order of the stitching. Types of fills, color,and stitch sequence can also be edited after conversion.Other Icons in the Auto-Digitize Toolbox:Insert Artwork appears as an icon in the General toolbar as well as in the Auto Digitize Toolbox. Using either icon will open a dialog box so that a bitmap can be inserted into the design screen.Crop Background opens several options for cropping a bitmap image. By clickingand dragging on the image, you will omit parts of the image, leaving the selectedcropped shape. With the Any Shape Crop tool (first one shown below), you can selectthe area you want by right and left clicking around the image.Adjust opens a dialog box so that an image can be edited. Sepia or Gray scale canbe applied and the image can be adjusted for lightness and contrast.Touch Up Bitmap Artwork opens the image in your chosen program—Paint, CorelPHOTO-PAINT, or Paint Shop Pro (if you have the program on your computer). The program used is selected in Settings Options. Paint is the default program.Matching Method opens a dialog box so you can choose how to match the bitmapcolors to thread chart colors or to palette colors. 2020 BERNINA of America. Permission granted to copy and distribute in original form only. Content may not be altered or used inany other form or under any other branding4
Adding a Library to File ExplorerWindows 8.1 and 10 do not have the Library Folder listed in File Explorer. On page 20of My BERNINA Mastery Part 1, instructions were given to add the Library folder to theInsert Embroidery dialog box. This makes the built-in embroidery files in Software 8available through Libraries for Windows 8.1 & 10.This process doesn’t automatically add the BERNINA 8 picture folder to the library. Tomake the pictures accessible through the library, follow these instructions:1.2.3.4.5.6.7.Open Insert Artwork.Navigate to C: Users Public Public Pictures.Right click on the BERNINA 8 Pictures folder.Select Copy or Create Shortcut.Select Libraries Pictures on the left side of the Insert Artwork dialog box.Right click on the right side of the dialog box and select Paste.Now BERNINA 8 Pictures are easily found in the Libraries folder. 2020 BERNINA of America. Permission granted to copy and distribute in original form only. Content may not be altered or used inany other form or under any other branding5
Auto-DigitizeOpen a New File/Blank File Click on the New Blank Design icon or select File New.Click here for video:Lesson 4: Auto-DigitizeNotes:Loading and Processing the Artwork Select Insert Artwork. Navigate to the Artwork Folder (Libraries Pictures BERNINA8 Pictures Artwork) select the Fish.wmf. Select Open. While the picture is selected, click on the Auto-Digitize icon inthe Auto-Digitize Toolbox. In the Bitmap Artwork Preparation dialog box, click on the drop- down arrow to change the number of colors in Reduce Colors to7. Notice that the software changed the pink wavy lines in thefish to lavender.Click Undo in the dialog box to bring back the color.Select the dark purple color chip in the dialog box.Click and hold on Locate. The software will show you where thatcolor is located.Hold the Ctrl key and select the black color chip to add the selection to the dark purple. Select Merge. The purple eyelashesare now black.You now have seven colors, but they are colors you have chosen to keep.Click OK.Auto-Digitize Dialog Box In the Auto Digitize dialog box that opens, click on the dropdown arrow by Fill next to the white color bar and choose Omit.Click OK in the dialog box.Click on the Bitmaps icon to hide the graphic.In the Zoom Toolbar, select To Fit.Deselect the design.Editing Auto Digitized Objects An auto digitized object will be much more interesting, if the de sign is edited.Select T on your keyboard to toggle to Design View.Click on the largest bubble to select it.Right click on the Satin Fill icon.In Object Properties, place a radio dot in front of Satin Special. This stitch places random needle penetrations while maintaining the smoothness of a satin stitch. It is a stitch to use when you want to apply a satin stitch toa large area where long floats could snag. Click OK.Lesson covers: Auto Digitizing colored artwork with outlines Editing Auto Digitized objects Applying Satin Special Changing Pull CompensationA number of different graphic fileformats may be used with and areincluded in BERNINA EmbroiderySoftware 8.With Auto Digitizing, all stitches arethe same step #1 fill with a 45ºstitch angle.Note for Stitch Details:Satin Lines create an even satinstitch while Satin follows the shapeof the object.Tip :Watch the lower left corner ofthe status bar for next steps. 2020 BERNINA of America. Permission granted to copy and distribute in original form only. Content may not be altered or used inany other form or under any other branding6
Select the medium size bubble. Click on the Satin Fill icon.Editing Continued Double click on the front part of the yellow fish body to open Ob ject Properties.Place a radio dot in Step Fill # 2.Click Apply.Select the back part of the yellow fish body.Select the Stitch Angle Tab.Enter 90º in the value tab.Select Apply.Notes:There are 30 different types ofStep Fills in the software. Refer tothe Appendices in the ReferenceManual for pictures of the differenttypes of Step and Fancy Fills.Apply will make the change to astitch and keep the dialog boxopen. OK will make the changeand close the dialog box. Whenyou have several changes tomake, use Apply.Changing Pull Compensation Select Edit Select All. Select the Effects button at the bottom of Object Properties dia-log box. Select the Others Tab. Change the Pull Compensation value to 0.40 mm. Click OK.Always change the Pull Compensation of Auto Digitized objects to0.40 mm.Saving the File Select T on the keyboard to see view the design in Artistic View.Select File Save As and name the design Auto Digitize.Save the file.Close the file. 2020 BERNINA of America. Permission granted to copy and distribute in original form only. Content may not be altered or used inany other form or under any other branding7
Instant Auto-DigitizeGetting Started Click here for video:Lesson 4: Instant Auto-DigitizeNotes:Select New Blank Design.Select Insert Artwork.Navigate to the location of the Artwork folder: Libraries Pictures BERNINA 8 Pictures Artwork.Select Sewing Basket.wmf.Select Open.Auto Digitize the Picture Open the Auto Digitize Toolbox.With the picture selected, select Instant Auto-Digitize from theAuto Digitize Toolbox.Select Bitmaps to hide the bitmap.Editing the Design: Elastic Fancy Fill Deselect; then select the basket base.Right click on the Fancy Fill icon in the Stitch Toolbar tochange the step fill to a fancy fill and to open Object Properties.Select one of the basket handles.Select Effects in the lower left corner of the Object Propertiesbox.Select the Elastic Fancy Fill tab.Place a check mark by Elastic Fancy Fill.Place a dot in front of Single Row, with Scaling.Notice that the preview updates to show how this effect willlook.Select Apply.Repeat these steps for the other side of the handle, but selectOK to close Object Properties.Lesson covers: Instant Auto Digitize Editing Auto Digitized objects Applying Elastic Fancy Fill Changing Pull CompensationYou can click on a picture andinstantly have stitches!Elastic Fancy Fill stitches can beapplied to areas of satin fill. Youhave four types of elastic fills—youcan choose between single andmultiple rows and with scaling orwithout scaling.Editing the Design Continued Double click on the tomato pin cushion. This opens ObjectProperties.Place a dot in front of Step Fill # 28. Notice the realistic previewof the fill stitch.Click Apply.Select the blue area of the ball of yarn that was converted to asatin stitch.Select Step from the drop-down list of Fill Type in Object Properties dialog box.Click OK.Select Ctrl A.Click on Effects. Go to the Others Tab. Change the Pull Compensation to 0.40 mm. Click OK.Select File Save As and name the file Instant Auto Digitize. 2020 BERNINA of America. Permission granted to copy and distribute in original form only. Content may not be altered or used inany other form or under any other branding8
Magic WandOpen a New File/Blank File Click on the New icon or select File New. Right click on Show Hoop. Choose the BERNINA 7 series from the drop-down list. Select BERNINA Large Oval Hoop, 255 x 145 from the HoopClick here for video:Lesson 4: Magic WandNotes:choices. Select Foot #26. Check Show Hoop. Click OK. Select Insert Artwork.Navigate to the BERNINA 8 Picture folder Artwork.Select Cherries.wmf. Click on Open.Hold the Shift key and click on a corner resizing handle and increase the size of the picture to about 120%. Select Zoom To Fit in the Zoom Toolbar.Prepare Outlined Image In the Auto-Digitize Toolbox, select Magic Wand.Click on the picture.Place a radio dot in front of Cartoon Processing.Drag the slider control to the right until part of the picture turnsblack. Use the left arrow key on your keyboard and press until the picture returns to its normal colors. This process sharpens the outlines. Click OK.Lesson covers: Increasing the size of an image Magic Wand Digitizing My Threads Docker Adding outlines with the Magic WandMy Threads Docker Overview Window Click on My Threads Docker. Adding multiple stitch angles Click on Match All in the Thread Docker. This converts the Colorto objectsPalette color chips to Isacord thread colors, the default thread col- Changing Pull Compensationor chart. Magic Wand matches the bitmap color to the closest match ofIsacord thread. You may also choose other thread charts to matchHolding the Shift key while resizingcolors by clicking on My Thread Charts to select other brands.resizes the picture from the center.Digitizing with Magic Wand: Digitizing Fills Create dimension by digitizing theobjects from background to foregroundThe Step Fill icon is automatically selected by default.Select the Satin Fill from the Stitch Toolbar.Click inside the stem that is positioned behind the leaves.Select the Step Fill.Click inside each leaf to add fill stitches.Right click on the Fancy Fill icon.In Object Properties, in the Pattern drop-down, select 046, Crazy.Click on OK.Click inside each cherry.Zooming in helps to select tiny areSelect the Step Fill.Select the Zoom icon and click and drag a bounding box to zoom as.in on the white highlight of one of the cherries.Click inside the highlight to set the stitches. 2020 BERNINA of America. Permission granted to copy and distribute in original form only. Content may not be altered or used inany other form or under any other branding9
Open the Overview Window. Select the Zoom icon in the Over-Notes:view Window and click and drag around the other white highlights To add a border around the picturein the Overview Window. Click the area on the design screen.that doesn’t add another borderaround the design, you must either Press 0 on the keyboard to show the design full screen.Adding Outlines Right click within each object to add an outline. Click in the orderthat you added fill stitches (stem, leaves, cherries, highlights). A single outline is added in a color to match the object. Select the Triple Outline icon. Right click in the white area of the picture to add a triple-stitchedselect a picture where black outlines of the design do not touch theblack outline of the picture or digitize a frame with Manual Digitizingtools of the software. Another option is to use the Auto Digitize instead of Magic Wand to add a border.frame around the picture. Notice that the outline is added around the frame as well asaround all the objects within the frame. Select Undo.Editing the Stitch Type Press Esc. The stitch type can be pre-selected before applyingMagic Wand to the object or it can be changed after stitcheshave been added. Select the white highlighted areas of the cherry in Color Film. Click on Satin Fill.Changing Pull Compensation Select the sailboat picture in Color Film.Press the Delete key to delete the picture from the design.Select Edit Select All.Click on the Effects icon. Select the Others tab. Change the Pull Compensation to 0.40 mm. Click OK.Editing the Stem The stem will not successfullystitch because the width of the satin stitch is too wide, so it must beedited.Deselect; then select the satin stem.Switch to Design View by pressing T on the keyboard.Notice the long satin floats on the left stem.Open the Edit Toolbox. Select Add Stitch Angles.Using two clicks, click across the stem to set multiple angles inthe fill. Move to another location and set another guide with twoclicks. See the illustration as a guide to place the clicks.Press Enter to activate the change.Reshape is automatically activated with Enter. The angles can beedited if necessary by clicking and dragging on the peachsquares to change the angles as needed. Press Esc.In Color Film, select the green outline of the stem & leaves. Select Back 1 Color twice to combine the green colors.Select the red outlines in Color Film. Click on Back 1 Color.Select File Save As and name the file Magic Wand.Close the file. 2020 BERNINA of America. Permission granted to copy and distribute in original form only. Content may not be altered or used inany other form or under any other branding10
Magic Wand Block DigitizingOpen the ArtworkClick here for video:Lesson 4: Magic Wand BlockDigitizingNotes: Select New Blank Design.Select Insert Artwork.Navigate to Libraries Pictures BERNINA 8 Pictures Artwork.Open A East 005.jpg.Open Color Film. There is now a placeholder for the artwork inColor Film. The placeholder is a Sailboat when Show Objects is deactivatedin Color Film. Click on Show Objects. When this is activated in Color Film, thepicture will show as the actual inserted artwork. Deactivate Show Objects by clicking on it again.Process the Artwork Open the Auto-Digitize Toolbox.Select Magic Wand Block Digitizing.Click on the picture.In the Bitmap Artwork Preparation dialog box, under ProcessingOptions, reduce the number of colors to four.Click OK.Select Zoom to Fit from the Zoom Toolbar.Click on each colored area of the picture to add satin stitches.Click on the green areas first; then the brown areas; and then thepink areas. The order you click determines the stitch order of thedesign.Press Esc to deactivate the tool.Editing the Design Because Magic Wand matches the color of the threads to thebitmap color, you may want to do some editing of the colors aftercreating the design. Select Pick Color. The mouse turns into an eyedropper. Click on the green stitches in the design. The mouse is now apaint bucket. Click on the brown stitches to change them to green. Press Esc to deactivate the tool. Select Edit Select All. Open Effects. Select the Others tab. Change the Pull Compensation to 0.40 mm. Click OK.Lesson covers: Magic Wand with Block Digitizing Placeholder for Artwork inColor Film Change colors with the ColorPick tool Changing Pull CompensationThis new Magic Wand option makesit easy to create satin stitches thathave mulitple angles, accomplishingmultiple tasks with one click!Look for pictures that have narrow,curved pieces. The Magic WandBlock Digitizing tool is designed toadd multiple angle satin stitches tothese types of pictures.Final Step In Color Film, move colors if needed so that there are only twocolor chips in Color Film. Click on Back 1 Color to move the colors so they will combine. Select File Save As and name the file Magic Wand Block Digitizing. 2020 BERNINA of America. Permission granted to copy and distribute in original form only. Content may not be altered or used inany other form or under any other branding11
Magic Wand Fill Without HolesOpen the Artwork Click here for video:Lesson 4: Magic Wand Fill WithoutHolesNotes:Select New Blank Design.Select Insert Artwork.Navigate to Libraries Pictures BERNINA 8 Pictures Artwork.Open A East 006.jpg.Processing the Artwork In the Auto-Digitize Toolbox, select Magic Wand Fill Without Holes.Click on the artwork.In the Bitmap Artwork Preparation dialog box, click OK.Select To Fit in the Zoom Toolbar (or press the 0 key).Click on each turquoise area of the butterfly.Repeat for the purple sections of the body and the antennae.Press Esc.Open Color Film.Editing the Design Click on the turquoise color chip in Color Film.Click on the Lacework Fill icon.Deselect the wings.Click on each purple area of the butterfly while holding the Ctrlkey.Click on the Ripple Fill icon. Press Esc.Click on each antenna while holding the Ctrl key.Click on Backstitch Outline.Click on Bitmaps to hide the picture.Lesson covers: Magic Wand Fill Without Holes Adding OutlinesUse this tool for complicated pictures you want to simplify.When Fill Without Holes is used,right clicking on the picture will adda second fill instead of an outline.Adding Outlines In Color Film, select the butterfly wings.In the Edit Toolbox, select Outlines and Offsets.Place a check mark by Object Outlines.Uncheck Offset Outlines if it is selected.Select the color of the butterfly wings from the drop-down colorchoices. You will find the butterfly colors at the end of the colors in the palette. Select the butterfly wing color.Outlines & Offsets dialog box has beenupdated to include lots of choices ofOutline stitches.In the drop-down box by type, selectBackstitch.Click OK.Save the file as, Magic Wand Fill Without Holes. Close the file. 2020 BERNINA of America. Permission granted to copy and distribute in original form only. Content may not be altered or used inany other form or under any other branding12
Magic Wand CenterlineOpen the ArtworkClick here for video:Lesson 4: Magic Wand CenterlineNotes: Select New Blank Design. Select Insert Artwork. Navigate to Libraries Pictures Artwork Center-line. Open Row of Houses.Selecting Hoop Right click on the Show Hoop icon. From the drop-down Machine choices, select BER NINA 5 series.Select the BERNINA Mega Hoop.Select Foot #26.Make sure Show Hoop is checked.Click OK.Processing the Artwork In the Auto-Digitize Toolbox, select Magic Wand Centerline. Click on the artwork. In the Bitmap Artwork Preparation dialog box, there are two col-ors. Click OK. In the Zoom Toolbar, select 1000 from the drop-down choices. Click on the black line. You can right or left click, but make sure you click on the line.A double run continuous stitch is applied.Press Esc.Select File Save As and name the file Magic Wand Centerline.Select Save.Close the file.Lesson covers: Magic Wand Centerline Auto Start & EndUse this tool for black and white linedrawn images or colored imageswith a black outline around the image. On multi-colored images, afterprocessing the image, zoom in andclick on the outline that surroundsthe image. A double run (single outline stitch that stitches twice) will beadded to the outline.For scanned images, it is importantthat the colors be reduced to twocolors—black and white. You mayneed to edit the pictures in CorelPhotoPaint. 2020 BERNINA of America. Permission granted to copy and distribute in original form only. Content may not be altered or used inany other form or under any other branding13
Color PhotoStitchLoading photo: Click here for video:Lesson 4: Color PhotoStitchNotes:Select New Blank Design.Switch to Artwork Canvas.Select Insert Artwork.Navigate to Libraries Pictures.Select folder BERNINA 8 Pictures Artwork PhotoStitch.Select Cat Face and click on Import.Click on the screen and press Enter to place the graphic.Convert to Color PhotoStitch Switch back to Embroidery Canvas. While image is selected, click on Color PhotoStitch in the Auto-Digitize Toolbox. An Automatic Resize dialog box opens. If the size of the photo is too large, the photo will be automatical-ly resized during processing.Lesson covers: Color PhotoStitch Stitch Player Click OK in the dialog box that opens. Click on Adjust to adjust basic lightness and contrast by clickingand dragging the sliders to the right. Set Lightness to 3.5 and the Contrast to 10. Confirm with OK. Place a radio dot in front of High under Resolution for the mostFor best results, use crisp imageswith well-defined subjects and constantly varying shades.Use Corel Photo-Paint to touch upthe image for the full range of adjustment techniques.detail and the highest stitch count. Click OK to process the image. Activate Show Artistic View if it is not activated. Deactivate Bitmaps to see the result. 2020 BERNINA of America. Permission granted to copy and distribute in original form only. Content may not be altered or used inany other form or under any other branding14
Stitch Player Open the Stitch Player by selecting it on the toolbar, go to View Stitch Player or press Shift R. Adjust the speed by clicking and dragging on the slider arrow.Notes:The Stitch Player is a greattool to simulate the stitchout ofthe design. Typical Media Player buttons are available : Play Pause Previous Color Next color Beginning End Play Backward To redraw only a part of the design, specify the start and end stitchin the color bar using the triangle pointers on the color bar. To close Stitch Player, click on the Stitch Player icon again or pressStop. Select File Save As and name the file, Color PhotoStitch. 2020 BERNINA of America. Permission granted to copy and distribute in original form only. Content may not be altered or used inany other form or under any other branding15
PhotoSnapOpen a New File Click on the New Blank Design icon or select File New.Click here for video:Lesson 4: PhotoSnapNotes:Loading and Processing the Artwork Select Insert Artwork.Navigate to the BERNINA 8 Picture Folder Artwork.Select Hungarian Quilt.bmp. Open the file.If the hoop is visible, click on Show Hoop to hide the hoop.Make sure Proportional Scaling is in the locked position.Enter 130% in the value box.Press Enter to activate.Right click and drag on the image and make four quick clones.Place as shown. Don’t worry about alignment for now.Using Rulers and Guidelines Change the Measurement Units to U.S.If the rulers and guidelines are not showing, click on Show Rulersand Guidelines icon.Select the Options icon.Click on the Grid tab. Place a check mark in front of Snap to Guides. Click OK.Select the Zoom icon and click and drag a box close to the topof the design. Zooming in makes it easier to accurately placethe guidelines.Click on 0, 3.5, and –3.5 on the horizontal ruler across the top toadd vertical guidelines. Use the scroll bars on the right or belowthe design screen to move to the location to add the guidelines.Click on 0, 3.5, and –3.5 on the vertical ruler to add horizontalguidelines.Double click on each of the yellow triangles and change the value if needed in the Guide Position box. Click OK to close.Select the Zoom icon and right click on the design screen tozoom out.Press Esc.Using the illustration as a guide, align the outside corners of thepictures along the intersection of the corresponding outside corners of the guidelines by clicking and dragging the pictures inplace. The guidelines will change colors when the picture is onthe guidelines when Snap to Guides is activated.Applying PhotoSnap Select the first image.Click on the PhotoSnap icon in the Auto-Digitize Toolbox.Repeat the process for each of the images until all of them havebeen processed.Lesson covers: Quick Clone Using rulers & guidelines Applying PhotoSnap to a picture Editing PhotoSnap ZoomTo delete a vertical guideline, clickand drag the yellow triangle intothe vertical ruler.To delete a horizontal guideline,click and drag the yellow triangleinto the horizontal ruler. 2020 BERNINA of America. Permission granted to copy and distribute in original form only. Content may not be altered or used inany other form or under any other branding16
Changing Views and Customizing the WorkspaceNotes: In the Zoom Toolbar, select To Fit in the drop down box to see the Change the background color topreview the design on the sametotal design as large as it can be seen on the design screen.color fabric that it will be stitched Click on Design Background.on. In the drop-down Solid Color box, select White. In the drop down Color Inside Hoop box, also select White.In the Fill Stitch tab of Object Prop Click OK.erties, the type of stitch will be Right click on Show Hoop.listed as Photo Satin. Select BERNINA 7 or 8 series from the Machine choices. Make sure Show Hoop is checked. Select BERNINA Maxi Hoop, 210 x 400. Select Foot #26. Make sure Show Hoop is checked. Click OK. Click on Bitmaps to hide the artwork.Altering PhotoSnap Object Properties Select the first design. Double click to open the Object Properties dialog box or click onthe Properties icon. The first design will be left with the default properties of mediumresolution, light background, and 0 degree angle. Select the design to the right. Change the Resolution to Coarse and leave other properties atthe default setting; click Apply.default setting; click Apply.The Dark Background is most successful with high-contrast picturesand larger spacing between thecontrast colors.Select the lower right design.Change the Background to Dark; click Apply.S
Auto Digitizing colored art-work with outlines Editing Auto Digitized objects Applying Satin Special Changing Pull Compensation A number of different graphic file formats may be used with and are included in BERNINA Embroidery Software 8. With Auto Digitizing, all st