Transcription
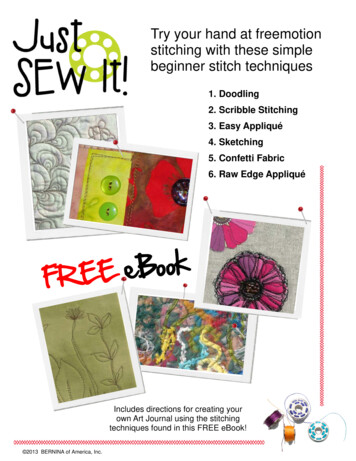
Try your hand at freemotionstitching with these simplebeginner stitch techniques1. Doodling2. Scribble Stitching3. Easy Appliqué4. Sketching5. Confetti Fabric6. Raw Edge AppliquékooBeEFREIncludes directions for creating yourown Art Journal using the stitchingtechniques found in this FREE eBook! 2013 BERNINA of America, Inc.
Freemotion Stitching TipsBefore You StartStabilized FabricFabric much be stabilized to accept freemotionstitching but there are a variety of ways to prepare it.One or more of these methods should be used toprepare the fabric for free motions stitching, Batting stabilizes the fabric and is oftenall that is needed, which makes it easyfor freemotion quilting. Embroidery stabilizers such as cut-away,tear-away and wash-away types work wellto stabilize fabric for freemotion stitching. Fusible fleece adds stability and support tofabrics; may also need to add a stabilizer. Hooping the fabric using a machine embroideryhoop is the traditional type of stabilizing and isoften used with other methods of stabilization.Always start with a new needle for the best stitchingresults.Use the hand wheel, Needle Up/Down button, orHalf-stitch foot control to pull the bobbin thread up tothe top of the work. This prevents the bobbin threadfrom tangling and creating a “bird’s nest” on thebottom of your work.Take 3-4 tiny stitches (almost in place) to secure thebeginning and ending of the stitching,Keys toSuccessful StitchingPlace one hand on each side of your work.Move the work front to back and side to side,NOT back and forth as if you were driving a car.Start practicing basic hand moments tomake the stitched lines and shapesshown at the left. When you can managethese, move on to simple shapes suchas puzzle pieces, stars, & leaves.Practice*RelaxPractice*BreathePractice*Have Fun!*Or use the BERNINAStitch Regulator! 2013 BERNINA of America, Inc.2 of 11
Freemotion Presser FeetThe vertical spring action of these BERNINA presser feet works with the hoppermechanism of the machine to hold the fabric in place, eliminating “flagging” (fabriccrawling up the needle) as you stitch.Darning Foot #9Teardrop Embroidery Foot #26Presser foot lifter is DOWNbut the sole of the foot doesnot touch the machine soyou can move the fabric. 2013 BERNINA of America, Inc.Embroidery Foot #15Freehand Quilting Foot #29/29CFreehand Embroidery Foot #24BERNINA Stitch Regulator #42As you take a stitch, thesole of the foot goes downto hold the fabric in placeas the needle pulls away3 of 11
Created by Susan BeckStitched Art JournalCreate an art journal to keep track of stitchtechniques and design ideas. The journaldetailed here is dedicated to FreehandEmbroidery Foot #24, featuring severalexamples of stitched art using this presserfoot. Created with six pages, more can beadded at a later date if desired.Finished size:6” x 9” for cover & 5” x 8” for pagesFreemotion Machine Settings Straight StitchFeed Dog LoweredUniversal Needle #80 unless otherwiseindicatedFreemotion Presser Foot (see below)See page 2 for Freemotion Stitching TipsSuppliesMachine & Accessories BERNINA 3 Series or 5 Series machine Freehand Embroidery Foot #24 Open Embroidery Foot #20/20C/20D Button Sew-On Foot #18Fabric & NotionsSpecific fabrics and notions are listed for each stitchexercise on the following pages.Freehand Embroidery Foot #24 was used for all of the stitch exercises shown on the following pages.The small sole with the cut-away opening in the front offers high visibility of the stitching area whichmakes it easy to follow drawn lines and appliqué edges. However, any of the BERNINA freemotionpresser feet shown on page 3, including the BERNINA Stitch Regulator #42, can be used. 2013 BERNINA of America, Inc.4 of 11
Front CoverBack CoverFreemotion Technique:Scribble StitchingFreemotion Technique:Scribble Stitching Print fabric, 10” x 10” Fuse ‘n Fleece, 10” x 10” Cotton or polyester thread Gesso & Paintbrush Permanent ink marker Small decorative button 3” square of fabric BasePaint over the area withgesso. It may be thinnedwith water if desired; canalso be used as a primerunder paint.fabric, 5½” x 8½”(can be pieced if desired) Fuse ‘n Fleece, 5½” x 8½” Cotton or polyester thread Assorted squares andrectangles of fabrics asdesired.Bond Fuse ‘n Fleece to the wrong side of the fabric.Place 1-2 layers of tear-away stabilizer on the fleeceside, using spray adhesive to adhere.Position in place on the background fabric, layeringas desired; glue stick in place.After the gesso is dry,draw or write over it witha permanent ink marker.Stitch the fabric pieces in place using basic backforth and side-to-side motions.Stitch on theletters or drawnobject as desired.Back with fusible fleeceor felt; scribble stitcharound the painted word.TrimcoverTo 5½”x 8½”.Using the pattern to theright, cut and fuse heartin place; freemotion stitchseveral times along theedge of the heart. Add abow using yarn, embroideryfloss or add a metal bowcharm. 2013 BERNINA of America, Inc.For additionalinformation onassemblingthe completefront and backcovers, seepage 10.5 of 11
Page 1Freemotion Technique:Doodle Stitching Two 10” squares of fabric One 10” square of batting Cotton or polyester thread 7 small merchandise tags 7 pieces of assorted fibers,ribbon, or yarn in varyinglengths from 12” - 20” 8” length of narrow ribbon Rubber bandMake a quilt sandwich with batting between the twopieces of fabric, wrong sides together. Use temporary spray adhesive to hold the layers together.Using the handwheel or needle stop down button,pull the bobbin thread up to the surface.Using a contrasting cotton or polyesterthread, make shapes as desired acrossthe surface of the fabric. Placing onehand on each side of the needle area,move the “quilt” sandwich front to backand side-to-side to form the shapes.Page 2Freemotion Technique:Easy Appliqué Background fabric, 5” x 8” Fuse ‘n Fleece, 5” x 8” Cotton or polyester thread Assorted squares andrectangles of beautifulfabrics as desired Assorted buttons Silk ribbon as desiredBond Fuse ‘n Fleece to the wrong side of the fabric.Cut out assorted sizes of squares & rectangles.Position in place on the background fabric asdesired; glue stick in place.Stitch inside the edges to follow the shape, creatinga “frame.” Stitch 2-4 rectangles, offsetting each onefor interest.Trim the stitchedfabric to 5” x 8” .Write one characteristics of doodling on each tag:Fun, Freemotion, Relaxing, Creative, Imaginative,Messy, Imprecise.Sew buttons in place asdesired using ButtonSew-on Foot #18.Double each fiber or cordand slip the folded endthrough the hole of a tag;thread the two endsthrough the loop and pullsnugly through the hole.Gather the cords in onehand and put the rubberband around them about2” from the top. Tie the ribbon around the fibers/cords to cover the rubber band.Tie silk ribbons asdesired on selectedbuttons.Hand stitch it to the page, near the upper edge,centered from side to side. 2013 BERNINA of America, Inc.6 of 11
Page 3Page 4Freemotion Technique:SketchingFreemotion Technique:Sketching Background fabric, 10” x 10” Fuse ‘n Fleece, 10” x 10” Cotton or polyester thread 1-2 layers tear-away stabilizer Fabric or paper for printing Background fabric, 10” x 10” Fuse ‘n Fleece, 10” x 10” Cotton or polyester thread 1-2 layers tear-away stabilizer Paper for printing the sketchthe labelBond Fuse ‘n Fleece to the wrong side of the fabric.Place 1-2 layers of tear-away stabilizer on the fleeceside, using spray adhesive to adhere.Bond Fuse ‘n Fleece to the wrong side of the fabric.Place 1-2 layers of tear-away stabilizer on the fleeceside, using spray adhesive to adhere.Nature elements are some of the easiest to sketchwith a needle. Using a pencil, pen, or marker, tracethe sketch on page 9of these instructions,starting at the lowerright edge and workingacross the bottom totravel in one continuous line, following theshape of the leaves.Go over the lines several times to familiarizeyourself with the paththe needle shouldtake. Note: If desired,use a fabric markerto draw the sketchendstartdirectly on the fabricto use as a pattern when stitching.Use the needle and thread to draw a recognizablemotif. The wood grain of a tree is represented in aseries of easy-to-sketch wavy lines.Working approximately in the center of the fabric,stitch the design following the same path as whenyou sketched.Using a pencil, pen, or marker,trace the sketch of the tree onpage 9 of these instructions.Go over the lines several timesto familiarize yourself with thepath the needle should take.Note: If desired, use a fabricmarker to draw the sketchdirectly on the fabric to useas a pattern when stitching.Working approximately inthe center of the fabric, stitchthe lines with thread usingFreehand Embroidery Foot#24. Stitch as continuously aspossible but stop when needed;tie-off and start in a new spot.When the stitching is complete, remove the stabilizer(some will remain) as completely as possible. Trimthe page to 5” x 8”, positioning the lower edge of thegarden about ¾” from the lower edge of the page.When the stitching is complete,remove the stabilizer (some will remain) ascompletely as possible. Trim the page to 5” x 8”,positioning the lower edge of the garden about ¾”from the lower edge of the page.Print the label from page 9 onto fabric or paper asdesired. Cut it out along the outer lines. Position itabove the garden and stitch it as described on theprevious page for Easy Appliqué.Print the small sketch of the tree shown on this pageand cut it along the outer lines. Position and stitch tothe page using the photo above as a guideline. 2013 BERNINA of America, Inc.7 of 11
Page 5Page 6Freemotion Technique:Confetti FabricFreemotion Technique:Raw Edge Appliqué Low-loft batting, 10” x 10” Assorted fibers and yarns Neutral colored tulle Background fabric, 10” x 10” Fuse ‘n Fleece, 10” x 10” Two identical shapes cutnetting, 10” x 10” Assorted scraps of fabric Variegated thread thatcoordinate with fabricsor paper for printingthe label Fabricfrom a print fabricCotton or polyester thread indesired color Cotton or polyester thread 1-2 layers tear-away stabilizer Paper-backed fusible web Stamped or printed words,“Dimension” and “Detail” Cover a piece ofbatting or felt withsnippets of fabricAdd pieces offibers on top ofthe fabric piecesBond Fuse ‘n Fleece to the wrong side of the fabric.Place 1-2 layers of tear-away stabilizer on the fleeceside, using spray adhesive to adhere.Cover with tulle;pin in placearound the edges of the fabric snippets.Stitch around the petals of the flower, adding additional stitches in the center and around the outeredges to add detail and dimension to it.Stitch over thetulle, through alllayers, coveringthe surface ofthe fabric witha continuousline of stitchingsimilar to thesketch below.Roughly cut the wordsinto individual letters.Place the on the pageas desired, spelling thetwo words. Use gluestick to hold them inplace. Randomly stitchover the letters, makingsure you stitch through each on at least once.Trim the confettifabric to 5” x 8” tomake the journalpage.OptionalAdd seed beads to the center of the flower. PositionFoot #24 over the desired area with the needle aboutOne bead width away from the desired position. Putthe needle (size 60 or 70) into the hole of the beadand take 1-2 stitches. Move the needle to the desiredposition and take1-2 stitches. Thiswill turn the beadon its side so theholes are not visible.Continue until thedesired number ofbeads are stitchedand then sew inplace to tie off thestitching.Adhere the shapes to the background fabric usingfusible web following the manufacturer’s direction.Print the Confetti headerfrom page 11 onto fabric orpaper as desired. Cut it outalong the outer lines. Position it at the top of the pageand stitch it along theedges.Note: Instead of using tulle, cover the snippets withwater-soluble stabilizer and rinse it away after thestitching is complete. 2013 BERNINA of America, Inc.8 of 11
All items on this page areshown in actual size to beused on the pages of theStitched Art Journal.How does yourgarden GROW? 2013 BERNINA of America, Inc.9 of 11
Book AssemblyInner and Outer CoversTechniques:Blanket Stitch AppliquéCouching Two pieces of felt, 13” x 9” each, one forthe outer cover & one for the inner coverTemporary spray adhesiveCotton or polyester thread3-6 pieces of yarn or fibers, 20” eachOpen Embroidery Foot #20/20C/20DBraiding Foot #21 for making custom cordOuter CoverFind the center of the piece of felt and mark a lineabout ½” on each side of it for the spine of the book.Position the front cover on the right side of the feltand the back cover on the left as shown .Attach Open Embroidery Foot #20/20C/20Dto the machine and select the Blanket Stitch, Usethe default settings or adjust as desired. Adjust theneedle position to the far right.Couch 3-6 strands of yarnor cord down the center ofthe spine using Open Embroidery Foot #20/20C/20Dand a zigzag stitch (2mm3mm for length a widthsetting that is wide enoughto go over the cord).The excess length of the cord will become a bookmark. Braid the cords together & tie end into a knot.Inner CoverPlace the second piece of felt on the wrong side ofthe outer cover using temporary spray adhesive tohold them together.Edgestitch along all 4 edges using a straight stitchand Open Embroidery Foot #20/20C/20D.Stitch along all four sides of the front cover, aligningthe fabric edge with the inside toe of Foot #20.Repeat for the back cover.Finish the cover by couching a cord along the edgesusing a zigzag stitch (2mm-3mm for length a widthsetting that is wide enough to go over the cord). Thecord will go next to the appliquéd covers, sitting onthe “lip” of felt. Note: See below for directions tomake custom cording.Custom CordingFeed one or more yarns into Braiding Foot #21.BackCoverFrontCoverZigzag over the yarn with azigzag stitch to cover the yarn.Start with an open stitch wideenough to go over the yarn.Stitch a second time with ashorter stitch length. Continuestitching over the yarn, varyingstitch settings and threads asdesired. 2013 BERNINA of America, Inc.10 of 11
Book AssemblyFrom felt, cut one binding strip for every two pages.Cut each strip 1½” x 8” (3 strips for the journal).Turn the book over, again to pages 2 and 3. Positionthe seam down the center of the inside cover; pin.Place two pageswrong sides together.Insert a felt bindingstrip between thetwo pages alongthe edge to bebound, leavingabout 1” extending.Pin the layerstogether.Stitch-in-the-ditch using Open Embroidery Foot#20/20C/20D to secure the pages to the cover. Thestitches will be hidden in the yarns that are couchedon the right side of the spine.Zigzag along allfour edges of eachpage, joining thetwo pages andsecuring the bindingstrip in the process.Stack the pages and sew together on the bindingstrip, about in the center.Stitch the binding strip a second time on pages 2and 5 only. Sew on the felt next to the fabric edgeas shown. Securing these pages to the coverencloses the seam allowances of the binding strips,giving a finished look to the inside of the book wherethe pages are attached.Open the book to pages 2 and 3. Turn it over andpress the seam open.Visit bernina.com for other Just SEW It eBooks! 2013 BERNINA of America, Inc.11 of 11
Fabric & Notions Specific fabrics and notions are listed for each stitch exercise on the following pages. Create an art journal to keep track of stitch techniques and design ideas. The journal detailed here is dedicated to Freehand Embroidery Foot #24, featuring