Transcription
Mini 4-HSEWINGAn Introduction to 4-HFor Youth in Grades K - 2A replacement manualwill cost 1.00.Purdue University is an equal access/equal opportunity institution.
Developed by Purdue Extension-Elkhart County17746 County Road 34 Ste E, Goshen, IN 46528, 574-533-0554Elkhart County Mini 4-H Sewing ManualRevised January 20192
4-H FactsThe 4-H Symbol: A four leaf clover withan “H” in each leaf.4-H Colors: Green and WhiteThe 4-H Motto: To make the best better!The 4-H Pledge:I PledgeMy Head to clearer thinkingMy Heart to greater loyaltyMy Hands to larger serviceMy Health to better livingFor my Club,My Community,My Country,and my World.3
Mini 4-HWelcome to Mini 4-H! You are now a member of the Elkhart County 4-Hfamily! We hope that you will have lots of fun learning new things in your 4-Hcareer.Mini 4-H is designed for youth in Kindergarten through Second grade. It will giveyou a taste of the 4-H program as well as help you to explore a variety of projectareas.Mini 4-H’ers may enroll in one project each year. This manual contains fun, ageappropriate activities to complete throughout the 4-H year. These activities willhelp you to learn about the project you have chosen. Additionally, the manualcontains all instructions for the exhibit you will be preparing for the ElkhartCounty 4-H Fair in July.There is no competition in the Mini 4-H program. Each child who completes aproject for the Fair will receive the same blue completion ribbon, certificate and4-H pin. Judges comment sheets are provided only as a way to help you do yourvery best on future projects.Mini 4-H does not have regular monthly meetings. Try to attend the specialactivities planned especially for YOU! These will give you a chance to meet theproject leaders, have some hands-on fun, and ask questions about yourimportant Fair display. Mini 4-H is FUN! You will enjoy it.Once you enter the third grade you can join a regular 4-H club that meetsmonthly. You must enroll each year of your 4-H career.If you have questions about the Mini 4-H program, please call the PurdueCooperative Extension Office at 574-533-0554. We will be happy to answer yourquestions.As a Mini 4-H parent, please help guide and encourage your child throughthe activities. Work with them to help them to “learn by doing”. Activitiesare designed to help your child learn about the project they have chosen. Itis not required that they complete all the activities. Choose those thatinterest you and your child. Only one may be submitted for Fair “judging.”4
Why do I need to know how to sew?Sewing is an important skill to know. Sometime in your life a button will fall off ora favorite pair of pants will get a hole in the pocket. You will need to repair themand you will be glad you know how to do some simple sewing. Also, sewing is agreat way to create way to create beautiful items like quilts, decorative pillows,aprons and dresses to decorate and enhance your home or wardrobe.You do not need a sewing machine to do this project. There are choices for you,if you would like to use a machine to sew.Important Tips for Sewing Before you start, make sure your hands and work station are clear ofanything that could soil your beautiful fabric. Don’t be in a rush when you sew. This is how mistakes happen. Make sure you have good posture and are sitting in a chair with a back onit so you do not tire out. Sit where there is lots of good light. Always clean up your work station when you are done and put your workin a safe spot. It is a good idea to have an adult help you press your fabric before startingyour project.5
Activity 1- Sewing Kit & Handmade Pin CushionA sewing kit is a box that will keep all your sewing tools together and safe untilyou need to use them for a project or repair. A pin cushion is used to store yourpins safely while not in use. Always make sure your pins make it back to yourpin cushion. Nobody likes finding a pin on the floor with their foot.Materials for Sewing Kit:Sturdy Box – to hold your sewing tools.Scissors – for trimming and clipping. Small pair works best.Pins – for holding fabric together and steady while you sew.Thread – good to match your thread color to your fabric color.Thimble – choose the right size to fit your pointer finger.Tailor’s Chalk – use it to mark the lines you want to sew or cut.Needles – ones that you can use with regular thread (size #7 or #8).Ruler – a six inch ruler to check hems or seam margins.Measuring Tape – used to measure while sewing. A coated tape is best.Embroidery Needle – Large needle that can be used with embroidery floss.Stitch Ripper – helps remove machine made stitches when a mistake is made.Pin Cushion – stores pins safely between projects.Once you have selected your sewing box, decorate it however you like! Make itpersonal. You can cover it with fabric, paper, add stickers, trim, spray paint orhand paint. Place all your items inside. Make sure they fit and your box willclose.You can follow the instructions for a pin cushion on the following page or make apin cushion from a different pattern. Pinterest has lots of cute ideas if you wouldprefer to make a different style.6
Materials for Pin Cushion.2 – 4” x 4” pieces of fabricPoly-filButtonNeedle and thread OR sewing machine1.2.3.4.5.6.Cut out 2 – 4” x 4” pieces of fabric.Place the fabric right side together.Sew three sides and leave one end open.Turn inside out so you can see the right side of the fabric.Stuff with poly-fil.Tuck in the edges and whipstitch the open edge closed.For machine sewing you will follow the same instructions, but to close tuck in theedges and zig zag or straight stitch.7. Sew button in the middle.What did you learn?Were there lots of choices for sewing notions? Why did you choose the onesyou bought?What tools do you think you will use the most?What else could you put in your sewing box that would be useful?7
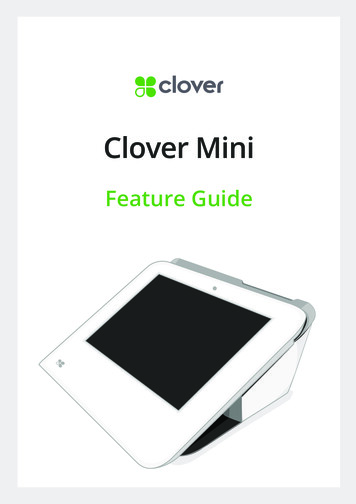
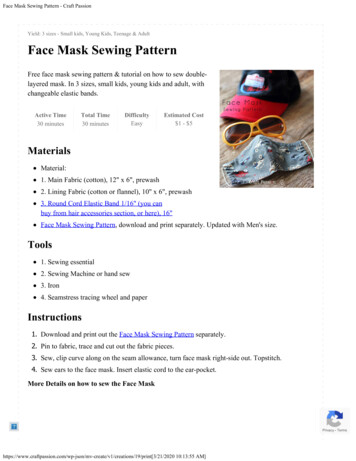
Activity 2 – Travel Tic Tac Toe BoardMaterials:2 – 6” squares of fleece or feltRulerTailor’s ChalkEmbroidery ThreadEmbroidery Needle10 buttons for play (5 buttons of 2 different colors)OR3 buttons of one color for display only1. Stack the two pieces of felt on top of each other.2. Using your ruler and chalk, draw a line 2” from each of the 4 edges. Thiswill make the 4 lines that make a tic tac toe board.3. Cut a piece of embroidery thread, knot end and thread needle. Stitch arunning stitch along the chalk lines. After stitching all 4 lines, sink acouple stitches in place to secure floss. Snip off any excel thread.4. The board is ready for play!For display at fair – sew three buttons on the board in a line to show off your tictac toe! (You can snip them off later to use the board for play.)Photo credit parents.com8
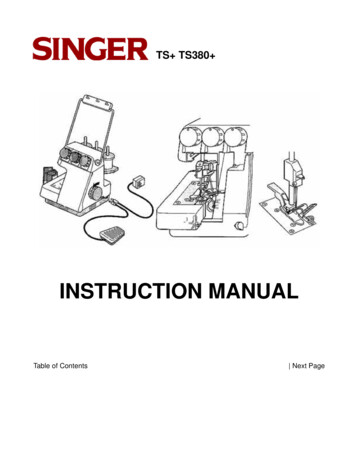
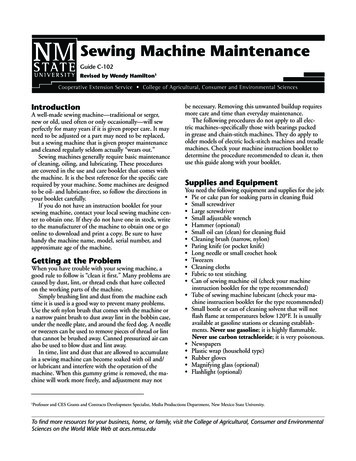
What did you learn?How did you keep your lines straight?Was it hard to sew on your buttons? Did you use 2 hole or 4 hole buttons?How did you attach your buttons (4-hole)? In an X pattern or a ll (parallel)pattern?Activity 3 – Embroidery Hoop AppliqueApplique is a technique that is a great way to practice your hand stitches andmake a cool piece of art. Learning how to apply fabric on top of other fabric canhelp in the future with a practical application like patches on clothes or a funapplication like quilting.You can use different stitches to attach your fabric pieces. Two basic ones arethe running stitch and the whip stitch.Running Stitch: Stitching goes in and out from bottom to top to bottom to top.Looks like dashes and can be use anywhere.Photo credit to autospecsinfo.com9
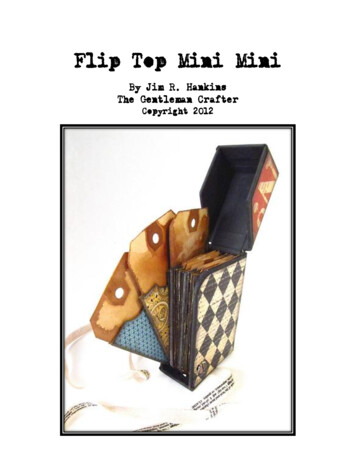
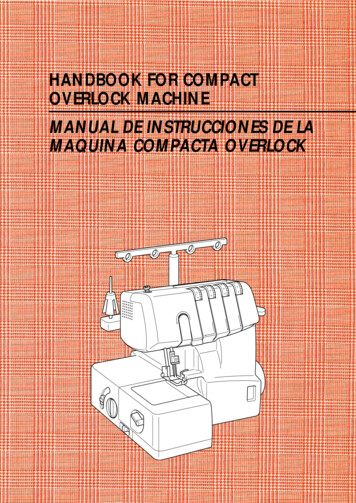
Whip Stitch: A whip stitch is a simple looping stitch often used inside garmentson hems. Stitching always enters the same side of fabric while working along theedge. This stitch is used on the edge of fabric. They kind of loop around theedge.Photo credit to sidneyeileen.comMaterials:Embroidery hoop (no larger than 10”)Fabric (fat quarter)Felt or other fabricEmbroidery flossEmbroidery needleScissorsRuler1. Cut your fabric in a circle 1” - 2” larger than your hoop. Unscrew top hoopand separate. Place fabric over inner hoop and then place outer hoopover top. Tighten screw to secure fabric. After screw is tightened, youcan gently pull on fabric ends to make it taut. This hoop is now ready tosew on.2. Cut a design out of your felt (or other fabric). You could cut out a heart,circle or other shape. For advanced sewers, you could cut out multiplepieces to attach and make a scene or a layered picture (like a 3D flower ora dog’s face).10
3. Tie a knot in the end of your embroidery floss and thread your needle.Place felt piece on the fabric on the hoop. Start your stitch from the backcoming up through the fabric. This will hide your knot. Running stitcharound the edge of your felt piece until it is completely attached. Finishwith thread in back. Tie off ends.Photo credit to boredart.comWhat did you learn?What kind of skills did you use?Where could you use this kind of applique technique in the future?Did you use any stitches other than a running stitch?11
Activity 4 – Machine Sewn PlacematMaterials:Two pieces of woven fabric (13” x 19” each)Sewing machinePinking shears (optional)1. Cut fabric to correct size. Place the two pieces together right side out.(Print side out, wrong sides should touch). Pin the two pieces together tokeep it from sliding while you sew.2. Sew together leaving a 1” margin. (You can find this on the guide on yourmachine. Keep the edge of your fabric on the guide marking. Sew all 4sides.3. Finish the edges. You can either use pinking shears to finish the edge,which will cut a zig zag in the fabric to minimize fraying of the weave ORyou can fringe the edges by hand. (A woven fabric will leave a fringewhen you pull threads from the cut edges.) Pull all threads from the edgeof fabric to the stitching.Things to know before beginning:Wovens are fabrics like burlap, duck and calico quilting fabric. Woven is how thethreads make up the fabric. These threads weave in and out of each other in avertical and horizontal pattern. The do not have a lot of stretch when you pullside to side. Burlap has a very loose weave and will be simpler to make a fringewith, but harder to finish with pinking shears. Simple calico will have a tighterweave and will be better finished with pinking shears than fringing. You candecide what is best for your selected fabric.Knits are fabrics that are made to move and use a loop-type weave to make upthe fabric. These will not fray. They are fabric like t-shirt fabric or fleece. Theywill usually roll at the edges when pulled taut.Be aware of these when you select your fabric for the placemat.12
1. Make a fringe by pulling out all the threads between the stitching andthe edge. It is best to pull threads out one at a time.2. Press your placemat.What did you learn?What kind of Woven did you choose? (Burlap, Calico, Duck)Was it difficult to pull the threads? Or did the edge fray after you cut the edgewith pinking shears?Did you use one or two different fabrics on your placemat? What color or patterndid you choose?What was the hardest thing about using the sewing machine?13
What to ExhibitSEWINGComplete one of the following for your fair exhibit.1. SEWING KIT & HANDMADE PIN CUSHION: ActivityYour sewing kit includes your decorated box and the tools you havecollected for basic sewing. This includes your hand made pin cushion.Attach Exhibit Tag and Record Sheet to the bottom of the kit.2. TRAVEL TIC TAC TOE BOARD: ActivityYour completed travel board must be mounted on a poster board. Yourposter must be 11 x 14 inches, displayed horizontally (wider than it istall) and attached to a stiff backing (like cardboard or foam board).Your poster must be covered with clear plastic or a poster sleeve. Yourposter must have a title. Attach Exhibit Tag on front of poster/bottomright hand corner. Attach Record Sheet to back of poster.3. EMBROIDERY HOOP APPLIQUE: ActivityYour embroidery project will be displayed in your embroidery hoop. Itwill be hung from a peg board. Attach Exhibit Tag and Record Sheet tothe back of the hoop.4. MACHINE SEWN PLACEMAT: ActivityYour placemat must be folded in half and mounted on a poster board.Your poster must be 11 X 14 inches, displayed horizontally (wider thanit is tall) and attached to a stiff backing (like cardboard or foam board).Your poster must be covered with clear plastic or a poster sleeve. Yourposter must have a title. Attach Exhibit Tag on front of poster/bottomright hand corner. Attach Record Sheet to back of poster.NOTE: If you are unable to pick your project up on project Release Day,the Sunday or Monday following the close of the fair, please makearrangements to have it picked up. All projects must be removed from theexhibit building on that day and there is no available storage space forunclaimed projects.No oversize posters will be accepted forexhibition.All projects must include: (both are foundon page 15) Record Sheet (attached to the back of the poster board ORbottom/back of the exhibit) Exhibit Tag (attached in the lower right front corner of theposter board OR bottom of exhibit)14
Mini 4-HExhibit Tag:NameCity GradeSchoolSEWINGRecord Sheet---------------------------------------Cut here----------------------------------------Name GradeWhat I made?How much time did you spend on this project?What kind of fabric did you use?Color? Cost?Who helped you with your project?What do you like about sewing?15
16
2. Sew together leaving a 1” margin. (You can find this on the guide on your machine. Keep the edge of your fabric on the guide marking. Sew all 4 sides. 3. Finish the edges. You can either use pinking shears to finish the edge, which will cut a zig zag in the fabric to minimize f