Transcription
4-H SEWING PROJECTREFERENCE GUIDEUpdated March 2014
The 4-H Motto“Learn to Do by Doing”The 4-H PledgeI pledgeMy Head to clearer thinking,My Heart to greater loyalty,My Hands to larger service,My Health to better living,For my club, my community, and my countryThe 4-H Grace(Tune of Auld Lang Syne)We thank thee, Lord, for blessings greaton this, our own fair land.Teach us to serve thee joyfully,with head, heart, health and handAcknowledgements: Adapted from the BC 4-H Sewing project and BC Agriculture, and the NovaScotia 4-H Sewing Project, 1997.Compiled by: Jade ReevePublished by:Canadian 4-H Council Resource Network, Ottawa, ONDate: Copyright 2014 4-H Canada
4-H SEWING PROJECT – REFERENCE GUIDE – TABLE OF CONTENTSIntroduction . 1Objectives . 1How to get the most from the 4-H experience . 2Equipment required . 2Sewing Box: . 3Cutting Supplies: . 3Pins and Needles: . 3Sharp Sewing Aids: . 3Sewing Machine and Serger:. 4Machine Use:. 4Pressing Safety:. 4Lighting: . 5Electrical Safety:. 5THE BASICS - Sample Meeting Agenda . 61. Tools of the Trade – Introductory (Core) . 7What we’ll learn in this section . 7Basic sewing notions . 7The sewing machine and its parts . 10Presser feet for the sewing machine . 102. Basic Sewing Techniques – Introductory (Core) . 13Construction Zone . 13Sewing by Hand: Practice with fabric scraps – simple stitches . 13Sewing by Machine: Practice on paper - straight lines and circles . 16Pressing . 18Tools for pressing . 18How to press and iron . 18Make It: – Envelope-style Pillow cover. 183. More Tools of the Trade – Intermediate (Core) . 23Tools of the Trade . 23What we’ll learn in this section . 23The Serger . 234.Sewing Techniques – Intermediate (Core) . 29Construction Zone . 29What we’ll learn in this section . 29Making Buttonholes . 29
Inserting Zippers . 305. Recycling and Upcycling – Intermediate / Advanced (Supplementary) . 406. Clothing for people with special needs – Advanced (Supplementary) . 477. Linings, Interlinings and Underlinings – Advanced (Core) . 488. First steps in patchwork – Advanced (Core) . 49Introduction to patchwork . 499. Tailoring Techniques – Advanced (Supplementary) . 56Construction Zone . 59THE NEXT STEPS - Sample Meeting Agenda . 601. Patterns – Introductory (Core) . 61Measuring Up! . 61Choosing a pattern. 64Buying Fabric . 65Preparing the pattern pieces . 662. Alter a Pattern – Introductory (Core) . 69Construction Zone . 69Basic Pattern Alterations . 69How to layout the pattern pieces and cut the fabric. 72Marking pattern pieces . 73Following Pattern Directions. 73Make It: Drawstring shorts or pants . 743. Fit and Fabric – Intermediate (Core) . 76How to determine if a garment is the right fit . 76Simple seam alterations . 77Altering a pattern . 774. Fibres, Fabrics and Finishes – Intermediate (Supplementary) . 79Fibres . 79Fabrics . 795. Interfacing – Intermediate (Core) . 80Different Types of seams . 81Finishing seams . 816. Construction Zone – Intermediate (Supplementary). 85Make It: Fleece mittens . 85CLOTHING TLC - Sample Meeting Agenda . 861. Clothing Care – Introductory (Supplementary) . 87General Clothing Care . 87Laundering Basics. 88
Clothing Storage . 922. Buying and Maintaining Your Clothing – Intermediate (Supplementary). 93Being a good clothing consumer. 93How to repair, mend and make minor alterations to your clothing . 943. Colour Coordination and Wardrobe Planning – Advanced (Supplementary). 98Making colour, texture and design work for you . 98Texture . 100Design . 100Wardrobe Planning . 102
4-H SEWING PROJECT - INTRODUCTION4-H SEWING PROJECTIntroductionPeople wear clothing for a number of reasons: modesty, survival, fashion and identification. Clothingprovides clues as to who we are and what we do and allows us to express our identity. Choosing tosew our own clothes and to sew projects for the home has numerous benefits. Knowing how to sewallows us to: Make the clothes and accessories we wantSave moneyLearn a new hobbyHave funMake things for other peopleFeel a sense of accomplishmentAlter, repair and recycle clothingThe topics within the sewing project are divided into three levels: introductory, intermediate, andadvanced.Introductory topics are designed for members with little or no sewing experience and will teach thebasics of sewing by hand and by machine. After completing the introductory topics of the sewingproject members will have the skills necessary to sew clothing, accessories and items for the home.The intermediate topics build on the skills learned from the introductory topics and are designed formembers who are able to read and follow patterns and are ready for more challenging projects. Bycompleting the intermediate sections of the sewing project members will have the skills necessary tosew clothing, accessories and items for the home.The advanced topics encourage participants to continue to develop their skills in order to learn howto sew tailored clothing as well as to learn how to personalize their wardrobe in order to reflect theirown personal style. By completing the advanced topics, members will have the skills necessary tosew clothing, accessories and items for the home.Core topics that all members must complete have been identified for each level (and are markedwith aicon. Supplementary topics are included to help Leaders to provide variety for their cluband provide flexibility so content can be included to suit the skills and interests of club members.These topics are marked with aicon.Sample agendas have been included at the beginning of each major section as a resource.ObjectivesUpon completing the introductory topic, members should be able to: Know the basic notions needed to start sewing Understand the parts of the sewing machine and how they work Know how to sew by hand Prepare fabric for sewing Know how to use a sewing machine4-H SEWING PROJECT – RESOURCE GUIDE1
4-H SEWING PROJECT - INTRODUCTION Know how to press and iron Understand basic laundering techniques Make basic pattern alterations Layout and cut the pattern from fabric Follow a pattern when sewingUpon completing the intermediate topics, members should: Understand the parts of the serger machine and how they work Recognize different kinds of needles used in sewing machines Be familiar with different presser feet for the sewing machine Know how to make buttonholes and insert a zipper Understand how to fit a garment Know how to alter a pattern and make simple seam alterations Understand the use of interfacing Know how to finish seamsUpon completing advanced topics, members should: Know how to recycle and upcycle fabric and clothing Understand the basics of sewing for people with special needs Be familiar with linings, interlinings and underlinings Have knowledge of basic tailoring techniques Know the basics of patchwork Understand how colour, texture and line can be used to their advantage Know how to design their wardrobeHow to get the most from the 4-H experience Attend club meetings Complete activities Listen and ask questions Participate in discussions Achievement requirements Complete your record bookEquipment requiredEach member will need:2 Access to a sewing machine that is in good working condition Sewing notions: scissors, pins, sewing needles, sewing machine needles, measuring tape,bobbins, seam ripper, all-purpose thread An iron and ironing board4-H SEWING PROJECT –RESOURCE GUIDE
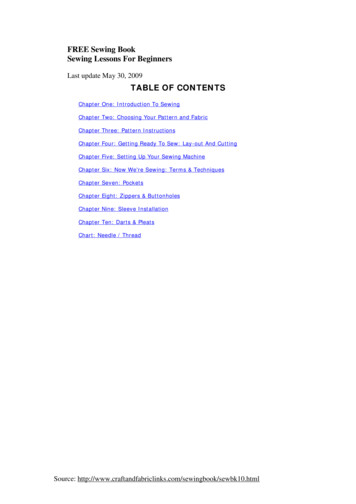
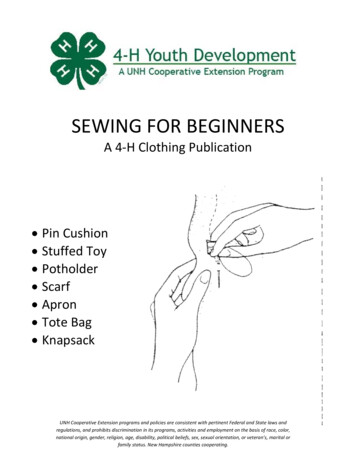
4-H SEWING PROJECT - INTRODUCTIONSEWING SAFETYFor introductory, intermediate, and advanced levels (Core)This section has been adapted from the Nova Scotia 4-H Leader’s Manual Sewing Project – 1997.Planning for a safe sewing project is important and that's what this section is all about. Members areencouraged to practice these points throughout their project year.Sewing Box:Keep all the sewing supplies in a sewing box. Use a sturdy box (hard plastic or shoe box) rather thana plastic grocery style bag. Sharp objects can pierce the bag causing injuries orlost items.Cutting Supplies:a) Scissors or Shears-- Sharp scissors are a must for cutting or trimmingfabric. Keep fingers away from the blades when cutting. Keep scissors orpinking shears closed and stored in a case, when not in use. When youpass them to another person, always pass the handles first.b) Rotary Cutter-- Use the special plastic mat so that the surface under the fabric is notdamaged. The blade is sharp so do not put your fingers too close. When finished with thecutter be sure the guard is in place, covering the blade.Pins and Needles:Keep pins & needles in a safe and convenient place. Never put them in your mouth because you mayswallow or inhale one, especially if you are startled or move suddenly. Putting them in your clothingcan cause scratches or they can stick into you. Always check carefully for pins on the floor, a personor pet may get one stuck in their foot.Carry or store pins in a tightly covered container or a pincushion. Pinswill easily stick to a magnetic pincushion or pin catcher placed nearthe sewing machine.The traditional pincushion (tomato shaped) is good; however, once thefabric covering starts to wear, the pins and needles easily fall out.A proper fitting thimble prevents the needle from puncturing your fingers. A needle threader helpsprevent eyestrain if you have difficulty threading the needle.Sharp Sewing Aids:Tracing wheels are available with smooth or serrated edges. When marking tracing lines, keep yourfingers away from the blades.The pointer or creaser, awl and hoop turner are all sharp objects so be careful not to punctureyourself with them. When not in use store them in safe place.4-H SEWING PROJECT – RESOURCE GUIDE3
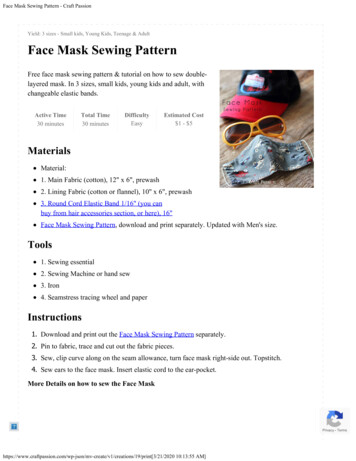
4-H SEWING PROJECT - INTRODUCTIONPOINTER OR CREASERHOOP TURNERAWLImage from:http://www.threadsmagazine.com/A seam ripper can be used to remove stitches. Never use razorblades; they are too dangerous.Sewing Machine and Serger:Follow these steps to prevent any damage or costly repairs. Before sewing, make sure the machine/serger is in goodworking condition and you understand how to use itproperly. The machine/serger should be placed on a sturdy table orcabinet, set close to an electrical outlet. Use an extensioncord only temporarily. Keep the machine's cord out ofpeople's way. Make sure the light is working to prevent eyestrain.Figure 1: Seam Ripper - Image fromhttp://commons.wikimedia.org/wiki/File:Seam ripper.jpgMachine Use: Use slow speed when learning how to use the machine. Keep fingers away from the machine's needle or cutting blades on the serger. Do not lean your face too close over the needle, if it should break a piece could fly up intoyour eye and cause an injury. Use pins with large heads so they won't get lost in the fabric. Remove pins as you get close tothem to prevent bending of the pins, the needles breaking, or damage to the serger blade. When finished sewing, make sure to turn off the light and put the needle and the pressurefoot down. Disconnect the cord from the wall outlet and then from the machine. This ensuresthere is no extra power that might cause a problem. Close the machine carefully and replacethe cover.Pressing Safety: 4Handle your iron with care. If it is a steam iron fill with water before plugging it in. Do notoverfill because it could boil over possibly scalding your arm or hand. Use distilled water ifrecommended by the manufacturer. Only touch the iron on the handle. Keep hands awayfrom steam and soleplate, you could get a painful burn. Do not let the cord dangle off theironing board. It could get caught and pull the iron off onto you or onto the floor. If the irondoes fall off, unplug it and have it checked before using it again. A fall can cause the insidesof the iron to become loose so it will not work properly and cause a fire.4-H SEWING PROJECT –RESOURCE GUIDE
4-H SEWING PROJECT - INTRODUCTION Rest the iron on its heel on a solid surface. Leaving itflat on it's soleplate on the ironing board can scorch thecover or start a fire if left alone long enough. Keep the soleplate and the steam holes of the ironclean. If the steam holes contain dirt it could spitcausing it to burn or soil the fabric. When finished ironing, turn it off and unplug the iron.When cool, store it in a protected place.Lighting: Image from:http://commons.wikimedia.org/wiki/FIt is important to have proper light when you are working. It willprevent eyestrain and it isile:PlanchaderopaPhilipsGC2520easier to see what you are doing. Without the proper light youcould stick a pin in your handfrontview.JPGor finger; burn yourself with a hot iron or cut yourself with a sharpobject.Electrical Safety: Always unplug electrical equipment before cleaning or repairing it. Never plug two or more pieces of equipment into one outlet. This overloads the fuse,producing heat, which can destroy the wires, causing a fire. If fuses blow or circuit breakerstrip repeatedly, call the electrician. Never use frayed or cracked cords; exposed wires can cause a fire or give you a shock. Use extension cords temporarily. Never run them under doors, carpets, rugs or mats. If youmust use an extension cord, never use one that is smaller in diameter than the cord of theelectrical appliance you are using.4-H SEWING PROJECT – RESOURCE GUIDE5
4-H SEWING PROJECT – THE BASICSTHE BASICSTHE BASICS - Sample Meeting AgendaWelcome, Call to Order &Pledge10 minRoll Call5 minPublic Speaking ActivityActivity - Get to Know Each Other Game (ofLeader’s choice)10 minParliamentary ProcedureElect executive, hand out Record Books20 minand discuss club requirements. Fill out cluband member information in Record Books,and have each member fill out their“Member Expectations and Goals” page.Topic InformationDiscussion:20 minSewing SafetyBasic Sewing Notions and the SewingMachine & its PartsActivity Related to TopicI’ve Got a Notion30 minTopic Information DiscussionBasic Sewing Techniques (includespractice of sample stitches)20 minWrap up, Adjournment &Social Time!Take Home Activity65 minEverything in its Place4-H SEWING PROJECT –RESOURCE GUIDE
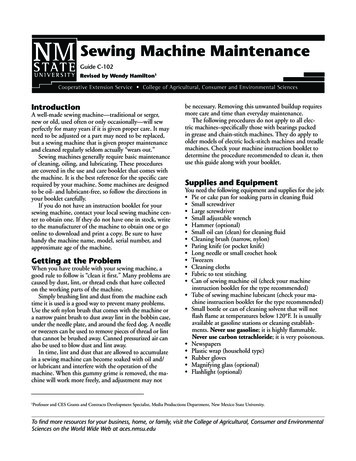
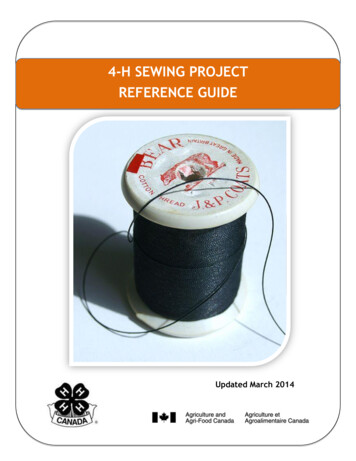
4-H SEWING PROJECT – THE BASICS1. Tools of the Trade – Introductory (Core)There’s lots to learn as we begin to sew so let’s get started!Every hobby has its own specialized tools and terms and sewing is no different. It’s important tounderstand the terms and to know how the tools and equipment works before we start to sew.What we’ll learn in this sectionIn this section we will learn about: The basic notions needed to start sewing The parts of the sewing machine and how they workBasic sewing notionsWhen looking at the notions in the fabric store it is easy to get overwhelmed by all the choices. Don’tpanic! There are only a few notions that are necessary to have when learning to sew. Other notionswill be added as we learn more skills and take on more complicated projects but for now we justneed scissors, pins and a pincushion, sewing needles, sewing machine needles, measuring tape,bobbins, seam ripper and all-purpose thread. It is also useful to have a container to keep all ournotions in one place.Hand sewing needlesHand sewing needles have differentthicknesses, lengths, points and eye sizes.There are numerous types of hand sewingneedles and the most common are sharps,betweens, embroidery or crewel and ballpoint.The common hand sewing needles areavailable in sizes from 1 – 12, 1 being thethickest and longest and 12 being short andfine. Each type of needle is designed to workwith specific fabrics and threads.Figure 2: Basic sewing notions - ewingtools-and-supplies/ Sharps – used most often for handsewing. They have a medium lengthand a sharp point and a round eye Betweens – also known as quilting needles, they are a shorter needle with a small, round eye Ballpoint – have a rounded point and are used for knits Embroidery/crewel – the same length and sharp point as a sharp needle but they have alonger eye which allows for thicker thread or ribbonSewing machine needlesThe needle may be the most important part of the sewing machine. Using the proper combination ofneedle and fabric will make a difference in the quality of your work. It is also important to make sureyour sewing machine needles are not damaged as that could cause torn fabric or skipped stitches. Agood rule of thumb is to change your needle before you start each project.4-H SEWING PROJECT – RESOURCE GUIDE7
4-H SEWING PROJECT – THE BASICSFigure 3: Anatomy of a sewing machine needleThere are six basic sewing machine needle types:1. Universal – Has a slightly rounded point and is used for both knits and woven fabrics2. Ballpoint – Has a rounded point, which pushes aside fabric threads instead of piercingthem. Used for sewing heavy, loose knit fabrics.3. Stretch – Similar to the ballpoint needle but the point is a little less round. For sewingknits and knit fabrics containing lycra.4. Sharp - Pointed needle used on woven fabrics such as microfiber, polyester and silk5. Leather – Has a cutting point and cuts the fabric rather than simply piercing it. Is usedon coarse materials such as leather and vinyl.6. Twin or Triple – There are two or three needles on one shaft and can come in a variety ofpoints. Used for decorative stitching, topstitching and for hemming T-shirts and fleecefabrics.The Schmetz needles website (http://www.schmetzneedles.com) has a very useful guide to helpdecide which needle should be used with each type of fabric.Cutting ToolsGood quality cutting tools are an important part of your sewing tools. They will last for years if usedonly for cutting fabric and sharpened regularly. The following tips are good to remember when usingyour cutting tools Never cut more than two layers of fabric at one time and be sure to keep all pins out of theway. Keep your shears oiled. Place a drop of oil whenever necessary near the screw. Keep the joint free from lint and fluff. Never try to sharpen scissors or shears yourself- its best to have them professionally done.To ensure accurate cutting, they should be sharpened at the first sign of dullness.The following cutting tools are the most common ones used when sewing:Rotary Cutter and Cutting Mat The rotary cutter consists of a blade attached to a handler and looks much like a pizza cutter.The mat is made from a material that self- heals and protects your table from the blade.Instead of pins, weights are used to hold the fabric in place while you are cutting. Rotarycutters work well with all sorts of fabrics and are particularly useful in cutting out heavierfabrics, such as leather and synthetic suede.General Sewing Scissors 8About 8 -15 cm (3-6”) in length are good for trimming threads and clipping and slashingseams. Scissors should have sharp points and round handles that are both the same size.4-H SEWING PROJECT –RESOURCE GUIDE
4-H SEWING PROJECT – THE BASICSBent-handle Dressmaker Shears Dressmaker shears are 18 - 20 cm (7-8”) long and are the best choice for cutting fabrics. Tocut with shears, put your thumb through the small handle and two or three fingers throughthe large handle. Make long even cuts by opening the shears wide each time you cut. Keepthe blade on the table so the fabric is not lifted when cutting out a pattern.Pinking Shears Pinking shears cut a zigzag edge and can be used for finishing seams and hem edges. Neveruse them to cut out your pattern because they do not make an accurate cut. Pinking shearsshould be about 22 cm (9”) in length so that they are strong enough to use on heavyweightfabrics.Stitch or Seam Ripper Seam rippers are generally between 10-15 cm (4-6”) long and consist of a u-shaped bladeattached to a handle. A seam ripper makes for easy removal of stitches and correction ofmistakes. It is important to be careful when removing stitches in order that the seam andfabric is not cut.Sew4Home de/sewing-101-top-five-cuttingtools-sewing) has a very good guide to purchasing cutting tools.Measuring toolsThese are used for taking body measurements, checking grain lines, seam widths and the depth ofcuffs and hems. Measuring tools include:Tape Measure Choose a tape measure that is flexible, made of a material that will not stretch or tear, andhas metal tips at each end. Your tape measure should be 150cm or 60” in length.Seam Gauge A seam gauge is a 15cm (6 inch) ruler with a moveable indicator, handy for measuring shortdistances. A 15 cm ruler will also do or you can make a seam gauge from heavy cardboardby cutting it at the depth for a seam or hem.Metre Stick or Yard Stick A metre stick is useful for marking straight long lines and measuring long lines and hems. Besure the stick has a smooth finish and edges so that it will not snag your fabric.Marking ToolsThese are used to transfer marking (for darts, tucks, pleats, etc.) from a paper pattern to fabric. Thefollowing tools are the most frequently used when marking fabric:Tracing Paper and Tracing Wheel Tracing paper or tracing carbon comes in a variety of colours and is used to trace darts, etc.on to the wrong side of fabric. The tracing wheel looks like a small pizza cutter and can haveeither a smooth or serrated blade. Choose a colour of tracing paper close to the shade of thefabric, but different enough so that you can see it distinctly. Try the carbon first on a scrap offabric to make sure marks don’t show through on the right side.Fabric Markers Fabric markers ca
4-H SEWING PROJECT – RESOURCE GUIDE 3 4-H SEWING PROJECT - INTRODUCTION SEWING SAFETY For introductory, intermediate, and advanced levels (Core) This section has been adapted from the Nova Scotia 4-H Leader’s Manual Sewing Project – 1997.Planning for a safe sewing projec