Transcription
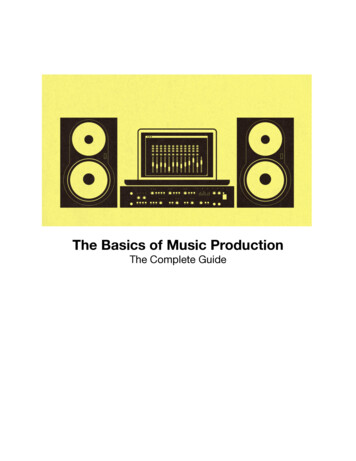
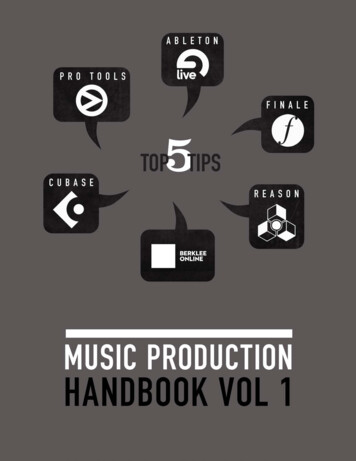
5Music ProductionHandbook Vol 13Ableton LIVEBy Loudon Stearns5Audio MasteringBy Marc-Dieter EinstmannTOP7Pro ToolsBy Andy Edelstein9ReasonBy Eric Hawkins11CubaseBy Ross Ramsay13FinaleBy Jonathan FeistTIPS
5Ableton LIVE132TOP TIPSBY LOUDONStearnsBack away from the mouseoff turns on and vice versa, so you canhear which version you like better. Thisprocess becomes so fast and easy youMapping, both Key and MIDI, is themight find yourself doing it all the time.foundation of Live’s performancecapability.Keymappin g,onceconfigured, gives you single-key accessGo parallel with Racksto Live’s most important functionslike looping, draw mode toggle, clicktrack, punch recording, etc. Once youThere are 4 types of Racks in Live:configure your set of key mappings, goEffect, Instrument, MIDI, and Drum.to the preferences, there is an optionEach is a way to split the incoming datato save the current project as yourinto multiple “chains” which have uniquedefault project, so those mappingsprocessing, then the data is combinedwill be waiting there for you in everyat the end. Racks are a way to processnew project.data (MIDI or audio) in parallel withina single track. Also, racks allow you tosave a group of effects as a single presetQuick A/Bto be used in other projects. Groupeffects together using a key command:Command G on Mac or Ctrl G on PC. WithWhen mixing you need to make sureinstrument racks you can layer multiplethat changes to effects like Compressionsoft synths to create huge thick pads.and EQ are really helping the track.With effect racks you can split the audioSome quick work with key mappinginto separate frequency bands, allowingmakes it easy to compare presets. Sayyou to put a delay on just the highs andyou have an EQ in a track and you wantkeep the low end mono perhaps. Withto try out some new settings. FirstDrum Racks each incoming MIDI noteduplicate the effect (command D onhas its own instrument and chain ofmac ctrl D on PC) Turn the first one offeffects, your snare could be sampledusing the effect’s power button (nowand run through a compressor, andthe first is off and the second one is on).the kick be created with a third partyEnter key mapping mode (commandsynth. With MIDI effect racks you canK on Mac Ctrl K on PC) and map bothcreate complex arpeggiated patternspower buttons to a single key (the Aby stacking multiple arpeggiators inkey), then exit key map mode. Now ifparallel along with other MIDI effects.you hit the A key the effect that was3
5Ableton LIVE45TOP TIPSBY LOUDONStearnsBe modular and documentedTry out some sound designClips, Racks, Tracks, and Presets can beOne of the coolest live effects, Corpus,shared from project to project. Rightcreates a “talking” synth. It is a prettyclick on the title bar of any of theselong process, but the end results areobjects and you can assign it a color,worth the time spent. Check out thisname, and even custom info text thatYouTube video where we go over manyshows up in the help view in the lower leftimportant Analog, Corpus, and Effectcorner of the Live window (“?” opens upRack features.the help view). In the Live Browser youcan look inside other projects, grabbingindividual tracks or clips and droppingthem in your current project. The moreyou name, color, and add custom text,the more efficient you will be in thefuture. Also, look for custom info textin the live library presets, many of thepatches give you hints at the best wayto use them.Loudon StearNsnssSsteachesAdvancedMusicProductionwith Ableton Live, and Composing andProducing Electronic Music at Berklee Online. As a bass player, producer, and laptopmusician, Loudon’s music can be heard on numerous documentaries and short films.While continuing his studies of composition, engineering, and sound design, he iscurrently pursuing a degree in physics as part of ongoing search for the answer tothe question of life the universe and everything.After studying harmony at University of Lincoln, Loudon became actively involved with the National GuitarWorkshop, where he was an instructor and the live sound engineer. At Berklee College of Music he graduatedwith honors with a dual major in bass performance and contemporary writing and production. Now an assistantprofessor in Berklee’s Contemporary Writing and Production Department, Loudon teaches classes in sequencing,arranging, and scoring to visuals.4
5Audio Mastering1324TOP TIPSBY Marc-DieterEinstmannL/R balanceTight low endAre the vocals well centered? If not:If bass is lacking focus and clarity, tryIn Ozone, unlink input level faders toa high-pass filter on the side-channelmake necessary adjustments. This will(‘elliptical EQ’), essentially making therarely be necessary, but should be donelow end mono. In Ozone, use the EQfirst. Subsequent stereo processing willin Mid-Side mode, listen and observetrack better to preserve imaging, i.e. theLF content in the side-channel. Whilestereo sound stage.listening to the regular stereo signal,adjust the cut-off frequency of the sidechannel high-pass filter until it soundsright. Make sure this is not set too high,stereo imaging and width should notchange noticeably.Frequency balanceDynamic problemsUsing the spectrum analyzer and yourears, are there any portions that needAre the various instruments of a trackto be cut? Subtracting unnecessarycohesive? For example: it may be easierfrequencies may unmask the importantto reduce sibilance early by de-essing.portions in audio better as well asIn Ozone, use the Multi-Band Dynamicsregaining headroom, rather than tryingtool. To affect only lead vocal sibilance,to boost the important parts andwhich is predominantly in the stereorunning the risk of clipping. In Ozone,center, use Mid-Side mode and useif large amounts of cut are needed,frequency dependent compressionit is usually best to use the EQ inon the mid channel only to minimizeDigital mode.unwanted side effects, such as loss ofclarity and silk. Use the mid-frequencyband in a 3-band processor to adjust forsibilant frequencies.5
5Audio Mastering5TOP TIPSLevelingat the highest resolution (24-bit, 32-bitfloat, or higher) used. Next, line up allthese bounced tracks in the right orderAn essential part in mastering is toas they should appear on a CD. Useensure all tracks play at the sameone instance of Ozone on the masterperceived loudness. This task is bestinsert using the Loudness Maximizerdone using your ears and relying less ononly. For a CD, set a healthy -0.3dBfslevel-meters, as they do not accuratelysafety Margin and leave the Thresholdrespond to the frequency response ofat 0dBfs. Set Mode and Dithering toour ears. To leave the entire load oftaste/need. Now you can use gain (e.g.leveling all your tracks to individualautomation) on individual tracks orlimiters is not recommended, as theyparts of a track to achieve coherenttend to alter the sound if driven tooleveling without having to change thehard. 2dB of limiting may already haveLoudness Maximizer settings. In vocalan adverse effect, especially on themusic, use the vocal level as a ‘loudness-transient and bass content of a track.UsepreviousgainstagesBY Marc-DieterEinstmanninanchor’ or reference when dealing withyourmixed musical styles and arrangements.processing to get all of your tracksListen to the transitions from one trackwithin 1dB of perceived loudness fromto the next for coherent leveling. Afterone another.all, we as mastering engineers areresponsible for making sure there aren’tFor example: In Ozone, before you useany sudden changes that would spoilthe Loudness Maximizer as a last stepthe flow of a record.in leveling, capture/bounce your tracksMarc-Dieter EinSTMANNteachesAudioMastering Techniques at Berklee Online. Marc is the seniormastering engineer at MasterLab Mastering Studios, based inBerlin and Hamburg, and owner of Sonic Silver Mastering, based inNew York City. Since 1987 has worked with artists and producers,such as Dave Stewart, Annie Lennox, Chrissie Hynde, Mick Jagger,Mary J. Blige, the late Notorious B.I.G., Depeche Mode, Yo-YoMa, Elvis Costello, The Neptunes, Frankie Knuckles, Flood (U2), David Kahne (Paul McCartney), Rodney Jerkins(Michael Jackson), Alan Moulder (Nine Inch Nails), Chris Evans-Ironside (Drafi Deutscher), Dru Hill, and D’Angelo,among others.6
5Pro tools1324TOP TIPSBY ANDYEDELSTEINSave Your FavoriteScreen LayoutsCreate a Preset LibraryPro Tools provides session templatesfor quickly creating new projects withUnless you have a couple of largestandard track layouts, but sometimesmonitors, your on-screen interface willyou’ll want to begin a new session witheasily get cluttered. Using view presetscustomized track configurations. Rather(via Memory Locations) and WindowConfigurations(accessedinthan building these from scratch, savetheyour favorite setups in dummy sessionsWindow menu), you can store and recallandyour favorite screen arrangements forusetheImportSessionDatacommand to pick and choose whatevertracking, editing, and mixing sessions.you want. For example, you could importCreate a set of presets for variousfrom a drum track session that containstasks with customized layouts, controlten of your favorite kick configurations,settings, and track displays; then switchanother ten for snare drums, and sobetween them with a single click.forth. If an á la carte approach worksbest, start with a rich menu!Watch Your Recording LevelsUse Groups for ReducingScreen ClutterWhile analog systems generate richharmonic distortion when overdriven,clipping the input to digital audiodevices almost always degrades soundMostpeopleuseg ro u p stoquality. Keep in mind that the waveformsimultaneously change levels or otherdisplays in the Edit window is not aparameters on multiple tracks, but it’sgood indicator of acceptable levels—also easy to simultaneously show andtracks recorded too hot can appear tohide all group members. You can usebe fine. Use your track meters whenthis function to switch between a setsetting input levels, and make sure theyof simplified screen views rather thannever display inputs in the amber range.scrolling around to locate tracks. CreateTo be safe, back off a bit when youra set of groups that account for all oflevels approach the extremes of thethe tracks in your session, making sureyellow range.that each group is small enough so allof its members can fit on screen. Usingthe Mac OS, simply Control-click on7
5Pro toolsTOP TIPS5BY ANDYEDELSTEINany group name to show only thoseby recording the mix on a track in thetracks. With Windows, this is a littlesession. Route your mix tracks to a buslessthethat feeds a new Audio track, then recordgroup name, then select Show Onlyon that track while playing through theTracks in Group.mix. After the first pass, you can punchconvenient —right-clickonin subsequent updates only in sectionswhere changes have been made ratherPunch in Mixes to UpdateBounces Fasterthan re-recording the entire song. WhenEven though there’s no way to bouncecommand to almost instantaneouslya Pro Tools mix without playing it ingenerate a bounce with the desiredreal time, you can speed up the processformat, bit depth, and sample rate.finished, consolidate the mixed regions(or clips, as of Pro Tools 10) and usethe Export Regions (or Clips) As FilesAndy EdelsteinnssSsteaches Pro Tools 101 and ProTools 110 at Berklee Online.Andy is an active educator, record producer, engineer, and multimediadeveloper. He is currently Associate Professor of Music Productionand Engineering at Berklee, and has also served as Assistant Chair ofthe Music Production and Engineering Department during his twentyfive-year tenure at the College. Andy has produced, recorded, and/or mixed numerous records from jazz and rock to bluegrass, Celtic,and blues, including the genre-bending Wayfaring Strangers critically acclaimed Rounder releases, the SpinARTdebut by independent rockers Apollo Sunshine, and the latest Dry Branch Fire Squad live album, all using his ProTools HD system. Andy is Principal of Rapid Eye Media, specializing in multimedia production services. His designand production work is featured in a series of award-winning interactive exhibits at the American Jazz Museumin Kansas City, MO and the Longyear Museum in Brookline, MA. Consulting clientele has included the GRAMMYFoundation in Santa Monica, CA. Andy holds a B.S. in Electrical Engineering from the Massachusetts Instituteof Technology.8
5REASON1324TOP TIPSBY ERIKHAWKINSWork Fast with TemplatesCombinators for Sound DesignHaving a project template set up withConstructing your own sounds is keyall of your favorite devices, patches,to creating a unique identity in yourmost commonly used parallel effects,productions. Combinators offer a quickandtoand easy way build your own soundsandwithout needing to know how everyproduction process. After creatingsynth parameter works. By startinga project containing these elements,with a mixer in the combinator youmake the file read-only so you don’tcan easily mix and layer instrumentaccidentally overwrite it. Then, make itpatches and effects for a monstrousthe Default Song Template in Reason’ssound without programming a singleGeneral Preferences. This way, as soonsynth. After you cook up something youas you open Reason you’ll be makinglike, you can then save the combinatormusic without any time wasted settingpatch for quick recall in any of yourup devices and tracks.Reason projects.Individual Outs forMax ControlMaster Bus Effects are gDJs often run an entire stereo mixthrough an effect, such as tempoMany of the devices feature individualsynchronizedoutputs, including Redrum, Kong, NNXT, and Dr. Octo Rex.filtersanddelays,add extra drama to their mixes.Learn how totoYoucan recreate this effect in Reason byassign sounds to these individual outsinserting an effect device, such as thefor maximum control over each signal inPH-90 Phaser and the Alligator Filteryour mix. For example, when you canGate, in the Main M
teaches Advanced Music Production with Ableton Live, and Composing and Producing Electronic Music at Berklee Online. As a bass player, producer, and laptop musician, Loudon’s music can be heard on numerous documentaries and short films. While continuing his studies of composition, engineering, and sound design, he is
