Transcription
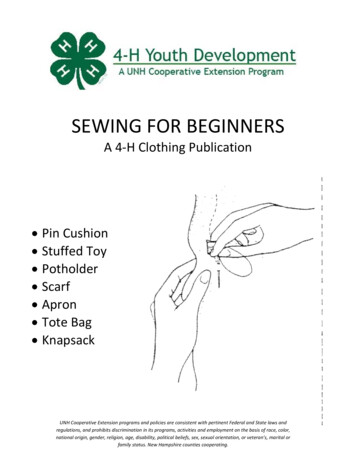
SEWING FOR BEGINNERSA 4‐H Clothing Publication Pin Cushion Stuffed Toy Potholder Scarf Apron Tote Bag KnapsackUNH Cooperative Extension programs and policies are consistent with pertinent Federal and State laws andregulations, and prohibits discrimination in its programs, activities and employment on the basis of race, color,national origin, gender, religion, age, disability, political beliefs, sex, sexual orientation, or veteran’s, marital orfamily status. New Hampshire counties cooperating.
SEWING FOR BEGINNERSIntroductionWe should all learn to sew. Sewing is a skill for people of all ages, in all occupations, and from all walks of life.From making small repairs to making complete wardrobes, sewing provides for our basic, and not so basic,clothing needs. Sewing can also produce knapsacks and stuffed toys, practical articles and gifts. Sewing is afun, useful craft that you can be proud of doing.This manual is an introduction to sewing. It is designed togive you information quickly and easily. The drawings anddescriptions will help you understand the most importantsteps and ideas.First, you will learn about the basic tools, terms, andtechniques of sewing. You will then develop your skills bycompleting a few simple projects.Never hesitate to seek help from more experienced sewers. If you have a problem with a project, ask a friend,parent or your club leader for help. Refer often to this manual and other sewing guides. Practice and have fun!TOOLSPeople need tools for every hobby and job. You need special tools for sewing.These tools will make sewing easier, neater, and more enjoyable. Youwill not need all of these tools to begin sewing. The more you sew,however, the more likely you are to find a use for everything.It is safe and convenient to keep all your tools together. A sewing boxwill help you organize and store the things you need.A wood, metal or strong cardboard box will work well. It should belarge enough to hold all your tools and basic supplies. It helps to havesome kind of partitions in your sewing box to hold everything in placeand keep your sewing box neat and orderly.
Tools for CuttingSCISSORS:“Scissors” are 3” to 6” long and have two ring handles foryour thumb and forefinger. Scissors are useful to clipthreads and cut paper or fabric.SHEARS:Shears” are longer than scissors and have one small ringhandle for your thumb and a larger handle for the otherfingers. The best shears have blades that are screwed together instead of riveted.TRIMMERS:When fabric is lying flat on a table, it is easier to cut it by using shears that have bent handles.These shears are called “trimmers”.Your cutting tools should be kept clean and sharp. Use them only for cutting fabric and thread.Avoid using them on heavy string, coarse paper, and cardboard. Be careful not to dent or drop the blades.A drop of sewing machine oil on the inside of the blades will improve the cutting edge.Remember to wipe the blades clean before cutting any more fabric.When cutting fabric, you may find that lint gathers on the edges of your blades. Carefully wipethis lint off with your fingers. The natural oils from your hands will help lubricate the blades.You will have to sharpen your scissors and shears periodically.Tools for MeasuringTAPE MEASURE:Use a good quality 60 – inch fabric or plastic‐coated tapemeasure that won’t stretch or rip.MEASUREING GUAGE: Include in your sewing box a 6‐inch ruler or smallmeasuring gauge. Both tape measures and measuringgauges are available in local stores.TAILOR’S CHALK:Chalk is used to mark cloth. Tailor’s chalk is good for marking; it makes thin lines andbrushes off easily.TRACING WHEEL:A dressmaker’s tracing wheel is also used to markfabric and transfer pattern markings.PENCIL AND NOTEPAD: Keep a good pencil in your sewing box. You mayneed pencil and paper to make notes andcalculations during a project.
Pins & NeedlesPINS:Dressmaker or silk pins have sharp points and will not make large holes in your fabric. Theyare particularly useful when working with fine fabrics and important items. For knit fabrics,use ball point pins they will not snag the threads of the fabric as other pins may.THIMBLES: Thimbles are made from silver, brass, nickel, steel or plastic. The thimble helps youpass the needle through the cloth. It should fit snugly over your middle finger.NEEDLES:There are four basic sewing needles, each with its own style and purpose. Sharps are medium‐length needles and are slender with round eyes. Betweens are shorter than sharps and are used for fine handiwork. Crewel needles have long eyes for easier threading and are used for darning,embroidering, and regular sewing. Darning needles are longer than crewel needlesand have wider eyes.Needles come in sizes 1 to 10. Size one is very course; size ten is very fine.You can buy needles in a package of assorted sizes or in a package withonly one size.Needles should match the kind of sewing you are doing and the kind of fabric and thread you are using. As youlearn more about sewing, you will learn which needles are best for the job.For beginners, a number seven sharp is a good needle to use.THREAD:There is cotton, silk and synthetic fiber threads,and threads that are actually a combination offibers. The most widely used thread is polyesterwith mercerized cotton cover. This comes in avariety of colors and has a strong finish on it.Threads should match the type of fabric you are using. Thecolors of the thread should match either the primary or background color of your fabric. When you can’tmatch the color exactly, choose the next darker thread color.EMERY BAG: When your needles grow dull, shine them up by pushing them back and forth through an emerybag. (Emery bags are often disguised as giant strawberries.)SEWING MACHINE NEEDLES:These also come in different sizes and styles, rangingfrom a size 9 for very delicate fabrics to a size 18 forcoarse, heavy fabrics. Ball‐point needles should beused when you are working with knits. These haverounded points that will not tear the threads for a knitfabric as easily as regular needles can.
Tools for PressingGood sewing requires proper pressing tools and techniques. Use agood iron, dry type or steam; a well‐padded ironing board; and apress cloth (muslin or cheesecloth) to dampen the fabric whilepressing.Ironing and pressing are actually two different techniques. Pressing isused more frequently than ironing in clothing construction. To press,bear down on the fabric with your iron, lift up, and bear down again.This applies heat and pressure without pushing or stretching thefabric. To iron, move the iron back and forth across your fabric.Pressing as you sew helps produce a fine finished item. Thetemperature of your iron should be adjusted to the type of cloth youare pressing, always press with the grain of the fabric to help holdthe size and shape of the piece. You press primarily on the “wrong”side of the fabric. Learn to use the tip of the iron to press openseams.Pressing is very important. Do not hesitate to ask more questionsabout pressing and ironing techniques, iron temperatures, and theuses of the press cloth.FABRICBefore you begin to sew, you must become familiar with fabric. Most patterns are designed for specific typesof fabrics. Suggested fabrics are listed on the back of each pattern. The necessary materials for the projects inthis manual have been listed in the directions.There are several important terms regarding fabric. One of the most important is grainline. The threads whichrun the length, or the long way, of the fabric are called the “lengthwise” threads or the lengthwise grain.Fabric is purchased by “yardage” which is measured along the lengthwise grain.The threads which run the width of the fabric, or the short way across, are called “crosswise threads”. The biasof the fabric runs diagonally across it and has the most stretch or give.c.
“Selvage”, pronounced Sell‐vij, is the narrow, tightly woven strip running along a long edge of the fabric. Theselvage edge will not ravel.Where fabric is folded down the middle, you have the “folded edge”. This sometimes creates a permanentcrease line.The end where the fabric has been cut or torn off is called the “raw edge”.Woven fabric is made by weaving crosswise threads back and forth, over and under, the lengthwise threads.The direction and angle of the threads determines the grain of the fabric.The lengthwise and crosswise threads of a fabric should meet at right angles. When they do not, the fabric is“off grain”. The raw edge of the piece of cloth should line up even with the end of a table when the lengthwiseedge is lined up against the tables’ side edge. If the edges don’t match, the cloth is off‐grain.Always make sure your fabric is straight before cutting it. To straighten fabric if it is not more than an inch off‐grain, hold both sides and pull and stretch diagonally towards the shorter end. Steam pressing may also helpstraighten the fabric.All fabrics should be preshrunk before you begin sewing. Wash and dry it, using the same method you will usefor the finished product. The fabric manufacturer should include recommended care instructions on a labelwith the cloth. Ask the salesperson for one.These labels also carry other information. They may tell you if your fabric is crease resistant, wrinkle resistant,wash and wear, or durable press.These finishes lock the threads in positon and you will be unable to straighten these fabrics when the pieceyou are using is off‐grain. Check the material before you buy it!Every bolt of fabric should have a label on the end. It will inform you about the fiber content of the fabric,whether it is cotton, nylon, polyester, or another combination.Labels also carry the dimensions of the fabric. Be sure to check the width of the fabric, as this will determinehow much of it you need for the design or style of pattern you have chosen.Finally, check the label for information about the color; if the label has a statement that the dyes are fast towashing, cleaning, and light, you may be certain that the colors will not run.
STITCHESUsing a needle and thread is the most basic skill of all. With your thimble on the middle finger of your sewinghand, hold the needle between your thumb and forefinger. The needle’s eye should rest near the thimble andpoint in the direction you plan to sew. Brace the needle against the side of the thimble – and stitch.RUNNING STITCHYou can sew faster by picking up several stitches in a row,and weaving the needle in and out of the fabric. Thenslide the stiches back onto the thread by pulling theneedle through the row.SLIP STITCHSlip stitching is invisible from either side of the stitched piece.First, pick up a few threads on your needle from the fold ofthe bottom edge. Now slip the needle ½” into the upper foldedge. Pull the needle out and repeat. Pull the thread tight sothe edges of the fabric are close together and the stitchescannot be seen.ZIG‐ZAG STITCHStitch back and forth between the edges of an opening: pull the threadstight as you sew to close the opening.OVERCAST STITCHMake slanted stitches ½” apart over the edge of the fabric.
PROJECTSpin cushionThis is an inexpensive and easy‐to‐doproject, and a very handy thing to have.The techniques you will use are important,so follow the direction closely. The pincushion should take one to two hours tocomplete and is made from readilyavailable materials.Materials: 2 cardboard circles, 2 3/8” in diameter2 scraps of wool cloth (should be tightly woven so as not to fray easily)Wool filler (small pieces of unraveled yarn or wool scraps)6 inches of ½” or ¾” elasticThimble, scissors, needle and threadDirections:1. Cut one circle of wool 5” indiameter, and cut the other circleof wool 3 ½ “ in diameter.2.Double‐thread your needle andsew a running stitch around theoutside of the larger wool circle3/8” from the edge.3.Pull the thread gently at the same time, push the fabricback along the thread. The edge of the circle shouldgather and form a cup shape. Stuff this with wool filler.4.Place one cardboard circle over the filler and pull theedge of the wool cup as close together over thecardboard as you can; now pull the thread tight. Closethe opening by sewing it shut with long zig‐zag stitches.5.Cover the other cardboard circle with the smaller pieceof wool. Sew a running stich around the wool as you didbefore; with the cardboard in the center of the wool,gather up the edge and pull the thread tight. Close theopening with zig‐zag stitches.
6.Fasten one end of the piece of elastic tothe bottom edge of the stuffed circle byusing an overcast stitch. Adjust the lengthof the elastic to fit over your wrist and add½” more to fasten the other end. Nowstitch the free end to the opposite side ofthe pin cushion.7.Use an overcast stitch to join the twohalves of the pin cushion.
stuffed toy or bean bagThis is a good project because it is cheap to make, youlearn to use the sewing machine, and you create a nice giftfor a young friend or relative.Materials Some soft fabric, like terry cloth or flannel,depending on the size and type of toy Scraps of cloth, shredded foam rubber, orpolyester fiber/fill for stuffing (use beans if youmake the bean bag toy) Embroidery needle and colored embroidery threadNew SkillsTo make this project, you have to thread and run a sewingmachine; embroider a design, and clip and notch seams.Begin embroidering by using three tiny stitches to securethe thread at the start, and finish it the same way.Embroider with a satin stitch to fill in designs. This is asmooth stitch and you sew it by working from one side ofthe design to the other, passing the needle throughunderneath and then drawing the thread through.Return to the beginning side of the design and repeat untilthe design space is covered. Stitches should be closetogether so that they touch without overlapping.For long lines, use the outline stitch. Insert the needlefrom right to left (or left to right if you are left handed) ona slant to the line you are stitching along. The needleshould come out right beside the thread as it comes upthrough the fabric.Clip and notch seams to make curved seams lie flat whenturned or pressed. On outside curves, cut a small v‐notch inthe cloth outside the seam line; on inside curves, clip theseam allowance almost to the line of stitching.
Directions:1. Make your own pattern or use the one here.2. Pin the pattern to a doubled layer of fabric, with the rightsides together, and cut out the pieces.3. Mark the outline of the design with chalk on the right sideof the fabric. A dressmaker’s chalk pencil works best as itbrushes off easily after you’re done. Mark the eyes, nose,mouth and other areas. Now embroider these areas withcolored thread onto the right side of the fabric. Brushaway any chalk marks that show around the edges of thedesign.4. Place the corresponding or right sides of the fabric together and pin around the edges so that it stays inplace. Slip the pins in at right angles to the edge of the cloth. On the sewing machine, stitch a seamaround the figure ½” from the edge, taking out each pinbefore the machine passes over it. Backstitch a fewstitches at the beginning and end of the seam to secure it.Remember: Leave 1 ½” section unstitched so that you canturn it right side out again.5. Clip and notch the seam allowance.6. Turn the toy back to the right side, using the eraser end of a pencil to turn the seams smoothly.7. Stuff the toy firmly, but not to overflowing; or fill it loosely with beans.8. Turn the seam allowances to the inside around the opening. Finally, pin the edges together and jointhem with overcast or slip stitch.
potholderEvery cook needs several of these and you can make one very quickly. This is a project for your sewingmachine. You learn to baste, sew mitered corners, and pivot corners with the machine.To base, sew a running stitch with a single thread, knotted on one end only. This will hold the pieces of fabrictogether for stitching on the machine.Pivoting allows you to sew seams around corners. To pivot with the machine, sew almost to the corner of yourpiece and leave the needle in the fabric. Now raise your presser foot and turn the fabric in the new direction,and continue sewing.Materials: Approximately 7” x 13” of cover fabric Two or three layers of flannel, or a piece of old blanket, furpadding (pieces should be cut about 1” smaller than coverpiece )Directions:1. Lay the cover fabric right side down. Center the pieces ofpadding on the side facing up (the wrong side) and pinthem together: the points should come out ½” from theedge of the padding. For safety’s sake, use plenty ofpadding.2. Make mitered corners by folding the coverover the edges of the padding. Press andbaste the folded edges.3. To make a loop for the potholder, cut astrip of fabric 1 ½” wide by 3” long; fold itin half, lengthwise, placing the right sidestogether. Stitch ½” from the edge along thelong side. Turn the right side out and press.Stitch close to the edge down both longsides.
4. Fold the loop and baste the ends to the center of one short side of the potholder.5. Fold the potholder with the padding inside, making sure all edges meet. Now press.6. Machine stitch ¼” ‐ 1/8” from the edge. Make sure both sides of the potholder catch in the stitching.7. Stitch a design on your potholder! Remember to backstitch each time you start or stop stitching.
scarfThis scarf is reversible so you can use two different fabrics.This project gives you the chance to trim seams, clip corners, topstitch and pivot.To keep seams from getting too bulky and lumpy, trim off all but ¼” of the seam allowance.Grade layers of cloth by trimming them at different heights.To reduce the bulk in the seam of a corner, cut diagonally across the corner of the seam allowance.Topstitching is used to keep layers of fabric and seams flat. It is also used for decoration. Topstitching is simplya line of stitching on the right side of the fabric.Materials: About ¼ yard of fabric and matching thread 40” – 48 “ of double‐fold bias tape Newspaper or tissue paper to draw your pattern on.Directions:1. Draw your pattern on some paper and cut it out. Start with a triangle approximately 14” x 14” x 20”.Try it on and adjust it if necessary before cutting out the fabric.2. Cut out two triangles of fabric.3. Pin the right sides of the triangle together.Stitch 5/8” seam along both the shortedges, pivoting at the corners. Backstitchboth ends of the seam.4. Now trim the seams. Clip off the point atthe corner.
5. Turn the scarf right side out andpress the edges flat.6. Lay the scarf down flat and pin theraw edge. Baste in place ¼” from theraw edge.7. Mark the center of the scarf’s bastededge with chalk. Mark the center of the bias tape.8. Unfold the tape only along the main,centerfold, leaving the side folds in place.Match the center of the tape with the centerof the scarf. The inside of the tape should beplaced against the lining side of the scarf. Thecenter fold line of the tape should be againstthe raw edge of the scarf. Pin the tape inplace. Machine stitch approximately 1/8” along the edge of the tape and through the scarf. Backstitchboth ends.9. Turn the scarf over and bring the tape up and over the raw edges of the scarf. Check to be sure thatthe raw edges of the tape are folded under. Pin the tape to the scarf and also pin the free ends of thetape together. Stitch 1/8” along the entire length of the tape. Try to keep your stitching straight.Backstitch at both ends.10. To finish, knot each end of the bias tape.
tote bagBy enlarging this pattern, you can make a book bag. To make a beach bag, add a piece of old shower curtainfor lining.Materials: 1/3 yard of fabric and matching thread (use a heavy fabric such as denim, burlap, or home spun) 1 yard of cording for drawstringDirections1. Cut a piece of fabric 10” wide by 24” long, or larger for a book bag. The finished item will be half thedimensions of your original piece.IMPORTANT: Cut your fabric 2” larger than you want the bag to be when finished to allow for seams.2. Edge stitch ¼” from the edge along all four sides or sew some other edge finish.3. Fold piece in half with right sides together. Match edges and pin together except for 4” at each end.Stitch at both ends of the seam. Turn the bag right side out and press seam flat.4. Press the free ends too, as though they were part of the seam.5.
5. Turn the raw edges of the free ends under ¼”. Press and stitch in place. Then fold the free ends in halfto the inside of the bag to form the casings. Leave ½” between the bottom of the casing and the end ofthe side seams. Pin the casings in and stitch close to the edge, over the previous row of stitching.Backstitch at each end.6. Cut the cord in half and run one piece through each casing. (Pinning a large safety pin through eachend of the cord will make it easier to pull through the casing.) Knot the ends together.
apronTo make this apron you will need to hem edges. To hem, turn the edge of the fabric in ¼” to the wrong sideand press it. Make another turn however wide you wish the hem to be. Press and pin in place. Stitch. Youredges will be neatly finished and they will not fray.Materials: 1 yard of 36” wide sturdy cotton fabric and matching thread (preferablecolor fast fabric)Directions:1. Measure 5” of fabric for thedrawstring. This strip of fabricshould be halved lengthwise.2. If your fabric is the same on bothsides, like chambray or gingham,turn up 7” of material forpockets. Right sides should beplaced together. Pin the sides.With other types of fabric, cut off7” of fabric; place the right sideof the pocket against the wrong side of the apron; pin; and stitch a 5/8”seam at the bottom. Turn the pocket right side out and press upward.3. Hem the top of the pocket.
4. Stitch the pocket’s division, back stitching at the end of each division.5. Hem the sides of the apron, making sure to include the edges of the pocket in the hem.6. Hem the top of the apron. Your second turn should be 1 ½” wide to make the casing for thedrawstrings.Stitch again ¼ ‐ ½” from the top of the casing to finish it.7. Make the drawstring by stitching the tow strips together at the ends. Press the seam open.8. Fold the drawstring in half lengthwise; keep the right sides together. Press.9. Trim the ends diagonally. Stitch ¼” from the raw edges leaving one end unstitched so the piece can beturned right side out.When stitching the corners, take a stitch across the point, pivot again, and continue stitching. Thismakes a neater corner that is easier to turn.10.
10. Trim the seam allowances at the corners.11. Turn the drawstring right side out. Turn the raw edges of the open end to the inside and baste in place.Press the whole drawstring.12. Top stitch all the way around the drawstring 1/8” from the edge.13. Use a large safety pin through one end of the drawstrings to help draw the string through the opening.14. Stitch drawstring in place at the center of the apron to keep it from pulling out.15. Press the whole apron carefully, and you are done!
knapsackDirections:1. Use a grocery bag to make the pattern for this project. Measure up 12” from the bottom of the bagand mark it with a pen or pencil on all sides. Cut off the extra bag above these marks. Next, cut the bagopen along the center side seams and the bottom side edges. Cut in an extra ½” on each bottom sideedge to allow for the side seams when sewing it. See the pattern layout for the dimensions of the bagpattern. You may use these dimensions of the bag pattern. You may use these dimensions to make atissue paper pattern if you prefer.2. Lay out the pattern on the right side of a single layer of fabric. Pin it in place and cut it out. Cut out 12”square of cloth for the flap, two strips of cloth 4” wide and 24” long for the straps, and two smallerstrips 2” wide and 5” long for the button loops.3. Trim the top of the flap to round off the edges. Stay stitch or use some other edge finish close to theedges of the flap and the main piece of the knapsack, all the way around both pieces to preventfraying.4. Make the straps first. Fold the strips in half lengthwise with the right sides together. Stitch a 5/8” seam.Trim off half the seam allowance to remove bulk. Then press the seam open. Use a pencil or ruler toturn the strap right side out. Turn the ends ¾” to the inside of the strap and then press the strap to theseam runs straight down the middle. Topstitch ¼” from the edge all the way around both straps.
5. To attach the straps, pin them to the main piece of theknapsack as shown in the diagram. Try it on and make anyadjustments before sewing. Be sure they are at least 2”from the top and bottom edges to allow for seams. Stitchthe straps in place as shown, going around in a triangletwo or three times to secure them. To prevent the strapsfrom setting in your way while you finish sewing theknapsack, fold them up and pin them to the knapsack.6. With right sides of the fabric together, match the sideedges of the bag and pin in place. Stitch a 5/8” seam downeach side. Press the seam open.7. Match the bottom edges of the knapsack with the bottom of the sides as shown. With right sidestogether, pin in place then stitch a 5/8” seam. Press the seam open. Turn the knapsack right side out.8. Turn the top edge of the knapsack under ¼” and stitch or use some other edge finish to preventfraying.9. Round off the top edges of the square for the flapwith your scissors. Stitch 5/8” from the top and sideedges of the flap and turn the edges under on thisstitching line. Notch the curves, press, and then stitchin place.
10. Fold the bottom edge of the flap in half to find itscenter and mark the spot with a pin. Do the same forthe top of the back of the knapsack. With right sidestogether, match the centers of the flap and the backof the knapsack and pin them. Stitch a 1” seam andcontinue stitching all the way around the top of theknapsack.11. Press the seam and the top of the knapsack downwards from the stitching line to the inside. Pin.Topstitch once close to the top edge (1/4”) and once close to the bottom edge.12. To make the fasteners, fold the 5” strips in half, lengthwise, with the right sides together. Stitch anarrow seam ¼” from the edges and turn them right side out with a pencil. Pin them to the undersideof the new flap, 2” from each side, as shown. Make sure to allow enough room for the button or toggleto pass through then stitch in place. Sew the buttons or toggles in place on the front of the knapsack tofinish.
sewing onNow that you have finished some simple projects and learned new skills and techniques, you are ready formore advanced sewing.You will now be able to make more complicated projects.Commercial patterns are issued by several companies. They publish catalogs listing their patterns everymonth.Catalogs and patters can be found in all fabric stores and many department stores. Some town librariesmay have a pattern exchange. People who sew a lot collect many patterns.Before buying a pattern, consider carefully what materials and skills are needed to make it. If you beginwith a project that is too complicated, you may not be able to finish it.Pick a pattern that you are sure you can do. Generally, the fewer pieces a pattern has, the easier it is.There are series of patterns called “Fast & Easy”, “Super Simple” and “How to Sew” patterns. Choose onethat will explain one or two new skills.Your measurements are perhaps the most important thing you needto know before obtaining a pattern. Have someone help you recordthe following measurements:a. Your bust or chest size (by measuring around the fullestpart or broadest part of your chest).b. Your natural waist line.c. Your back length.d. Your hips (7” to 9” below your waist line over fullest part).e. Shirt‐sleeve length, which is measured from the center ofthe back of the neck, along the shoulder, over a slightly‐bent elbow, to the wrist.f. Your height. When you are making pants, you need tomeasure your inseam, from the crotch to the bottom ofthe ankle.
Size ranges are only approximations. Don’t be surprised if you don’t have a perfect fit. When you make adress, shirt, or top, follow the bust or chest measurements (for the most part). When making skirts or pants,go by the hip measurements (the fullest part of the hips); it is easier to adjust the waist line and length than itis the hip.If you are making clothes to wear, consider what type of garment you need. Consider what color and type offabric will go well with the rest of your clothes. Make something practical.Patterns are written very clearly. You will be able to follow most patterns without any difficulty. Read alldirections before beginning, especially directions that explain pattern markings.Pay attention to detail and do not try to hurry. Spend as much time as you need on each project to do it well.
When you are familiar with the directionson your pattern, have completed yourmeasurement chart, and pre‐shrunk yourfabric, you are ready to begin cutting outyour pattern.Work on a smooth, clean surface, first,spread out the cloth and lay out thepattern pieces to make sure that it fits.Follow the suggested cutting layout shownin the pattern. Be sure your fabric iscorrectly folded usually in half lengthwisewith right sides together.The grainline arrow on your pattern shouldfollow the lengthwise grain of your fabric.Check it by measuring the distance fromthe selvage or folded edge of the fabric tothe grainline arrow; the distance shouldremain the same all the way down thearrow. When correctly adjusted, pin thearrow in place so it won’t shift, then pinthe pattern down and cut it out.
A dressmaker’s tracing wheel can be used to transfer pattern markings tothe fabric. Check on a scrap of cloth to see if the markings are too light orshow through the
learn more about sewing, you will learn which needles are best for the job. For beginners, a number seven sharp is a good needle to use. THREAD: There is cotton, silk and synthetic fiber thread