Transcription
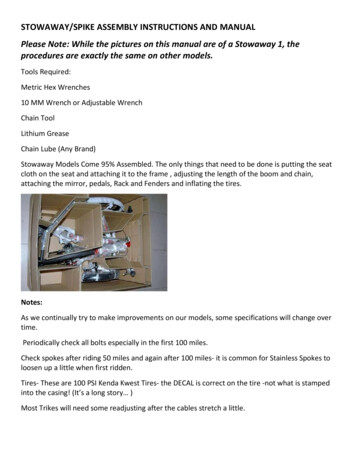
STOWAWAY/SPIKE ASSEMBLY INSTRUCTIONS AND MANUALPlease Note: While the pictures on this manual are of a Stowaway 1, theprocedures are exactly the same on other models.Tools Required:Metric Hex Wrenches10 MM Wrench or Adjustable WrenchChain ToolLithium GreaseChain Lube (Any Brand)Stowaway Models Come 95% Assembled. The only things that need to be done is putting the seatcloth on the seat and attaching it to the frame , adjusting the length of the boom and chain,attaching the mirror, pedals, Rack and Fenders and inflating the tires.Notes:As we continually try to make improvements on our models, some specifications will change overtime.Periodically check all bolts especially in the first 100 miles.Check spokes after riding 50 miles and again after 100 miles- it is common for Stainless Spokes toloosen up a little when first ridden.Tires- These are 100 PSI Kenda Kwest Tires- the DECAL is correct on the tire -not what is stampedinto the casing! (It’s a long story )Most Trikes will need some readjusting after the cables stretch a little.
Important – Adjustable Boom WarningWhen adjusting the boom, the chain length needs to be adjusted accordingly. Riding withimproper chain length can cause damage to both the rear derailleur and frame. Always make surethere is enough chain for the big chainring/big cassette cog gear combination.Also when retightening boom bolts- do it evenly- DON’T tighten one fully and then tighten theother. This could lead to cross threading the nut. Tighten one halfway, then tighten the otherhalfway go back and tighten the first one some more and then the second one etc.Step 1: Take all packing materials off Trike. The Stowaway Trikes come folded in the shippingcarton. Unfold the Trike tighten the quick release of the folding hinge, and inflate the tires to100PSI. TAKE NOTICE THAT THE SERIAL NUMBER OF YOUR TRIKES IS INSIDE THE HINGE.Step 2: To prevent shipping damage, the rear derailleur is not attached to the frame. Using anallen wrench, attach the rear derailleur as shown in the picture. Then attach the rear wheel to thetrike and tighten the quick release.
Step 3: Take the seat cloth and attach it to the seat frame. It is supposed to fit tight. Next tightenthe Velcro straps. You can adjust each one to give you as much or as little support as you like.Step 3: Fasten the seat to the frame using the provided quick release skewers. It is easiest to dothe bottom first. You have a choice of 3 seat heights . On the top you have four angle choices.Most people prefer to start with the more upright of the positions. Tighten quick release skewersfully.Step 4: Adjust boom length. The Boom is shipped turned at a 90 Degree angle. Loosen the boomand make sure the dreailleir post is perpendicular to the ground . Tighten a little so the boomdoes not rotate and attach the pedals - remember that the left pedal has reverse threads. Loosenboom bolts FULLY using a 6MM Hex Wrench. . Note: it is always important to fully loosen screwswhen adjusting boom- otherwise you will severely scratch the finish. It is also helpful if you put a
little Lithium Grease on the threads of these bolts for loosening at a later date. While sitting onthe seat extend your leg fully so that the heel of your foot just touches the pedal. This is thecorrect boom length. Make sure the Front Derailleur stem is perpendicular to the ground and thentighten fully. Also when retightening boom bolts- do it evenly- DON’T tighten one fully and thentighten the other. This could lead to cross threading the nut. Tighten one halfway, then tightenthe other halfway go back and tighten the first one some more and then the second one etc.Step 5: Adjust Chain Length. For most people the chain will not be the right length. There is amaster link in your chain. If you are unfamiliar with how these come apart- here are pictures andinstructions http://www.kmcchain.com/index.php?ln en&fn find&mo view&id 1091 We havealso included some extra chain in your parts bag.When you are in the middle chainring on the crankset, and one of the middle cogs on the cassettethe Derailleur Cage should be at approximately 6 O’Clock.There are many methods to adjust Chain Length- here is a link to the best id 26Brake Adjustment: Trident Trikes all come with brakes preadjusted. However- they may needperiodic readjustments and of course will need pads replaced eventually.Here is a link to the manual on the Avid BB5’s (Standard on Stowaway 1 and Spike 2) and BB7’s(Standard on Stowaway 2 & Transport /sites/default/files/techdocs/service manual bb7 bb5.pdfMirrors, Lights,Flag Rack Fenders: .The front mirror goes inside the accessory mount. If you ordered an extra right side mirror (oryou are in one of those countries that drive on the left) you will also have to reverse the mirroritself. An adapter for a wireless magnet s available separately on our website.
Fenders are standard on Stowaway & Transport models. They are available in the accessorypackage for Spikes. On Spikes you will need to remove the Silver Kingpin caps. The order oftightening is very important. First you tighten the screw that goes into the Kingpin. This makessure the bearings in the headset are seated properly, Last tighten the bolt on the fender itself tokeep it from rotating on the kingpin. For the rear fender, there is a bolt that goes through the rearrack support on the frame (I find it easier to remove the rear wheel to attach this bolt to the rearfender), and then the wires attach to the frame with an allen cap screw and washer- please referto the pictures.
The rear rack gets attached by means of 2 rods that go from the rack to the framesupport as well as 2 bolts/washer/nuts that attach to the holes in the dropouts. Pleaserefer to the following pictures.
Folding Procedure:Remove Seat by releasing both quick release levers.Loosen the quick release lever that holds the folding hinge and let it hang straight downward.
This lever is spring loaded (L&R). Pull the lever towards you to release the hinge pin.Lift the back half over the front- its that easy!!Trident Trikes 5 Year Limited Warranty:Trident Trikes warranties that its Trike Frames, Seat Frames and Steering Components are free ofdefects and workmanship for a period of 5 years from the date of purchase. This warranty islimited to the original owner and is non transferrable. This warranty does not apply to the paint orfinish, normal wear and tear, or any damage directly or indirectly resulting from customer abuse,neglect, abuse, improper assembly, alterations, collisions & accidents or misuse of the intendeduse of our Trikes. It also does not apply to any components attached including, but not limited to:wheels, tires, chains, cables, seat cloth, and drivetrain components. These items are subject to thewarranty (if any) of the original manufacturer.Warranty claims must be made in writing or by calling us. Proof of purchase will be required.Trident Trikes reserves the right and has the sole discretion as to whether to repair or replace anypart covered by this warranty. Replacement parts may be substituted depending on availability.
The original owner is responsible for all labor, shipping and/or transportation costs related to therepair or replacement of warranty partsLiability:Riding a Trike can be dangerous and result in serious injury or death. When you are riding aTrident Trike model you are expressly assuming all risks resulting from any injuries sustained whileriding a Trident Trike including bodily injury, and property damage. The owner shall indemnifyTrident Trikes for any damages- financial or otherwise incurred as a result of an injury, or anyproperty damage caused by the owner, or somebody else riding the owners trike.
STOWAWAY/SPIKE ASSEMBLY INSTRUCTIONS AND MANUAL . Please Note: While the pictures on this manual are of a Stowaway 1, the procedures are exactly the same on other models. Tools Required: Metric Hex Wrenches . 10 MM Wrench or Adjustable Wrench . Chain Tool . Lithium Grease . C
