Transcription
Autodesk Industry Academia 2012Integrating AutoCAD Electrical with Autodesk Vault Professional
Integrating AutoCAD Electrical with Autodesk Vault ProfessionalAutodesk Vault and Vault ProfessionalAutodesk Vault manages the work in progress files within a project. By nature, Vault is amultiple-user system that supports concurrent engineering. With Vault, you can manage all datafrom one central storage location. Versions of files and the file relationships are maintained withVault. Think of Vault as the file management system.Autodesk Vault Professional requires Vault as a pre-requisite and has Vault integrated with it.Vault Professional adds additional capability to Autodesk Vault, most notably, bill-of-materialmanagement, release management and change management.Vault Professional can store any file format such as that from Microsoft Office, managingversions for any file. As opposed to versioning, Vault Professional produces revisions andoperates on objects called items. The files from Vault are used as item data in the VaultProfessional environment. Think of Vault Professional as more of the data management system.Drawing data can populate Vault Professional’s Item Master, and can be compiled with other Billof Material data from other CAD systems like AutoCAD Electrical, AutoCAD Mechanical andAutodesk Inventor. This compiled BOM data can then be synchronized with upstreamapplication such as ERP/MRP.For a customer operating in the vault environment, when the work in progress is consideredcomplete and ready for release, it would be released into the Vault Professional environmentwhere changes and revisions are managed.In summary, versions, managed by Autodesk Vault, are considered the design iterations thatoccur during the engineering process. Revisions, managed by Autodesk Vault Professional, arethe controlled changes that occur after the initial release from Engineering. Thus a revisionmight require several versions during the redesign or change process.More About VaultAutodesk Vault is a centralized data management application that securely stores and managesdesign data. Vault is included at no additional cost with all Autodesk manufacturing designsoftware and AutoCAD customers signed up for the subscription service. Tightly integrated witheach design application, Vault organizes all engineering data in a centralized location andreduces the time needed to find, reference, and reuse design data.The graphical UI (User Interface) in Vault offers CAD users an intuitive way to access andmanage their data. As product designs evolve, version management features in Autodesk Vaultprovide protection from unintentional overwriting of good designs.2
Integrating AutoCAD Electrical with Autodesk Vault ProfessionalThe following is a summary of the benefits of using Vault: Managing the myriad file types and inter-related files describing the CAD design createdby Inventor is a complex task. The file types include .IPT (part files), .IAM (assemblyfiles), .IDW (drawing files), and .IPN (presentation files).Vault maintains its data in a secure fashion. Someone with administrative permissionsassigns privileges to appropriate users to move data in and out of the Vault. Thus data isdelivered only to authorized personnel.Vault is a no charge feature of all Autodesk design applications!Vault provides a common location for backing up your valuable data. By providingavailability of previous versions, Vault allows you to recover from major design errors.Vault automatically saves and advances to new versions when design changes aremade. Assurance that you are always working with the correct released data isenormously valuable.Vault's copy design function allows users to readily create new designs from existingones, saving time and encouraging reuse of designs and parts.Vault data can be searched, the result being increased productivity by finding the correctdata faster, and better reuse of existing parts.Vault lays the groundwork for using Vault Professional, a straightforward, yetsophisticated release management system.More About Vault ProfessionalWhen you are ready for the next step, Autodesk offers the Vault Professional releasemanagement system. This includes Bill of Material Management, Release Management andChange Management. Autodesk Vault Professional automates the release-managementprocess by managing engineering changes and bills of materials (BOMs), which allowsengineering departments to maintain control over the design data after release to adjacentdepartments.Automating this process helps reduce costly errors and delays by minimizing manual data entryso that design changes are communicated directly back to engineering and correct parts areordered or manufactured for a specific design. Engineering can more easily share designinformation knowing released information is secure and changes cannot be made withoutimplementation of a formal engineering change order (ECO).In addition to automating release management and tracking the change order process,Autodesk Vault Professional manages bills of materials and enables the sharing of valuabledesign data with users outside engineering and applications such as enterprise resourceplanning (ERP) and material requirements planning (MRP) systems, as illustrated in the imagebelow, provided by Autodesk.3
Integrating AutoCAD Electrical with Autodesk Vault ProfessionalDesigned to go beyond the task of maintaining the correct version, for which it requires Vault,Vault Professional offers many additional advantages. Only a few of these follow. Users aresure to find many more. The ability to electronically track the status of ECO's (Engineering Change Order) andopen work can improve the management of engineering processes.The ECO process can be changed by monitoring the routing of reviews and approvals,thus possibly eliminating bottlenecks in the process. This is impossible with a manualsystem.The bill-of-material compare capability promises an easier review of in-process andbetter accuracy of completed ECOs.Enacting rigorous controls for approvals allows more traceability and avoids "lost" ECOs.Revision Vs. VersionsVersion control (V for Vault) stores the changes to each part or assembly every time it’schecked in. This is the primary tool for designers.Release control (Vault Professional) manages the process of taking a part, preparing it formanufacture (according to a change request or spec) and creating a new release of that part formanufacture. This is the primary tool for management.It might sound like semantics, but it’s important to understand the difference. Version control ishandy for designers, while release is essential for management of an engineering ormanufacturing business.The ideal is a system that manages both, Within the Autodesk portfolio, this requires both Vaultto manage versions and Vault Professional to manage releases. While managing the process isessential, of equal importance is the ability to control how those changes are managed – and forthat, you use the Vault Professional Change Management functions.4
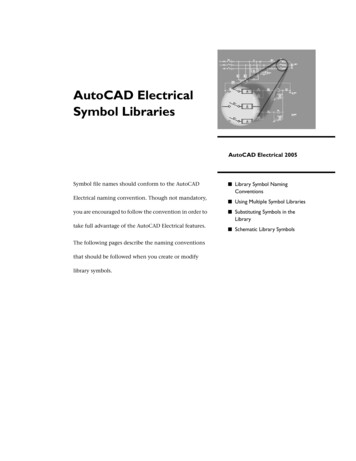
Integrating AutoCAD Electrical with Autodesk Vault ProfessionalAutoCAD Electrical ReferencesAutoCAD Electrical Project Description LinesAn AutoCAD Electrical project file is a text file, with no property fields. The project file containsinformation about the project including, project settings or defaults, included drawing file names,drawing description lines, and most important to Vault Professional, project description lines.Project description lines contain information entered by the designer about the project and caninclude entries such as Customer, Drafter, and Date. Project description lines are frequentlymapped to title blocks and contain much of the information usually placed in title blocks.An example of project line portion of a typicalproject file is displayed. Only the lines with anasterisk are project lines, the remaining linesare project settings, drawing descriptions andso on.Vault Professional needs to be taught ormapped to lines within the project file in orderto read the data from it. The startup, mapping,or seed file is checked into Vault. Themapping process references these checked infiles.Each project line you want to map must have a value entered for it. Without a value assigned toa project line it is removed from the WDP file, and therefore is not available for mapping to VaultProfessional.In previous versions of Vault Professional, the “In Reports” checkboxes needed to be selectedfor each line you wanted to map to Vault Professional. This is no longer a requirement.5
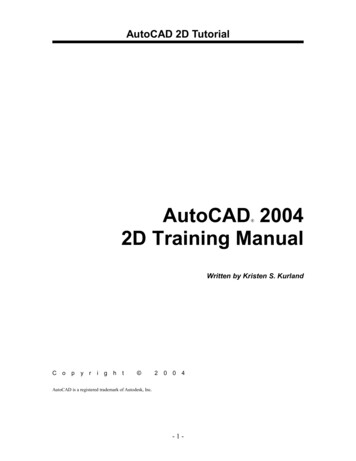
Integrating AutoCAD Electrical with Autodesk Vault ProfessionalWDL Mapping FileProject file place holders are frequently masked, or use alias names that are more descriptive.In the example shown, lines 1-10 are mapped to aliases. The remaining lines are not mappedand display the default Line#s, Line11, Line12, and so on. The alias names are displayed in the left column and have entries such as Title 1, Date,Engineer, and Scale.The center column of data fields displays the data entered about the project. This datacan be imported into Vault Professional.The original file placeholder names are shown in red.For example, Vault Professional can be mapped to either “Line6” or “Engineer”.LINE1LINE2.LINE10The mapping of the Line#’s to their aliases is accomplished through the use of a text file with aWDL extension. The file format is simply Line# Alias. One line is used for each mapping.6
Integrating AutoCAD Electrical with Autodesk Vault ProfessionalAn example of a WDL file is shown.Line# Versus Alias MappingsVault Professional can be mapped to either the original name or the alias.Be aware that mapping to Line#’s or to line aliases may have different display results within theVault environment.Line#’s are more universal. When you map to the Line#’s, the alias names are ignored. Themappings you create will work with every checked in project file. Whatever data exists in theLine# will be mapped to the Vault Item Property. This can cause confusion if different projectshave different Line# data assignments.If you map to the alias names, data is only mapped when the alias name is an exact match tothe item property mapping. If the alias name is changed, or does not exist in the project file nodata is transferred into the vault item property.You can create and map both the Line# and the Alias name to a single vault item property.Whatever one is found first is the one used by Vault Professional.7
Integrating AutoCAD Electrical with Autodesk Vault ProfessionalAutoCAD Electrical Catalog DataComponent information from the AutoCAD Electrical parts catalog databases can also beimported into Vault Professional. Vault Professional reads the information from the projectdatabase. Assemblycode and Assemblylist data is not transferred. Subassembly items aretransferred as individual pieces.Several fields in AutoCAD Electrical part catalog database may also be “masked” or use aliasnames. These are listed below: Query1, frequently listed as Description.Query2, frequently listed as Type, but could vary. (Vault Query 1)Query3, listed as Coil, Style, or Voltage, but could vary. (Vault Query2)Miscellaneous1, listing varies.Miscellaneous2, frequently listed as Miscellaneous, but could vary.User1-3, are custom defined fields, and may also have custom alias names assigned.8
Integrating AutoCAD Electrical with Autodesk Vault ProfessionalVault Professional SetupAll of the setup required to map AutoCAD Electrical data to Vault Professional takes place withinthe Vault Professional environment.Vault Professional manages the AutoCAD Electrical project by using a Vault Professional entitycalled an item. The AutoCAD Electrical project file is assigned to an item.Each item in Vault Professional is assigned properties that hold the data. These item propertiesin Vault Professional get mapped to the data in AutoCAD Electrical.Mapping Vault Professional Item PropertiesNote: You must be assigned the role of Administrator to perform these actions.Almost all setup tools are accessed through the Tools menu, under Administration VaultSettings.9
Integrating AutoCAD Electrical with Autodesk Vault ProfessionalOnce the Vault Settings dialog box is displayed, on the Behaviors tab, under Properties, youuse the Properties option to display the Property Definitions dialog box where the item propertyediting takes place.10
Integrating AutoCAD Electrical with Autodesk Vault ProfessionalProperty AssociationsThere are three different types of propertyassociations commonly used for mapping toAutoCAD Electrical.Item Electrical - Used to map to AutoCADElectrical drawing files and extract Bill ofMaterial data.Item Electrical Project - Used to map toAutoCAD Electrical project file and extractproject line data.Reference Designator - Used to map toAutoCAD Electrical drawing files and extractDescription and Rating data.GuidelinesHere are some guidelines to keep in mind:1. Only the AutoCAD Electrical project file is assigned to an item. The individualdrawings are all assumed to be necessary to complete the project, and must beincluded to complete the item. Because the project files references or contains alldrawings, only the project file is assigned to items.2. Item Mappings MUST be established before assigning the Item Number to theProject.3. Beginning with Productstream 2009 ( one of the previous names), data is alsotransferred from Vault Professional Item Properties into the AutoCAD ElectricalProject File line descriptions.4. Don’t map the reference designators Installation and Location to item properties.These values are automatically referenced in the First Level, and Part Only views ofthe BOM.11
Integrating AutoCAD Electrical with Autodesk Vault ProfessionalExercises* Initial Check In – Seed ProjectIn this section you work inside of AutoCAD Electrical to perform the initial check in ofthe SeedVlt project into Vault. This is the project used to map the data from AutoCADElectrical to Vault Professional item properties.1. In AutoCAD Electrical, on theProject tab, click Manager.2. In the Project Manager, open oractivate the SeedVlt project.3. If already logged into Vault, skip toStep 7.4. On the Vault tab, Access panel clickLog In.12
Integrating AutoCAD Electrical with Autodesk Vault Professional5. In the Welcome Autodesk DataManagement dialog box, click LogIn.6. In the Log In dialog box, do thefollowing: For User Name, enterAdministrator. For Password, leave blank. For Server, select Localhost. For Database, select Vault. Click OK.7. In Project Manager, right-click theactive project, SeedVlt, click Vault Check In All.8. In the Select Vault Location dialogbox, click New Folder.9. In the / dialog box, for New Folder,enter SeedVlt. Click OK.10. In the Select Vault Location dialogbox, select SeedVlt.11. Click OK.12. In the Check In 'SeedVlt.wdp' dialogbox, for Enter Comments to Includein This Version, enter Initial CheckIn.13. Click OK.13
Integrating AutoCAD Electrical with Autodesk Vault Professional14. Notice the project and drawing filesare checked into Vault.* Map ACE Project Line Values to Vault Item PropertiesIn this section you log in to the Vault. You map three ACE project lines to ElectricalProject item properties. Title 1 is mapped to both Line 1 and the alias, Title1. Title 2 ismapped only to the alias, Title 2. Title 3 is mapped only to Line 3.Then you map the Vault Revision item property to the ACE project Line 5.1. Start Vault Professional.2. In the Welcome dialog box, clickLog In.3. In the Log In dialog box, do thefollowing: For User Name, enterAdministrator. For Password, leave blank. For Server, select Localhost. For Database, select Vault. Click OK.14
Integrating AutoCAD Electrical with Autodesk Vault Professional4. Click Tools menu Administration Vault Settings.5. In the Vault Settings dialog box,Behaviors tab, under Properties,click Properties.6. In the Property Definitions dialogbox, click New.7. In the New (Property) dialog box,do the following: For Name, enter Title 1. For Type, select Text. For Associations, from the dropdown list, do the following: Select Item. Select Electrical Project. Click Close.15
Integrating AutoCAD Electrical with Autodesk Vault Professional8. On the Mapping tab, click ClickHere to Add a New Mapping.9. Click File Property.10. Click Import Properties.11. Click Import From Vault.12. In the Select File dialog box, do thefollowing: Double-click SeedVlt. Select SeedVlt.wdp. Click Open.16
Integrating AutoCAD Electrical with Autodesk Vault Professional13. In the New (Property) dialog box,on the Mapping tab, do thefollowing: For Item, File Property, selectTitle1 from the list. Click OK. Click in blank area to acceptentry. Click Click Here to Add a NewMapping. For Item, File Property, selectLine1 from the list. Click OK. Click in blank area to acceptentry. Click OK.14. Repeat the above steps, mappingTitle 2 to only the alias Title2.15. Repeat the above steps, mappingTitle 3 to only Line 3.16. In the Property Definitions dialogbox, from the list, select Revision.17. Click Edit.18. In the Edit (System) dialog box, onthe Mapping tab, do the following: Click Click Here to Add a NewMapping. For Entity, select Item from thelist. Click File Property. Click Import Properties. Click Import From Vault.17
Integrating AutoCAD Electrical with Autodesk Vault Professional19. In the Select File dialog box, do thefollowing: Double-click SeedVlt. Select SeedVlt.wdp. Click Open.20. In the Edit (System) dialog box, onthe Mapping tab, do the following: For Item, File Property, selectLine10 from the list.21. Click OK.Notice that the mapping is one wayonly, from Vault to the file.22. Click OK.* Map ACE BOM Values to Vault Item PropertiesIn this section you map AutoCAD Electrical Bill of Material values to Vault Professionalitem properties.1. If closed, click Tools menu Administration Vault Settings.2. In the Vault Settings dialog box,Behaviors tab, under Properties,click Properties.18
Integrating AutoCAD Electrical with Autodesk Vault Professional3. In the Property Definitions dialogbox, click New. In the New (Property) dialogbox, do the following: For Name, enter MFG. For Type, select Text. For Associations, from the dropdown list, do the following: Select Item. Select Electrical. Click Close.4. On the Mapping tab, click ClickHere to Add a New Mapping.5. For File Properties, click ImportProperties.6. Click Import From Vault.7. In the Select File dialog box, do thefollowing: Double-click SeedVlt. Select VaultSeed 04.dwg. Click Open.19
Integrating AutoCAD Electrical with Autodesk Vault Professional8. In the New (Property) dialog box,on the Mapping tab, do thefollowing: For Item, File Property, selectMANUFACTURER from thelist. Click OK. Click OK to save mapping.9. Repeat the above steps, mappingQUERY 2 to Query 2.10. Repeat the above steps, mappingMISC1 to Miscellaneous 1.* Map ACE Reference Designators to Vault Item PropertiesIn this section you map AutoCAD Electrical component reference designators to VaultProfessional Reference Designator item properties.1. If closed, click Tools menu Administration Vault Settings.2. In the Vault Settings dialog box,Behaviors tab, under Properties,click Properties.20
Integrating AutoCAD Electrical with Autodesk Vault Professional3. In the Item Property Definitionsdialog box, click New.4. In the New (Property) dialog box,do the following: For Name, enter DESC1. For Type, select Text.5. For Associations, from the drop-down list, do the following: Select Reference Designators. Click Close.6. On the Mapping tab, click ClickHere to Add a New Mapping.7. For File Property, click ImportProperties.8. Click Import From Vault.9. In the Select File dialog box, do thefollowing: Double-click SeedVlt. Select VaultSeed 04.dwg. Click Open.10. In the New (Property) dialog box,on the Mapping tab, do thefollowing: For Item, File Property, selectDESC1 from the list. Click OK.11. Click OK to save mapping.21
Integrating AutoCAD Electrical with Autodesk Vault Professional12. Repeat the above steps, mappingDESC2 to DESC2.13. Repeat the above steps, mappingDESC3 to DESC3.14. In the Property Definitions dialogbox, click Close.15. In the Vault Settings dialog box,click Close.* Assign Item NumberIn this section you assign an item number to the electrical project file.The most important step is to assign an item to the AutoCAD Electrical project file thathas been loaded into the Vault system. Vault Professional uses the item assignment tomanage all of the data.1. In Autodesk Vault Professional,click Vault Explorer.2. Click Refresh.22
Integrating AutoCAD Electrical with Autodesk Vault Professional3. In the Vault Explorer tree view,expand Vault Explorer ( ).4. Select SeedVlt.5. In the SeedVlt preview window,right-click SeedVlt.wdp, clickAssign Item.6. In the Assign Item Wizard, do thefollowing: Preview Items dialog box, clickNext. Find Duplicates dialog box,click Finish. View Results dialog box, clickClose.7. In Autodesk Vault Professional,click Item Master.8. In the View Filter menu, selectElectrical Project Items.23
Integrating AutoCAD Electrical with Autodesk Vault Professional* Check In Working DatasetIn this section you check in the working dataset, Integrating ACE and Vault, and assignan item number to the electrical project file.1. Move to AutoCAD Electrical.2. In the Project Manager, open oractivate theIntegrating ACE And Vaultproject.3. In Project Manager, right-click theactive project,Integrating ACE And Vault, clickVault Check In All.4. In the Select Vault Location dialogbox, click New Folder.5. In the / dialog box, for New Folder,enter Integrating ACE And Vault.Click OK.6. In the Select Vault Location dialogbox, select Integrating ACE AndVault.7. Click OK.8. In the Check In 'Integrating ACE And Vault.wdp'dialog box, for Enter Comments toInclude in This Version, enterInitial Check In.9. Click OK.10. Move to Vault ProfessionalExplorer.11. Click Refresh.12. In the Vault Explorer tree view,expand Vault Explorer ( ).13. Select Integrating ACE And Vault.24
Integrating AutoCAD Electrical with Autodesk Vault Professional14. In the Integrating ACE And Vaultpreview window, right-clickIntegrating ACE And Vault.wdp,click Assign Item.15. In the Assign Item Wizard, do thefollowing: Preview Items dialog box, clickNext. Find Duplicates dialog box,click Finish. View Results dialog box, clickClose.* View Transferred Project DataIn this section you view the project file data transferred from AutoCAD Electrical intoVault Professional.1. In Autodesk Vault Professional,click Item Master.2. In View filter menu, select ElectricalProject Items.3. In Item Master pane, selectSeedVlt.wdp.25
Integrating AutoCAD Electrical with Autodesk Vault Professional4. On General tab, the information hasbeen transferred from project Line#,and alias values.5. In Item Master pane, selectIntegrating ACE And Vault.wdp.6. Notice that not all of the informationappears as with the SeedVlt.wdpfile. This is because the Line# andAlias mappings do not matchexactly.7. In AutoCAD Electrical, in theProject Manager, right-clickIntegrating ACE And Vault, clickDescriptions.8. In the Update Project Descriptionsdialog box, click Yes.9. In the Project Description dialogbox, notice that except for Line 2,Title 2, the Alias names are differentthan the SeedVlt.wdp project.Title 2 in the SeedVlt project has anextra space.26
Integrating AutoCAD Electrical with Autodesk Vault Professional* View Transferred Catalog DataIn this section you view the catalog file data transferred from AutoCAD Electrical intoVault Professional.1. In Vault Professional, Item Master,select Bill of Materials tab. Catalogdata has been transferred.2. Right-click any heading and selectCustomize View.3. In the Customize View dialog box,click Fields.4. In the Customize Fields dialog box,in the Select Available Fields Fromlist, select Item Fields.5. From the Available Fields list, selectMFG. Click Add.6. Repeat Step 5 for the following: QUERY 2 MISC127
Integrating AutoCAD Electrical with Autodesk Vault Professional7. In the Show These Fields in thisOrder pane, select Title (Item,CO). Click Remove.8. Repeat Step 7 for the following: Detail ID Revision State9. Click OK.10. In the Customize View dialog box,click Close.11. Right-click over any heading andclick Best Fit.12. Catalog data from AutoCADElectrical is displayed.For Structure,select First Level from list.13. Select Show Reference Designators.14. Notice the list is sorted anddisplayed by Installation andLocation.28
Integrating AutoCAD Electrical with Autodesk Vault Professional* Update DataIn this section, you edit both the item and file properties and update the AutoCADElectrical project description lines and the Vault Professional item properties with theedited values.1. In the Item Master, right-click theprojectIntegrating ACE And Vault.wdpitem, select Change Revision.2. In the Choose Next Revision dialogbox, select Next Primary. Click OK.3. Move to AutoCAD Electrical4. In the Project Manager, clickRefresh.5. After the Refresh is complete, noticethe project icon has changed,indicating that Vault Professionaland the project file contain differentinformation.6. Right-click the active project name,click Descriptions.7. In the Update Project Descriptionsdialog box, click Yes.Note: Two things trigger update of VaultProfessional: Description change Titleblock update (Optional) Drawing List Report(Requires title block update)29
Integrating AutoCAD Electrical with Autodesk Vault Professional8. In the Project Description dialogbox, Notice the Revision entry.9. In the Project Description dialogbox, For Customer:, enter VaultProfessional Mapping. For Job Model No., enter 98765-02. Click OK.10. Move to Autodesk VaultProfessional.11. On the Item Master tab, right-clickIntegrating ACE And Vault.wdp.Click Update.15. In the Update Item Wizard, Preview Items dialog box, clickNext. Find Duplicates dialog box,click Finish. View Results dialog box, clickClose.12. In the Item Master preview window,click the General tab.Note: Values are updated underProperties, matching the projectdescriptions.This completes the exercise.30
Integrating AutoCAD Electrical with Autodesk Vault Professional 5 AutoCAD Electrical References AutoCAD Electrical Project Description Lines An AutoCAD Electrical project file is a text file, with no property fields. The project file contains information about the project including, p