Transcription
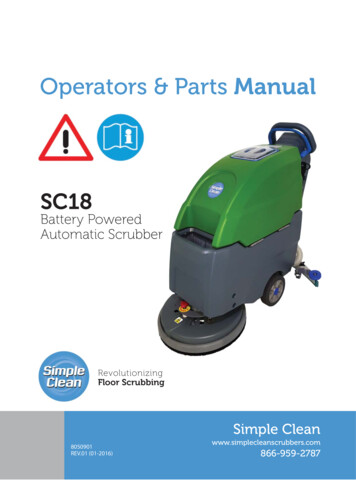
Operators & Parts ManualSC18Battery PoweredAutomatic ScrubberRevolutionizingFloor ScrubbingSimple Clean8050901REV.01 (01-2016)www.simplecleanscrubbers.com866-959-2787
OPERATOR MANUALRead operator manual carefully!IMPORTANT: To ensure full warranty protection, please fill out ourwarranty submission form online located at the following web address.Scan QR code or navigate to:www.simplecleanscrubbers.com/warrantyScan to submit warrantyHOW TO ORDER PARTSScan QR code or navigate to:www.simplecleanscrubbers.com/shop-partsScan to order partsYou can also call us at 866.959.2787PROTECT THE ENVIRONMENTPlease dispose of packaging materials,old machine components suchas batteries, hazardous fluids, including antifreeze and oil, in an environmentally safe way according to local waste disposal regulations. Always remember to recycle. Specifications and parts are subject to change without notice.2SC18
OPERATOR MANUALTABLE OF CONTENTSSAFETY PRECAUTIONS.4MACHINE COMPONENTS.5MACHINE SETUP & INSTALLATION.6MACHINE OPERATION.7TANK DRAINING.8BATTERY CHARGING.8PREVENTATIVE MAINTENANCE.9BASIC TROUBLESHOOTING.10TECHNICAL SPECIFICATIONS.11PARTS LIST.12-26WEARABLE PARTS.27WIRING DIAGRAM.28SC 183
OPERATOR MANUALSAFETY PRECAUTIONSThis machine is intended for commercial use. Itis designed exclusively to scrub hard floors in anindoor environment and is not constructed for anyother use. Only use recommended accessories.All operators shall read, understand and exercise the following safety precautions:1. Do not operate machine:-- Unless trained and authorized.-- Unless you have read and understand theoperators manual.-- In flammable or explosive areas.-- If not in proper operating condition.-- In outdoors areas.2. Before starting machine:-- Make sure all safety devices are in placeand operate properly.3. When using machine:-- Go slow on inclines and slipperysurfaces.-- Follow all safety guidelines.-- Be very careful when using the machine inreverse.-- Reduce speed when turning.-- Report and fix any damage to machine priorto operating it.-- Never allow children to play on oraround.-- Do not operate on inclines that exceed 5%(3 ).-- Avoid any contact with battery acid-- Avoid moving parts. Do not wear loose fittingclothing while servicing machine.WARNING: Batteries emit hydrogengas. Explosion or fire can result from hydrogen gas. Keep sparks and open flamesaway! Keep battery compartment openwhen charging.WARNING: Flammable materials cancause an explosion or fire. Do not use flammable materials in tanks.WARNING: Flammable materials orreactive metals can cause explosion or fire.Do not pick up.4. Before leaving or servicing machine:-- Stop on level surface.-- Turn off machine.5. When servicing machine:-- Read operators manual thoroughly prior tooperating or servicing this machine.-- Use manufacturer supplied or approvedreplacement parts.-- Secure machine with wheel blocks prior tojacking the machine up.-- Use approved jack or hoist to safely elevatethe machine.-- Disconnect batteries prior to working onmachine.-- Wear gloves when handling batteries orbattery cables.4WARING: Repairs are to be completedby Authorized service centers only. Any repairscompleted by unauthorized persons will avoidthe warranty.SC18
OPERATOR MANUALMACHINE 24.25.15Control triggerRecovery tank support standVacuum motorBatteriesSolution tank fill-portPressure adjusting handleScrub headSplash GuardMotor hub lock on tankRecovery tankClear cover, Recovery tankControl handle barBattery meterVacuum motor switchBrush motor switchCircuit breakerClear cover, Battery chargerDrain hoseClear tube, solution tank sight gaugeSqueegee lift leverVacuum hoseSqueegee assemblyRear parking wheel8 Inch wheels171819202122232425SC 185
OPERATOR MANUALMACHINE SET UPMACHINE SET UP & INSTALLATIONUNCRATING MACHINEBe sure and check packing carton for any damage.Immediately report any damage to carrier. Checkthe contents of package to ensure that thefollowing items are included: Machine 2-12V Batteries Squeegee assembly Pad Driver or BrushINSTALLING BATTERIESThe batteries are already in the machine upondelivery; However you will need to connect thecables to the battery posts.WARNING: Batteries emit hydrogen gas.Explosion or fire can result from hydrogengas.Keep sparks and open flames away! Keepbattery compartment open when charging.1. Turn off the machine.2. Lift the Recovery tank (see machinecomponents, p5 item #2) to access the batterycompartment.3. Carefully place the two batteries into thecompartment as shown in figure below.DO NOT DROP BATTERIES INTOCOMPARTMENT!4. Connect battery cables to posts as shown indrawing below.RED to POSITIVE and BLACK to NEGATIVE.61.2.3.4.1.2.3.4.5.6.PRE-OPERATION CHECKSSweep or dust mop the surface to be cleaned.Check battery meter to make sure batteries arefully charged. (See BATTERY CHARGING)Check that squeegee is properly installed.Check that brush / pad is properly installed.INSTALLING PAD DRIVER OR BRUSHEnsure that the machine is turned off.Lift the Squeegee lift lever (see machinecomponents, p5 item #12) to the upwardpostion.Lift the Scrub head (see machine components,p5 item # 23) by pushing down the Controlhandle bar (see machine components, item4), while the Rear parking wheel (see mahcinecomponents, p5 item #15 ) will touch the floor.If using a Pad Driver, first attach the appropriatepad to the pad driver surface.Turn the brush motor hub until the slot with thespring clip is visible through the scrub headwindow.Mount the pad driver or brush to the brushmotor hub by lining up the three studs with thethree holes in the brush motor hub. Once in theholes, rotate the driver toward the spring clip tolock the pad driver into place.If necessary, press down on the Motor hub lockpin (see machine componts, p5 item # 25) tolock motor hub in place.MOUNTING THE SQUEEGEE ASSEMBLY1. Lift the Squeegee lift lever to the upwardposition.2. Mount the Squeegee assembly (see machinecomponents, p5 item #14) to the squeegee pivotbracket. make sure the knobs are completelyseated into the slots before securing knobs.3. Connect the vacuum hose to the squeegeeassembly. Loop the hose by using the hose clipprovided.4. Check the squeegee blades for properadjustment.SC18
OPERATOR MANUALFILLING THE SOLUTION TANKThe machine is equipped with a Solution fill-port(see machine components, p5 item #21 )at thefront of the Solution tank, you can fill the solutiontank by using a hose or a bucket.Fill the solution tank to the "10 Gal" level on theSolution tank sight gauge (see machine components, p5 item #11). When using the bucket, stopfilling when the level reaches the bottom edge ofthe fill-port.NOTE: When filling the solution tank with a bucket, make sure that the bucket is clean. Do not usethe same bucket for filling and draining the machine.WARNING: Do not put any flammablematerials into solution tank. This can causean explosion or a fire. Only use recommendedcleaning chemicals. Contact your Simple CleanScrubbers dealer for recommendations onproper chemicals.MACHINE OPERATIONWARNING: Do not operate machine unless you have read and understand this manual.1. Lower the Squeegee assembly to the floor bylowering the Squeegee lift lever.2. Lower the Scrub head to the floor by liftingthe Control handle bar, while the Rear parkingwheel will not touch the floor.3. Turn on the Brush motor switch (see machinecomponents, p5 item #7), Check the Batterymeter (see machine components, p5 item #5),if the battery meter is in the red, DO NOT continue to operate the machine and recharge thebatteries immediately.4. Turn on the Vacuum motor switch (see machinecomponents, p5 item #6), and then the vacuummotor will start work.5. Pull the Control trigger (see machine components, p5 item #17) backwards to start scrubbing by moving the machine forward.NOTE: The Brush motor will not work andthe solution will not flow until the controltrigger is pulled.6. To stop scrubbing, release the Control trigger,lift the Squeegee assembly and turn off the Vacuum motor switch, and then turn off the Brushmotor switch, lift the Scrub head.SC 18WHILE OPERATING MACHINEWARNING: Fire Or Explosion Hazard. DoNot Pick Up Flammable Materials Or ReactiveMetals.1. Go slow on inclines and slippery surfaces. Donot operate the machine on inclines that exceed5% (3 ).2. Do not keep the machine in the same positionwith pad / brush spinning, keep the machinemoving to prevent damage to floor finish.3. If the squeegee assembly leaves streaks on thefloor, raise the squeegee off the floor and wipethe blades down with a damp cloth. Pre-sweepthe area to prevent leaving streaks on the floor.4. Pour a recommended defoamer into therecovery tank if excessive foam appears.WARNING: Do not allow foam to enterthe float shut-off screen, vacuum motor damage will result. Foam will not activate the floatshut-off screen.5. Occasionally check the Battery meter, the indicator displays the level of the batteries. Whenmeter is in the red, stop scrubbing and rechargethe batteries.Red Yellow 2 Yellow 1 Green 2 Green 1All green lights on: 100% level.Yellow lights on, green lights off : 50% level.Red light on, other lights off: 20% level, the machine should be stopped and the batteries shouldbe recharged.Red light flash: the batteries have already beendischarged deeply.6. When the solution tank runs empty, turn offthe Brush motor switch and lift the brush head.Keep the squeegee down and continue to vacuum until all the dirty water is picked up.NOTE: See TANK DRAINING section to learnhow to drain recovery and solution tanks.7
OPERATOR MANUALTANK DRAINING1. Turn off the machine.2. With the squeegee and scrub head in their "up"position, transport machine to approved area fordraining tank(s).DRAINING THE RECOVERY TANKAny time scrubbing is completed, or when refillingsolution tank, the recovery tank should be drainedand cleaned.WARNING: If the recovery tank is notdrained when the solution tank has been refilled, foam or water may enter the float shutoff screen and cause damage to the vacuummotor.1. While holding the drain hose (see machinecomponents, p5 item #10) upward, remove thecap and lower hose to drain.2. Open the recovery tank cover and rinse outthe tank. Use a rag to remove any excess dirt.Clean the float shut-off screen and debris traylocated in the recovery tank .BATTERY CHARGINGWARNING: Fire Or Explosion Hazard.Batteries Emit Hydrogen Gas. Keep Sparks andOpen Flame Away. Keep Battery CompartmentPropped Open When Charging.1. Transport the machine to a well ventilated area.2. Turn the machine off.3. If charging wet, lead acid, batteries check thefluid level before charging.4. Prop up the recovery tank onto the supportstand (see machine components, p5 item #18)for ventilation.5. Connect the charger's AC power supply cord toa properly grounded receptacle.6. The charger will automatically begin to charge,you can watch the charging status on the window (machine components, p5 item #9), oncethe charging cycle begins, the indicator lightswill progress from red, yellow to green. Whenthe green indicator light comes on, the chargingcycle is done. Unplug the charger cord.NOTE: The machine will not operate whencharging.DRAINING THE SOLUTION TANKAny time scrubbing operation is completed, thesolution tank should be drained and cleaned.1. Pull the solution clear tube(see machine components, p5 item #11) off the hose fitting, thiswill allow the solution to flow freely into a bucketor floor drain.2. Remove the cover of the filter assembly to drainthe solution tank, check the filter screen andclean up it if necessary.3. Rinse the solution tank with clean water afterevery use. This will help prevent chemicalbuildup and clogging of the solution lines.4. After rinsing out the tank, securely reconnectthe tank level hose to the hose fitting, replacethe filter assembly cover and be sure the filterscreen and the "O" ring is in the correct position.8SC18
OPERATOR MANUALBATTERY MAINTENANCEPREVENTATIVE MAINTENANCEWARNING: Before performing any maintenance on the machine, be sure that the poweris turned off, or the batteries are disconnected!WARING: Repairs are to be completedby Authorized service centers only. Any repairscompleted by unauthorized persons will voidthe warranty.1.2.3.4.5.6.7.1.2.3.4.5.6.DAILY MAINTENANCERemove pad driver/ brush and clean with approved cleaner.Drain recovery and solution tanks completelyand rinse out with clean water. Visually checkthe recovery tank for debris and clean out asnecessary.Raise the squeegee assembly off floor and wipeit down with a damp towel. Be sure to store thesqueegee in the up position.Remove the float shut-off assembly and rinse itout with clean water.Clean machine with an approved cleaner and adamp towel.Recharge the batteries.Check the condition of the squeegee bladewiping edge, rotate blade if worn.MONTHLY MAINTENANCEClean the battery tops to prevent corrosion.Check for loose battery cable connections.Inspect and clean the recovery tank cover seal.Replace it if damaged.Lubricate all grease points and pivot points withsilicon spray and approved grease.Check the machine for loose nuts and bolts.Check the machine for leaks.MOTOR MAINTENANCE1. Contact your Simple Clean Scrubbers dealer forany motor maintenance.2. Motor should have the brushes checked every250 hours. Brushes should be replaced whenthey are worn to a length of 10 mm or less.SC 18WARNING: Batteries emit hydrogen gasand an explosion o fire can result. Keep sparksand fire away from batteries at all times.WARNING: Whenever servicing batteries,be sure to wear protective gloves. Avoid contact with battery acid at all times.NOTE: For the best machine performance, keepbatteries properly charged at all times. Do not letthem sit in a discharged condition.1. Always follow the battery charging directions asoutlined in the BATTERY CHARGING section ofthis manual.2. Keep battery tops and terminals free from corrosion. A strong solution of baking soda and wateris the best way to keep the batteries corrosionfree. DO NOT ALLOW THE BAKING SODA /WATER SOLUTION TO ENTER THE BATTERYCELLS.3. Use a wire brush with the baking soda solutionto properly clean the battery posts and connections.4. Check battery connections for wear and looseterminals. Replace if necessary.1.2.3.4.5.6.7.8.MACHINE STORAGEAlways store the machine indoors.Always store the machine in a dry area.Always store the machine in its upright position.Always store the machine with the pad driver/brush raised off the floor.Always store the machine with the squeegeeassembly raised off the floor.If storing in an area which may reach freezingtemperatures, be sure to drain all fluids from themachine prior to storage. Any damage causedby freezing temperatures will not be covered bythe warranty.Drain the recovery tank.Drain the solution tank of all fluid.9
OPERATOR MANUALBASIC TROUBLESHOOTINGPROBLEMCAUSEBatteries need to be chargedMachine will notBad battery(s)operateControl handle trigger not pulledPull control handle triggerTripped brush motor circuit breakerReset brush circuit breaker buttonReplace brush motor switchReplace brush motor solenoidFaulty brush motor or wiringContact Simple Clean Scrubbers DealerWorn motor carbon brushesContact Simple Clean Scrubbers DealerBad vacuum motor switchReplace vacuum motor switchReplace vacuum motor relayContact Simple Clean Scrubbers DealerWorn Motor carbon brushesContact Simple Clean Scrubbers DealerBall valve is shut offTurn on the ball valveClogged solution tank filter or solutionhoseClean solution tank filter or flush outsolution hoseClogged solution Solenoid valveRemove valve and cleanRecovery tank is fullDrain recovery tankLoose drain hose capTighten capClogged float shut-off screen located inrecovery tankClean screenClogged squeegee assemblyClean squeegee assemblyWorn squeegee bladesReplace or rotate squeegee bladesIncorrect squeegee blade deflectionAdjust squeegee blade heightPoor water pickLoose vacuum hose connectionsup10Replace battery(s)Tighten loose cableVacuum motor Bad vacuum motor relaywill not operate Faulty vacuum motor or wiringShort run timeCharge batteriesLoose battery cableBrush motor will Bad brush motor switchnot operateBad brush motor solenoidLittle or nosolution flowSOLUTIONSecure hose connectionsClogged vacuum hoseRemove clogged debrisDamaged vacuum hoseReplace vacuum hoseRecovery tank lid not in placeProperly position coverDamaged recovery tank cover sealReplace sealFaulty vacuum motorContact Simple Clean Scrubbers DealerLow battery chargeRecharge batteriesLow battery chargeFully recharge batteriesDefective batteriesReplace batteriesBatteries need maintenanceSee BATTERY MAINTENANCEFaulty battery chargerRepair or replace battery chargerSC18
OPERATOR MANUALTECHNICAL SPECIFICATIONSModelSC18Voltage24VDCRecovery tank capacity13 gal / 50 LSolution tank capacity10 gal / 40 LCleaning path width18 in / 450 mmSqueegee width30 in / 762 mmDrive systemBrush AssistedPad/Brush pressure55 lbs / 25 KgBrush motor0.75 hp / 0.55 KwBrush speed180 RPMVacuum motor0.68 hp / 0.5 KwWater lift45 in. H2O/ 1143 mm. H20Batteries2- 12, 85AH @ 20 hrWeight without batteries145 lbs / 65 KgWeight with batteries265 lbs / 120 KgDecibel rating at operator's ear, indoors68dB(A)Grade level, max5% (3 )Dimensions L W HSC 1843.4 20.5 42.5 in/ 1152 520 1080mm11
PARTS LISTRECOVERY TANK GROUP12SC18
PARTS LISTRECOVERY TANK GROUPDIANO.PARTNUMBER18050201RECOVERY TANK128131010DRAIN HOSE131962050CLAMP148111300HINGE ASSEMBLY251421612FLAT WASHER M6 12 1.61261021616HEX HEAD BOLT M6 161078131020CABLE188132050VACUUM MOTOR, 24VDC, 2-STAGE, KIT191123608LOCK NUT, M63108011007MUFFLER1118112006STUD, M6 923121121605NUT, M63138112005GASKET, VACUUM MOTOR1148050106LOGO, SIMPLE CLEAN1158111008BRACKET1161421824FLAT WASHER M8 24 2.02178111007RECOVERY TANK SUPPORT1188115404SLEEVE, P/M1191021830HEX HEAD BOLT M8 301208111015FLOAT, SHUT-OFF1211321210SCREW, SELF-TAPPING, ST4 106222320220ELBOW1231421409FLAT WASHER M4 9 0.84242320217RUBBER HINGE1252320218GASKET1262320216COVER, CLEAR1SC18DESCRIPTIONNOREQ'D13
PARTS LISTSOLUTION TANK GROUP14SC18
PARTS LISTSOLUTION TANK GROUPDIANO.PARTNUMBER18050101SOLUTION TANK128119100FILTER ASSEMBLY131421409FLAT WASHER M4 9 0.8241221412PAN HEAD SCREW M4X12258016010WHEEL SHAFT161421824FLAT WASHER M8 24 2.0371422821LOCK WASHER, M8581021820HEX BOLT, M8 X 20298115200WHEEL, 8 INCH2101421828FLAT WASHER M8 28 2.03111021816HEX BOLT, M8 X 162128115205WHEEL CAP2131645324COTTER PIN1148037015PIN 12 701158115004SPRING1168037010BRACKET, SQUEEGEE1178135001PLASTIC WASHER, M8 30 1.54188115001SQUEEGEE SUPPORT1191123115LOCK NUT, M122208114511JOINT BEARING1211421618FLAT WASHER M6 18 1.68221123608LOCK NUT, M61238115405SLEEVEE, P/M2241421132FLAT WASHER M12 32 2.02251021230HEX BOLT, M12 X 302261021616HEX BOLT, M6 X 166271422616LOCK WASHER, M66288037020BRACKET, SQUEEGEE MNTG1298119007ELBOW, G1/21308119005BALL VALVE, G1/21311021830HEX BOLT, M8 X3013280130162 INCH CASTER1338034012BRACKET, CASTER1341962025CLAMP, 16-25MM1SC18DESCRIPTIONNOREQ'D15
PARTS LISTSOLUTION TANK GROUPDIANO.PARTNUMBER358050105CLEAR TUBING1368050130CONNECTOR1378113009NYLON, CLAMP7381421510FLAT WASHER M5 10 110391221512PAN HEAD SCREW M5X128408013010BATTERY, DISCOVER EV24A-A OR TROJAN 24TMX2418114751JACKET, BATTERY TERMINAL, BLACK4428050476BATTERY CONNECT CABLE, RED1438050475BATTERY CONNECT CABLE, BLACK3441321310SCREW, SELF-TAPPING, ST4.8 X 9.53458050153CHAIN1468050151LID, SOLUTION TANK FILL PORT1478050150LID, 116DESCRIPTIONNOREQ'DSC18
PARTS LISTCONTROL CONSOLE GROUPSC1817
PARTS LISTCONTROL CONSOLE GROUPNOREQ'DDIANO.PARTNUMBER18050401CONTROL CONSOLE HOUSING128050420PLATE, CONTROL PANEL138050430DECAL, CONTROL PANEL141421510FLAT WASHER M5 10 1.01651221512PAN HEAD SCREW M5 12968014063BATTERY CAPACITY METER178014006ROCKER IT BREAKER, 35A1112320403CABLE GLAND1128014070UON BOARD BATTERY CHARGER, KIT1131123406LOCK NUT, M46148112030APOWER CORD, BATTERY CHARGER1158134060PLATE, BATTERY CHARGER MNTG1168134061CLEAR COVER1171221306PAN HEAD SCREW M3 X 62181421409FLAT WASHER M4 9 0.86191221412PAN HEAD SCREW M4 X 126201021630HEX HEAD BOLT M6 30,SS1211421618FLAT WASHER M6 18 1.61228050410CABLE, SQGE LIFT1238014101LIFTING ROPE SPACER1248034011BAFFLE1251123608LOCK NUT M61268134501BRACKET1271021512HEX HEAD BOLT M5 12,SS1281421515FLAT WASHER M5 15 1.03291421132FLAT WASHER M12 32 1.52301121605HEX NUT M61318134081SLEEVE1328134080SQUEEGEE LIFTING HANDLE1338113104BALL KNOB M81341021840HEX HEAD BOLT M8 40,SS218DESCRIPTIONSC18
PARTS LISTCONTROL CONSOLE GROUPDIANO.PARTNUMBER1422821LOCK WASHER M8361421828FLAT WASHER M8 28 32376210111CLAMP, DRAIN HOSE1381221516PH SCREW M5 167398034013WEIGHT14081140301411421824BRACKET, CONTROL CONSOLE MNTGFLAT WASHER M8 24 2421021820HEX BOLT M8 206431221520PH SCREW M5 202441021320SCREW M3 202451434300LOCK WASHER, TOOTH, M32468114712MICRO SWITCH1471123507LOCK NUT M55488014061BRACKET, MICRO SWITCH1491123305LOCK NUT M32508014062BRACKET, REAR KET, SPRING1548210421RELAY1551534608SET SCREW M6 84568014022TRIGGER1578014031BUSHING, HEX1588014032SPRING ROD1598014033PLATE1601422411LOCK WASHER, M42618114101SHAFT135SC18DESCRIPTIONNOREQ'D8619
PARTS LISTSCRUB HEAD GROUP20SC18
PARTS LISTSCRUB HEAD GROUPNOREQ'DDIANO.PARTNUMBER18015200BRUSH MOTOR, 24VDC 3/4HP, 5010BRACKET, SCRUB HEAD168015007BUSHING371511040SOCKET SCREW, M10 X 40281421618FLAT WASHER M6 18 1.6891021625HEX HEAD BOLT, M6 X 254101222510SH SCREW, M5 X 102111221516PAN HEAD SCREW M5 X 163121422513LOCK WASHER, M56131421518FLAT WASHER M5 18 2.04141321213SELF-TAPPING SCREW, ST4.2 X 132151221410PAN HEAD SCREW, M4 X 102168015103BRACKET, SOLENOID VALVE1178015005COVER, SCRUB HEAD1188015090SPLASH GUARD, SCRUB HEAD1198015087SPACER1201221616PAN HEAD SCREW, M6 X 168211123608LOCK NUT M64228015001BRACKET12380151164241644220NYLON WASHER 12.5 20 1.52251646240PIN 12 20COTTER PIN 2 X 402268015060INLET1271221510PAN HEAD SCREW M5 X 101281221512PAN HEAD SCREW M5 X 122291421510FLAT WASHER M5 10 1.02308116002PLATE, BRUSH CLAMP1318116003SPRING CLIP1328116008HUB, DRIVE, 3-LUG13381160101341422821FLAT WASHER 8.5 25.4 4.5SC18DESCRIPTIONLOCK WASHER, M8121
PARTS LISTSCRUB HEAD GROUPNOREQ'DDIANO.PARTNUMBER351023815HEX BOLT, 5/16-18 X 1.5" UNC1361011016HEX BOLT, M10 X164371421020FLAT WASHER M10 20 2.04388015108SUPPORT1391212410SH SCREW M4 X102408015041BRACKET, BRUSH MOTOR1411111215HEX NUT, M161428015050BRUSH PLUNGER1439040017PAD HOLDER, 17 INCH1449000001BIG MOUTH1459050018BRUSH, 18 INCH1461021835HEX HEAD BOLT, M8 X 3514714218243488116009WHEEL, BUMPER1498115404FLAT WASHER, M8X 24 2.0SLEEVEE, P/M1501123810LOCK NUT, M815114390051528015105538015104RING, 554DESCRIPTIONHOUSING, BEARING1JOINT BEARING11111008HEX NUT, M101558015106DECAL1568015020HANDLE, ADJUSTING1571511065SOCKET BOLT M10 X 6515880151152598015002608015121NYLON WASHER, 10.5 30 2.561111301222BRACKET1SPACER1LOCK NUT M101SC18
PARTS LISTSQUEEGEE GROUPSC1823
PARTS LISTSQUEEGEE GROUPNOREQ'DDIANO.PARTNUMBER11123810LOCK NUT M8221421824FLAT WASHER M8 24 2.0438116009PROTECTIVE WHEEL241021616HEX BOLT M6 16258115404BEARING, JOURNAL261421612FLAT WASHER M6 12 1.6278118300RIGHT BRACKET188118400CASTER, 2 INCH298118600CLAMP ASSEMBLY, SQUEEGEE18118022SQUEEGEE BLADE, REAR, LINATEX18118002SQUEEGEE BLADE, REAR, PU (OPTIONAL)1118118003STAR KNOB M84128118004SQUEEGEE HOUSING1131021835HEX BOLT M8 352148118005RETAINER,SQUEEGEE18118021SQUEEGEE BLADE, FRONT, LINATEX18118001SQUEEGEE BLADE, FRONT, PU (OPTIONAL)1168118610SHORT CLAMP ASSEBLY1171221575SCREW M5 751188118200LEFT BRACKET1191121008HEX NUT M102208118600ACLAMP OCK NUT M51248118109HOLDER VACUUM HOSE1258118006VACUUM HOSE18118000SQUEEGEE ASSEMBLY, LINATEX1SQUEEGEE ASSEMBLY, PU1101526248118000-PUDESCRIPTIONSC18
PARTS LISTSOLUTION FLOW GROUPSC1825
PARTS LISTSOLUTION FLOW GROUPNOREQ'DDIANO.PARTNUMBER18119005BALL VALVE, G1/2128119007ELBOW G1/2131962016CLAMP1048050901TUBING ID 12MM L 85MM258119002ELBOW, TUBING BARB268050902TUBING ID 12MM L 230MM178119100FILTER ASSEMBLY, 70 MESH188119101BASE, FILTER ASSEMBLY191622760O RING1108119103SCREEN, FILTER, 70 MESH1118119102CAP, FILTER ASSEMBLY1121421409FLAT WASHER M4 9 0.82131221412PAN HEAD SCREW M4X122148050903TUBING ID 12MM L 120MM1158018007SOLENOID VALVE,24VDC1168018004TUBING1178015060INLET, TUBING126DESCRIPTIONSC18
PARTS LISTWEARABLE PARTSNOREQ'DDIANO.PARTNUMBER18115200WHEEL, 8 INCH, WITH BEARINGS228116009BUMPER, ROLLER338118400CASTER, 2 INCH28118001FRONT SQUEEGEE BLADE, PU18118021FRONT SQUEEGEE BLADE, LINATEX18118002REAR SQUEEGEE BLADE, PU18118022REAR SQUEEGEE BLADE, LINATEX169040017PAD HOLDER, 17 INCH179050018BRUSH, 18 INCH188015090SPLASH GUARD, SCRUB HEAD145SC18DESCRIPTION27
WIRING DIAGRAMWIRING DIAGRAM28SC18
Explosion or fire can result from hy-drogen gas. Keep sparks and open flames away! Keep battery compartment open . Yellow lights on, green lights off : 50% level. Red light on, other lights off: 20% level, the ma- . cap and lower hos
