Transcription
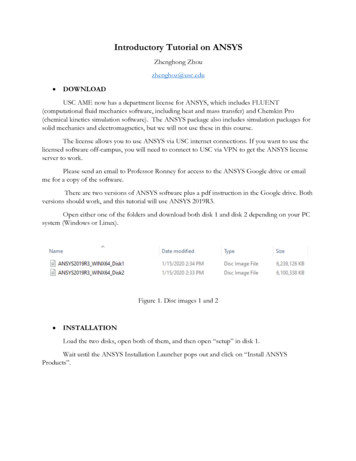
Introductory Tutorial on ANSYSZhenghong Zhouzhenghoz@usc.edu DOWNLOADUSC AME now has a department license for ANSYS, which includes FLUENT(computational fluid mechanics software, including heat and mass transfer) and Chemkin Pro(chemical kinetics simulation software). The ANSYS package also includes simulation packages forsolid mechanics and electromagnetics, but we will not use these in this course.The license allows you to use ANSYS via USC internet connections. If you want to use thelicensed software off-campus, you will need to connect to USC via VPN to get the ANSYS licenseserver to work.Please send an email to Professor Ronney for access to the ANSYS Google drive or emailme for a copy of the software.There are two versions of ANSYS software plus a pdf instruction in the Google drive. Bothversions should work, and this tutorial will use ANSYS 2019R3.Open either one of the folders and download both disk 1 and disk 2 depending on your PCsystem (Windows or Linux).Figure 1. Disc images 1 and 2 INSTALLATIONLoad the two disks, open both of them, and then open “setup” in disk 1.Wait until the ANSYS Installation Launcher pops out and click on “Install ANSYSProducts”.
Figure 2. Open “setup”Figure 3. ANSYS Installation Launcher
When the ANSYS Installation Launcher asks for license server specification, please followthe instructions in Figure 4.ANSYS Licensing interconnect port number: 2325ANSYS FlexNet port number: 1055Hostname: vsoelics-01.usc.eduFigure 4. License Server SpecificationClick “Next”, and a window will pop out for you to choose the desired bundles. Please makesure “Chemkin” and “Fluent” are checked. When I was installing, I used all of the default responses.Hit “Next”. It takes about 10 minutes or so to finish the installation, during which time theInstallation directory will request the path to next media as in Figure 5. Choose disk 2 (“F:” in mycase) and continue.When the task bar hits 100%, click on “Exit” and you should be ready to go.
Figure 5. Installation directory #2
CHEMKIN PROFor Windows users, you could either search “Chemkin” in the start menu or go to the folder“Chemkin” shown in Figure 6.Figure 6. CHEMKIN PRO file locationFigure 7. Create shortcuts for ANSYS
Figure 8 shows the basic window of Chemkin-Pro.Figure 8. Chemkin-Pro windowGo to “Help” “Getting started” or “Tutorial”, you will be redirected rnurl /Views/Secured/corp/v195/chemkin gs/section h2m vns kbb.htmlwhere detailed explanations and instructions of the software can be found.In this tutorial, the project “flame speed freely propagating” is used as an example to showthe basics of Chemkin-Pro.Press “Ctrl O” or click on “Project” “Open.”, go to “samples 2010” folder and thenelect “flame speed freely propagating.ckprj”. The “flame speed freely propagating” project shouldappear under Open Project as Figure 9 shows.Diagram View helps to visualize the simulation process. If everything is set up correctly, allthe blocks will be green. If a certain block turns red, it means an error occurred in the correspondingstep.
Figure 9. Diagram ViewRemember to run Pre-Processing before any further actions. Double click on PreProcessing, and a window shown in Figure 10 will pop out. This window allows you to select theChemistry Set (chemical mechanism, e.g. USC Mech II) you want to use. If you are satisfied withANSYS inciv195 which is the default chemistry set, click on Run Pre-Processor. Notice that GasPhase Kinetics File, Thermodynamics Data File and Gas Transport Data File can be modifiedseparately.
Figure 10. Pre-Processing windowAfter running Pre-Processing, double click on “Flame Speed (C1)” “C1 FlameSpeed”and you’ll see what’s in Figure 11. You can hover your mouse over each option and a detailedexplanation will be displayed. I set the reactor physical properties as shown in Figure 11. You canexperiment with the Grid Properties and Species-specific Properties; the simulation accuracy andsimulation time will change respectively.
Figure 11. Reactor Physical PropertiesGo to C1 inlet1, input your guess of the inlet velocity or the mass flow rate. Again, you canuse “HELP” to look for detailed explanation on the flame propagation model. Species-specificProperties can also be changed. Notice that the default value gives a stoichiometric CH4 O2mixture with N2 as the diluent gas. Changing any of the mole fraction will change the mixture andthus the adiabatic flame temperature and the flame speed.Click on “Run Calculations” and begin simulation. When the simulation is done, the AnalyzeResults window will appear as Figure 12 shows. You can choose to plot results or analyze reactionpaths.
Figure 12. Analyze Results windowIf you choose to plot results, after clicking on “Next Step ”, you will be able to furtherchoose the data you need. Also, if you choose “use Excel to post-process”, the results will bepresented as Excel files (see Figure 13).Tabs 1, 2, 3 show the detailed solution of properties of the mixture before and aftercombustion. Tab 4 shows the flame speed results. The three flame speeds in Figure 13 is acceptablebecause they are roughly the same. However, if you go back and refine the grid properties, the threeresults could be more nearly identical.
Figure 13. Simulation results in ExcelIf you choose to analyze reaction paths, the Reaction Path Analyzer will be called, and youcan do further analysis within this window as in Figure 14.
Figure 14. Reaction Path Analyzer
ANSYS Workbench Fluent Basics (with just heat conduction, no flow or combustion)Open Workbench 2019 R3 and save the new project with a proper name. Find “Fluid Flow(Fluent)”, left click and drag it into the Project Schematic window.Figure15. Project Schematic windowIn this tutorial, a 2D-Heat Transfer in a rectangular region is used as an example.The first setup involves creating the required geometry for your problem. Besides ANSYSitself, any commonly used CAD software should work. I used Solidworks to create the geometry.When the simulation is 2D, make sure that the sketch plane is the X-Y plane in the CAD software.After building the geometry, save the file as Parasolid (*.x t) file. Go back to Workbench and rightclick on “Geometry”, and then select “Import Geometry” to import the surface you created.
Figure 16. 2D-surfaceNext, right click on “Mesh” and select “Edit ” and the meshing window will appear. Use“Ctrl E” or click on the Edge selection as Figure 17 shows and select the left side of the rectangle.Then edge would turn green if selected. Right click on the selected side, select “create NamedSection”, name it “hot boundary”, then hit “OK”. Hold “Ctrl” and left click on the rest three sides,and name them “cold boundaries”.Figure 17. Graphics ToolbarClick on “Mesh” and you could change the mesh properties in the left bottom Details of“Mesh” window. I changed the Mesh size to 0.001m. In some situations, you may need to have finermesh at the boundaries. One way of doing this is to right click on “Mesh” and insert inflation.“Ctrl B” select the surface click on “no selection” next to “Geometry” and then apply.“Ctrl E” select the four sides click on “no selection” next to “Boundary” and then apply.You could adjust the maximum layers and growth rate as you like. Also, if you want to createdifferent inflations for different boundaries, just create another inflation and repeat the procedure.Generate mesh, save the mesh file, go back to Workbench and update the project until yousee a green “check” symbol next to “Mesh”. Then, open “Setup”. When the Fluent launcher popsout, you can choose if you want double precision and parallel processing.
Figure 18. Generate MeshFigure 19. Inflation
Figure 20. Mesh with inflationExpand models and right click on “Energy” to switch on the energy equation. You canchoose the materials to be solid or liquid in “Cell Zone Conditions”.The most important step is to set up the boundary conditions. Double click on“cold boundaries”, go to “thermal”, and set the temperature to 300K. By the same procedure, setthe “hot boundary” temperature to 800K.Right click on initialization and hit initialize. You could also change the initialization method.Double left clicks on “Run Calculation”, put 20 in the “Number of Iterations” and hit calculate.Wait until the “Calculation complete” window appears, and the results are ready to be checked.For example, if we double click on Contours, select “temperature” in the float window, andhit “Save/Display”, a temperature contour of the rectangular region will be generated as Figure 22shows. You could play with Graphics, Plots and Animations to see what happens.If we close the Fluent Calculation window and go back to open “Results” in Workbench, wecan further customize more detailed contours, plots, reports, etc.If you’re looking for more complicated examples or detailed tutorials, there are tons onlineeither in the form of videos or interactive webpages (ANSYS learning hub).
Figure 21. Outline ViewFigure 22. Temperature Contour
2D premixed combustion problemFirst, create a 50cm 500cm rectangular surface and then import it into a new project (I callit 2D-Combustion). For the Named Sections, name the left side edge as “inlet”, right side edge as“outlet”, top and bottom sides as “walls”. Generate 0.01 m uniform mesh for the surface as Figure23 shows.Figure 23. Mesh for 2D-CombustionAfter generating the mesh, save the project and go back to the Workbench. Update the meshand wait until the yellow lightening icon becomes a green check.Open “setup”. Turn on the energy equation in “Models”.For “Viscous” and “Species”, please follow what’s shown in Figure 24. Here we selected thek-ε viscous model which you’ll learn about later in AME 513b; for now just accept that the k-εmodel is a simplified way of modeling the mass, momentum and energy transport caused byturbulence without having to solve the 3D unsteady Navier-Stokes equations directly; it assumes thatthe turbulence is isotropic, that is, the same in all coordinate directions. You could also try the“Reynolds Stress” (an extension of k-ε that allows for anisotropic turbulence) or the “Laminar”(which suppresses all turbulence effects) viscous model to see what happens.In “Species Model”, select “Species Transport” and make sure that “Volumetric” is checked.Also, check “Eddy-Dissipation” in the “Turbulence-Chemistry Interaction”. (The eddy-dissipationmodel essentially assumes that the rate of reaction is determined by the rate of turbulent mixing ofproducts with reactants and that reactants react infinitely rapidly once mixed with products; we’lldiscuss this later in AME 513b). I’ve tried multiple cases and believe that even if the flow speed islow, the “Eddy-Dissipation” still works best because of the existence of boundary layers and thus
some turbulence. You can manually change the turbulence intensity, but if it is set to zero, thecomputation might not converge.Figure 25 shows how the inlet boundary conditions are set. And for the wall boundaryconditions, make sure “Heat Flux” is checked in the “thermal conditions” and anything else is zero.Figure 24. Setups in “Models”Figure 25. BCs at the inlet
Next, go to “Solutions” “Monitors” “Residuals” and set it as what Figure 26 shows.Initialize the project by clicking on the “Initialize”, and then click on “Patch ” as Figure 27 shows.Make sure that the surface in “zones to Patch” is also selected, and then click on “Patch”. This givesthe computer an initial input for the computation, which would make the convergence easier.Note that “Residuals” is a source of great confusion - everybody who uses FLUENT reportsit but almost nobody knows what it means. It’s a measure of how nearly a conservation equation(e.g., x-velocity, which should read x-momentum since velocity is not a conserved quantity butmomentum is, or more precisely, the rate of change of momentum is equal to the sum of the forces)is satisfied.If you want to monitor an animation of the computation. You can go to “CalculationActivities and follow what Figure 28 shows.Set the number of iterations to 250 and start calculation.Figure 26. Residual Monitors
Figure 27. Patch
Figure 28. Solution AnimationsFigure 29. The temperature contour for 2D-CombustionFigure 30. The velocity contour for 2D-CombustionFrom the temperature contour we could tell that the premixed flame sheet is a very curvedlayer despite that our initial velocity of the flow is only 2cm/s. Compare the temperature results withthe velocity contour, we may say that the curved profile is due to the thermal expansion effect. Thatis, the burnt gas density is drastically dropped, and the flow is accelerated after combustion.You could try:1.2.3.4.Changing the inlet velocity and the premixed mixture mole fractions.Turning on radiation or giving the wall boundaries a fixed temperature.Changing mesh size.Having two inlets instead of one, which makes the combustion mostly non-premixed.
The ANSYS package also includes simulation packages for solid mechanics and electromagnetics, but we will not use these in this course. The license allows you to use ANSYS via USC internet connections. If you want to use the licensed software off-campus, you will need to connect to USC via VPN