Transcription
Internet of Things withArduino BlueprintsDevelop interactive Arduino-based Internet projectswith Ethernet and Wi-FiPradeeka SeneviratneBIRMINGHAM - MUMBAI
Internet of Things with Arduino BlueprintsCopyright 2015 Packt PublishingAll rights reserved. No part of this book may be reproduced, stored in a retrievalsystem, or transmitted in any form or by any means, without the prior writtenpermission of the publisher, except in the case of brief quotations embedded incritical articles or reviews.Every effort has been made in the preparation of this book to ensure the accuracyof the information presented. However, the information contained in this book issold without warranty, either express or implied. Neither the author, nor PacktPublishing, and its dealers and distributors will be held liable for any damagescaused or alleged to be caused directly or indirectly by this book.Packt Publishing has endeavored to provide trademark information about all of thecompanies and products mentioned in this book by the appropriate use of capitals.However, Packt Publishing cannot guarantee the accuracy of this information.First published: October 2015Production reference: 1201015Published by Packt Publishing Ltd.Livery Place35 Livery StreetBirmingham B3 2PB, UK.ISBN 978-1-78528-548-6www.packtpub.com
CreditsAuthorPradeeka SeneviratneReviewersFrancesco AzzolaProject CoordinatorShweta H BirwatkarProofreaderSafis EditingPaul DengCharalampos DoukasPaul MasseyCommissioning EditorNadeem BagbanAcquisition EditorVivek AnantharamanContent Development EditorArwa ManasawalaTechnical EditorVivek AroraCopy EditorsImon BiswasAngad SinghIndexerTejal SoniGraphicsJason MonteiroProduction CoordinatorAparna BhagatCover WorkAparna Bhagat
About the AuthorPradeeka Seneviratne is a software engineer with over 10 years of experience incomputer programming and systems designing. He loves programming embeddedsystems such as Arduino and Raspberry Pi. Pradeeka started learning aboutelectronics when he was at primary college by reading and testing various electronicprojects found in newspapers, magazines, and books.Pradeeka is currently a full-time software engineer who works with highlyscalable technologies. Previously, he worked as a software engineer for several ITinfrastructure and technology servicing companies, and he was also a teacher forinformation technology and Arduino development.He researches how to make Arduino-based unmanned aerial vehicles and RaspberryPi-based security cameras.
About the ReviewersFrancesco Azzola is an electronics engineer with more than 15 years of experiencein the architecture and development of JEE applications. He has a deep knowledge ofmobile messaging, smart cards, and mobile applications. He enjoys building Androidapps and experimenting with the IoT ecosystem using Arduino and Android. He is aSun Certified Enterprise Architect (SCEA), SCWCD, SCJP, Prince2 (Foundation), andVCA-DCV. In his spare time, he runs a blog about Android and IoT (http://www.survivingwithandroid.com/).Paul Deng is a senior software engineer with over 8 years of experience in IoT appdesign and development. He has been working with the Arduino platform since itsearly days in 2008.His past experience involves end-to-end IoT app design and development, includingembedded devices, large-scale machine learning, and cloud and web apps. Paulholds software algorithm patents and was a finalist of the Shell Australian InnovationChallenge 2011. He has authored several publications on IoT and sensor networks.Paul is an open source contributor and active blogger. He is also an AWS CertifiedSolutions Architect and Developer with a master's degree in distributed computingfrom the University of Melbourne.He lives in Melbourne, Australia with his wife, Cindy, and son, Leon. You can visithis website at http://dengpeng.de/ to see what he is currently exploring and tolearn more about him.Paul Massey has worked in computer programming for over 20 years, 11 years ofwhich have been as a CEO of Scriptwerx (http://ghost.scriptwerx.io/). He is anexpert in JavaScript and mobile technologies, as well as working with the Arduinoplatform (and similar platforms). He has worked on this platform for a number ofyears, creating hardware and software projects for Internet of Things, audio-visual,and automotive technologies.
www.PacktPub.comSupport files, eBooks, discount offers, and moreFor support files and downloads related to your book, please visit www.PacktPub.com.Did you know that Packt offers eBook versions of every book published, with PDFand ePub files available? You can upgrade to the eBook version at www.PacktPub.com and as a print book customer, you are entitled to a discount on the eBook copy.Get in touch with us at service@packtpub.com for more details.At www.PacktPub.com, you can also read a collection of free technical articles, signup for a range of free newsletters and receive exclusive discounts and offers on Packtbooks and ion/packtlibDo you need instant solutions to your IT questions? PacktLib is Packt's online digitalbook library. Here, you can search, access, and read Packt's entire library of books.Why subscribe? Fully searchable across every book published by PacktCopy and paste, print, and bookmark contentOn demand and accessible via a web browserFree access for Packt account holdersIf you have an account with Packt at www.PacktPub.com, you can use this to accessPacktLib today and view 9 entirely free books. Simply use your login credentials forimmediate access.
Table of ContentsPrefaceChapter 1: Internet-Controlled PowerSwitchv1Getting startedHardware and software requirementsArduino Ethernet ShieldThe Arduino Ethernet boardConnecting Arduino Ethernet Shield to the InternetTesting your Arduino Ethernet ShieldSelecting a PowerSwitch TailPN PSSRKT-240PN80135Wiring PowerSwitch Tail with Arduino Ethernet ShieldTurning PowerSwitch Tail into a simple web serverWhat is a web server?A step-by-step process for building a web-based control panel222671016161818202121Sensing the availability of mains electricityTesting the mains electricity sensorBuilding a user-friendly web user interfaceAdding a Cascade Style Sheet to the web user interfaceFinding the MAC address and obtaining a valid IP addressFinding the MAC addressObtaining an IP address25272728303031Summary36Handling client requests by HTTP GETAssigning a static IP addressObtaining an IP address using DHCP[i]213135
Table of ContentsChapter 2: Wi-Fi Signal Strength Reader and Haptic Feedback37Chapter 3: Internet-Connected Smart Water Meter59Chapter 4: Arduino Security Camera with Motion Detection77PrerequisitesArduino WiFi ShieldFirmware upgradingStacking the WiFi Shield with ArduinoHacking an Arduino earlier than REV3Knowing more about connectionsFixing the Arduino WiFi libraryConnecting your Arduino to a Wi-Fi networkWi-Fi signal strength and RSSIReading the Wi-Fi signal strengthHaptic feedback and haptic motorsGetting started with the Adafruit DRV2605 haptic controllerSelecting a correct vibratorConnecting a haptic controller to Arduino WiFi ShieldSoldering a vibrator to the haptic controller breakout boardDownloading the Adafruit DRV2605 libraryMaking vibration effects for RSSIImplementing a simple web serverReading the signal strength over Wi-FiSummaryPrerequisitesWater flow sensorsWiring the water flow sensor with ArduinoReading pulsesRising edge and falling edgeReading and counting pulses with ArduinoCalculating the water flow rateCalculating the water flow volumeAdding an LCD screen to the water meterConverting your water meter to a web serverA little bit about plumbingSummaryPrerequisitesGetting started with TTL Serial CameraWiring the TTL Serial Camera for image capturingWiring the TTL Serial Camera for video capturingTesting NTSC video stream with video screen[ ii 4646768707374767878808181
Table of ContentsConnecting the TTL Serial Camera with Arduino andEthernet ShieldImage capturing with Arduino8385Uploading images to FlickrCreating a Flickr accountCreating a Temboo accountCreating your first Choreo86879091The Software Serial libraryHow the image capture worksInitializing OAuthFinalizing OAuthGenerating the photo upload sketchConnecting the camera output with TembooMotion detectionSummary8586919697102102103Chapter 5: Solar Panel Voltage Logging with NearBusCloud Connector and Xively105Chapter 6: GPS Location Tracker with Temboo, Twilio,and Google Maps127Connecting a solar cell with the Arduino Ethernet boardBuilding a voltage dividerBuilding the circuit with ArduinoSetting up a NearBus accountDefining a new deviceExamining the device listsDownloading the NearBus agentCreating and configuring a Xively accountConfiguring the NearBus connected device for XivelyDeveloping a web page to display the real-time voltage valuesDisplaying data on a web pageSummaryHardware and software requirementsHardware requirementsSoftware requirementsGetting started with the Arduino GPS shieldConnecting the Arduino GPS shield with the ArduinoEthernet boardTesting the GPS shieldDisplaying the current location on Google Maps[ iii 29130131
Table of ContentsGetting started with TwilioCreating a Twilio accountFinding Twilio LIVE API credentialsFinding Twilio test API credentialsGet your Twilio numberCreating Twilio Choreo with TembooSending an SMS with Twilio APISend a GPS location data using TembooSummary133133135136137138138140140Chapter 7: Tweet-a-Light – Twitter-Enabled Electric Light141Chapter 8: Controlling Infrared Devices Using IR Remote167Index185Hardware and software requirementsHardwareSoftwareGetting started with PythonInstalling Python on WindowsSetting environment variables for PythonInstalling the setuptools utility on PythonInstalling the pip utility on PythonOpening the Python interpreterInstalling the Tweepy libraryInstalling pySerialCreating a Twitter app and obtaining API keysWriting a Python script to read Twitter tweetsReading the serial data using ArduinoConnecting the PowerSwitch Tail with ArduinoSummaryBuilding an Arduino infrared recorder and remoteHardwareSoftwareBuilding the IR receiver moduleCapturing IR commands in hexadecimalCapturing IR commands in the raw formatBuilding the IR sender moduleControlling through the LANAdding an IR socket to non-IR enabled devicesSummary[ iv 68168169170171174176178180183
PrefaceArduino is a small single-chip computer board that can be used for a wide variety ofcreative hardware projects. The hardware consists of a simple microcontroller, board,and chipset. It comes with a Java-based IDE that allows creators to program theboard. Arduino is the ideal open hardware platform to experiment with the world ofInternet of Things. The credit card-sized Arduino board can be used via the Internetto make useful and interactive Internet of Things (IoT) projects.Internet of Things with Arduino Blueprints is a project-based book that begins withprojects based on IoT and cloud computing concepts. This book covers up to eightprojects that will allow devices to communicate with each other, access informationover the Internet, store and retrieve data, and interact with users—creating smart,pervasive, and always connected environments. It explains how wired and wirelessInternet connections can be used with projects and explains the use of varioussensors and actuators. The main aim of this book is to teach you how Arduino canbe used for Internet-related projects so that users are able to control actuators, gatherdata from various kinds of sensors, and send and receive data wirelessly acrossHTTP and TCP protocols.Finally, you can use these projects as blueprints for many other IoT projects and putthem to good use. By the end of the book, you will be an expert in the use of IoT withArduino to develop a set of projects that can relate very well to IoT applications inthe real world.What this book coversChapter 1, Internet-Controlled PowerSwitch, briefly introduces Arduino UNO andArduino Ethernet shield basics while focusing on building an Internet-controlledPowerSwitch using Arduino UNO, the Arduino Ethernet shield, and PowerSwitchTail to turn electrical appliances on/off through the Internet via a web-based userinterface. Also, you will learn how to increase the complexity of PowerSwitch byadding a circuit to track the mains electricity.[v]
PrefaceChapter 2, Wi-Fi Signal Strength Reader and Haptic Feedback, briefly introduces ArduinoWi-Fi shield basics, vibration motors, and haptic feedback. You will learn howto make advanced vibration patterns using vibration motors with a haptic motorcontroller and the Adafruit haptic library according to the Wi-Fi signal strengthreceived by the Arduino Wi-Fi shield.Chapter 3, Internet-Connected Smart Water Meter, focuses on building a flowsensor-based water meter in conjunction with the Arduino Ethernet shield tomeasure water flow rate and volume, and then display them on an LCD screen.In addition, you will learn how to convert this water meter to a web server andrequest readings through the Internet of Ethernet.Chapter 4, Arduino Security Camera with Motion Detection, explains how to incrementallydevelop a Arduino Ethernet shield-based security camera with the Adafruit TTL SerialJPEG camera and the VC0706 camera library. In addition, you will learn how to addmotion detection functionality and upload the captured images to Flickr.Chapter 5, Solar Panel Voltage Logging with NearBus Cloud Connector and Xively, brieflyintroduces the NearBus cloud connector and Xively, while focusing on building asolar panel voltage logger with the Arduino Ethernet shield with a few electroniccomponents. Also, you will learn how to log the output voltage of a solar panel incombination with NearBus and Xively, and then display real-time data that can beviewed through a web browser.Chapter 6, GPS Location Tracker with Temboo, Twilio, and Google Maps, brieflyintroduces the GPS shield and how to use the TinyGPSPlus library and the GoogleJavaScript API library to build a real-time location tracker to display the currentlocation of the GPS shield on Google Maps. You will also learn the basics of Tembooand Twilio cloud services.Chapter 7, Tweet-a-Light – Twitter-Enabled Electric Light, introduces Python, a morepowerful programming language that can be used to read Twitter tweets and writedata to a computer's serial port accordingly. Finally, you will learn to build anelectric light switch that can be controlled using Twitter tweets to turn the switchon and off.Chapter 8, Controlling Infrared Devices Using IR Remote, focuses on building an infraredremote control with the Arduino Ethernet shield and a few electronic componentsthat can be controlled through the Ethernet or Internet to control IR-enabled devicesremotely. You will learn how to record and reproduce IR commands using theArduino IR remote library. In addition, you will learn how to add IR functionality tonon-IR enabled devices.[ vi ]
PrefaceWhat you need for this bookThis book has been written and tested on the Windows environment and usesvarious software components with Arduino. It would be great if you could prepareyour development environment before proceeding with the sample code providedalong with each chapter. The following list briefly gives you the details about thesoftware requirements that you should have to set up your PC for each chapter: The Arduino software: This is the main development environment thatyou will use to write, verify, and run your sketches in every chapter of thisbook. The latest Arduino installer for Windows can be downloaded fromhttps://www.arduino.cc/en/Main/Software. Throughout this book,we will write and test Arduino sketches in the Windows environment. A web browser: Normally, every PC has a default web browser, such asMicrosoft Internet Explorer (or Microsoft Edge in Windows 10), GoogleChrome, or Mozilla Firefox. The Adafruit DRV2605 library: You need this library to control vibrators (thatis, vibration motors) with the Adafruit DRV2605 haptic controller in Chapter 2,Wi-Fi Signal Strength Reader and Haptic Feedback. You can download this libraryfrom https://github.com/adafruit/Adafruit DRV2605 Library. The Adafruit VC0706 camera library: You will need this library to interfacethe Adafruit VC0706 Serial JPEG camera with Arduino in Chapter 4, ArduinoSecurity Camera with Motion Detection. You can download this library rial-CameraLibrary. NearBus Agent (An Arduino library for Ethernet): You will need this libraryto connect the Arduino Ethernet shield with the NearBus cloud connectorfor Arduino memory mapping with NearBus in Chapter 5, Solar Panel VoltageLogging with NearBus Cloud Connector and Xively. You can download this libraryfrom http://www.nearbus.net/downloads/NearBusEther v16.zip. FlexiTimer2: This will make sure that Arduino correctly functions with theNearBus Agent library in Chapter 5, Solar Panel Voltage Logging with NearBusCloud Connector and Xively. You can download it from 1. The TinyGPSPlus library: This will be required to work with the SparkFunGPS shield in Chapter 6, GPS Location Tracker with Temboo, Twilio, and GoogleMaps and can be downloaded from aster.zip.[ vii ]
Preface Python: You can download Python from https://www.python.org/,and the instructions about the download and installation can be foundin Chapter 7, Tweet-a-Light – Twitter-Enabled Electric Light. The Arduino IR remote library: You will need this library to send and receiveand extract IR commands in Chapter 8, Controlling Infrared Devices Using IRRemote. You can download it from https://github.com/z3t0/ArduinoIRremote.Who this book is forThis book is intended for those who want to learn more about Arduino and makeInternet-based interactive projects with Arduino. If you are an experienced softwaredeveloper who understands the basics of electronics, then you can quickly learn howto build the Arduino projects explained in this book.ConventionsIn this book, you will find a number of text styles that distinguish between differentkinds of information. Here are some examples of these styles and an explanation oftheir meaning.Code words in text, database table names, folder names, filenames, file extensions,pathnames, dummy URLs, user input, and Twitter handles are shown as follows:"Copy the following index.html file from the code folder of Chapter 5 to yourcomputer's hard drive."A block of code is set as follows:// Set the picture size - you can choose one of 640x480, 320x240 or160x120// Remember that bigger pictures take longer to transmit!cam.setImageSize(VC0706 640x480); // biggest//cam.setImageSize(VC0706 320x240); // medium//cam.setImageSize(VC0706 160x120);// smallWhen we wish to draw your attention to a particular part of a code block, therelevant lines or items are set in bold:int32 t WiFiDrv::getCurrentRSSI(){startScanNetworks();WAIT FOR SLAVE SELECT();// Send CommandSpiDrv::sendCmd(GET CURR RSSI CMD, PARAM NUMS 1);[ viii ]
PrefaceAny command-line input or output is written as follows: python your python script.pyNew terms and important words are shown in bold. Words that you see on thescreen, for example, in menus or dialog boxes, appear in the text like this: "Click onthe Create an App link if it is not selected by default."Warnings or important notes appear in a box like this.Tips and tricks appear like this.Reader feedbackFeedback from our readers is always welcome. Let us know what you think aboutthis book—what you liked or disliked. Reader feedback is important for us as ithelps us develop titles that you will really get the most out of.To send us general feedback, simply e-mail feedback@packtpub.com, and mentionthe book's title in the subject of your message.If there is a topic that you have expertise in and you are interested in either writingor contributing to a book, see our author guide at www.packtpub.com/authors.Customer supportNow that you are the proud owner of a Packt book, we have a number of thingsto help you to get the most from your purchase.Downloading the example codeYou can download the example code files from your account at http://www.packtpub.com for all the Packt Publishing books you have purchased. If youpurchased this book elsewhere, you can visit http://www.packtpub.com/supportand register to have the files e-mailed directly to you.[ ix ]
PrefaceDownloading the color images of this bookWe also provide you with a PDF file that has color images of the screenshots/diagrams used in this book. The color images will help you better understandthe changes in the output. You can download this file from: oads/5486OS ColoredImages.pdf.ErrataAlthough we have taken every care to ensure the accuracy of our content, mistakesdo happen. If you find a mistake in one of our books—maybe a mistake in the text orthe code—we would be grateful if you could report this to us. By doing so, you cansave other readers from frustration and help us improve subsequent versions of thisbook. If you find any errata, please report them by visiting http://www.packtpub.com/submit-errata, selecting your book, clicking on the Errata Submission Formlink, and entering the details of your errata. Once your errata are verified, yoursubmission will be accepted and the errata will be uploaded to our website oradded to any list of existing errata under the Errata section of that title.To view the previously submitted errata, go to https://www.packtpub.com/books/content/support and enter the name of the book in the search field. The requiredinformation will appear under the Errata section.PiracyPiracy of copyrighted material on the Internet is an ongoing problem across allmedia. At Packt, we take the protection of our copyright and licenses very seriously.If you come across any illegal copies of our works in any form on the Internet, pleaseprovide us with the location address or website name immediately so that we canpursue a remedy.Please contact us at copyright@packtpub.com with a link to the suspectedpirated material.We appreciate your help in protecting our authors and our ability to bring youvaluable content.QuestionsIf you have a problem with any aspect of this book, you can contact us atquestions@packtpub.com, and we will do our best to address the problem.[x]
Internet-ControlledPowerSwitchFor many years, people physically interacted with electrical appliances usinghardware switches. Now that things have changed, thanks to the advances intechnology and hardware, controlling a switch over the Internet without anyform of physical interaction has become possible.In this chapter, we will incrementally build a web server-enabled smart powerswitch that can be controlled through the Internet with a wired Internet connection.Let's move to Arduino's IoT (Internet of Things).In this chapter, you will do the following: Learn about Arduino UNO and Arduino Ethernet Shield basics Learn how to connect a PowerSwitch Tail with Arduino UNO Build a simple web server to handle client requests and control thePowerSwitch accordingly Build a simple mains electricity (general purpose alternating current) sensorwith 5V DC wall power supply Develop a user friendly UI (User Interface) with HTML (Hyper TextMarkup Language) and Metro UI CSS (Cascade Style Sheet)[1]
Internet-Controlled PowerSwitchGetting startedThis project consists of a DC (Direct Current) activated relay switch with anembedded web server that can be controlled and monitored through the Internetand the integrated mains electricity sensor that can be used to get the status of theavailability of mains electricity. The possible applications are: Controlling electrical devices such as lamp posts, water pumps, gates, doors,and so on, in remote locations Sensing the availability of mains electricity in houses, offices, and factoriesremotely Detecting whether a door, window, or gate is open or shutHardware and software requirementsAll the hardware and software requirements are mentioned within each experiment.Most of the hardware used in this project are open source, which allows you to freelylearn and hack them to make more creative projects based on the blueprints of thischapter.Arduino Ethernet ShieldArduino Ethernet Shield is used to connect your Arduino UNO board to the Internet.It is an open source piece of hardware and is exactly the same size as the ArduinoUNO board. The latest version of the Arduino Ethernet Shield is R3 (Revision 3).The official Arduino Ethernet Shield is currently manufactured in Italy and can beordered through the official Arduino website (https://store.arduino.cc). Also,there are many Arduino Ethernet Shield clones manufactured around the world thatmay be cheaper than the official Arduino Ethernet Shield. This project is fully testedwith a clone of Arduino Ethernet Shield manufactured in China.[2]
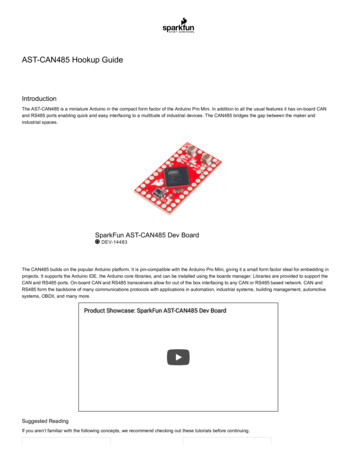
Chapter 1Arduino UNO R3 (Front View)Arduino Ethernet Shield R3 (Front View)[3]
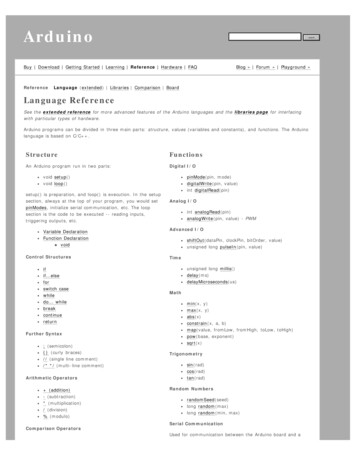
Internet-Controlled PowerSwitchPlug your Arduino Ethernet Shield into your Arduino UNO board using wire wrapheaders so that it's exactly intact with the pin layout of the Arduino UNO board.The following image shows a stacked Arduino UNO and Arduino Ethernet Shieldtogether:Arduino Ethernet Shield R3 (top) is stacked with Arduino UNO R3 (bottom) (Front View)Arduino Ethernet Shield consists of an Ethernet controller chip—WIZnet W5100—the only proprietary hardware used with the shield. The WIZnet W5100 includes afully hardwired TCP/IP stack, integrated Ethernet MAC (Media Access Control),and PHY (Physical Layer).The hardwired TCP/IP stack supports the following protocols: TCP (Transport Control Protocol) UDP (User Datagram Protocol) IPv4 (Internet Protocol Version 4) ICMP (Internet Control Message Protocol) ARP (Address Resolution Protocol) IGMP (Internet Group Management Protocol) PPPoE (Point-to-Point Protocol over Ethernet)[4]
Chapter 1The WIZnet W5100 Ethernet controller chip also simplifies the Internet connectivitywithout using an operating system.The WIZnet W5100 Ethernet controller (Top View)Throughout this chapter, we will only work with TCP and IPv4 protocols.The Arduino UNO board communicates with the Arduino Ethernet Shield usingdigital pins 10, 11, 12, and 13. Therefore, we will not use these pins in our projectsto make any external connections. Also, digital pin 4 is used to select the SD cardthat is installed on the Arduino Ethernet Shield, and digital pin 10 is used to selectthe Ethernet controller chip. This is called SS (Slave Select) because the ArduinoEthernet Shield is acting as the slave and the Arduino UNO board is acting asthe master.However, if you want to disable the SD card and use digital pin 4, or disable theEthernet controller chip and use digital pin 10 with your projects, use the followingcode snippets inside the setup() function:1. To disable the SD card:pinMode(4,OUTPUT);digitalWrite(4, HIGH);2. To disable the Ethernet Controller chip:pinMode(10,OUTPUT);digitalWrite(10, HIGH);[5]
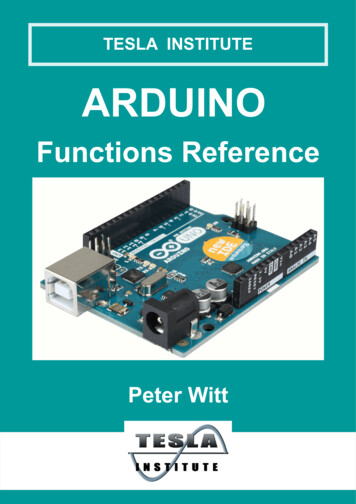
Internet-Controlled PowerSwitchThe Arduino Ethernet boardThe Arduino Ethernet board is a new version of the Arduino development boardwith the WIZnet Ethernet controller built into the same board. The USB to serialdriver is removed from the board to keep the board size the same as Arduino UNOand so that it can be stacked with any Arduino UNO compatible shields on it.You need an FTDI cable compatible with 5V to connect and program your ArduinoEthernet board with a computer.The Arduino Ethernet board (Front View)FTDI cable 5V (Source: https://commons.wikimedia.org/wiki/File:FTDI Cable.jpg)[6]
Chapter 1You can visit the following links to get more information about the Arduino Ethernetboard and FTDI cable: The Arduino Ethernet board (https://store.arduino.cc/product/A000068) FTDI cable (https://www.sparkfun.com/products/9717)You can build all the projects that are explained within this chapter and otherchapters throughout the book with the Arduino Ethernet board using the samepin layout.Connecting Arduino Ethernet Shield to theInternetTo connect your Ethernet shield to the Internet, you require the following hardware: An Arduino UNO R3 board (https://store.arduino.cc/product/A000066) A 9VDC 650mA wall adapter power supply. The barrel connector of thepower supply should be center positive 5.5 x 2.1 mm. (Here is the linkfor a perfect fit: https://www.sparkfun.com/products/298) A USB A-to-B male/male-type cable. These types of cables are usually usedfor printers (https://www.sparkfun.com/products/512) A Category 6 Ethernet cable (https://www.sparkfun.com/products/8915) A router or switch with an Internet connection[7]
Internet-Controlled PowerSwitchUse the following steps to make connections between each hardware component:1. Plug your Ethernet shield into your Arduino board using soldered wire wrapheaders:Fritzing representation of Arduino and Ethernet shield stack2. Get the Ethernet cable and connect one end to the Ethernet jack of theArduino Ethernet Shield.One end of the Ethernet cable is connected to the Arduino Ethernet board[8]
Chapter 13. Connect the other end of the Ethernet cable to the Ethernet jack of thenetwork router or switch.The other end of the Ethernet cable is connected to the router/switch4. Connect the 9VDC wall adapter power supply to the DC barrel connector ofthe Arduino board.5. Use the USB A-to-B cable to connect your Arduino board to the computer.Connect the type A plug end to the computer and the type B plug end tothe Arduino board.One end of the Ethernet cable is connected to the Ethernet shield (top) and the power connectorand USB cable are conne
board. Arduino is the ideal open hardware platform to experiment with the world of Internet of Things. The credit card-sized Arduino board can be used via the Internet to make useful and interactive Internet of Things (IoT) projects. Internet of Things with Arduino Blueprints is a proj